Hip roof construction is commonly used in residential construction so let’s explore an efficient way to model them in SkyCiv S3D.
Start by heading over to S3D and clicking Start New. Now we have a blank canvas, let’s draw the top plate using the pen tool, we will ignore studs in this tutorial. Tap V to switch to the pen tool, the cursor will become a pen. Click once and this will plot the first node at the origin.
Next, click node one and draw 6m to the right, if you need more space, move your mouse to the left and scroll down, this will zoom out and bring the model to the left.
Click and drag in any empty space to rotate the model into an isometric view, now you can continue drawing the top plate 3m back. Complete the rectangle as seen below.
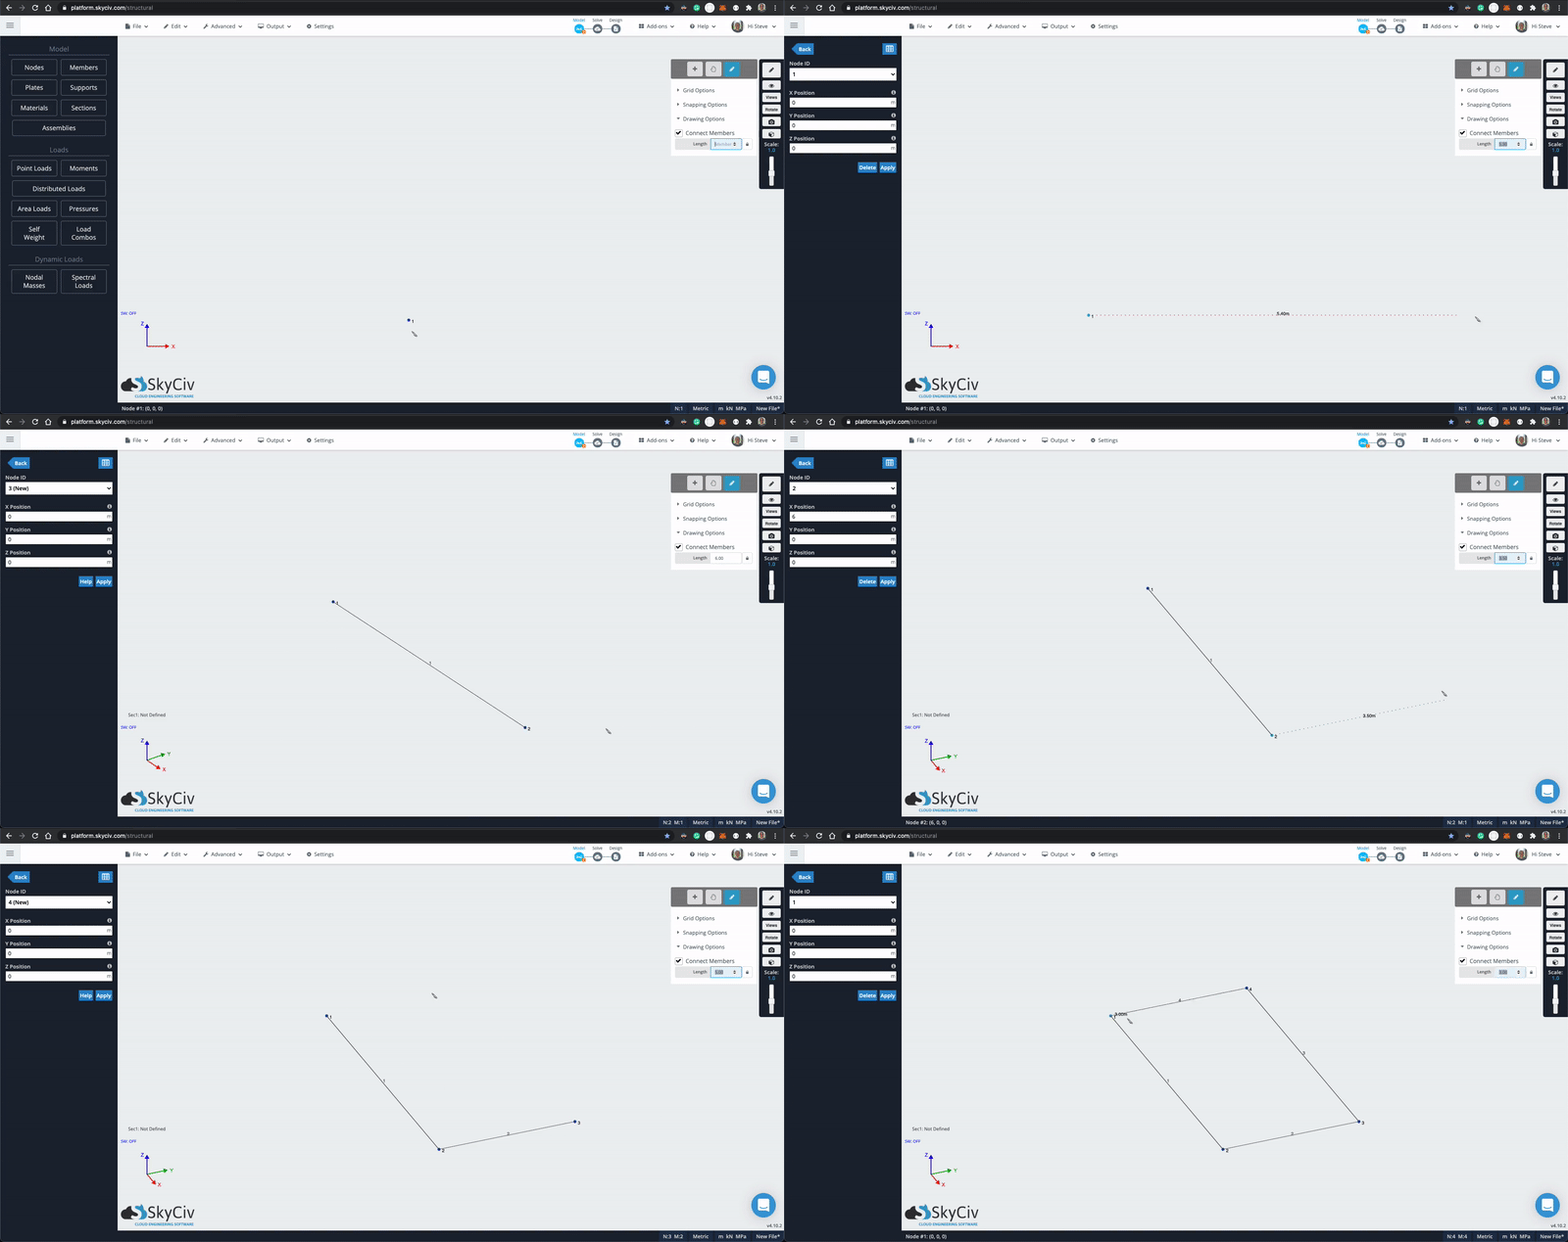
With the pen tool still selected, tap the ESC button to disconnect from the last member. Hover over the middle of member 3 until you see Midpoint appear, click to place a node at the midpoint then draw a member upward to the desired ridge height. We won’t be using members 3 and 5 however it is important to understand that this operation did not connect them. We will see how you could connect them with the intersect tool soon. Draw the hips and common rafters into the model with the pen tool.
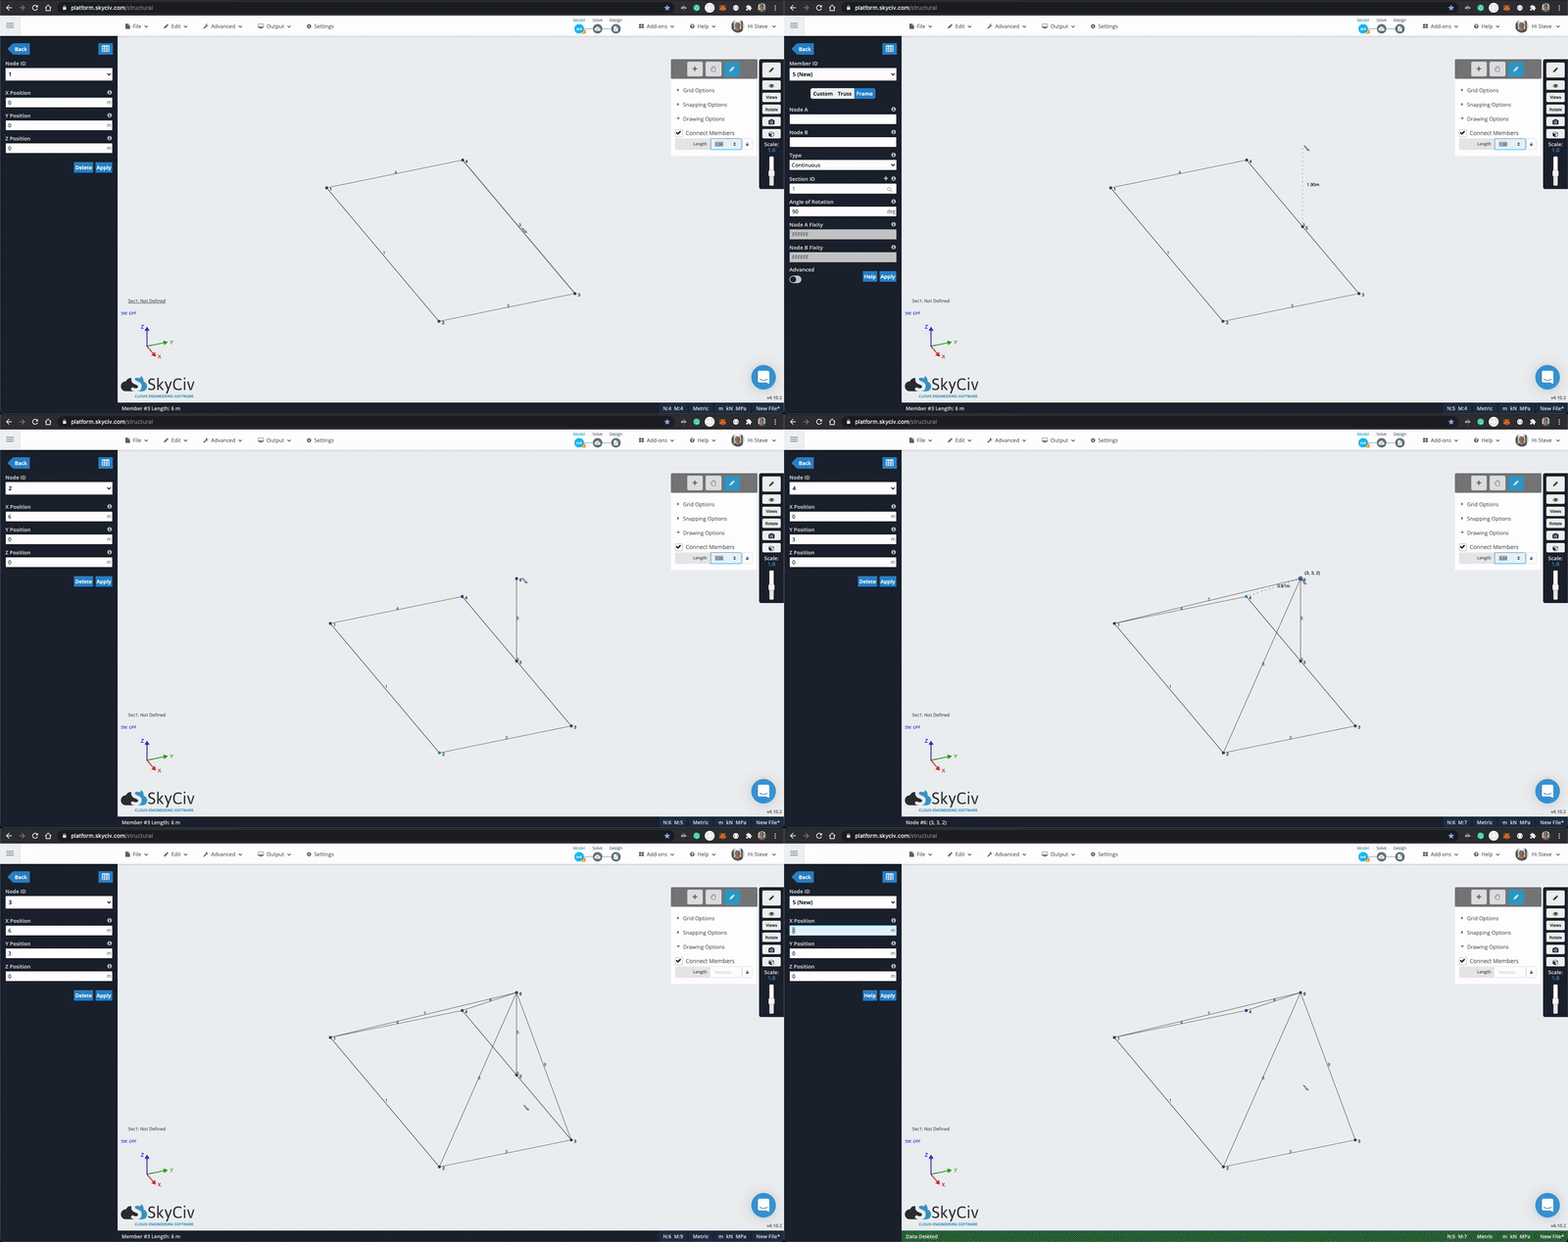
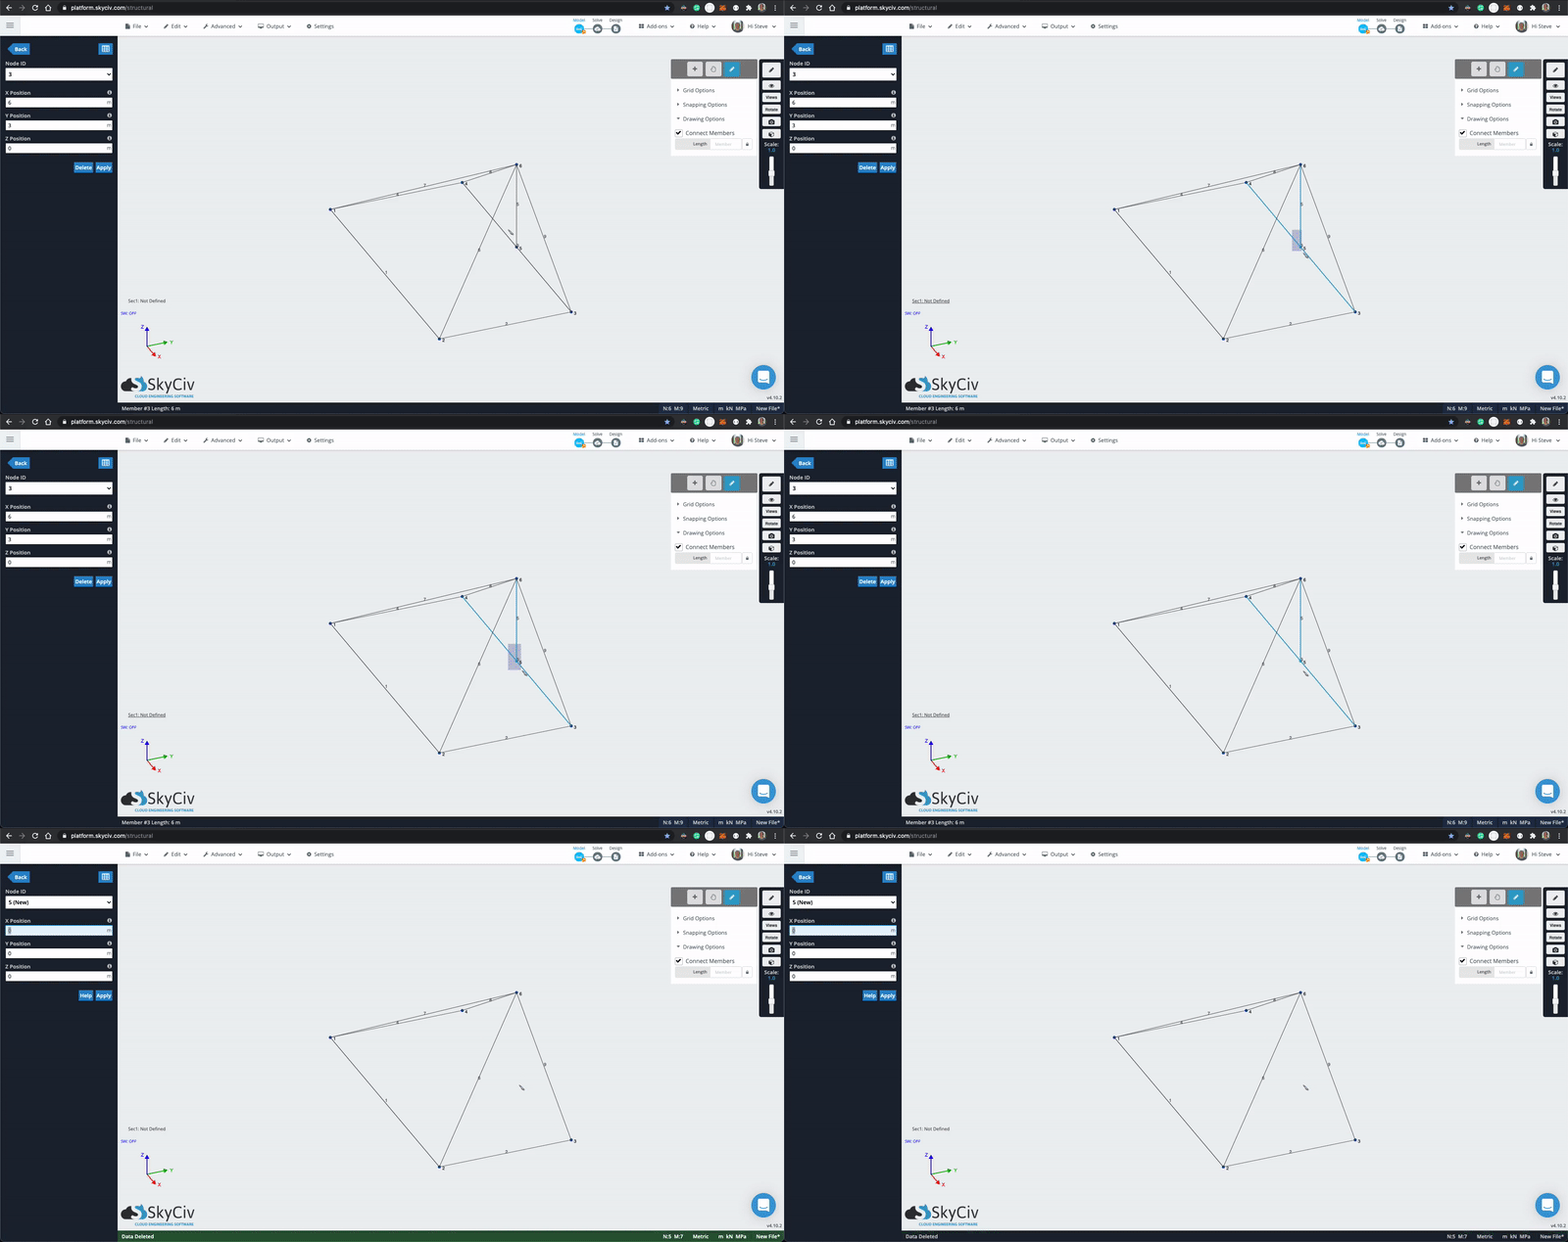
Dragging from left to right will select anything that the selection box touches, from right to left will only select elements that and entirely contained inside the selection box. With this in mind, hold CTRL (⌘) and drag from left to right so the selection box intersects members 3 and 5 then press the delete key.
Now we have the hip and common rafters laid out, let’s use the repeat tool to add in the jack rafters. Rotate the view so you can easily select the two common rafters with a left to right selection. Go to Edit → Operations → Repeat or use the shortcut, CTRL+D. Fill out the fields, with the following values:
- Type: Linear
- Number of repetitions: 6
- Distance between repetitions: 0.45
- Direction: Negative Y-axis (or Negative Z-axis if your preferences specify a Y vertical axis)
Leave the checkboxes and click Submit.
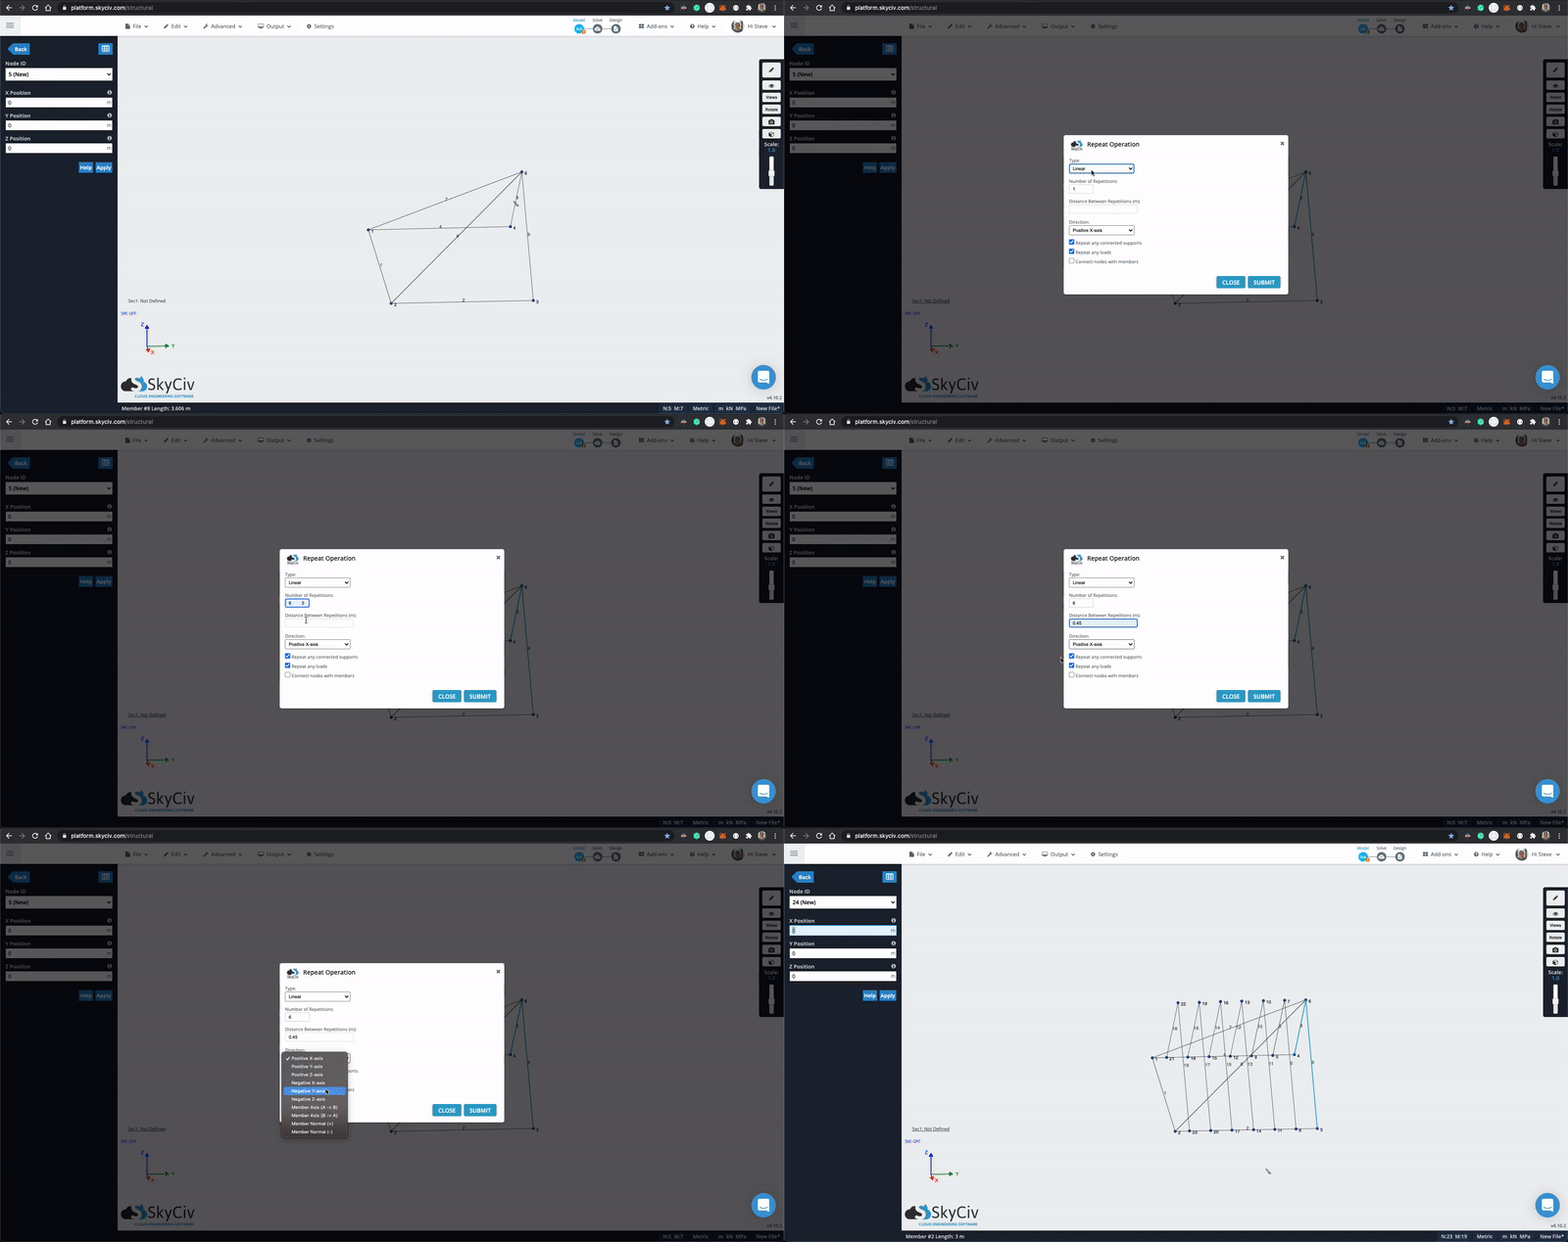
Once submitted, press CTRL+A to select everything, then right-click in empty space and choose Intersect Members. This option will only appear when this operation is possible. You will see that the top-plates and hips become sub-divided into multiple members so everything is connected.

Click Views → Side in the right panel, to make selecting the excess of the rafters easier. Make a left to right selection of the excess rafters above the hip and hit the delete key.
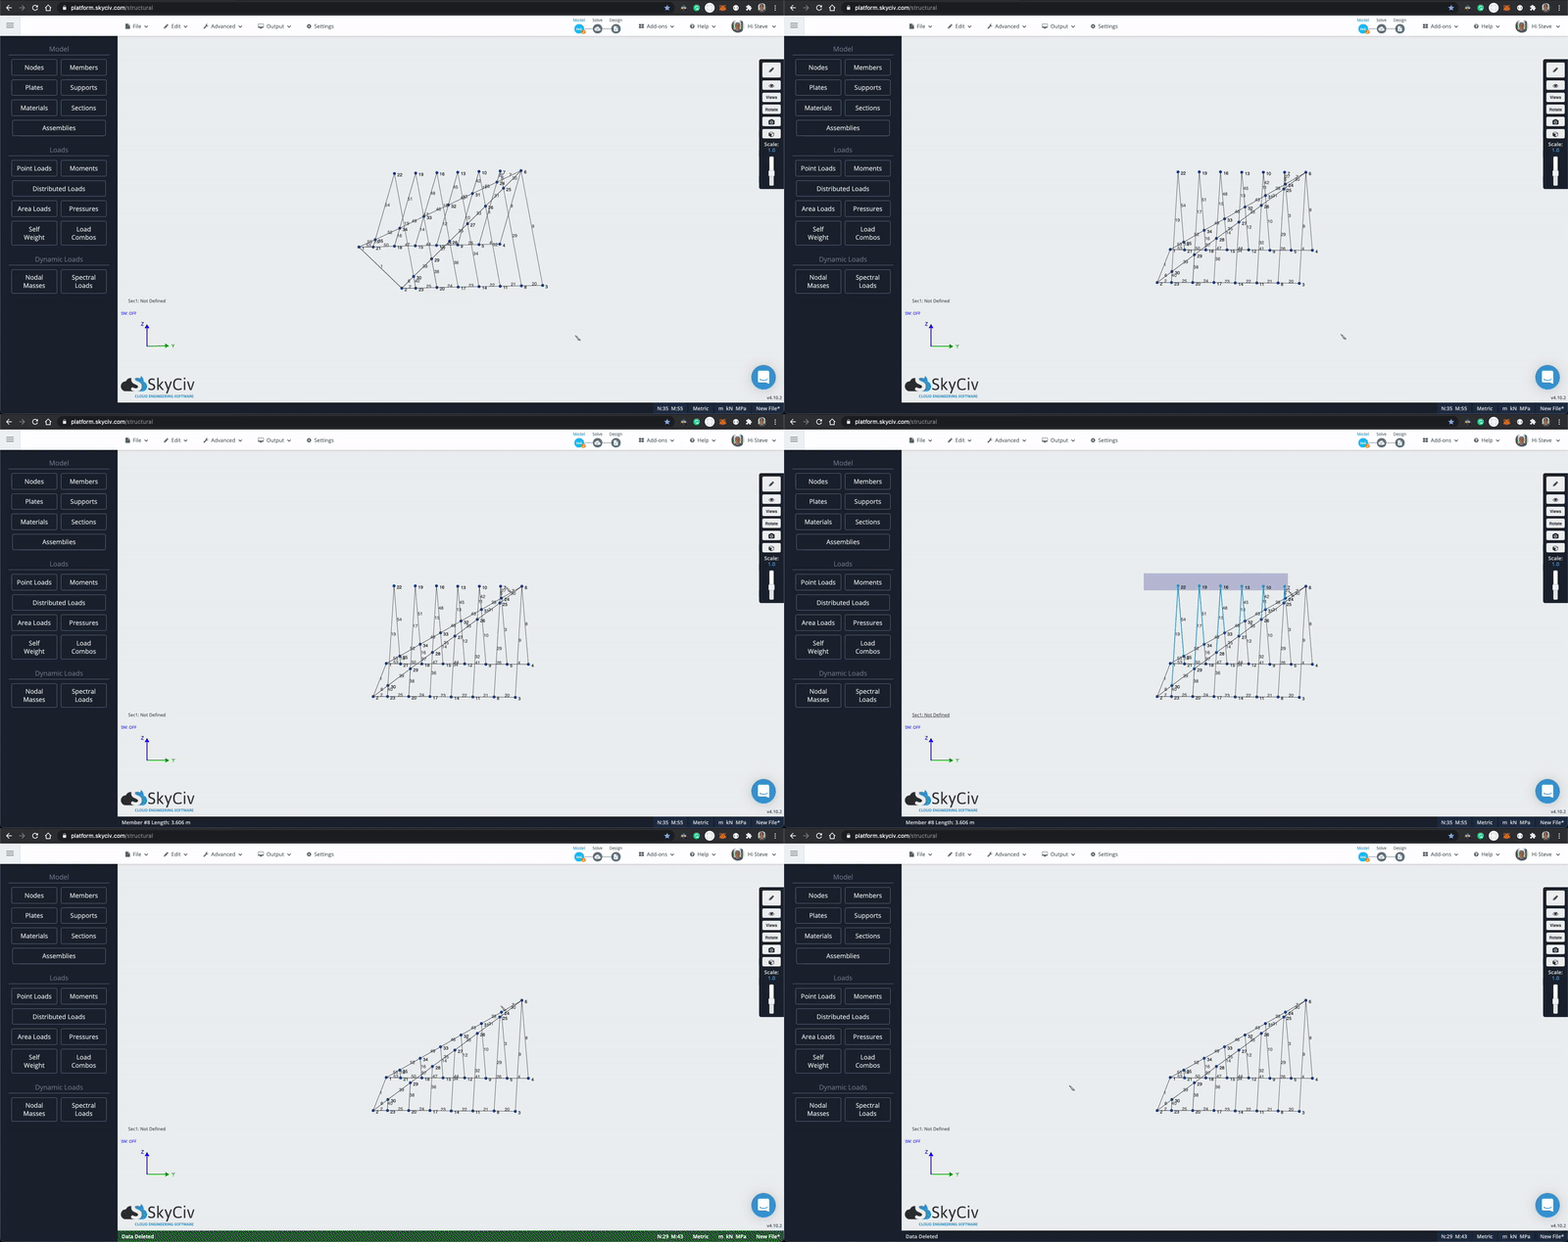
Select the pen tool and rotate back to the front of the model. Draw in the last common rafter by selecting the apex node and drawing down to the midpoint of the top plate. Use the same technique we used earlier to Repeat (CTRL+D) the common rafter 6 times in both the positive and negative X direction. Select all elements and run the intersect operation again and finish up by deleting the excess of the jack rafters.
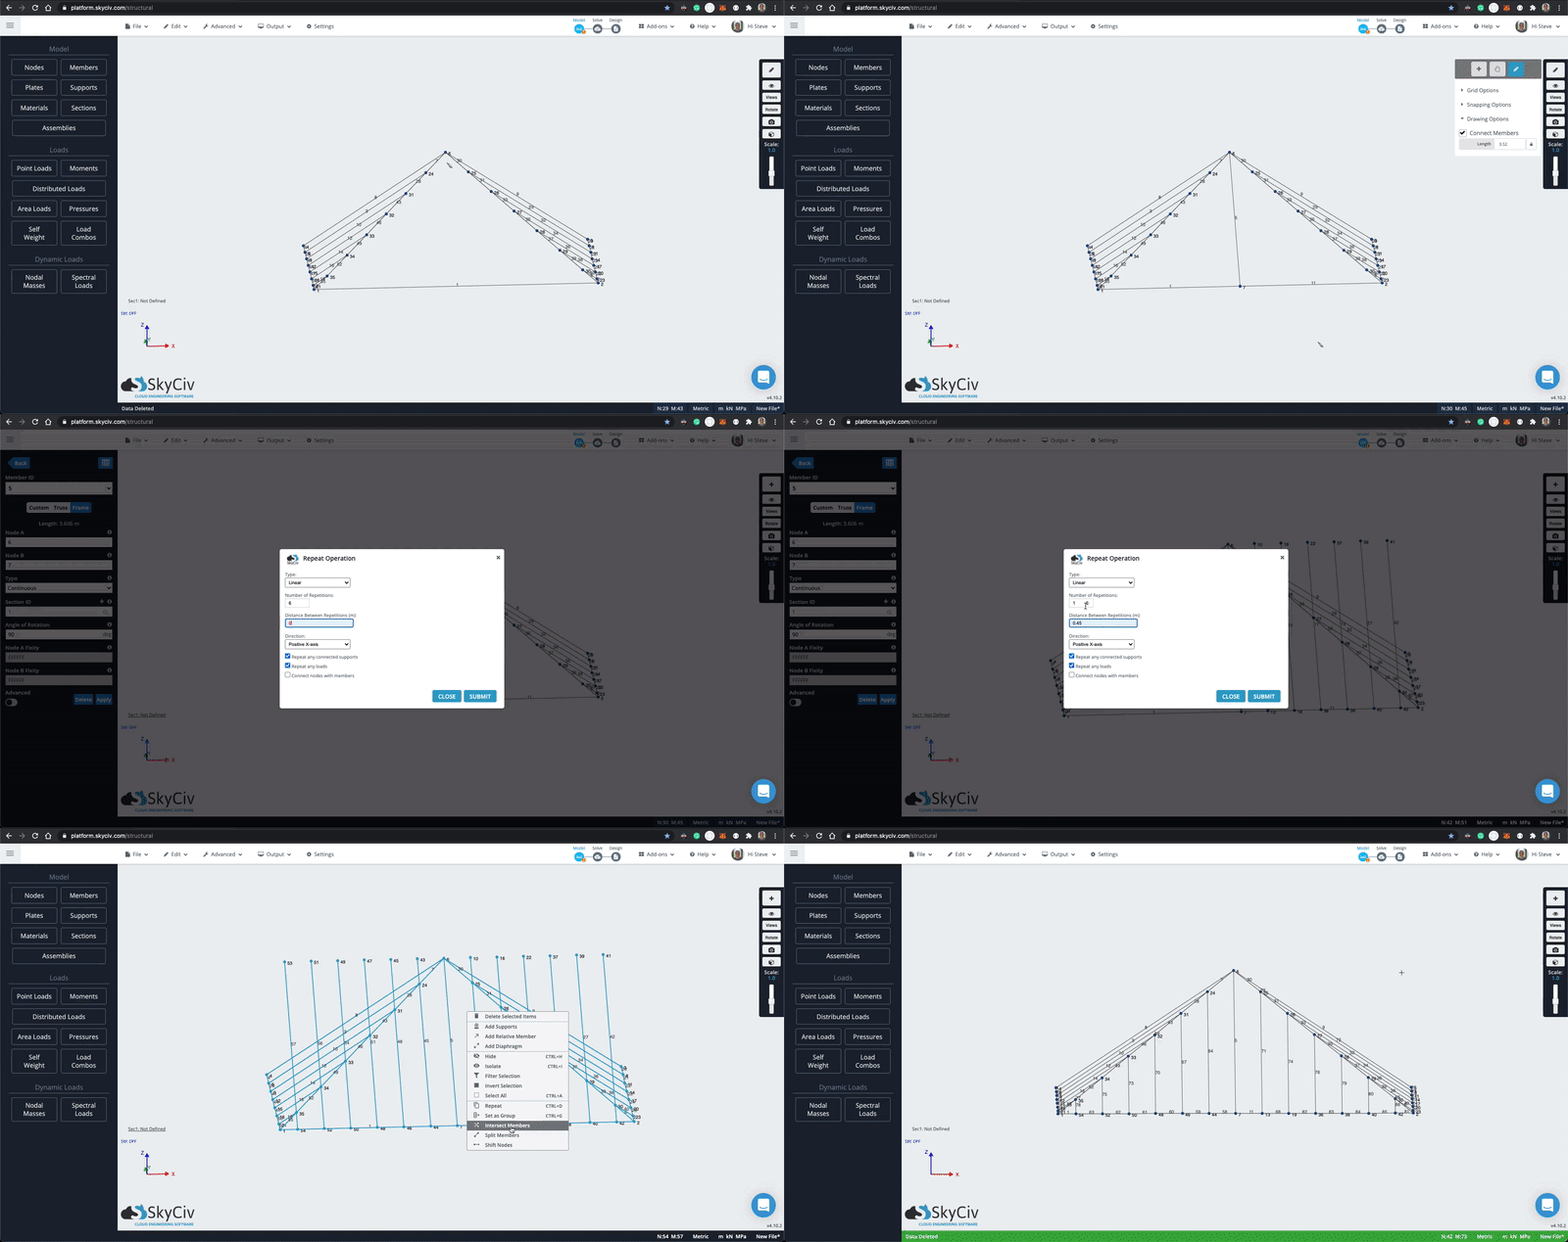
Now you have a basic hip roof – pretty fast right? If you would like to run an analysis, just turn on self-weight and add some supports and sections.
When using these powerful operation tools, it’s a good idea to run Advanced → Repair on the model which will do some sanity checks and make sure nothing was duplicated.


