Move, copy, rotate, mirror and scale parts of your structure
The operations in SkyCiv Structural 3D let you move, copy (repeat), rotate, mirror and scale parts of a model in a few clicks, instead of editing nodes one by one. They are the quickest way to build structures made of repeated parts, such as the portal frames of a warehouse or the floors of a building, and to fix the geometry of an existing model.
All operations are in Edit > Operations. The Move and Repeat operations open a panel on the left of the screen and show a live preview of the result in the model, so you can check it before you apply it. The other operations open a dialog.
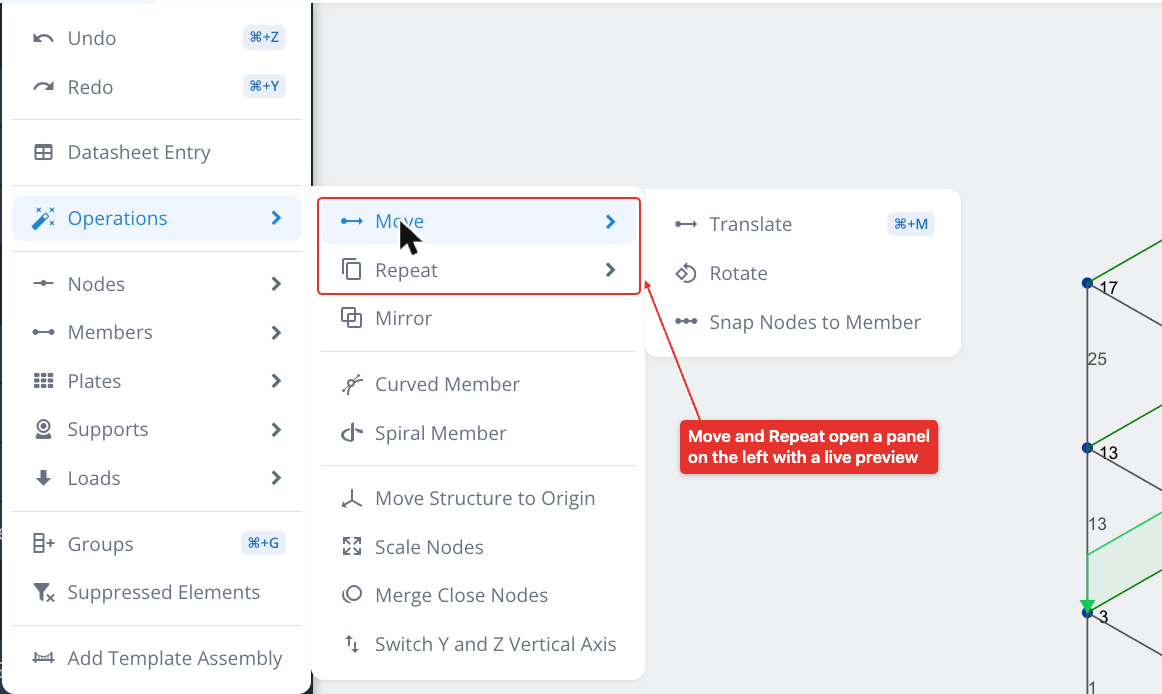
| Operation | What it does |
|---|---|
| Move > Translate | Moves the selection by a distance |
| Move > Rotate | Rotates the selection about an axis |
| Move > Snap Nodes to Member | Moves the selected nodes onto a member |
| Repeat > Linear | Copies the selection one or more times along a direction |
| Repeat > Circular | Copies the selection one or more times around an axis |
| Mirror | Creates a mirror image of the selection about a plane |
| Curved Member and Spiral Member | Generate curved and helical members |
| Move Structure to Origin | Moves the whole model so that it starts at (0, 0, 0) |
| Scale Nodes | Enlarges or shrinks the selection about a point |
| Merge Close Nodes | Merges nodes that are closer than a tolerance |
| Switch Y and Z Vertical Axis | Swaps the Y and Z coordinates of every node |
You can also run most of these with the AI Assistant, by describing the change in plain language (see Using the AI Assistant for operations below).
Selecting what to operate on
Most operations work on the current selection, so select the nodes, members and plates first. If nothing is selected, a message asks you to make a selection and try again.
- Hold Ctrl and click parts of the structure to add them to the selection, or
- hold Ctrl and drag with the mouse to select parts of the structure in bulk.
Translate (move nodes and members)
Edit > Operations > Move > Translate (Ctrl+M) moves the selection to a new position. The Translate panel opens on the left with these methods:
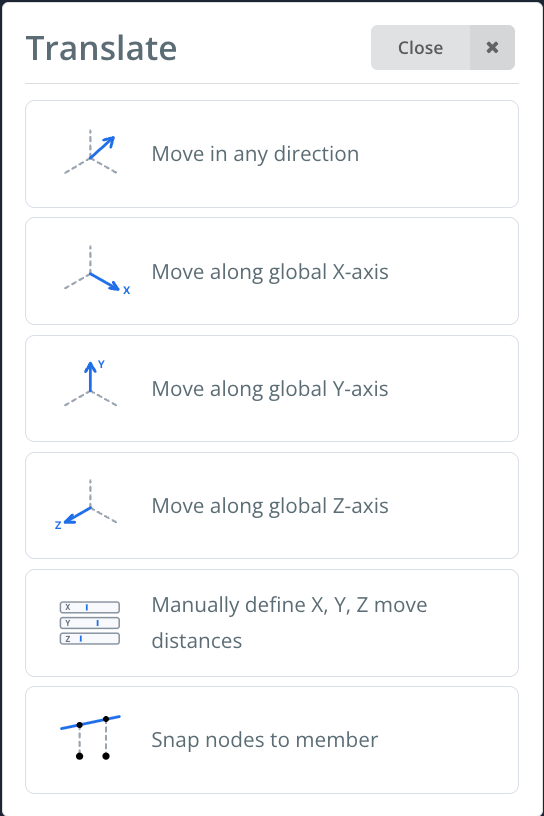
- Move in any direction: pick the move in the model with the mouse.
- Move along global X-axis, Move along global Y-axis and Move along global Z-axis: move along one axis only. Click a node to start defining the move distance in the model, or type the distance in the field (for example X Distance). Use a negative value to move in the negative direction.
- Manually define X, Y, Z move distances: enter the distance along each axis.
- Snap nodes to member: opens the Snap Nodes to Member tool (see below).
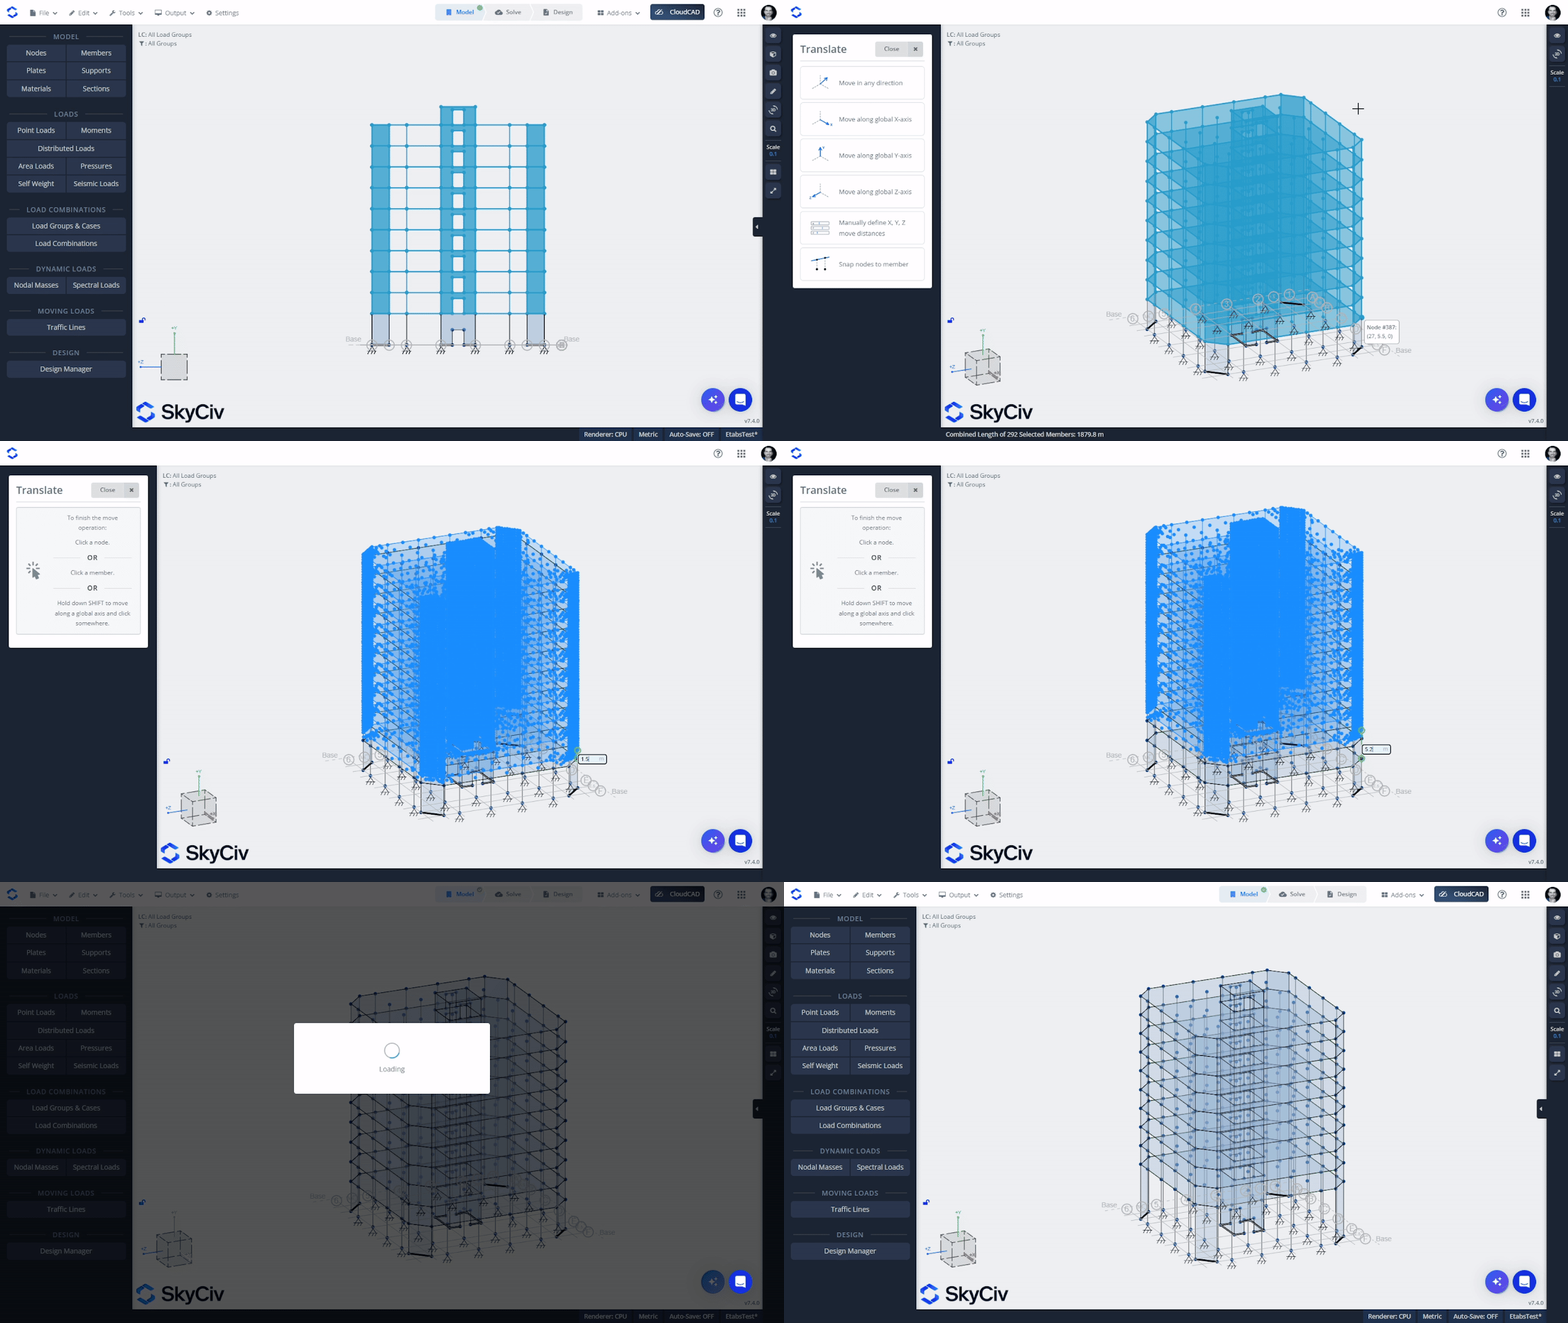
As soon as you enter a distance, the moved structure is previewed in blue, with dashed lines from each node to its new position. Tick Also move other connected nodes to move the nodes connected to the selection as well, then click Finish to apply the move, or Close to cancel it.
Rotate
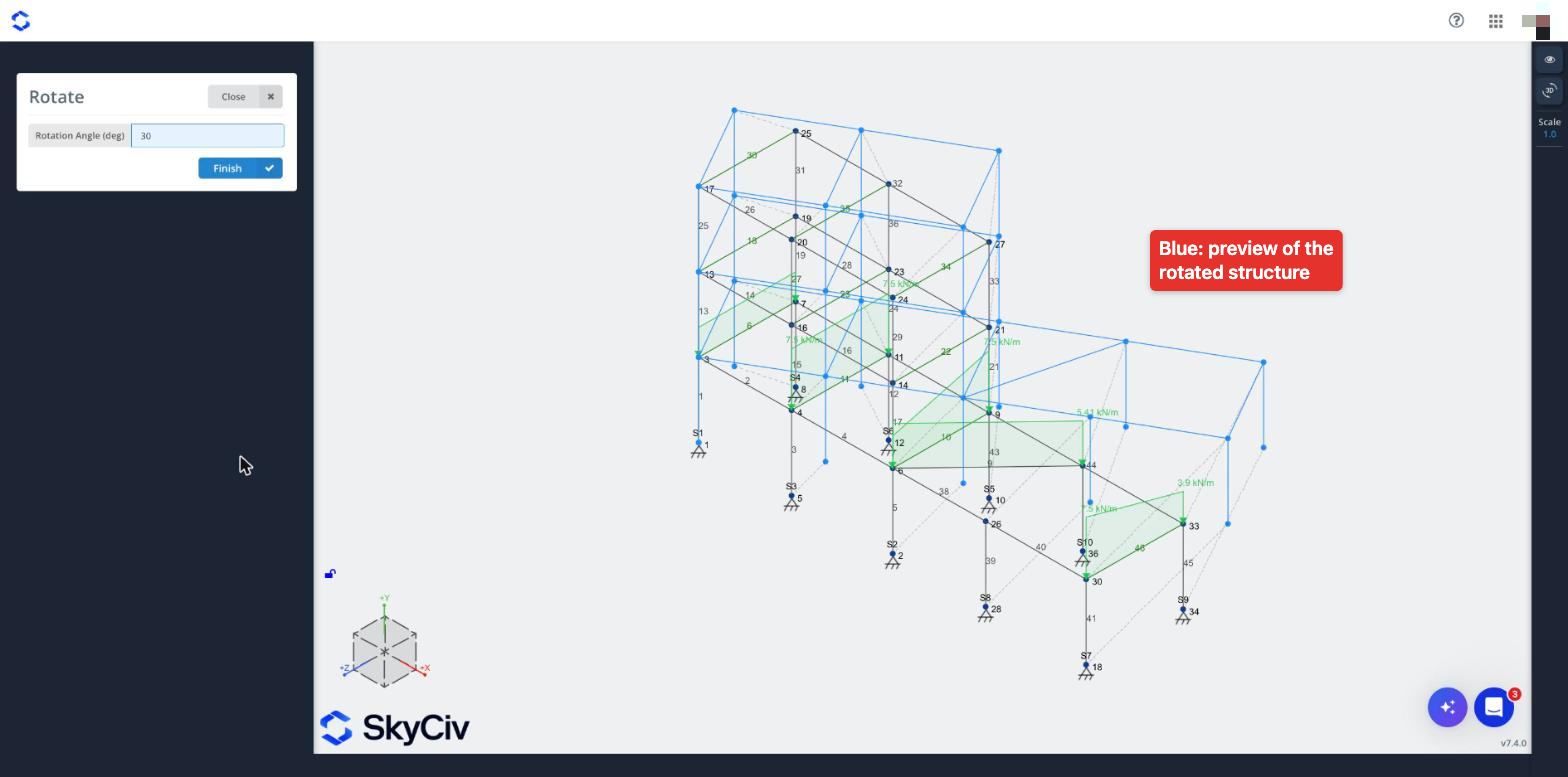
Edit > Operations > Move > Rotate rotates the selection about an axis.
- Define the pivot axis: click two nodes or one member in the model, or enter the coordinates of Pivot Axis Point A and Pivot Axis Point B in the panel. For a rotation in plan when Y is vertical, use two points on a vertical line, such as (0, 0, 0) and (0, 1, 0).
- Click Next and enter the Rotation Angle (deg). The rotated structure is previewed in blue. Enter a negative angle to rotate the other way.
- Click Finish to apply the rotation.
Snap nodes to a member
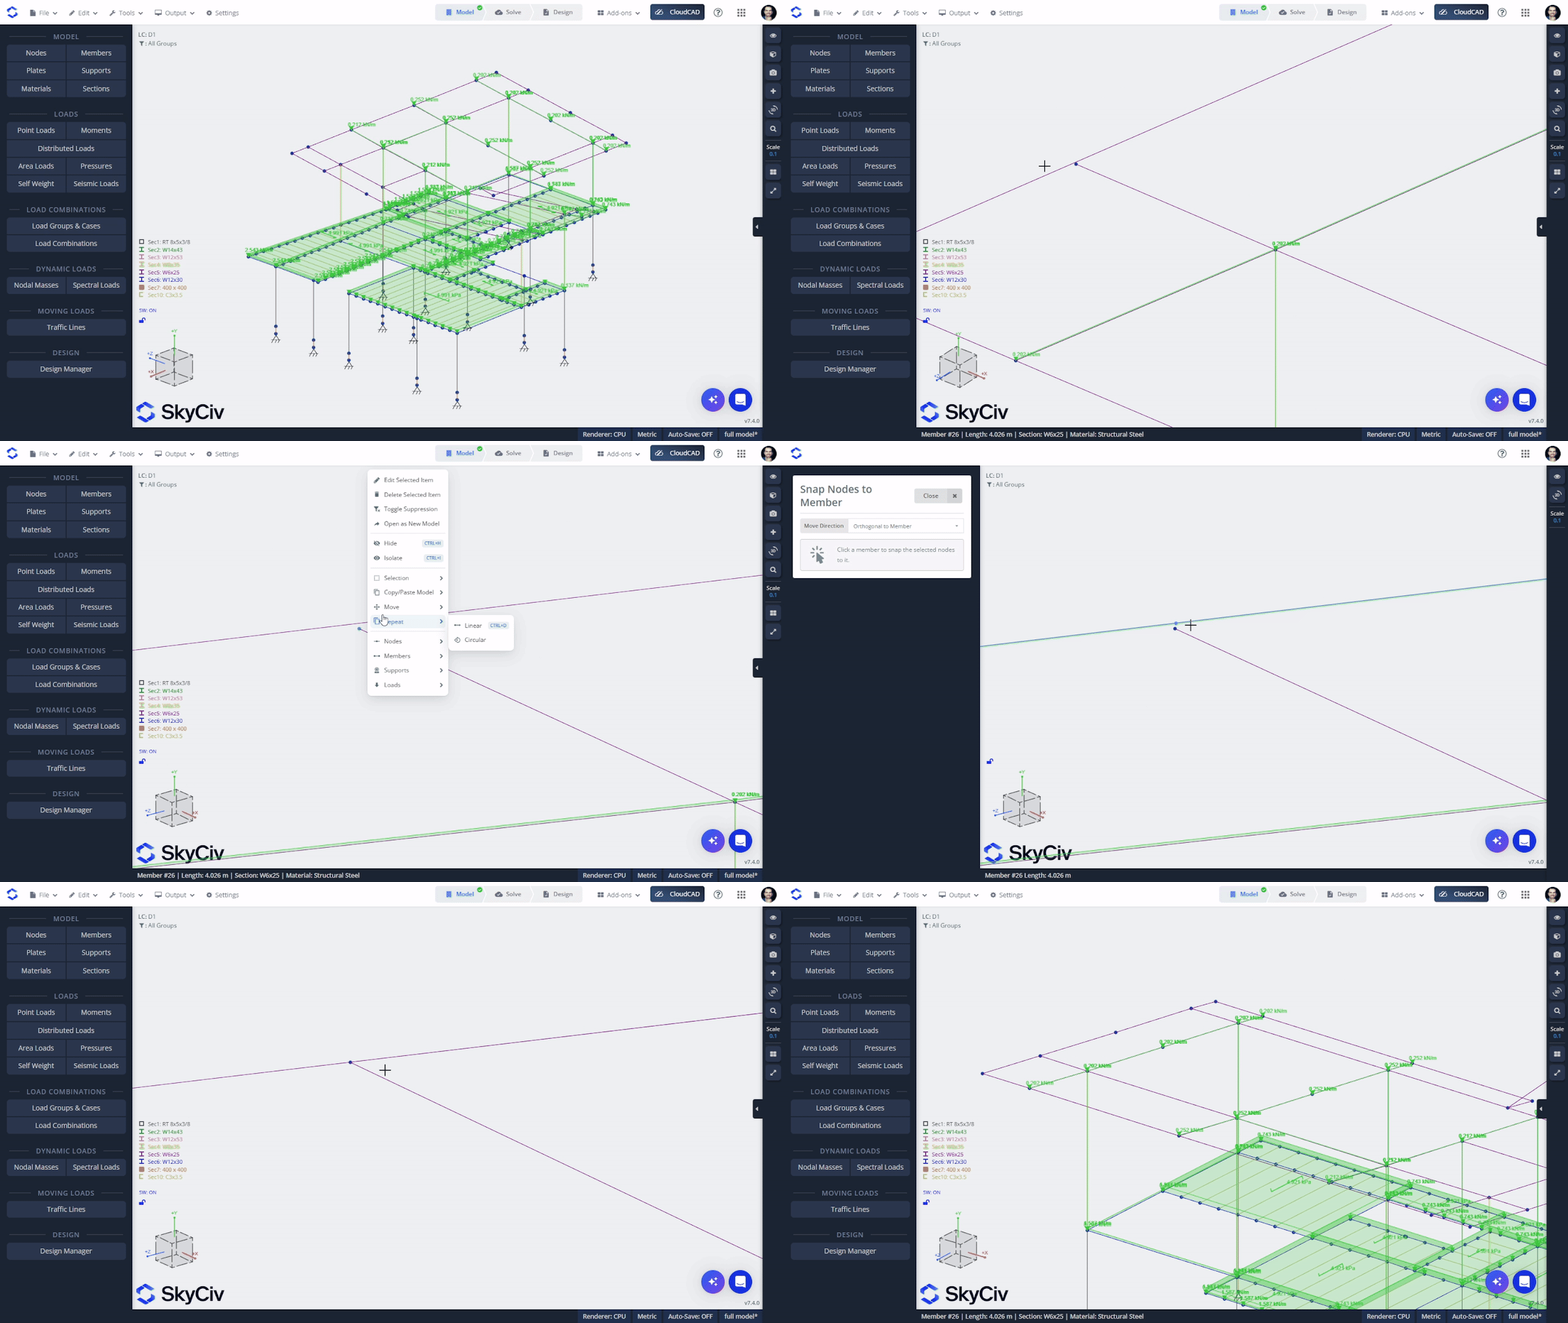
Edit > Operations > Move > Snap Nodes to Member moves the selected nodes onto a member. It is useful to line up nodes that are slightly off a beam, or to bring the tops of columns onto a sloping rafter.
Select the nodes, open the tool, choose the Move Direction, then click the member to snap the nodes to it:
- Orthogonal to Member: each node moves to the closest point on the member.
- Keep X-axis unchanged, Keep Y-axis unchanged or Keep Z-axis unchanged: the nodes move onto the member without changing that coordinate. For example, keep X unchanged to move columns vertically up to a sloping rafter without moving them sideways.
Linear Repeat (copy)
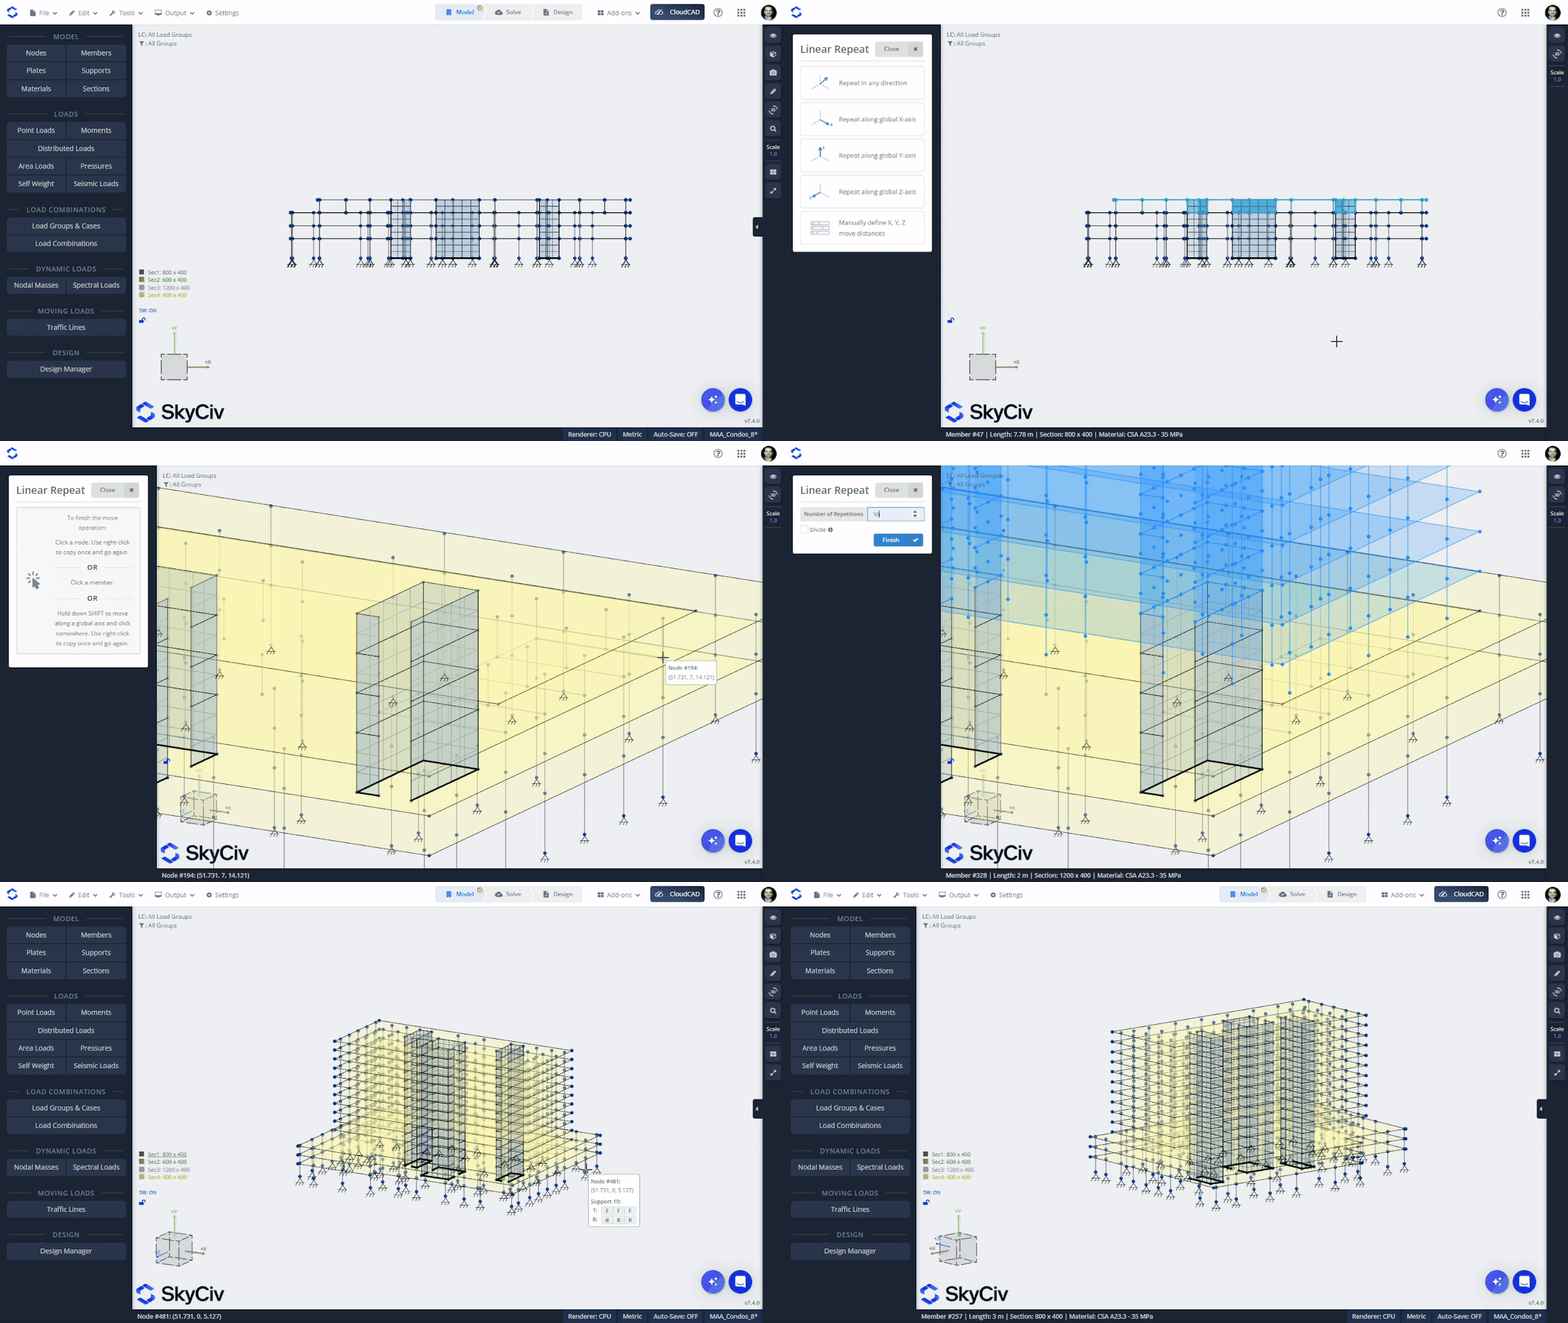
Edit > Operations > Repeat > Linear (Ctrl+D) copies the selection one or more times in a straight line. It is the fastest way to model a structure made of repeated parts, such as a warehouse made of identical portal frames: model one frame, then repeat it along the length of the building.
- Select the part of the structure to repeat.
- Open Repeat > Linear and choose how to define the spacing: Repeat in any direction, Repeat along global X-axis, Repeat along global Y-axis, Repeat along global Z-axis, or Manually define X, Y, Z move distances.
- Click a node to start defining the distance in the model, or enter it in the panel (for example Z Distance), then click Next.
- Enter the Number of Repetitions. The copies are previewed in blue.
- Click Finish to create them.
The Divide option sets how the distance is used:
- Divide off: the distance is the spacing between copies. A Z distance of 6 m with 3 repetitions creates copies at 6, 12 and 18 m.
- Divide on: the distance is the total length, divided evenly across the repetitions. The same inputs create copies at 2, 4 and 6 m.
Circular Repeat
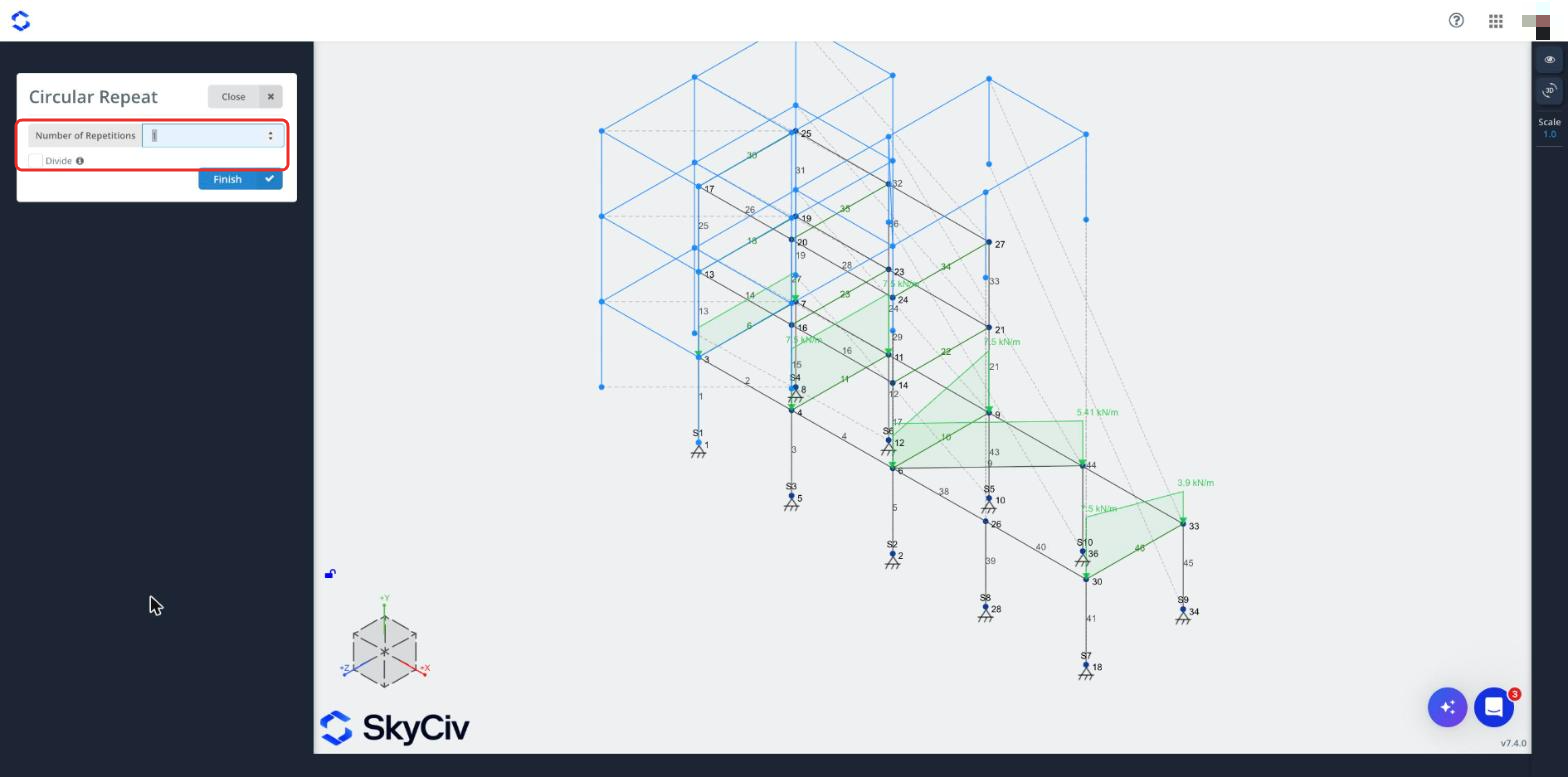
Edit > Operations > Repeat > Circular copies the selection around an axis, for example to model a circular tank, a dome or a radial roof.
- Define the pivot axis: click two nodes or one member, or enter Pivot Axis Point A and Pivot Axis Point B, then click Next.
- Enter the Rotation Angle (deg) between copies and click Next.
- Enter the Number of Repetitions. Tick Divide to spread the angle evenly across the repetitions instead of repeating it for each copy (for example 360° with Divide on and 8 repetitions gives a copy every 45°).
- Check the preview and click Finish.
Mirror
Edit > Operations > Mirror creates a mirror image of the selection, for example to model the second half of a symmetrical structure. Select the part to mirror, open Mirror, and fill in the Mirror Operation dialog:
- Mirror Plane: the plane the mirror lies in (XY, XZ or YZ plane). To mirror a frame that spans along X, use the YZ plane.
- Mirror Plane Location: the position of the plane along the axis perpendicular to it. For the YZ plane, this is the X coordinate of the mirror.
- Duplicate any connected supports: also mirrors the supports of the selection (on by default).
- Merge Nodes Tolerance: mirrored nodes closer than this distance to an existing node are merged with it, so nodes on the mirror plane are not duplicated.
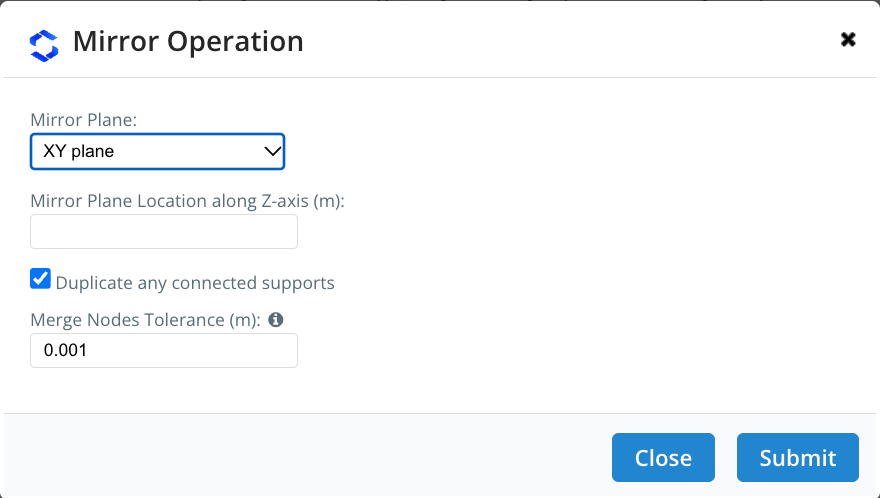
Click Submit to create the mirrored part. If the result isn’t what you expected, undo it with Ctrl+Z and try again.
Other operations
- Curved Member and Spiral Member: generate an arc between two selected nodes, or a helix from one selected node, made of straight members. See Curved and Spiral Members for their inputs.
- Move Structure to Origin: moves the whole model so that its smallest X, Y and Z coordinates are all zero. It doesn’t need a selection.
- Scale Nodes: enlarges or shrinks the selected nodes about a point. Enter the Scale Factor (greater than 1 to enlarge, less than 1 to shrink, 2 to double) and the Scale Center Coordinate, which defaults to the center of your structure.
- Merge Close Nodes: finds groups of nodes that are closer to each other than the Distance Tolerance and merges each group into a single node. With two or more nodes selected it only checks those nodes, otherwise it checks the whole model. Use it to clean up an imported model or nodes that almost coincide.
- Switch Y and Z Vertical Axis: swaps the Y and Z coordinates of every node in the model, for a model imported with a different vertical axis. You choose whether Y becomes +Z or -Z. To change only the vertical axis of the view, use Settings > View > Vertical Axis instead.
All operations can be undone with Ctrl+Z (Cmd+Z on Mac). You can also find them, pin them and give them your own shortcuts in the Operations Toolbox.
Using the AI Assistant for operations
The AI Assistant in Structural 3D can do many of these operations for you from a plain-language request. Click the sparkle icon in the bottom right corner (or Tools > AI Model Assistant) and describe the change with the node or member IDs, distances and angles, for example:
- "Copy members 1 to 12 four times along Z at 6 m spacing"
- "Move nodes 5, 6 and 7 up 500 mm"
- "Mirror the frame about the plane X = 10 m"
- "Rotate the whole structure 30 degrees about the vertical axis through node 1"
When it is done, the AI Assistant tells you what it changed, and you choose Keep or Undo. Check the result in the model, as with any AI-generated change. Each request uses AI credits.
Suppressing elements
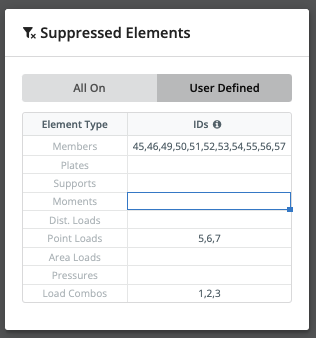
Suppressing elements turns members, plates, loads, load combinations and other elements off for the analysis, without deleting them. SkyCiv also ignores anything attached to a suppressed element: for instance, if a point load is on a member and that member is suppressed, the point load is ignored too.
There are a number of ways to suppress an element:
- Right-click the element and choose Suppress Element.
- Edit > Suppressed Elements lists all the suppressed elements of your model, for a quick reference:
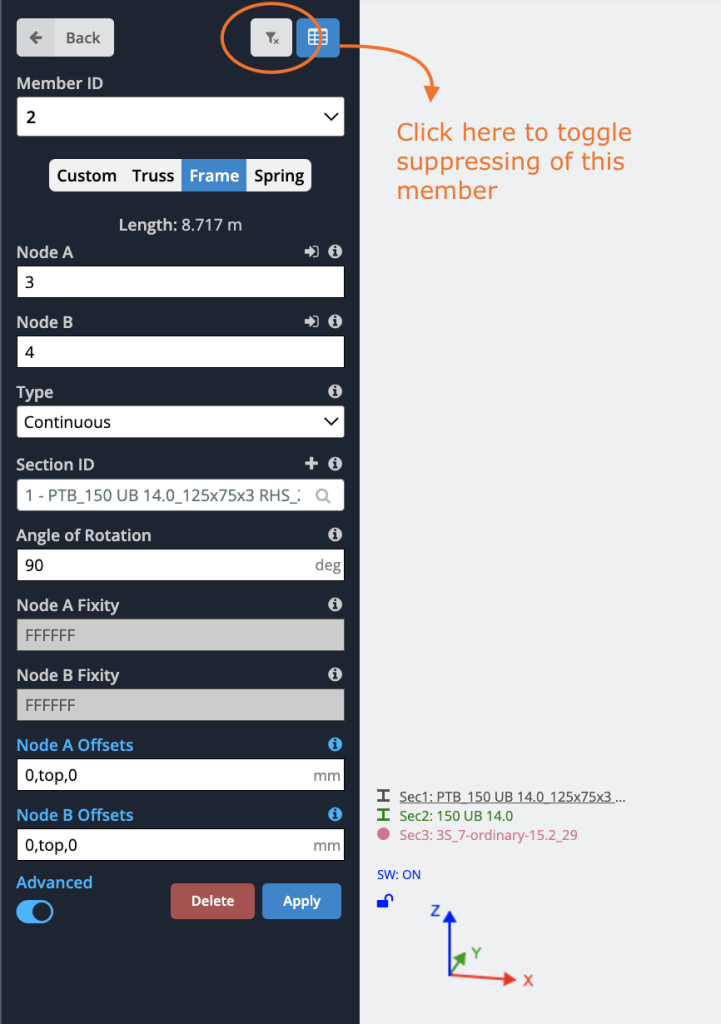
- Click the suppress option in the input form of an individual element:
Center of gravity and weight of the structure
Tools > Center of Gravity calculates the total weight and the center of gravity of your structure, or of the part of the model you have selected.
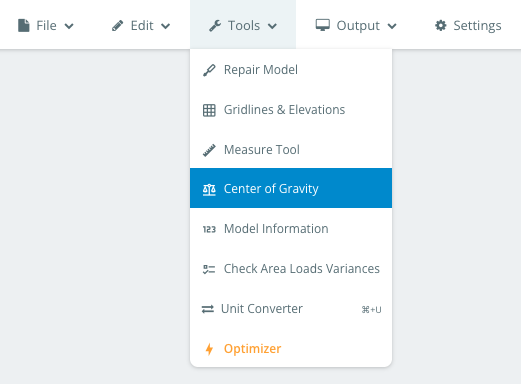
It uses the material density and the weight of the selected members to give the total weight and the position of the center of gravity:
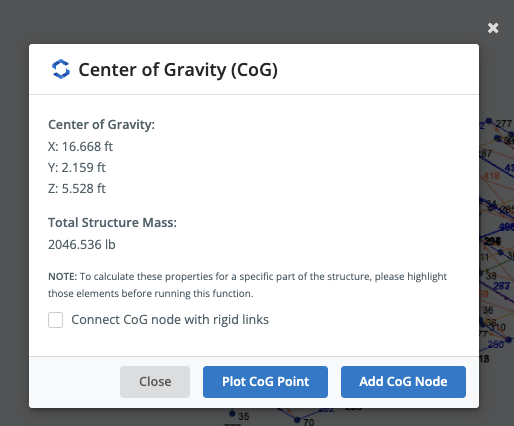
You can also plot the center of gravity point, or add a node at this location. Tick Connect CoG node with rigid links to connect that node to your structure automatically. This is helpful to connect the center of gravity of a piece of equipment to a structure, or to find where to attach a crane or support to a structure.
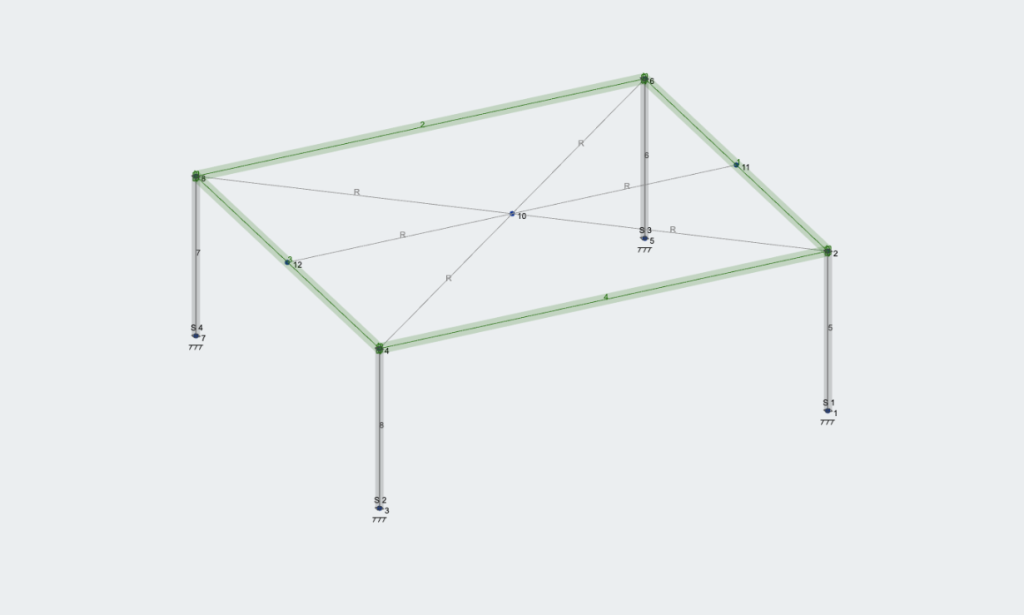
For instance, selecting the beams of this structure and connecting all nodes of those beams to the CoG node with rigid links: