Example: I-shape reinforced with a T-section
In this example, we’re going go create a section made up of an I-shape reinforced on its bottom flange with a upside down T-shape. We’ll be using the default corresponding shapes in the Section Templates for this example.
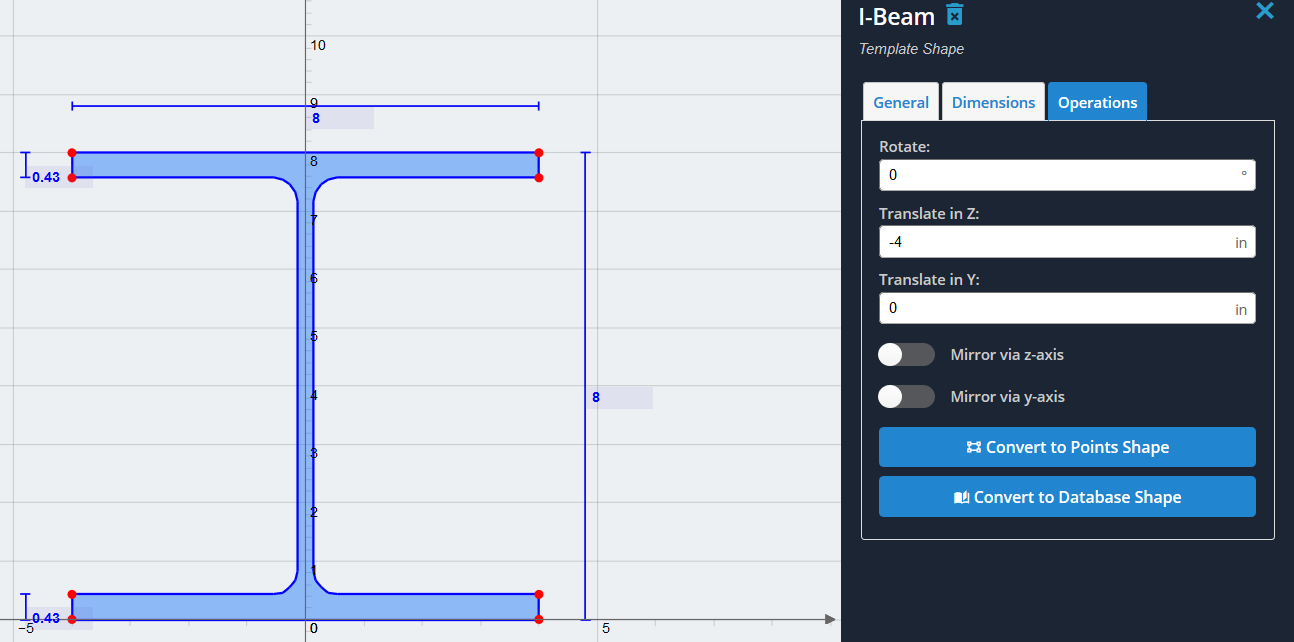
1) Start by adding the I-shape from the Section Templates menu. Select ‘I-shape’ from the menu and click ‘Add’.
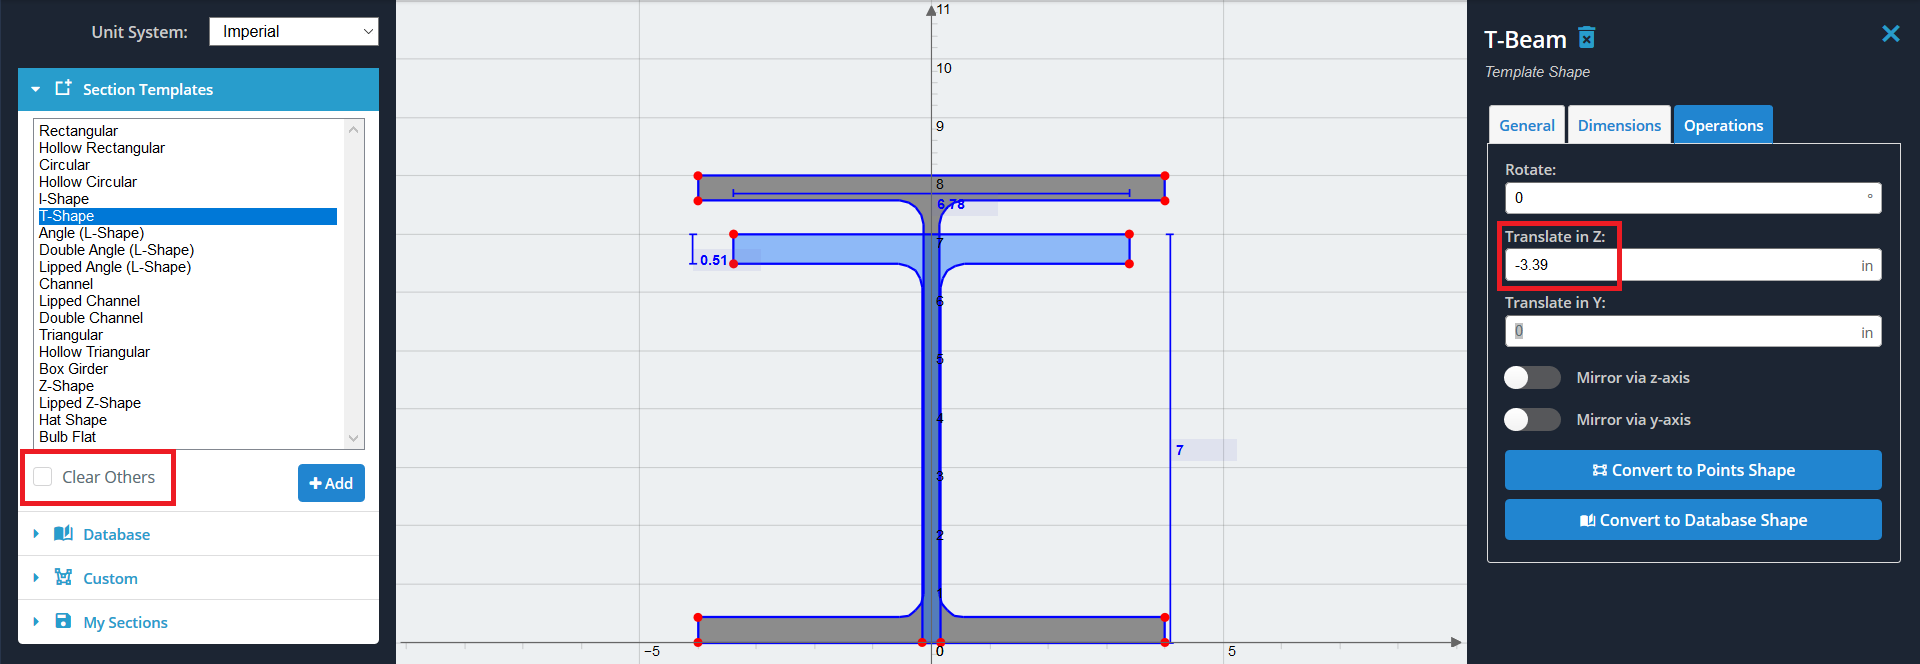
2) For simplicity, lets move the I-shape so that it is centered on the Y axis. To do this, we will want to translate the shape in the negative Z direction by half of its flange width (8/2 = 4 inch). Put in (-4) in the ‘Translate in Z’ field under the ‘Operations’ tab’
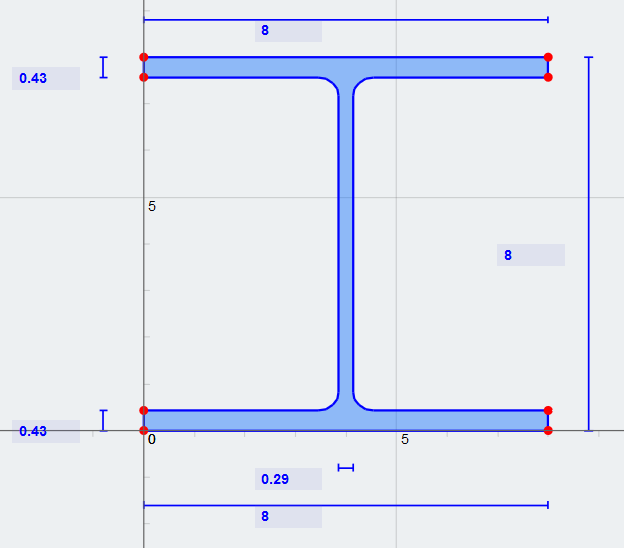
3) Now lets add the T-shape and also center it on the Y axis. Select the ‘T-shape’ from the same Section Templates list and click ‘Add’. Translate late it in the negative Z direction by half of its overall Z dimension (6.78/2 = 3.39 inch). Both shapes should now be centered on the Y axis as shown:
Note: make sure that the ‘Clear Others’ option is unchecked, or else it will clear the I-shape we just generated.
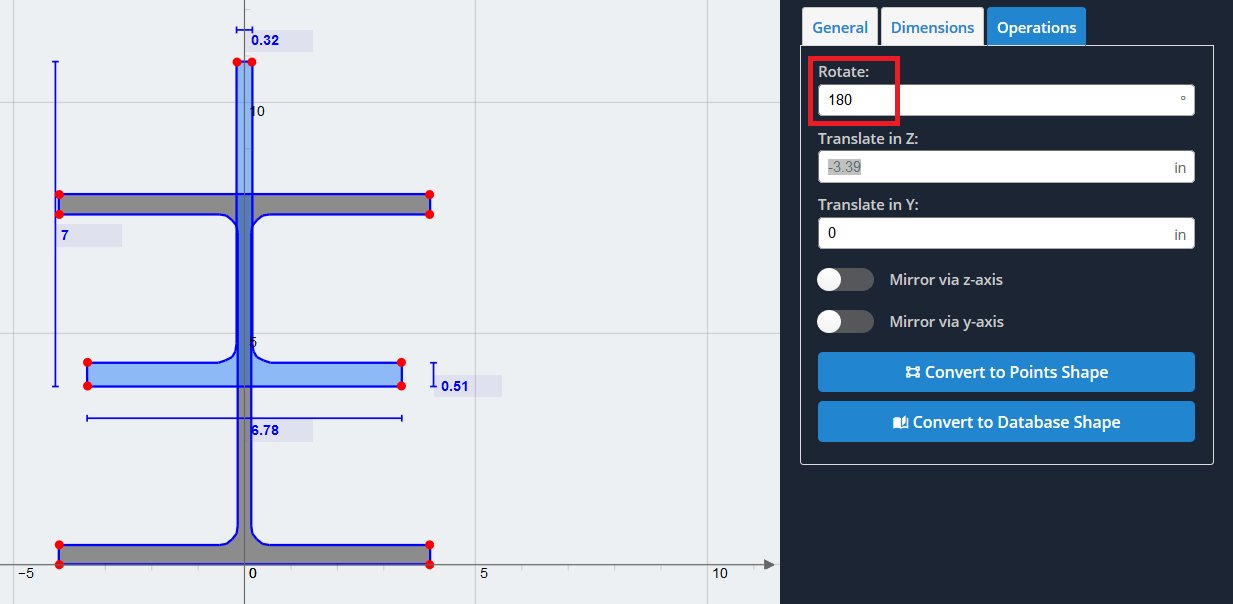
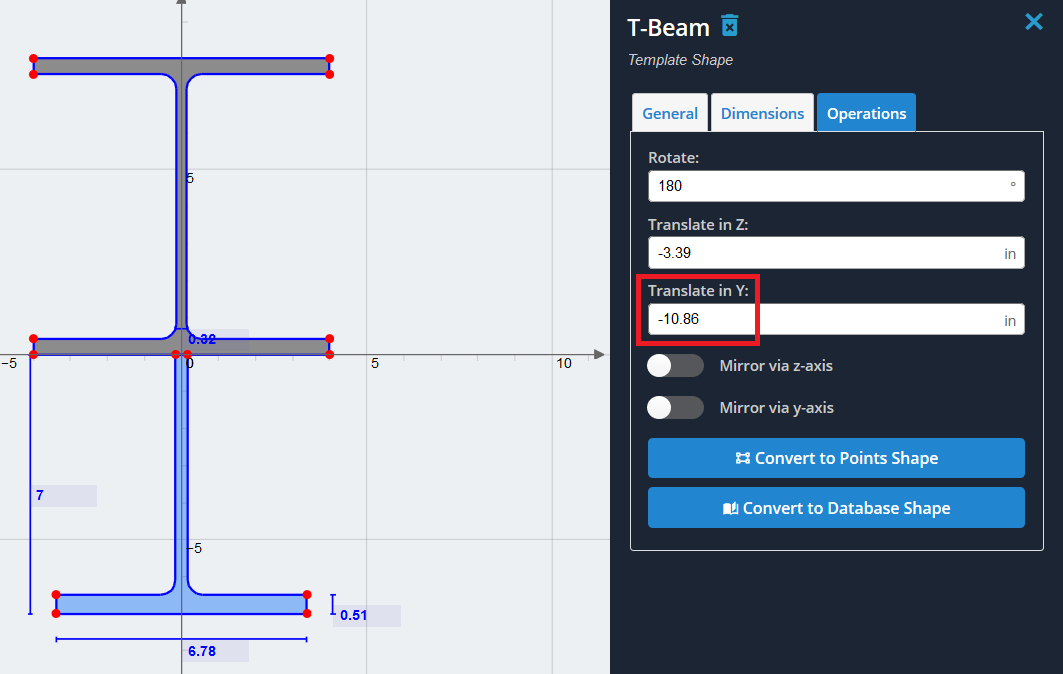
5) Now we need to offset the upside down T-shape down so that it is “connected” to the bottom of the bottom flange of the I-shape. Because we want those top points to have a Y axis value of zero, we want to offset it by its current position. To view the position of any point indicated with a red dot, hover over it with the mouse. In our case, the Y axis value of the T-shape is (10.86)
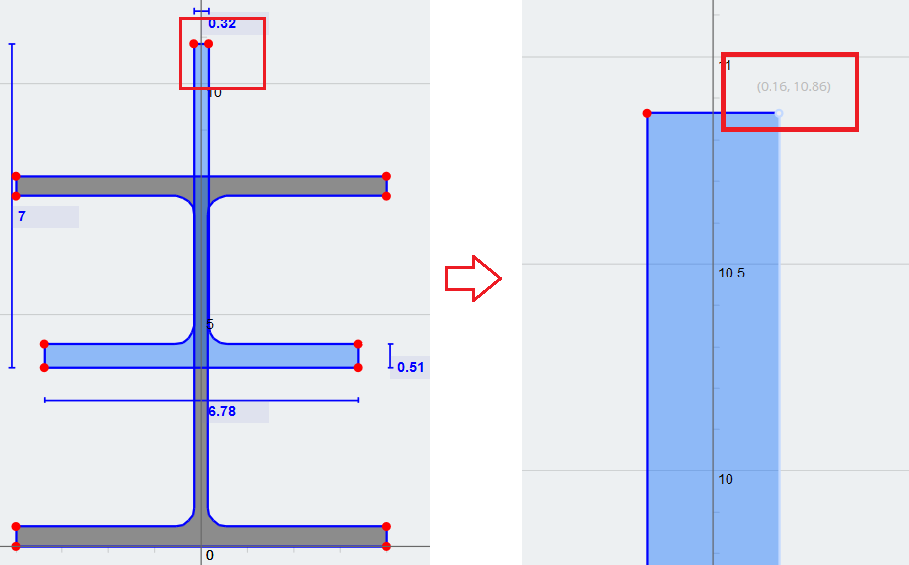
6) Finally, put in (-10.86) as the value for the ‘Translate in Y’ field to get our desired combination of shapes. You can now calculate the section properties using the ‘Calculate’ button on the top toolbar, and bring it into other modules for further analysis.