Modelling a rigid body using Rigid Diaphragms in S3D
What is a Rigid Diaphragm?
A Rigid Diaphragm is a planar collection of nodes that exemplifies infinite in-plane stiffness and moves in the diaphragm plane as a rigid body. This leads to an absence of axial, shear, and moment forces within the diaphragm. An example of a rigid diaphragm in practice could be a reinforced concrete slab, where the bending in-plane is negligible.
What isn’t shown but is present in the calculations, are rigid links that connect each of the nodes in the diaphragm together. These rigid links achieve rigidity through a combination of slaving in the DOFs of the diaphragm plane + an additional consideration for eccentric effects. This means that the nodes are constrained to move together in the plane of the diaphragm, except when rotating about the axis of the master nodes.
To learn more about Plates themselves and their capabilities in Structural 3D, make sure to read the Plates documentation article as well as other interesting pieces in the Documentation.
Creating Rigid Diaphragms in SkyCiv Structural 3D
Rigid Diaphragms are modeled in Structural 3D by using the Plate element and then selecting the diaphragm option. Plates themselves can be modeled using the datasheet, or with the mouse controls. To generate a Plate and then a diaphragm:
- Click on the Plates button
- With the crosshair mouse, click on the nodes that make up the exterior corners of your rigid diaphragm. You should see a blue outline forming.
- Close of the Plate outline by selecting the node you initially selected.
- Select the new Plate, turn on the Advanced Settings.
- Switch the Diaphragm field to Rigid.
You should now see the Plate change to a light yellow color, this is the indication that your rigid diaphragm is now present.
Example
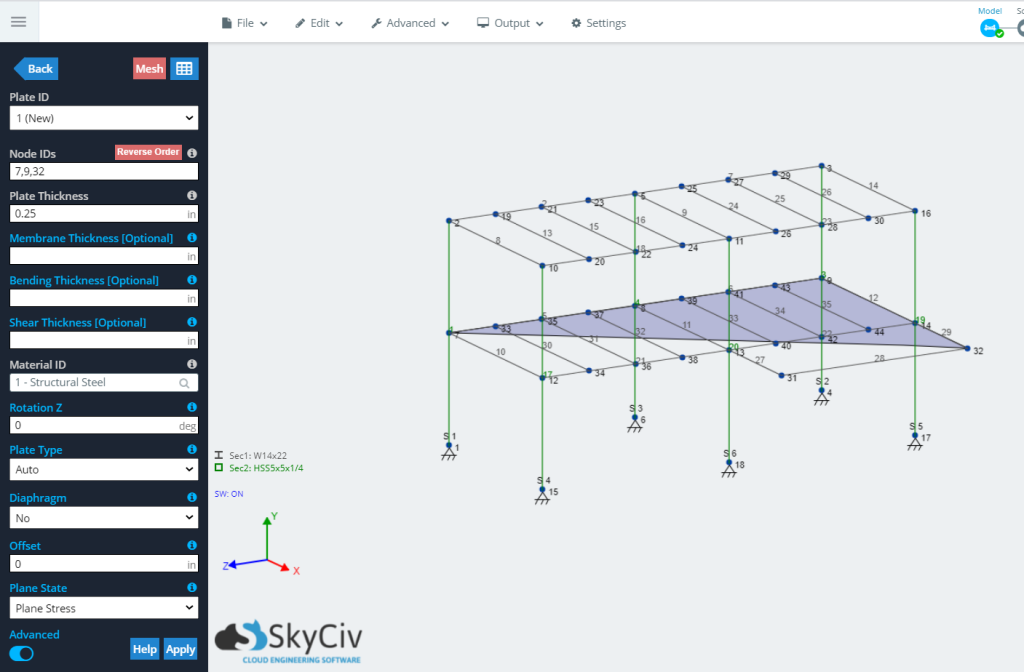
Open up the Plates button and start setting up the extents of your Rigid Diaphragm. You will see the polygon start to take shape:
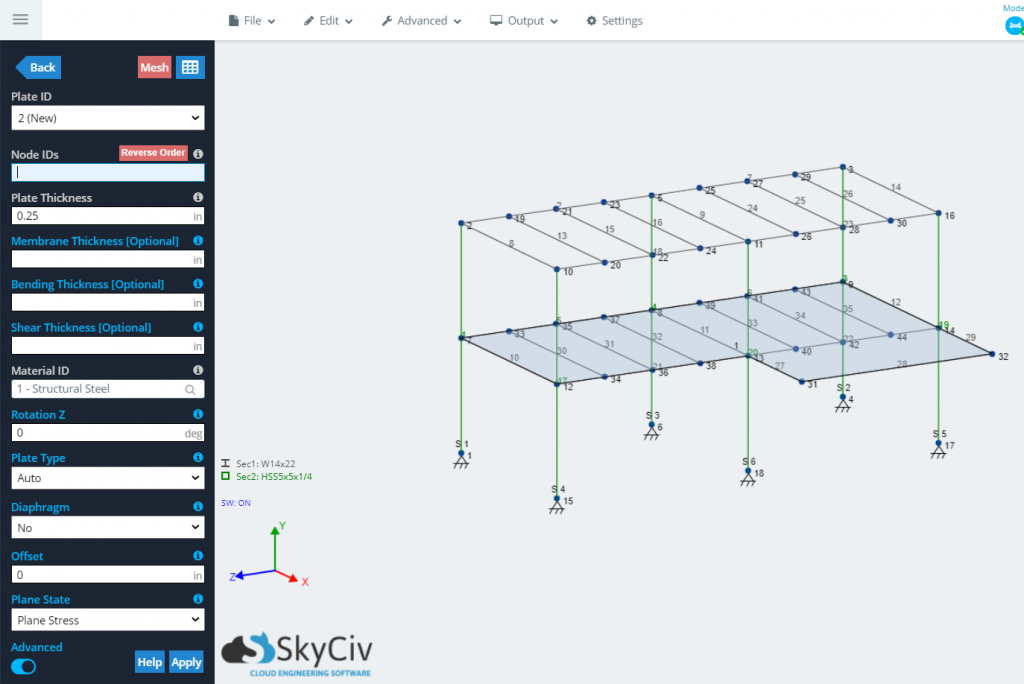
Finish modeling the Plate by going around and clicking on the corner nodes, finishing on the first node selected:
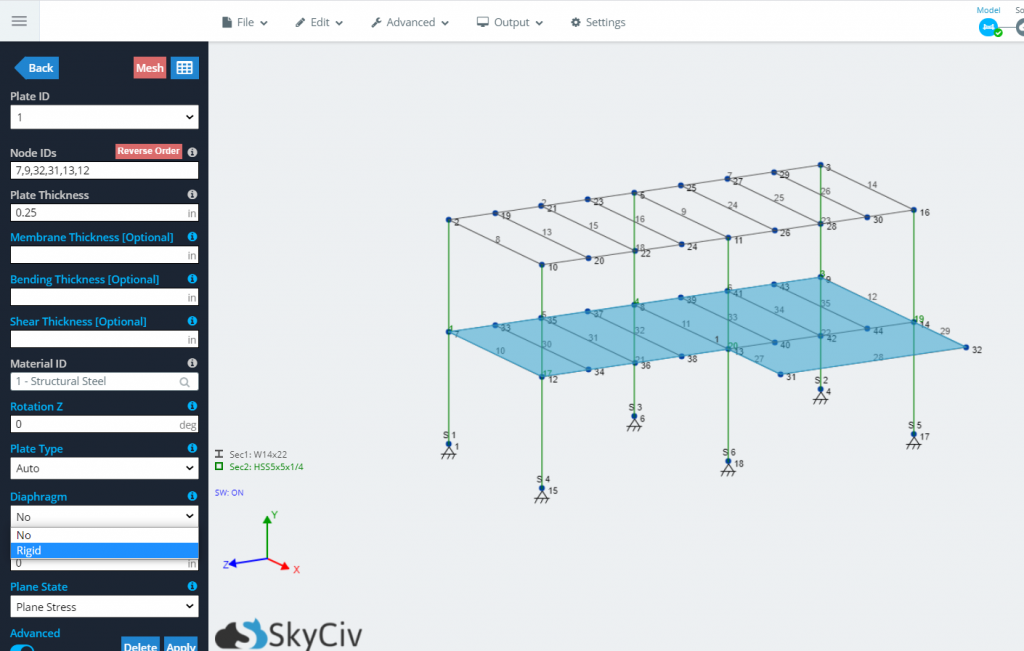
Select the Plate, go the Advanced Settings and switch the Diaphragm option from No to Rigid:
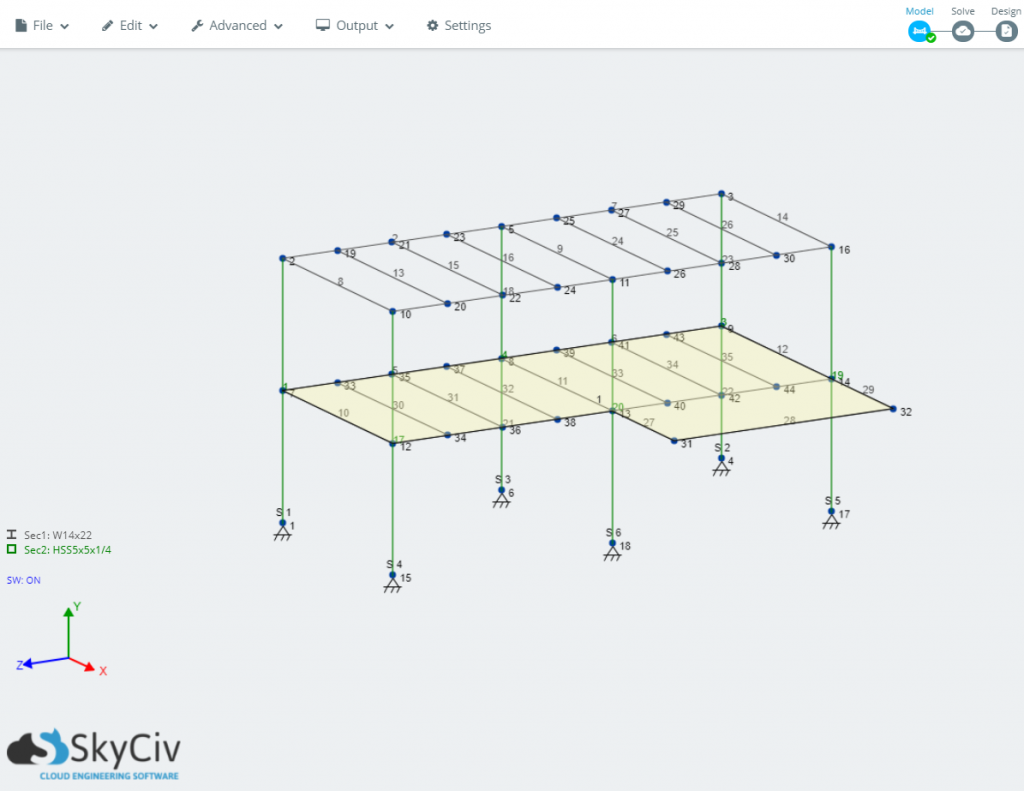
Hit Apply, your Plate is now a Rigid Diaphragm, as indicated by the yellow shading:
The difference in structural behaviour, using Rigid Diaphragms
The below video goes through the difference in results produced by using SkyCiv Diaghpragm functionality: