
Using the SkyCiv Load Generator in ASCE 7-16 Wind Load Calculation for Solar Panels
To calculate the wind load pressures for a structure using SkyCiv Load Generator, the process is to define first the code reference. From there, the workflow is to define the parameters in Project Details, Site Data, and Structure Data, respectively. However, free users can only use the calculation for a gable or pitched roof for a maximum of 3 solves per week. With a Professional Account or by purchasing the standalone Load Generator module, you can use all the features of this calculation as long as you want. Note that ASCE 7-16 and ASCE 7-22 can be used for Imperial and Metric units while ASCE 7-10 is only limited to Imperial.
Users will need to define the parameters from top to bottom. The subsequent sections will detail the input parameters that you will need to define to generate the wind results. After selecting the design code, it will automatically open the Site Data menu so you can enter the location of the structure you are designing.
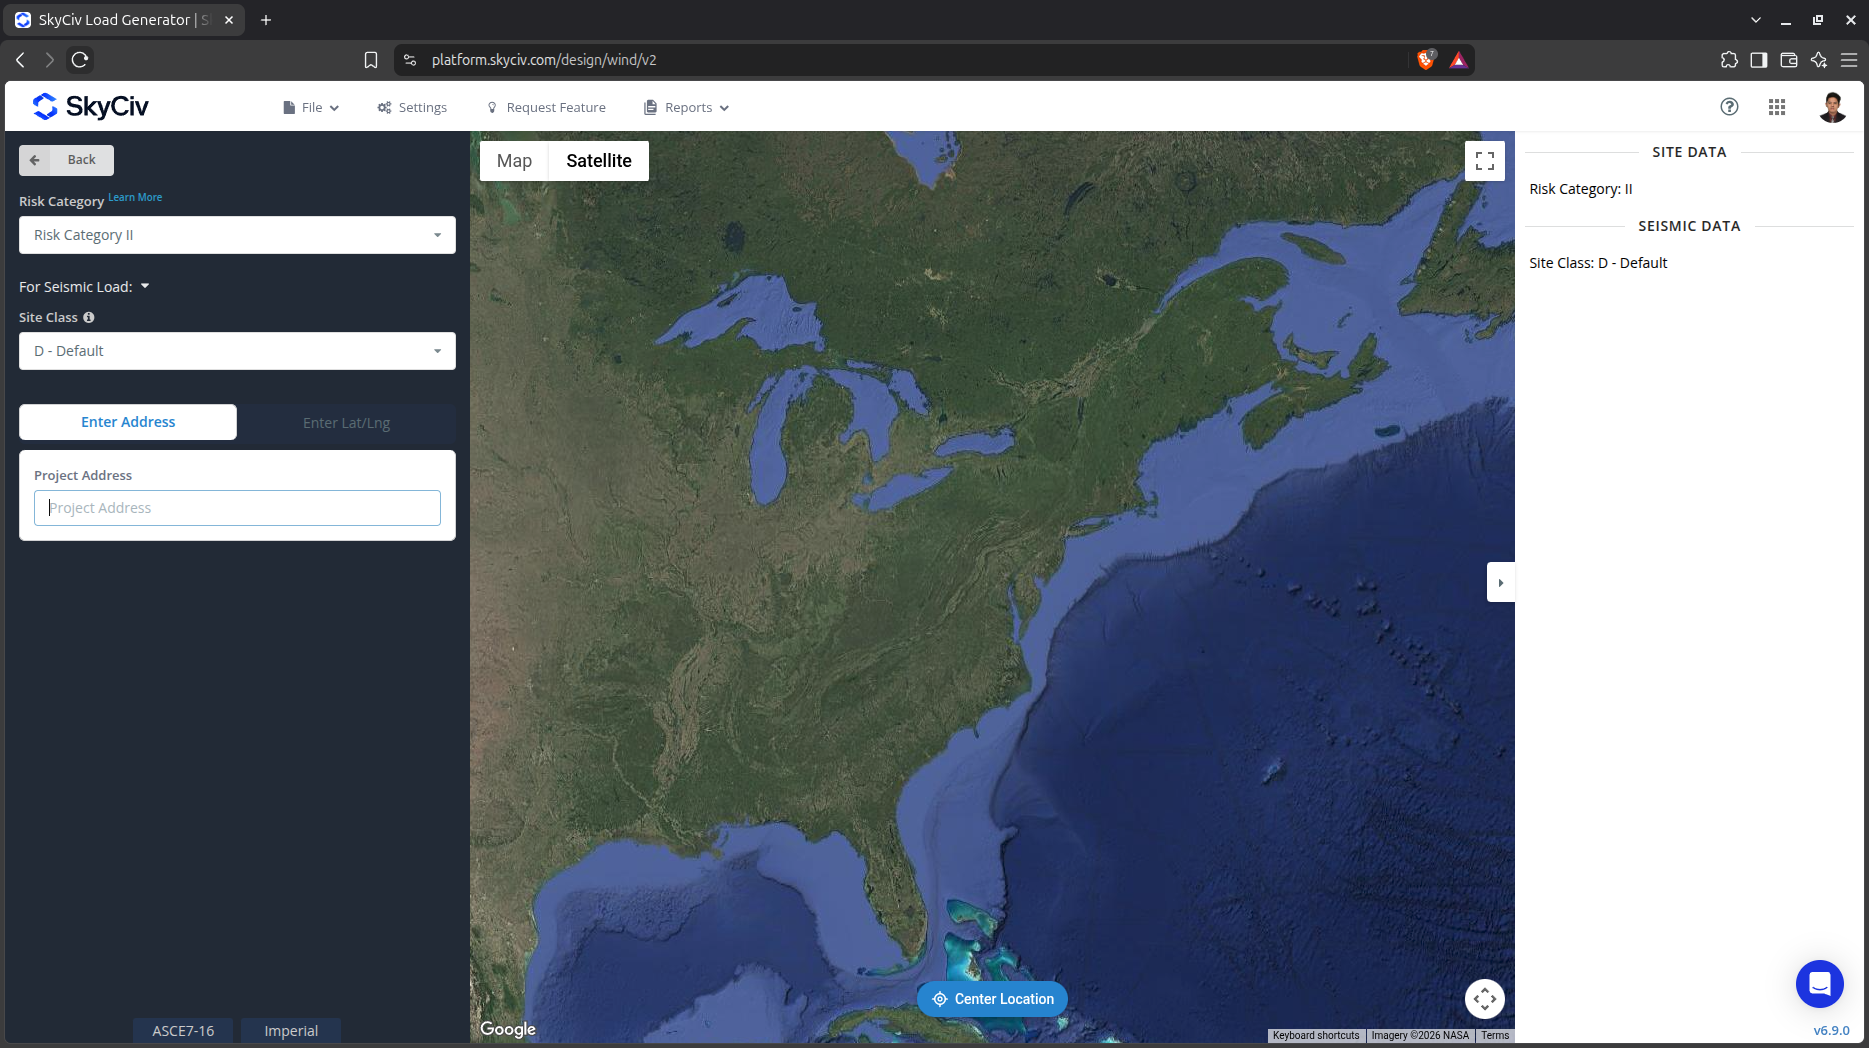
Figure 1. SkyCiv Load Generator UI
Site Data
Users can get the wind speed by location from the SkyCiv wind speed map database. Using ASCE 7, you just need to define the Risk Category of the structure and put the address located in USA, put the Lat/Lng, or click on the map, regardless if it is ASCE 7-10, ASCE 7-16 or ASCE 7-22. You can also use the ASCE 7 wind load calculation procedure even if the location is outside USA and its territories. You just need to put the address and manually put the basic wind speed.
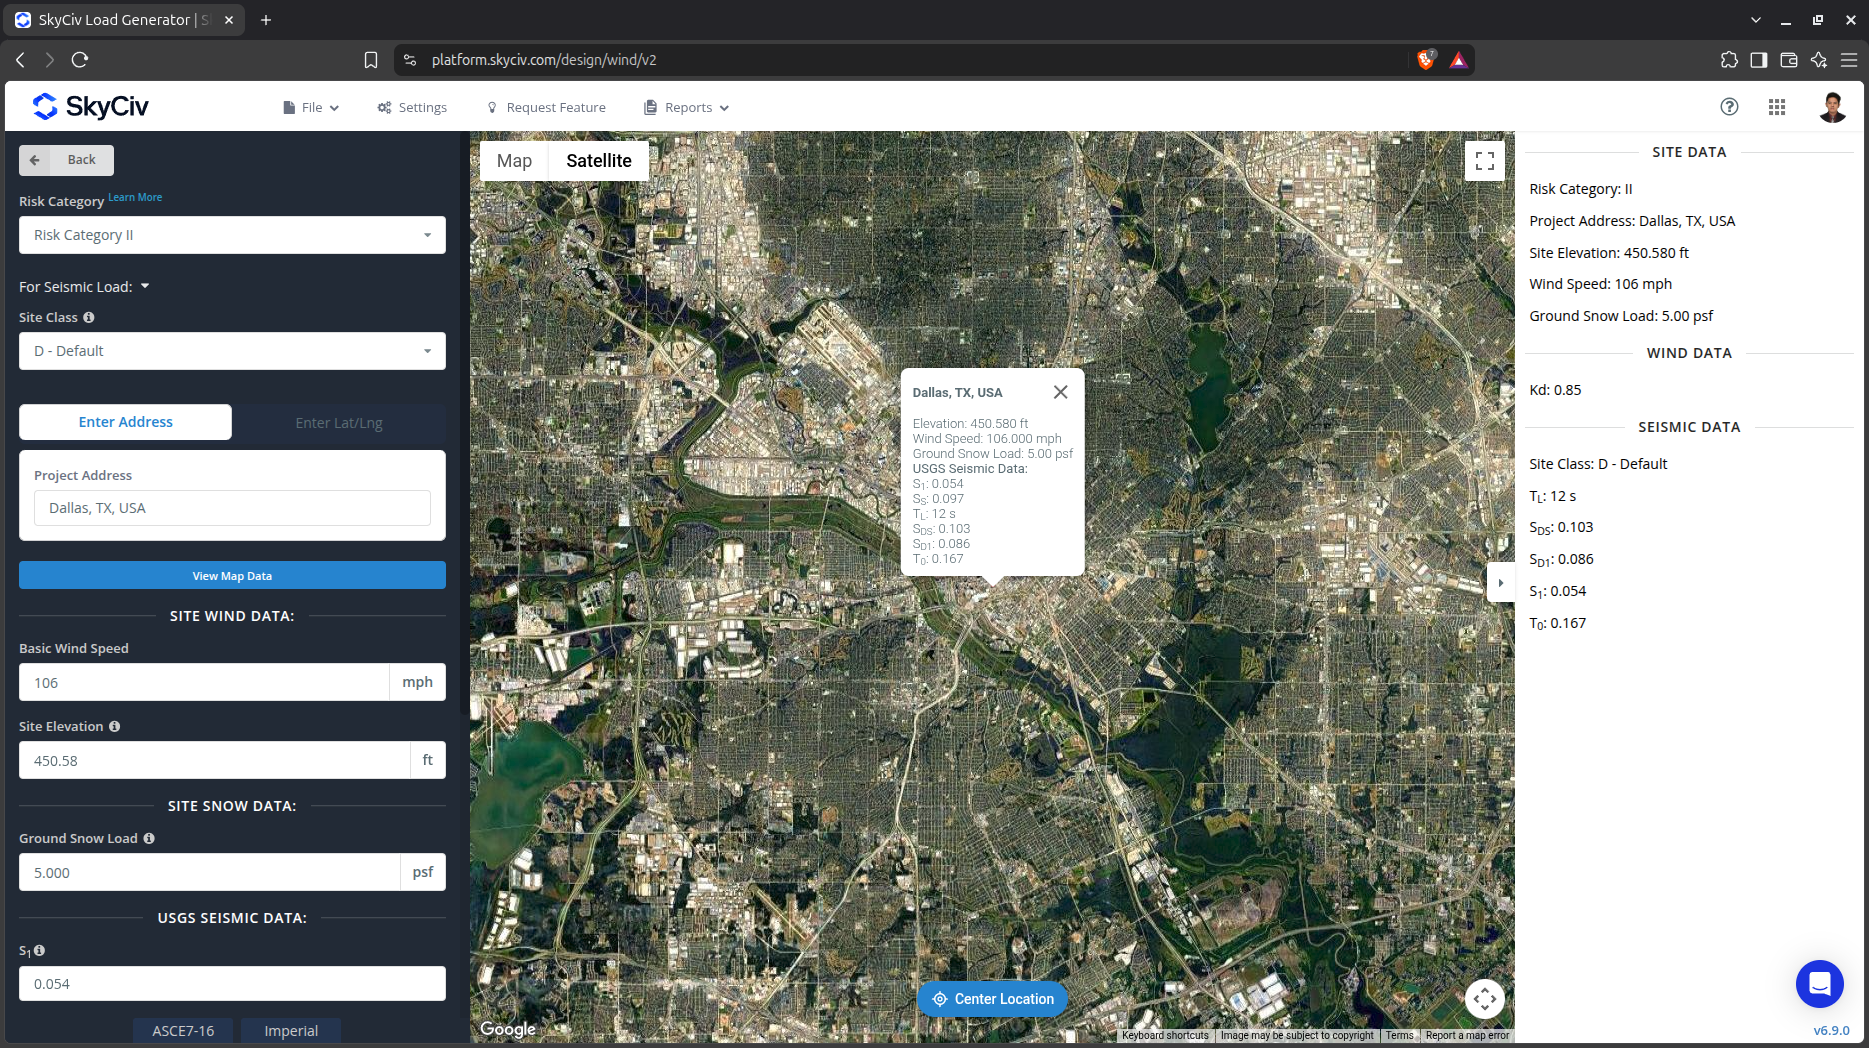
Figure 2. Site data of SkyCiv Load Generator
SkyCiv has digitalized the map as per the paperback standard. This means, you can simply enter in the site location and the software will automatically pull the wind speeds based on this input. There is a limit to how many times the wind speed can be calculated on the free tool. The software will use our internal interpolator to calculate values between the contours, to ensure accurate wind speeds are used in your designs. The Site Elevation is relevant in calculating the Ground Elevation Factor, Ke, for ASCE 7-16.
Site Input Parameters for Wind Load Calculation
Risk Category – Used in determining the basic wind speed V value
Project Address – Used for getting the nearest wind speed based on the Risk Category selected
Basic Wind Speed – the basic wind speed to be used in calculating the design wind pressure. This is automatically determined based on Risk Category and Project Address and can be modified by the user
Site Elevation – used in calculating the elevation factor Ke (for ASCE 7-16 and ASCE 7-22)
Once the parameters above are completed, we can click the “Confirm Site Data” to check if our input is okay. After this, we can now proceed to the Structure Data section.
Structure Data
The structure data and the wind and snow parameters are separated into different accordions. In order to calculate the design wind force for the solar panel, the wind load should be checked. You need to select “Solar Panels” on the Structure dropdown. Note that there are two types of solar panels – ground-mounted and rooftop.
Ground Solar Panel
To calculate wind and/or snow load on ground-mounted solar panels, you need to select “Ground” on the Solar Panel Location dropdown.
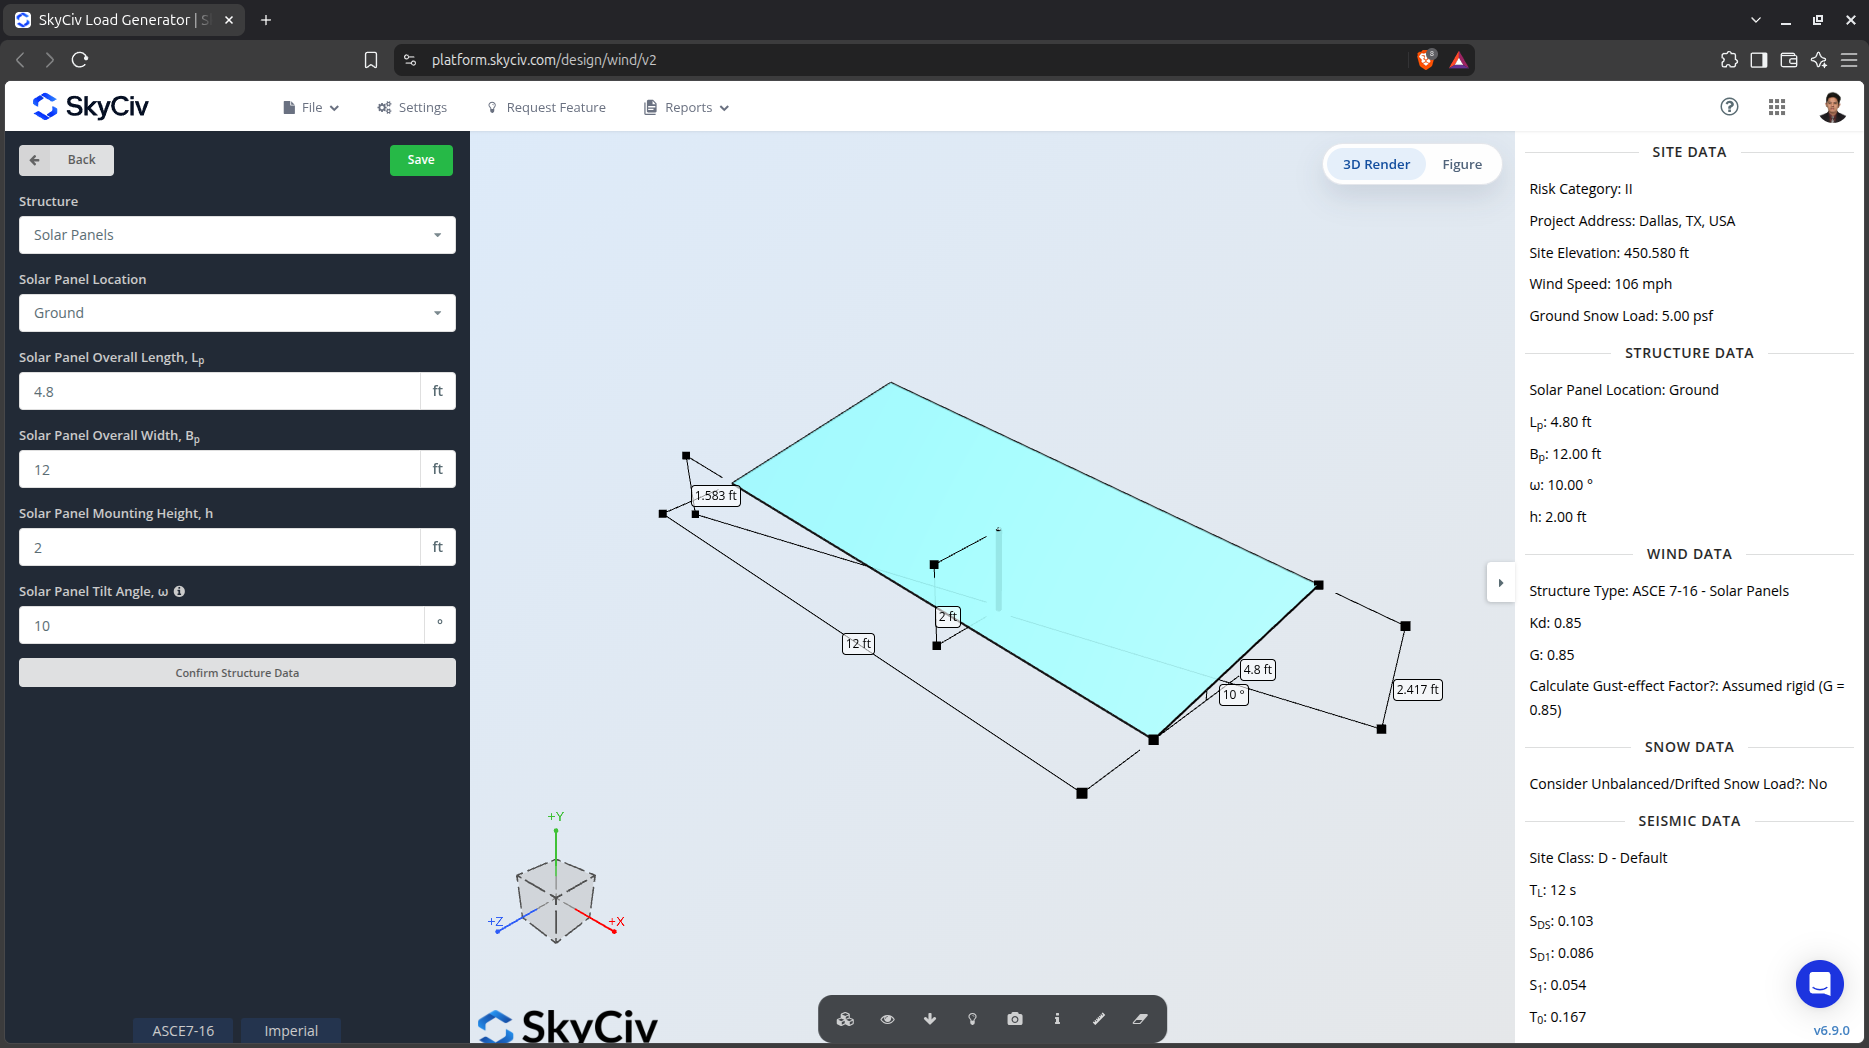
For Ground Solar Panels, you need to specify the size of the solar panel, mounting height, and tilt angle. For tilt angle less than or equal to 45 degrees, the wind load calculation procedure for open monoslope roof is used while for more than 45 degrees, the procedure for freestanding wall/solid sign is utilized.
Rooftop Solar Panel
To calculate wind and/or snow load for rooftop solar panels, you need to select “Rooftop” on the Solar Panel Location dropdown.
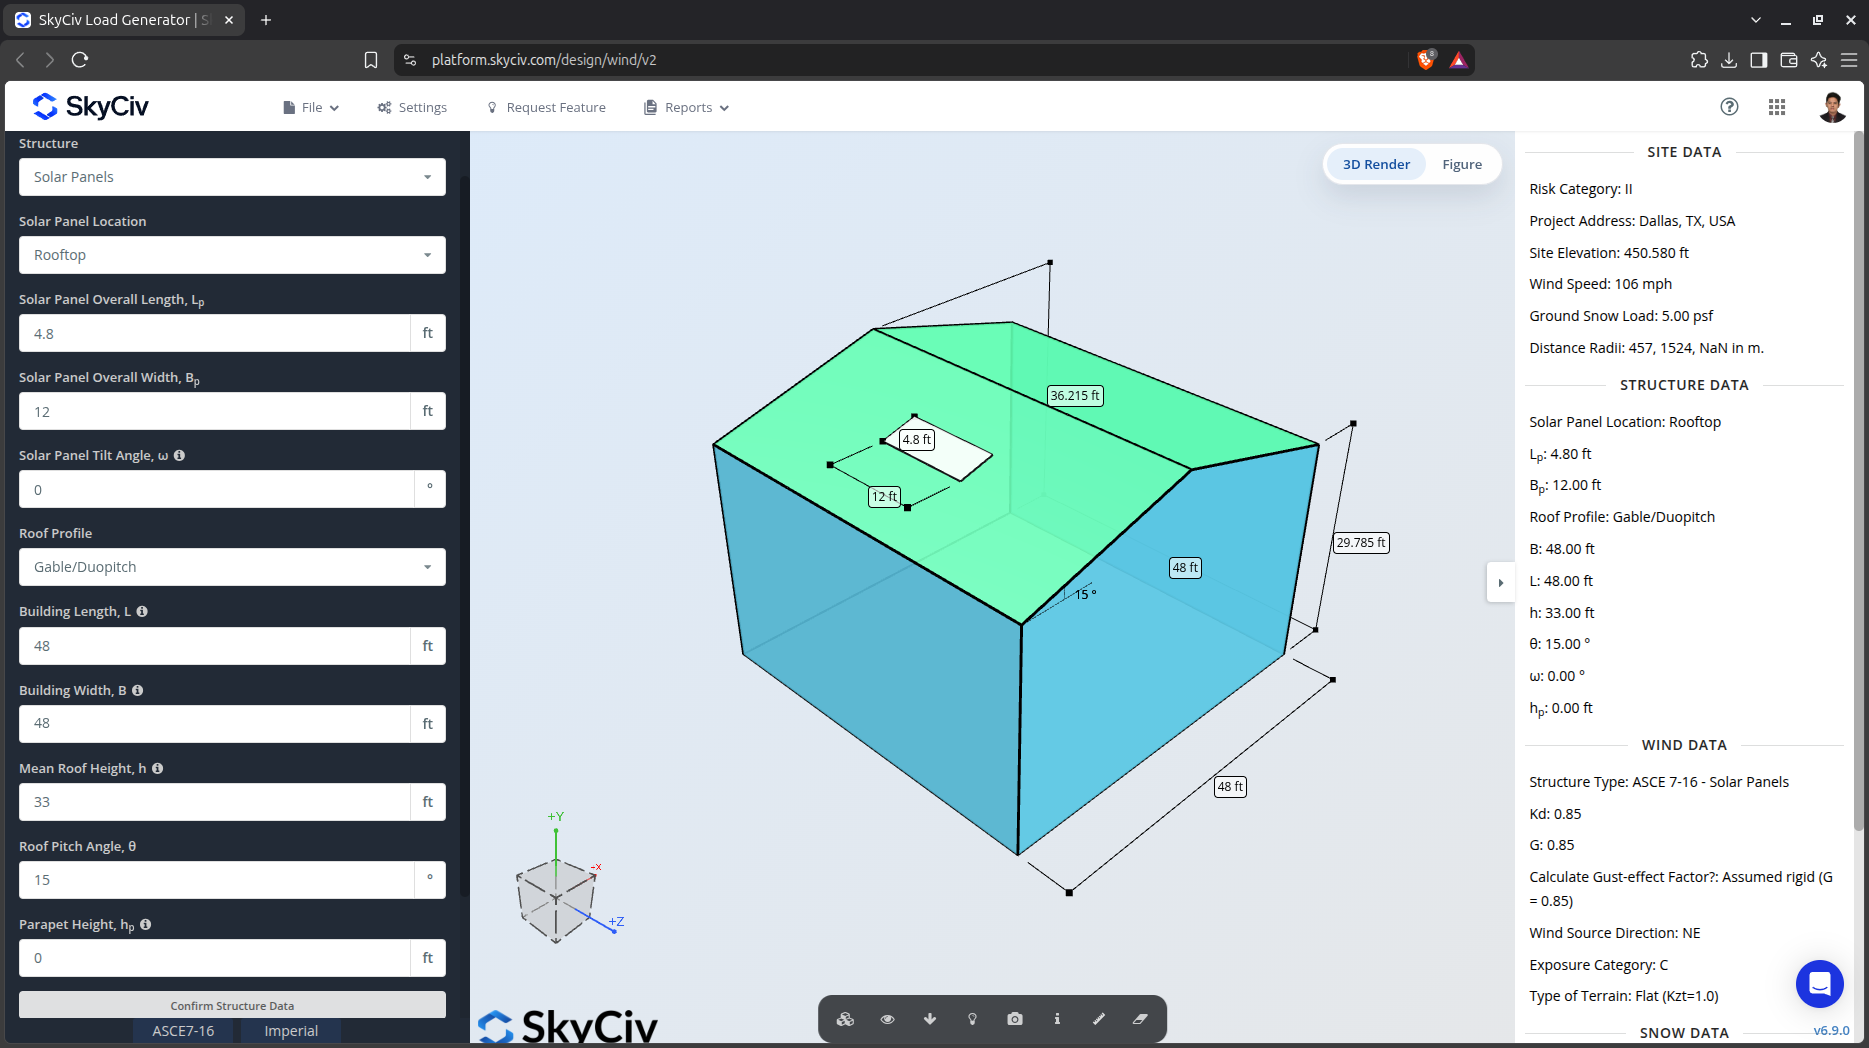
Figure 4. Rooftop solar panel parameters.
The building parameter where the rooftop solar panels will be installed is required to calculate wind and/or snow load pressures.
Wind Data
To proceed with our wind load calculation, we need to check the checkbox first beside the Wind Load button. By default, this is checked when the site wind data has been defined.
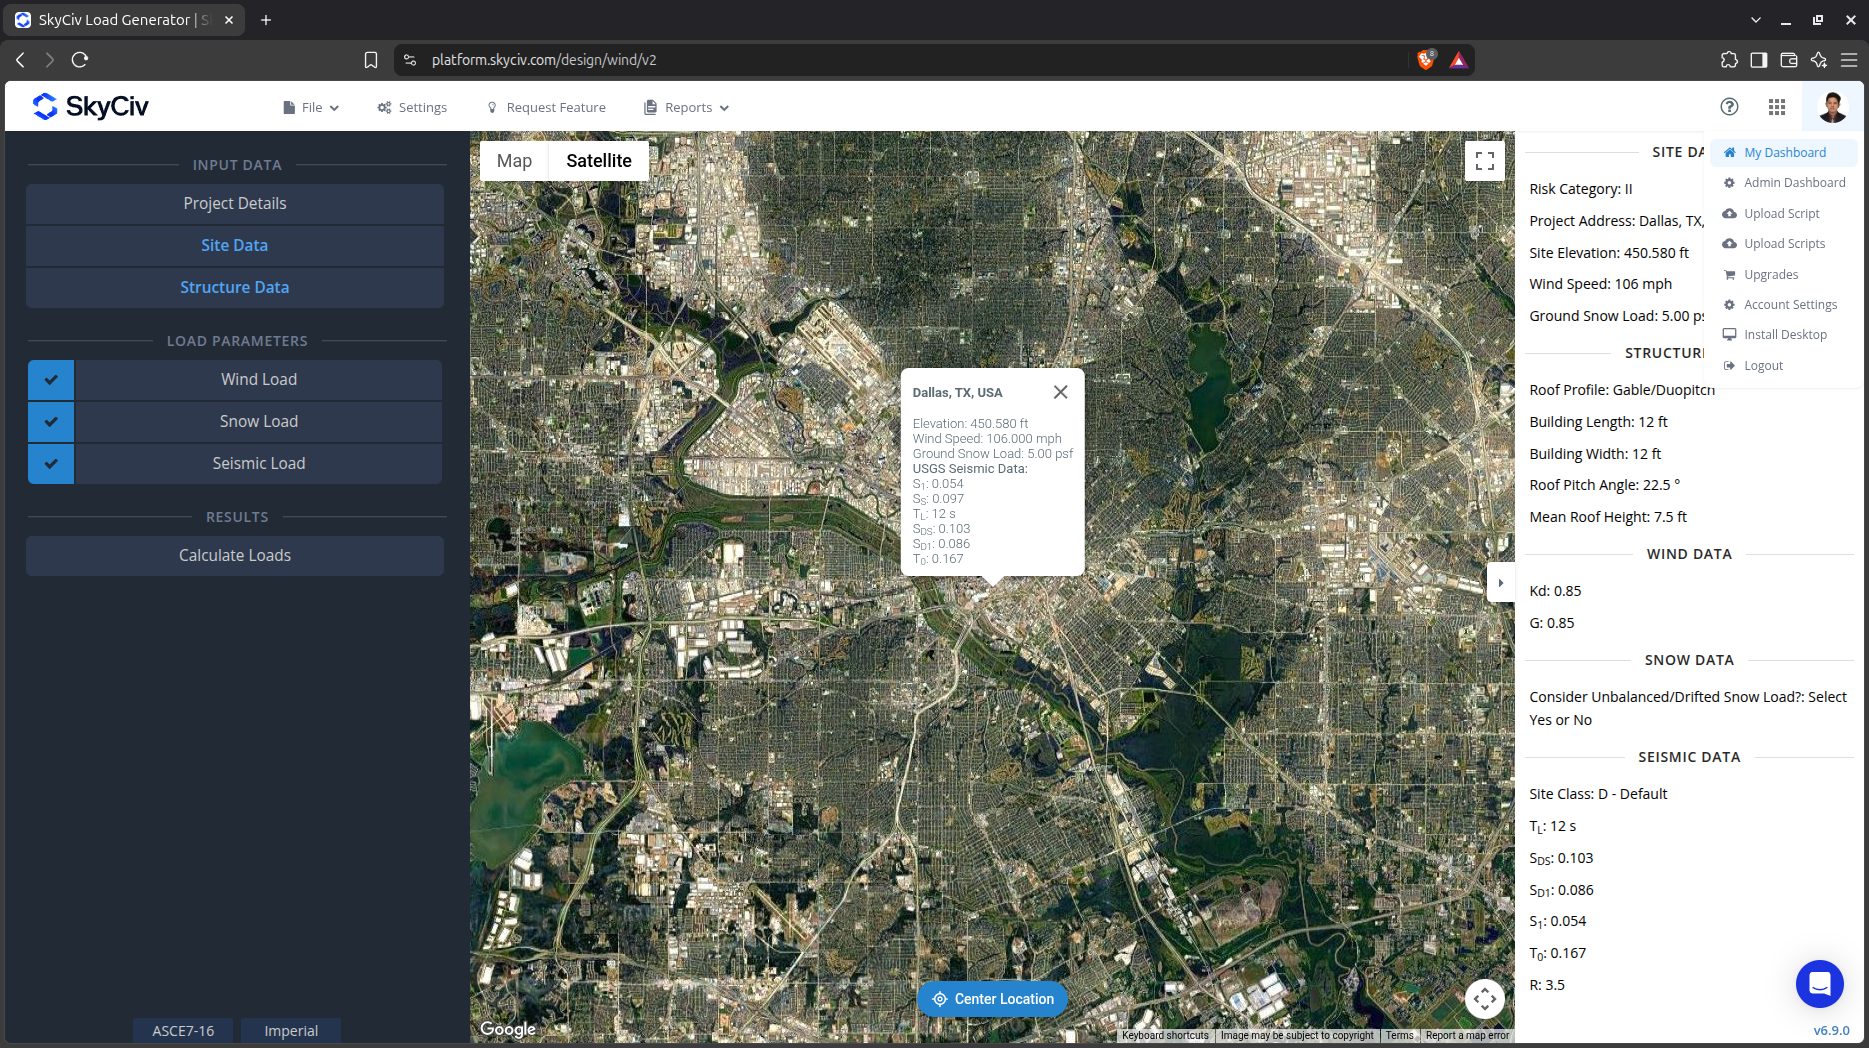
Figure 5. Checkbox for Wind Load Data.
The next step, is to define the Wind Source Direction the corresponding Exposure Category of the upwind area. The Wind Direction parameter is used in obtaining the upwind (left side) and downwind (right side) ground elevations to calculate for Topographic Factor, Kzt. In addition, the Exposure Category is used in determining the Velocity Pressure Coefficient Kz. For standalone users or Professional account, you can determine the worst wind source direction by clicking the View Design Wind Inputs for All Directions button so you can set the Exposure Category per upwind Wind Source Direction as represented by a 45-degree sector. Note that the default Exposure Category is set to Exposure D.
In version v6.6.0, we’ve introduced the automatic building detection for the site to automate exposure category analysis for each wind direction using Overpass API and Microsoft Global Footprint Data. If the building data are missing some areas, there is an option to use our trained AI model to detect these building footprints on the map. The algorithm uses the area and height of the building from the data sources to analyze the obstructions inside each direction sector.
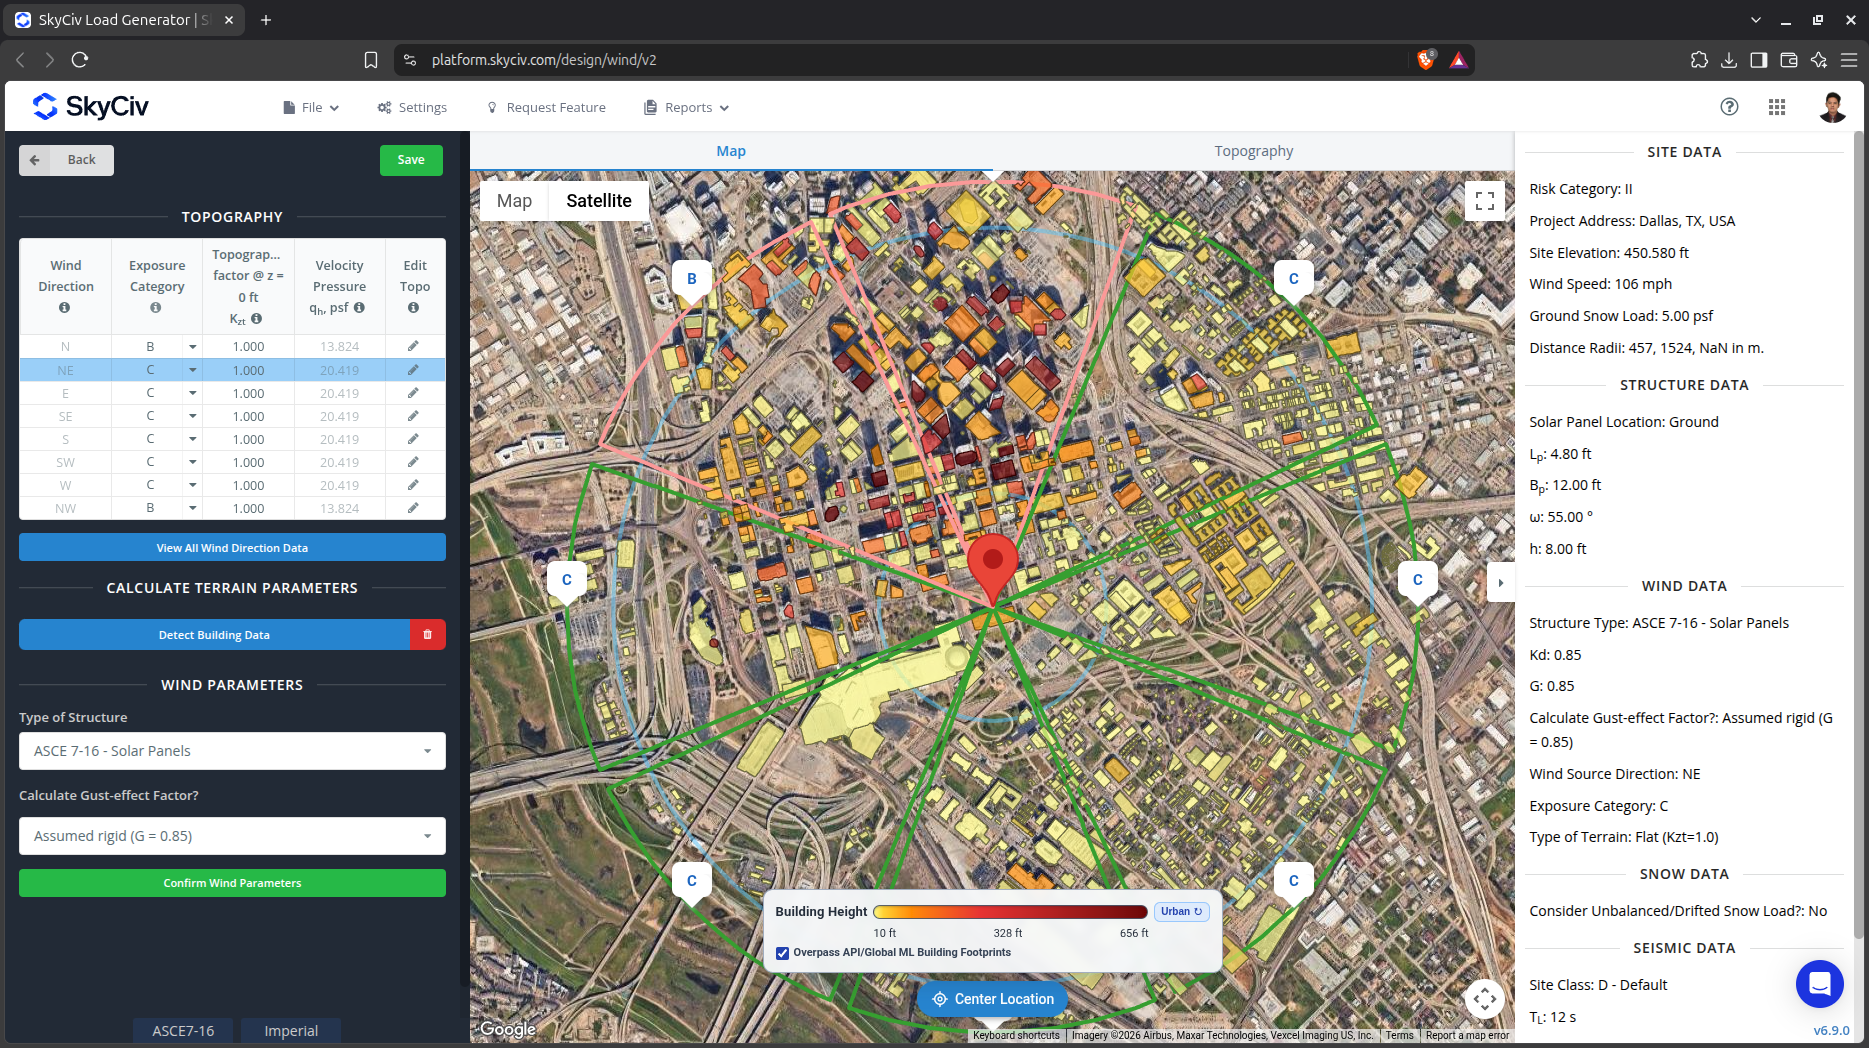
Figure 6. Automatic building detection in Load Generator to determine the Exposure Categories.
Users also have the option to edit the data points in the Elevation chart that are used to calculate the Topographic Factor, Kzt for the selected wind source direction.
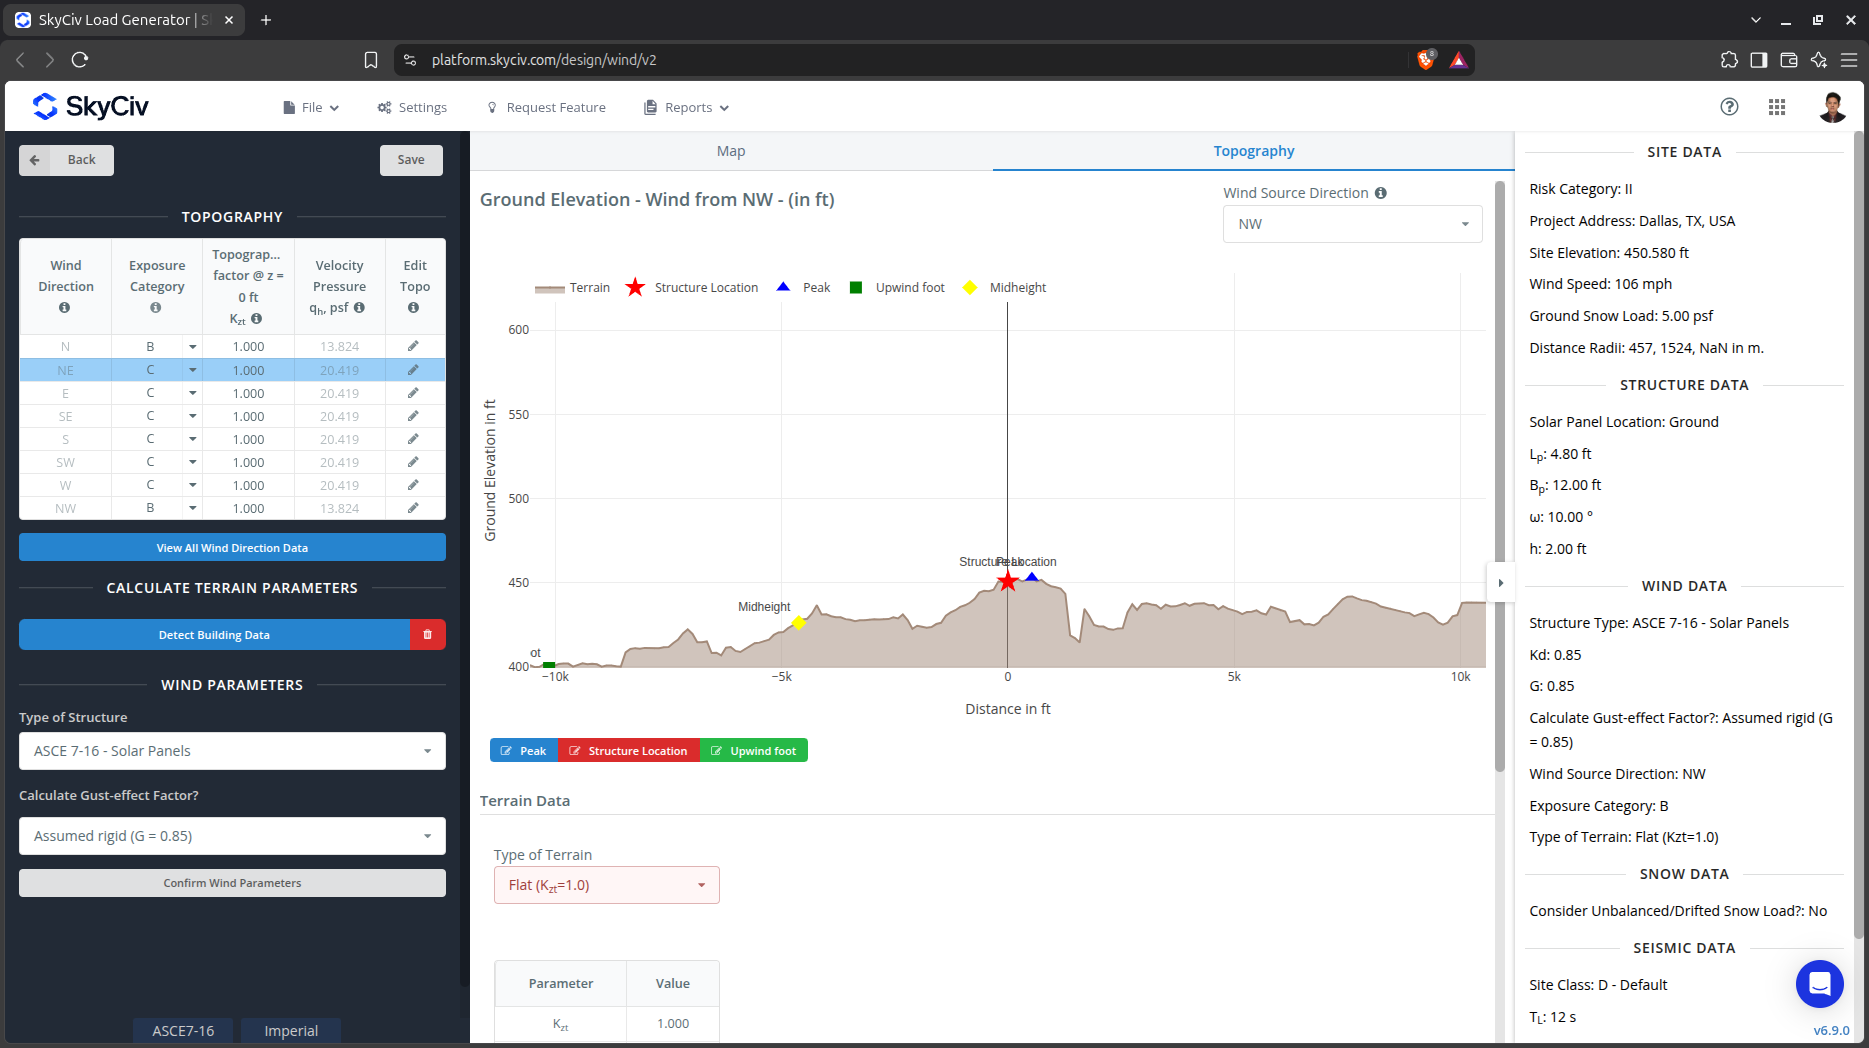
Figure 7. Elevation chart for the selected wind source direction.
Topography Input Parameters
Exposure Category – Used in calculation of Velocity Pressure Coefficient Kz and Topographic Factor, Kzt . Assumed to be homogenous for each wind source direction
Wind Source Direction – used to obtain the elevation data on a specific direction section of the area. These elevation data are used in determining the Topographic Factor, Kzt
Type of Terrain – Options to select Flat, Hill, Escarpment, Ridge
H – Height of obstruction/terrain. For type of terrain is set to option other than Flat terrain, this is used in calculating the Topographic Factor, Kzt
Lh – Horizontal distance from peak to the middle height of the obstruction. For type of terrain is set to option other than Flat terrain, this is used in calculating the Topographic Factor, Kzt
x – Horizontal distance of structure to the peak of the obstruction with the peak as the point of reference. For type of terrain is set to option other than Flat terrain, this is used in calculating the Topographic Factor, Kzt
After all these parameters are defined, the next step is to click the Calculate Loads on the left side of the UI.
Results
Once all the parameters are defined, clicking the Generate Loads button will give a result as shown below.
Ground Solar Panel
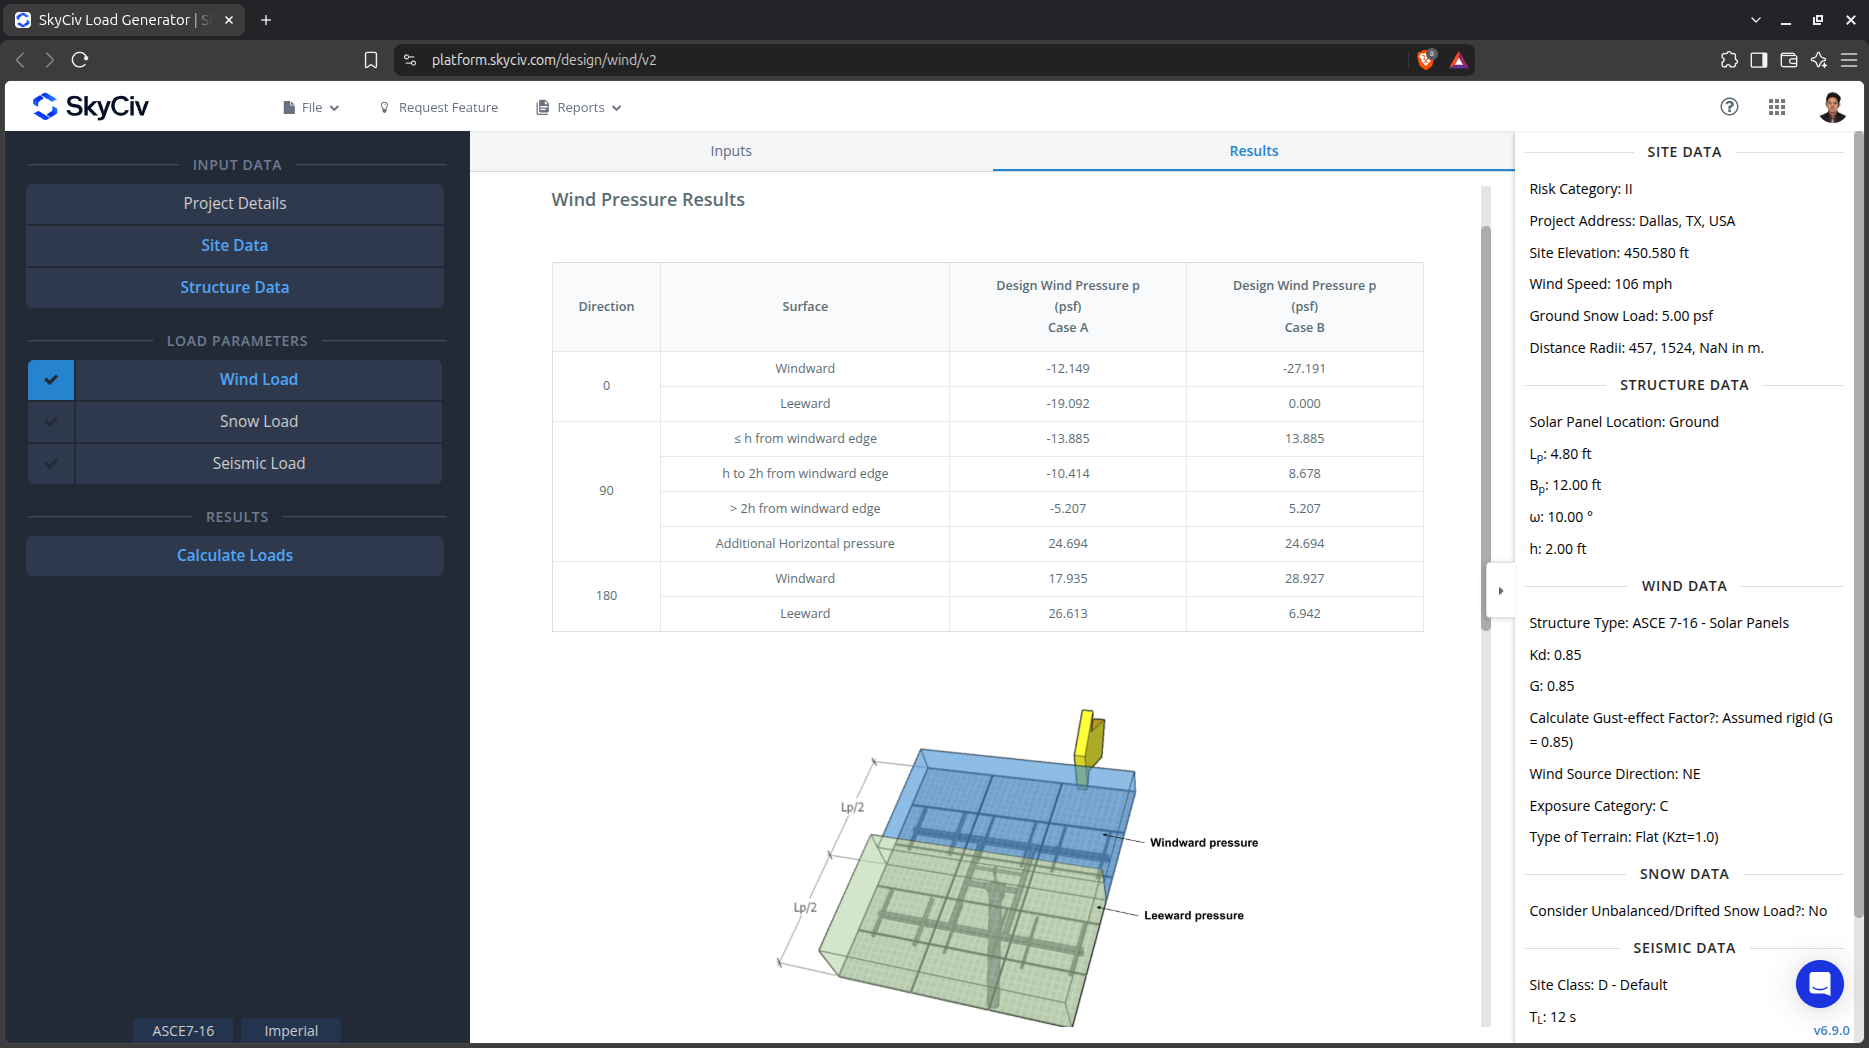
Figure 8. Tabulated design pressures for the ground-mounted solar panels.
Rooftop Solar Panel
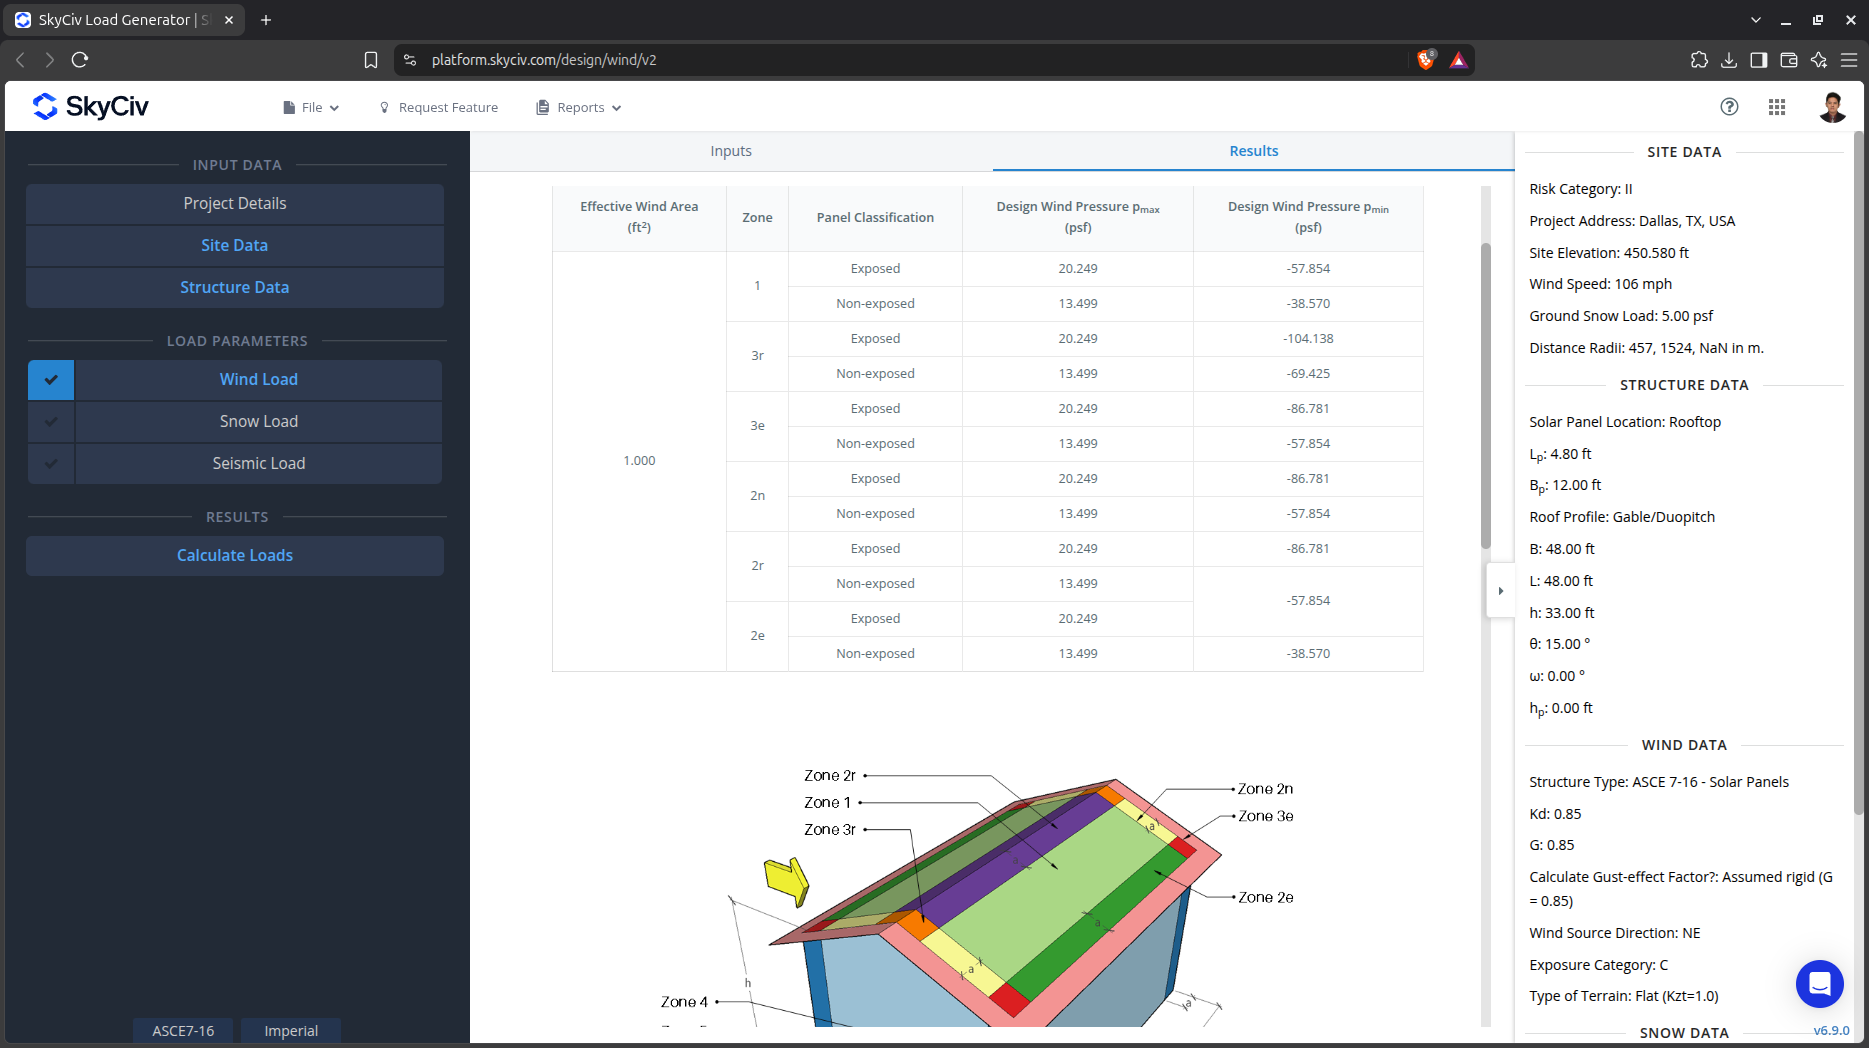
Figure 9. Tabulated design pressures for the rooftop solar panels.
Detailed Calculation Report
The detailed wind load calculations can be accessed only by Professional account users and those who purchased the standalone load generator module. All the parameters and assumptions used in the calculation are displayed on the report to make it transparent to the user. You can download a sample detailed calculation thru this link.
Ground Solar Panel
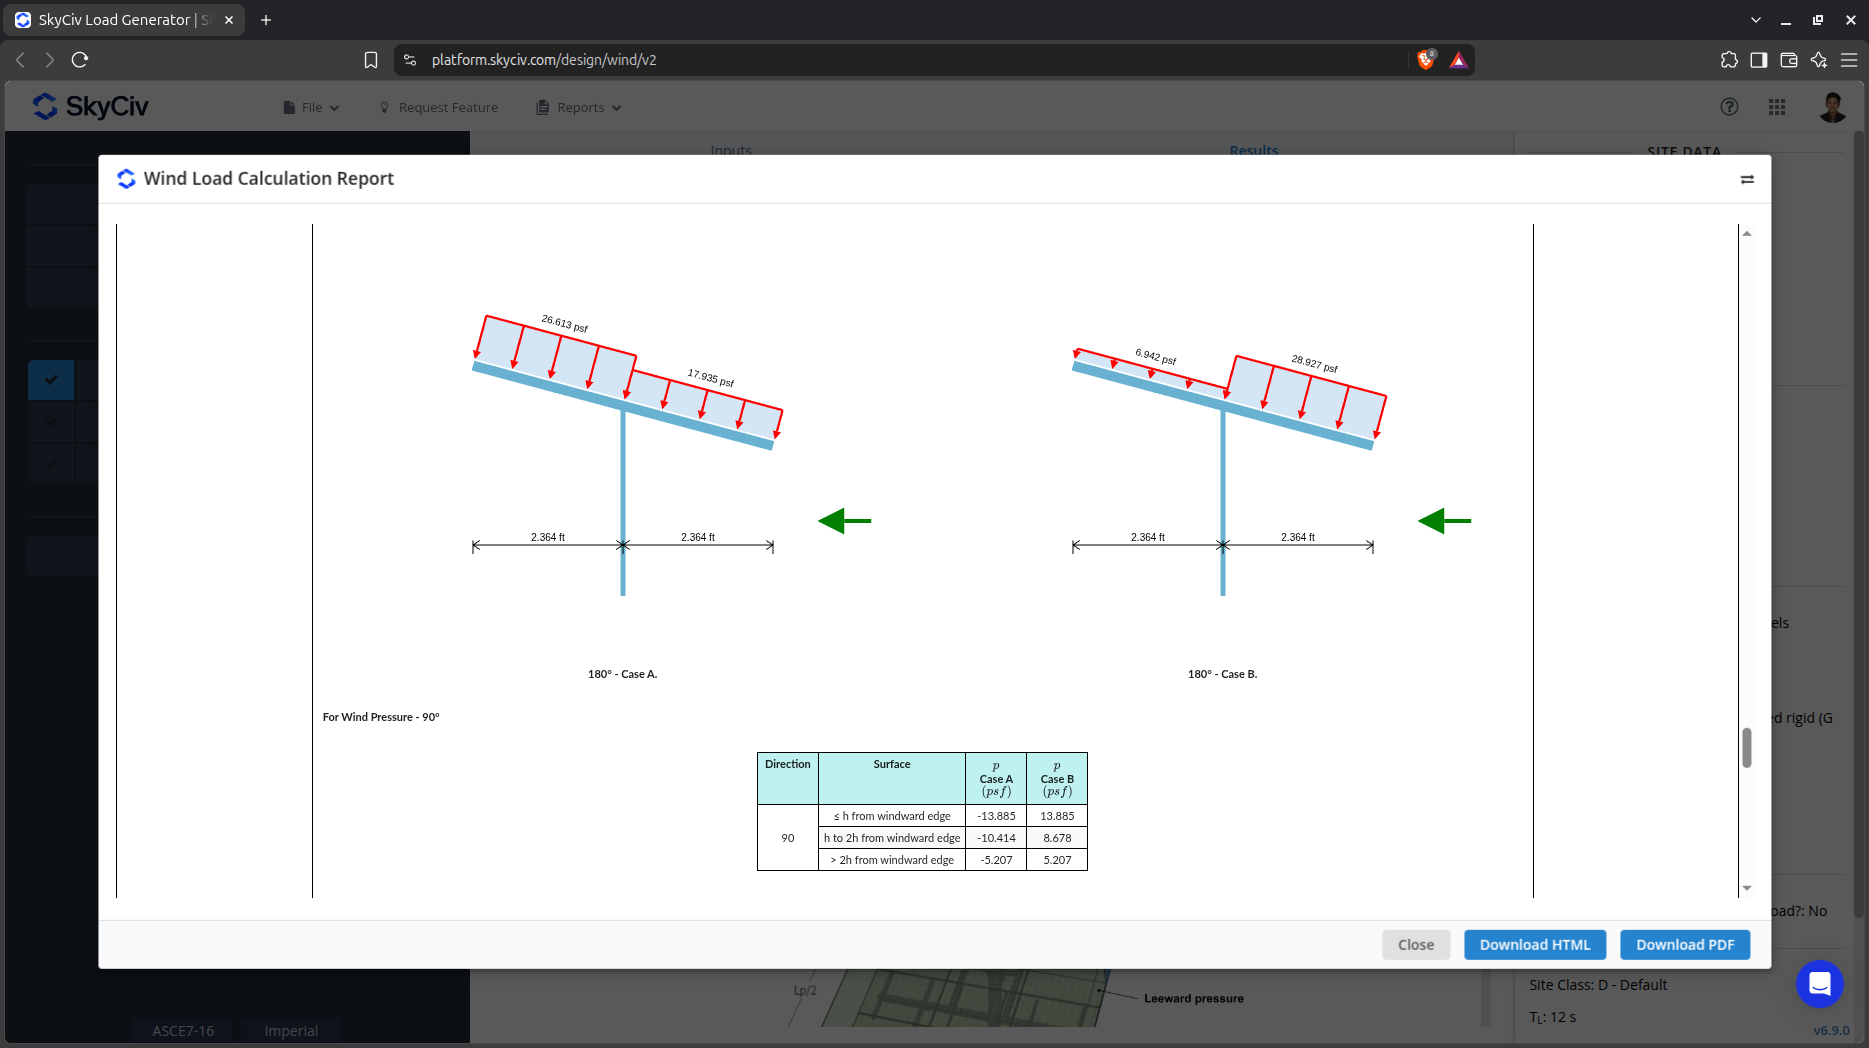
Figure 10. Detailed wind load calculation for the ground solar panel.
Rooftop Solar Panel
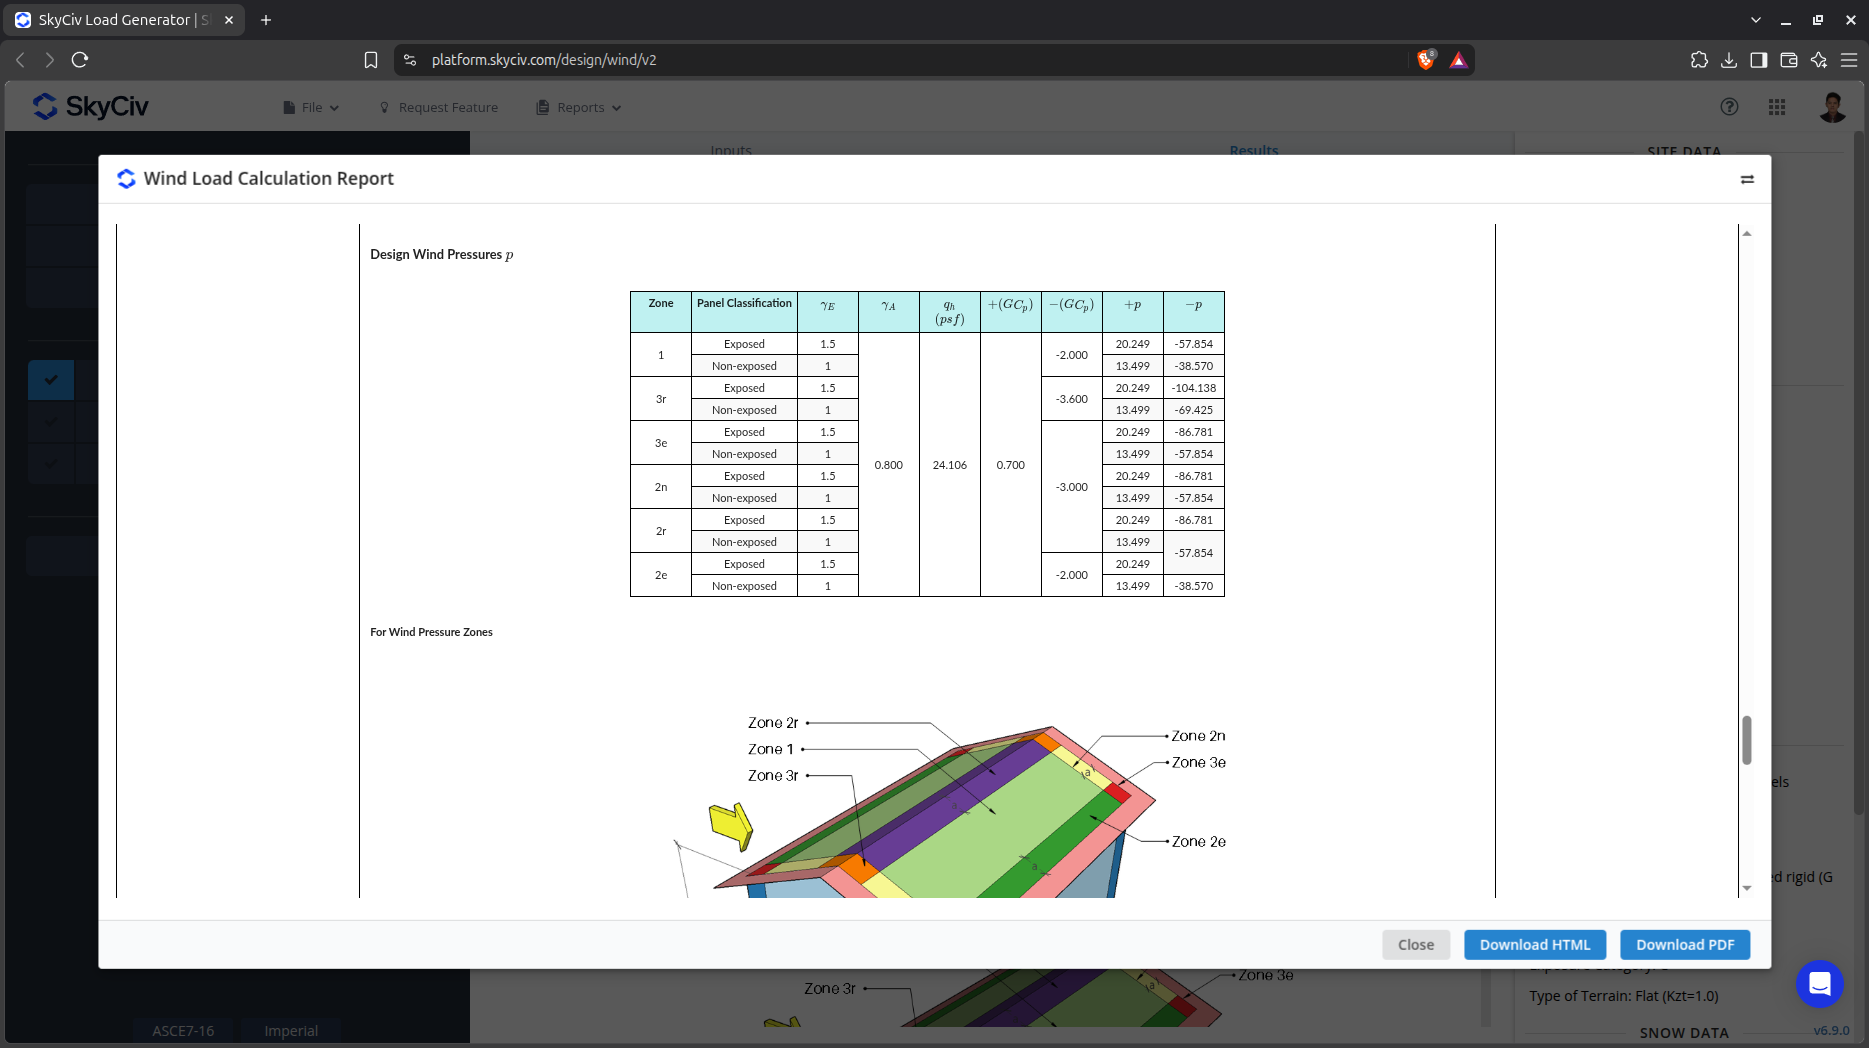
Figure 11. Detailed wind load calculation for the ground solar panel.

