How to model a simple Warren Truss using structural analysis software
Course: Structural Analysis (3rd Year)
Sample Model: Simple-Warren-Truss.s3d
Structural analysis software is a powerful tool for any structural engineer. It gives engineers an easy way to model a truss and use the Finite Element Method to calculate the internal member forces of each member. In today’s lesson plan, we are going to learn how to model a truss in structural analysis software – and learn the various technical significance of what we are building. SkyCiv’s lesson plans are a great way to explore our Truss Structure Calculator functionality and create efficient truss designs.
Modeling our Truss
A truss is a structure commonly used in structural engineering. If you are unfamiliar with it, visit our previous article on types of truss structures.
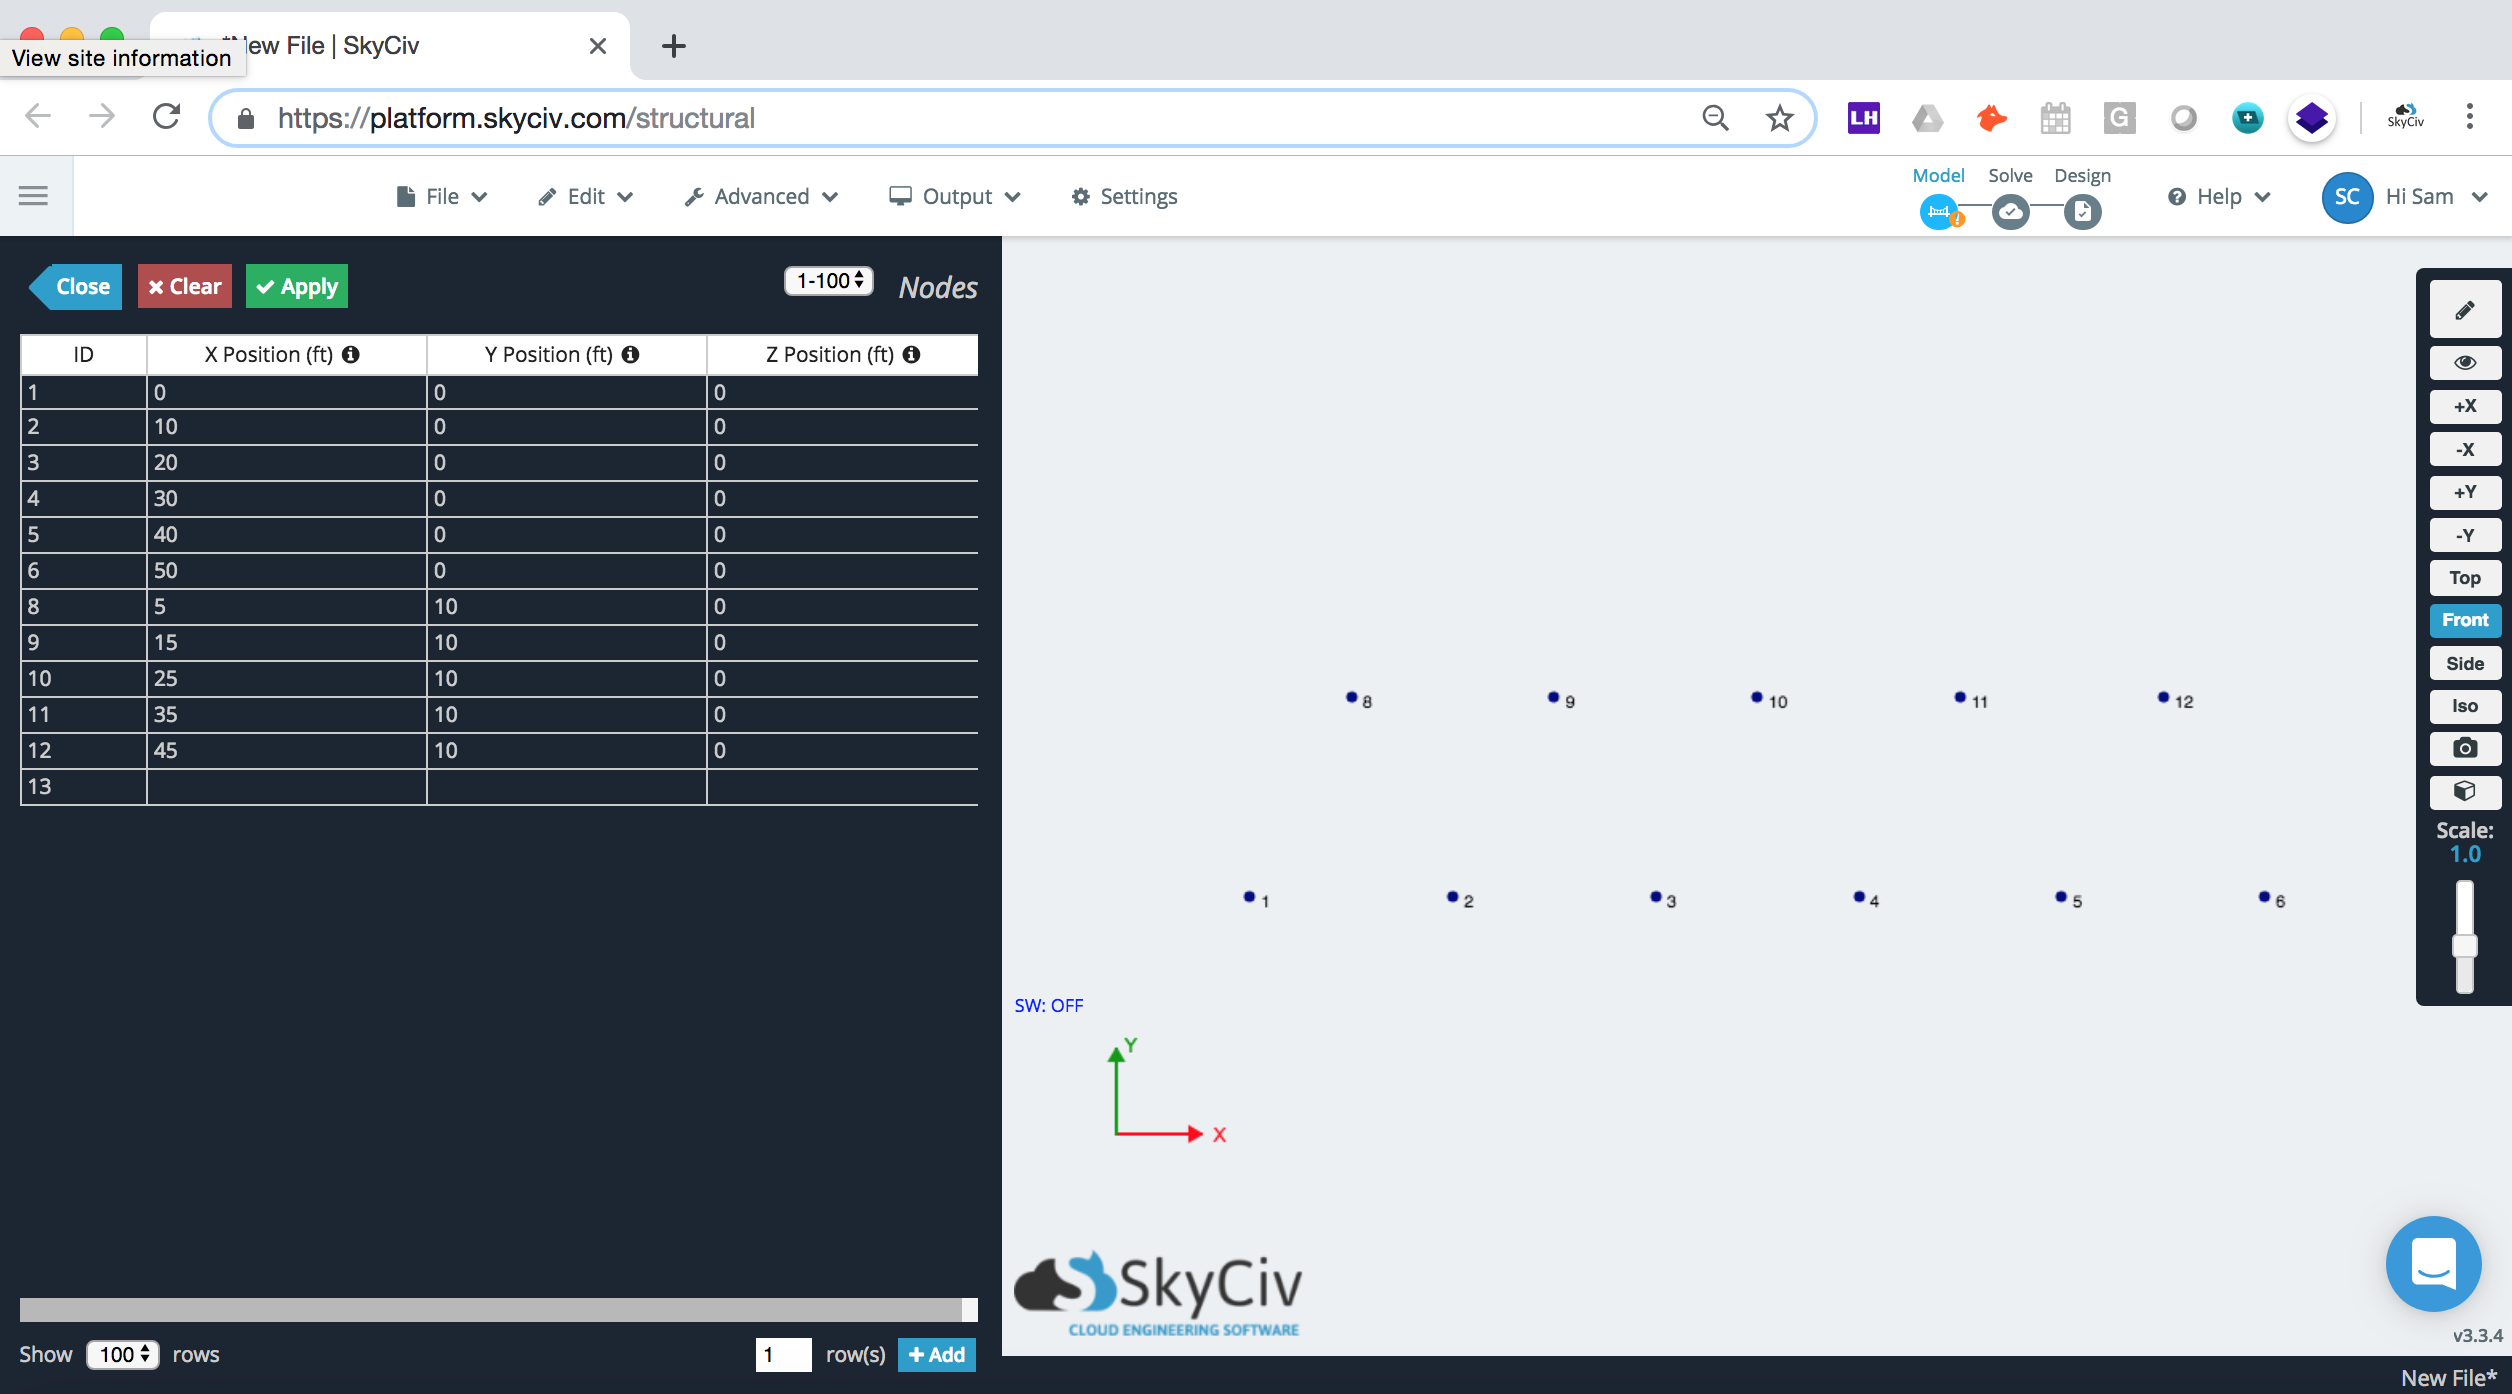
To begin modeling our truss first open your structural analysis software, we can either use SkyCiv Truss (simplified 2D version) or SkyCiv Structural (3D, more powerful). Both are available from our Dashboard. Once you’ve opened the software, open Nodes on the left-hand screen, and start entering the coordinates of your nodes. These are the start and endpoints of each member. We are trying to map out the dimensions of our truss, to essentially model the truss. You can do this by entering one at a time, but I have chosen to use the datasheet so I can see all my node input and copy and paste:
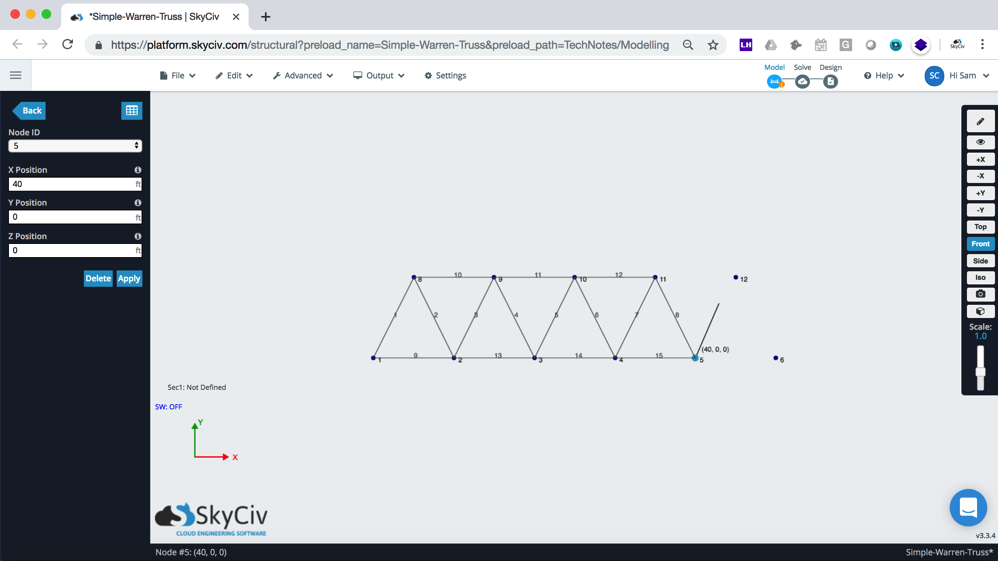
Next, we will add members by connecting the nodes by clicking and dragging between the nodes:
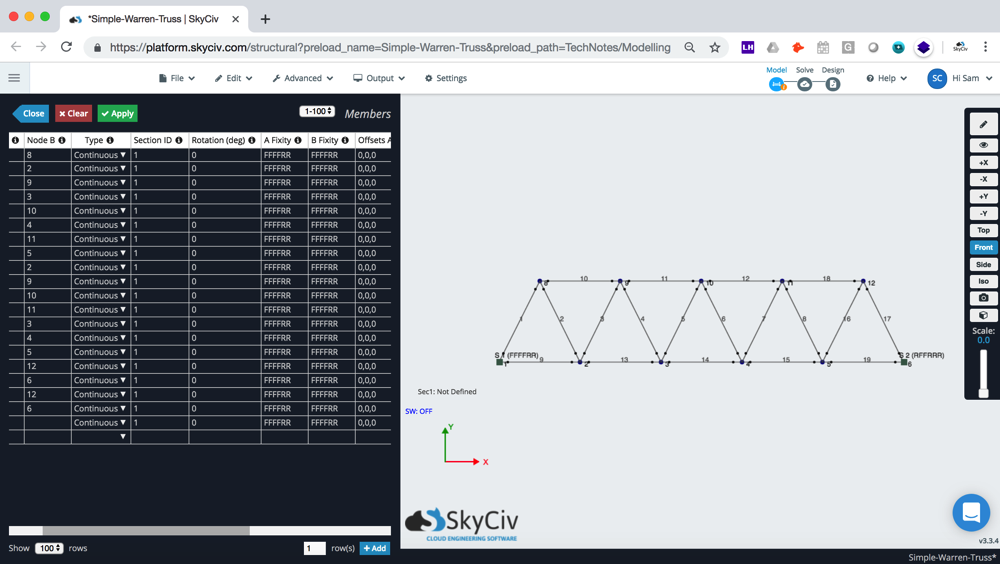
By default, SkyCiv Truss will give all members a pinned connection. This is denoted by a little black dot which if you hover over it, will show “FFFFRR”. In Structural 3D, you will have to manually change all Start Fixity and End Fixity to “FFFFRR”. It is essential that all your members are pinned, or your truss analysis results could be wrong. Remember, at any time you can log in and review our sample model Simple-Warren-Truss.s3d to see this example.
[icon icon=’info’] A quick note on pinned connections
A truss should have all member fixities set to pinned. What this means is that each member is free to rotate and the transfer of forces is all in axial. A quick way to check if your model is set up correctly is when you solve it – all bending moment member forces should be 0.
Click here to learn more about hinge connections ->
An easy way to make this change is through the datasheet. When you apply, you should see the little black dots on your members (SkyCiv Truss will have these on by default):
Add Supports
In structural engineering, we need our models to be static. At the moment, our truss is not connected to anything, so if we apply loads to it there is nothing holding it still. Supports are our boundary conditions – they are what stop the truss from moving when loads are applied. Think of a truss bridge, at either end, it is connected to the land. Supports also have fixity codes to them – these indicate how the truss is supported. For instance, roller support means the truss can move left to right (i.e. it can translate in the x-direction).
It’s sometimes important to apply a roller-support on one side of a bridge, so that the structure has a bit of “give”, in case it expands. So, on our left side, we will give our bridge a pinned support and on the right side, we will give it a roller-support. To add this, click the Supports button on the left screen:

Our Truss is now sufficiently supported, we can now proceed with applying loads.
Applying Loads
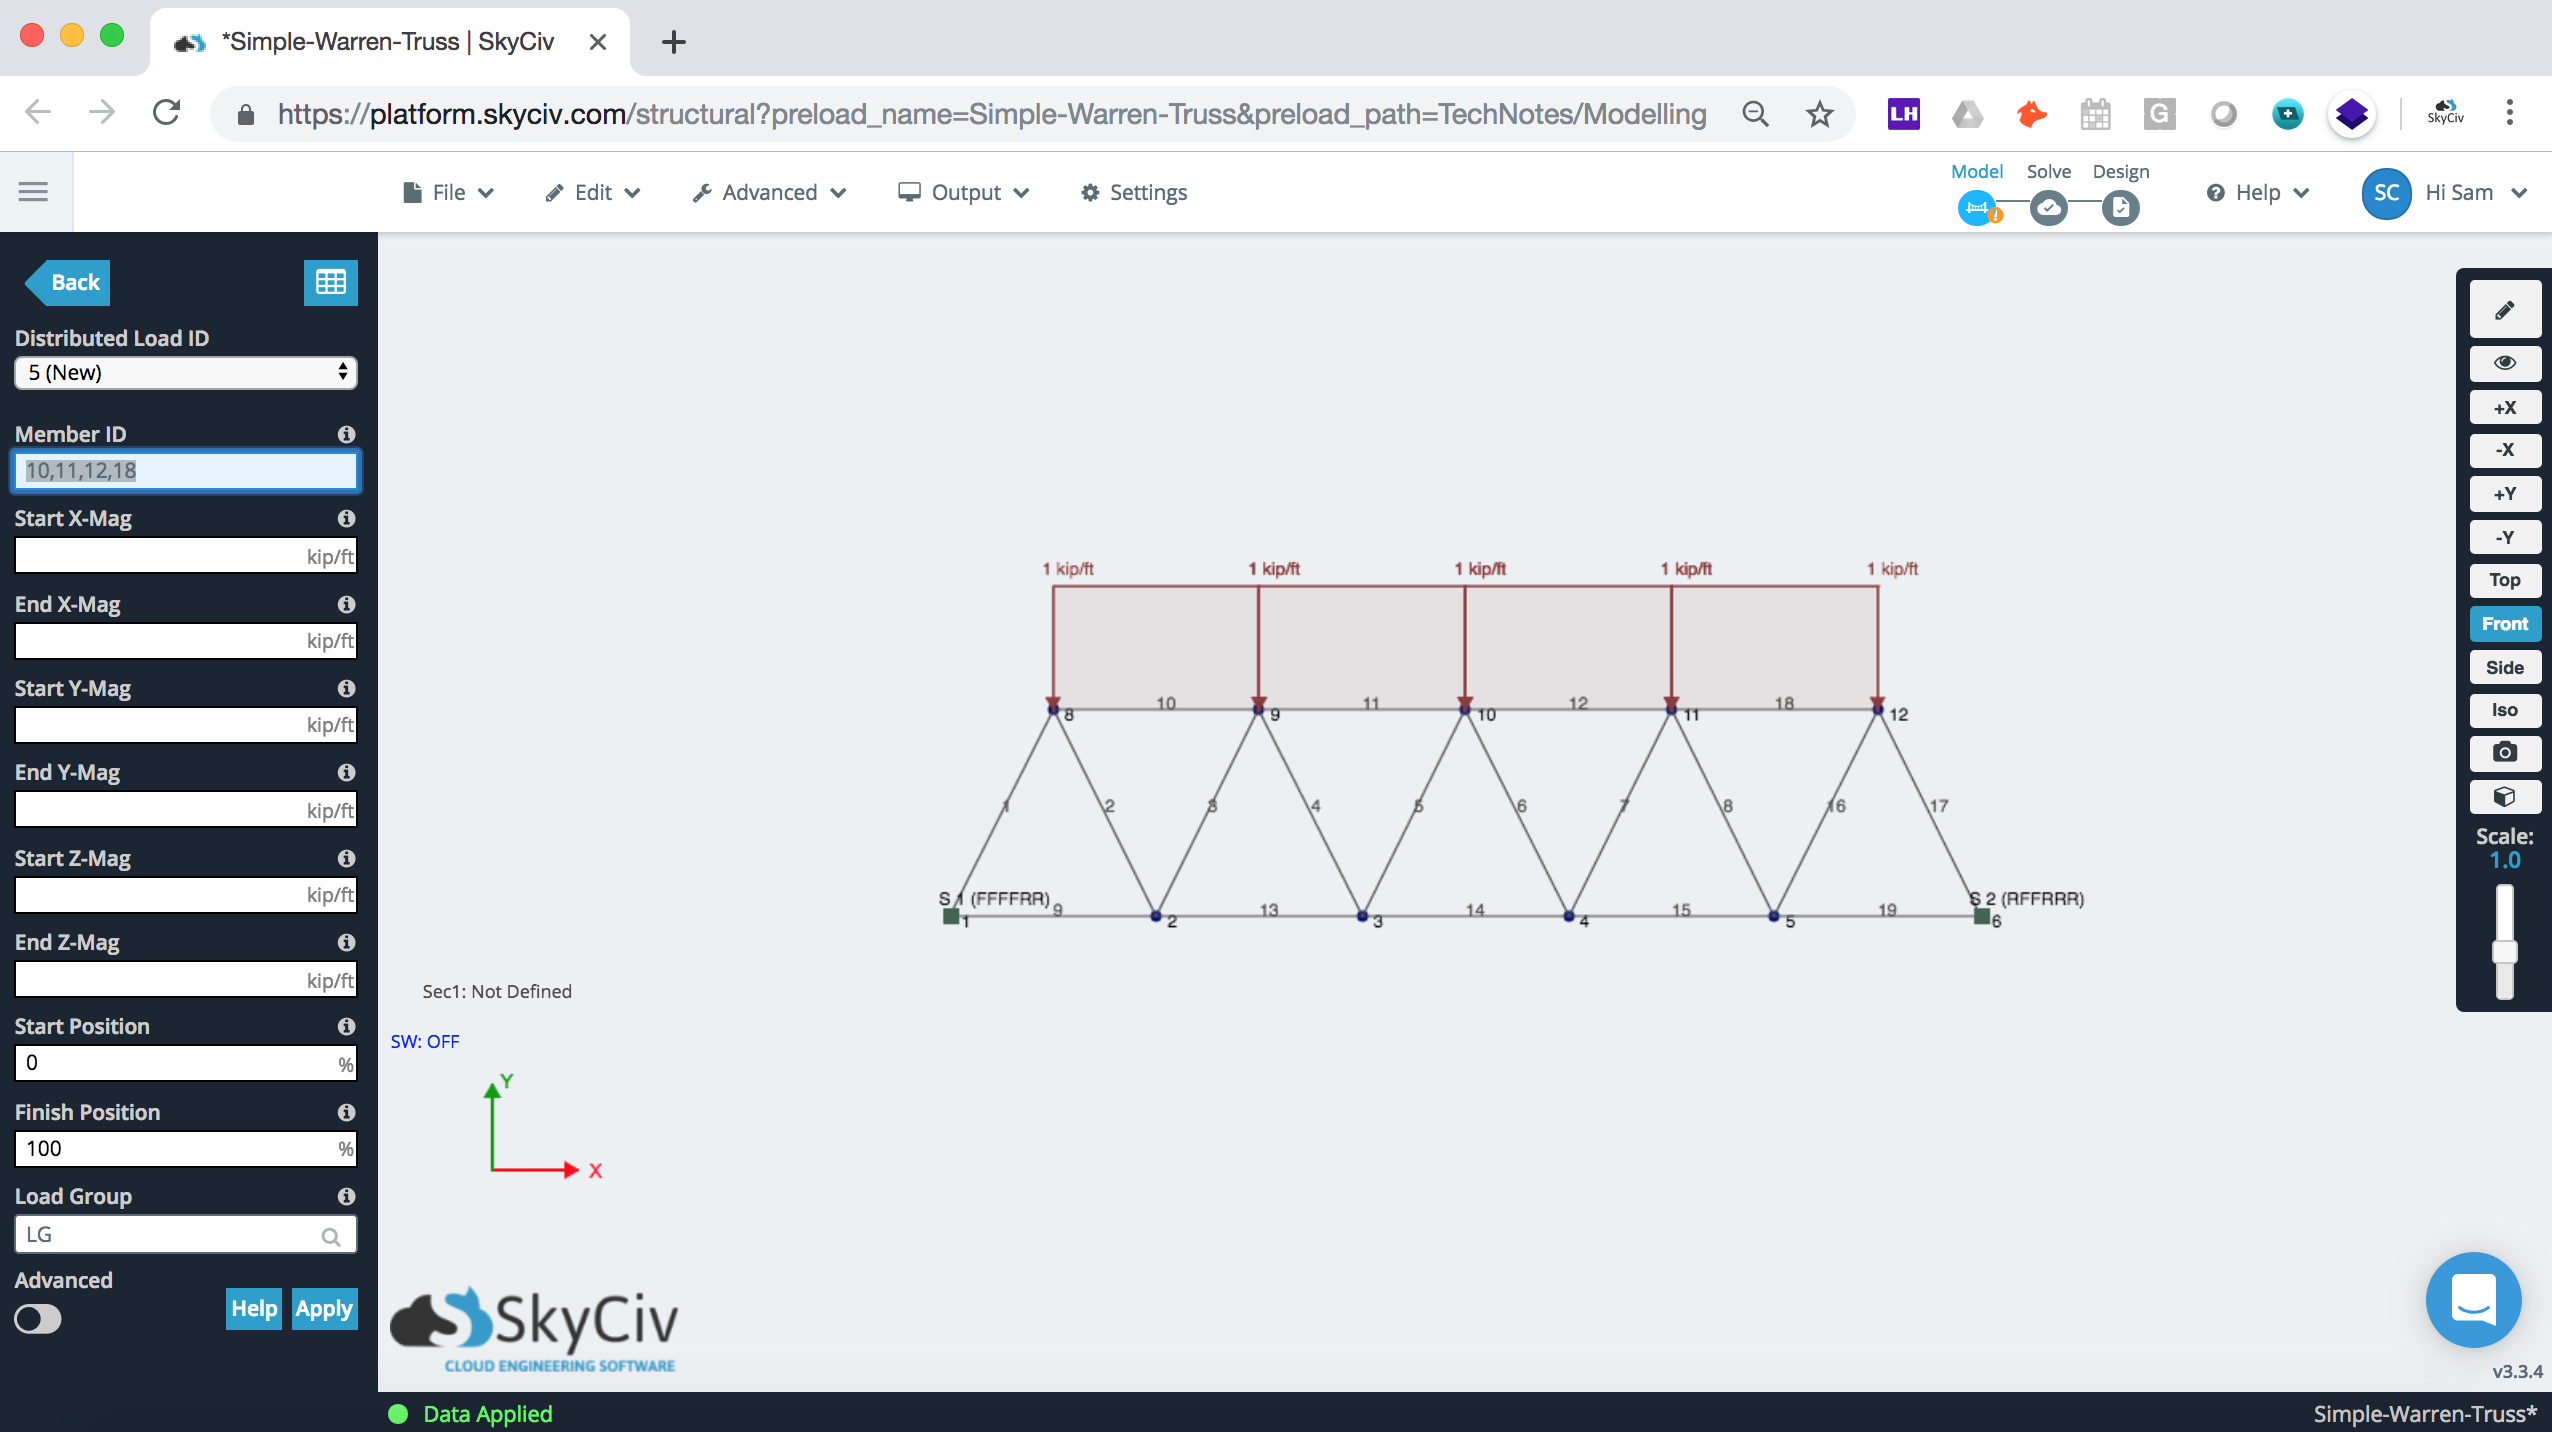
Loads are the forces in which the truss is to withstand. For instance, the truss may be required to take the load of a 2T truck, so we need to use the software to simulate these forces and ensure the truss is safe for construction. Here we will add some distributed loads on the top chord of our structure:
Reviewing Your Results
Once you’re happy with your Truss, click Solve in the top right corner. In S3D it might prompt you to add a section, just click Repair for some nominal section properties. Note: if you need to add section properties, you can do this via Section, but in looking at reactions at supports and axial force, the section properties shouldn’t really affect your results.
If everything is set up correctly, you should be able to click Axial to review your axial force results. An axial force is the force applied as either tension (member being pulled apart) or in compression (member being pushed in). Generally dealing with trusses – axial force is the most important result.
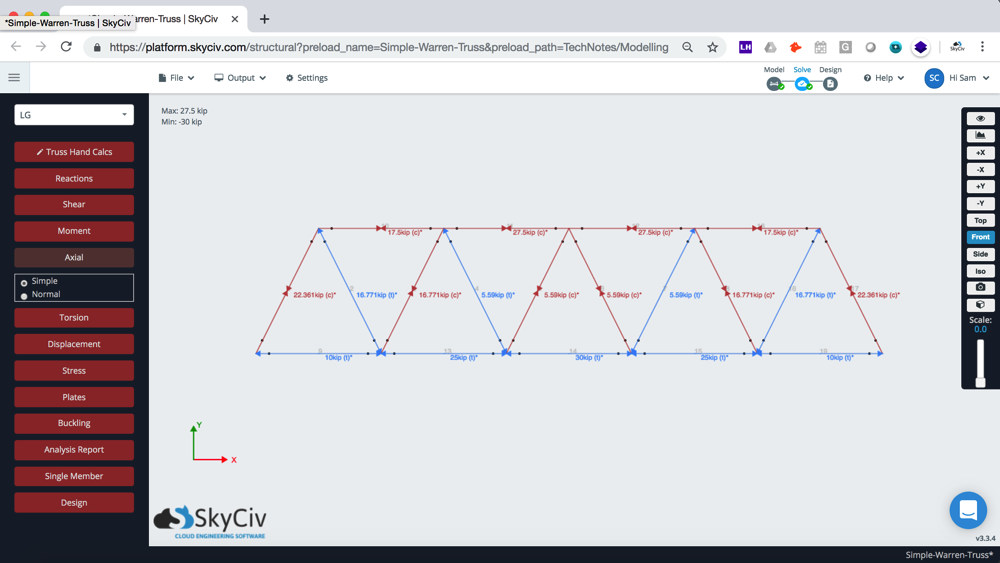
Since the members are all pinned and free to rotate, it means that internal forces should all be axial. We can confirm this by looking at the bending moment results. Apart from the top members (who have distributed loads on them), all the members in the system have 0 bending moment forces. This is because the only forces in the members are axial:

SkyCiv Truss Calculator
SkyCiv Free Trusses Calculator is a truss design tool that generates the axial forces and reactions of completely customizable 2D truss structures or rafters. Or to make the most of our powerful Truss Software, sign up today to get started!