SkyCiv’s Section Builder allows you to upload your own custom section libraries using data created spreadsheet editors such as Microsoft Excel or Google Sheets and exported in CSV format. CSV section templates can be uploaded through the SkyCiv Section Builder and stored in your cloud storage so that you can access them any time with your SkyCiv account.
Creating Section Libraries in CSV Format
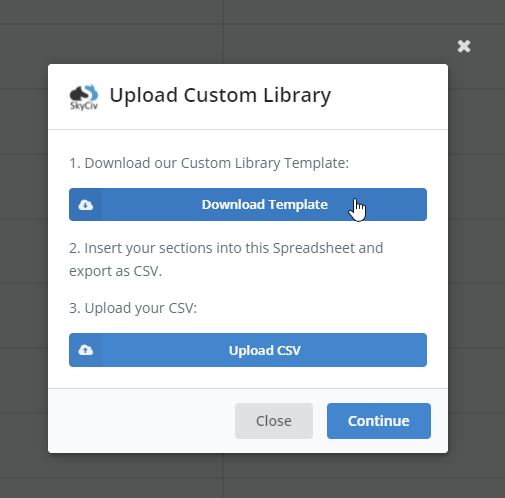
A spreadsheet has been provided for building section libraries to ensure section data is compatible with the SkyCiv Section Builder. You can download the template spreadsheet from the Download Template button in the uploader or from this link.
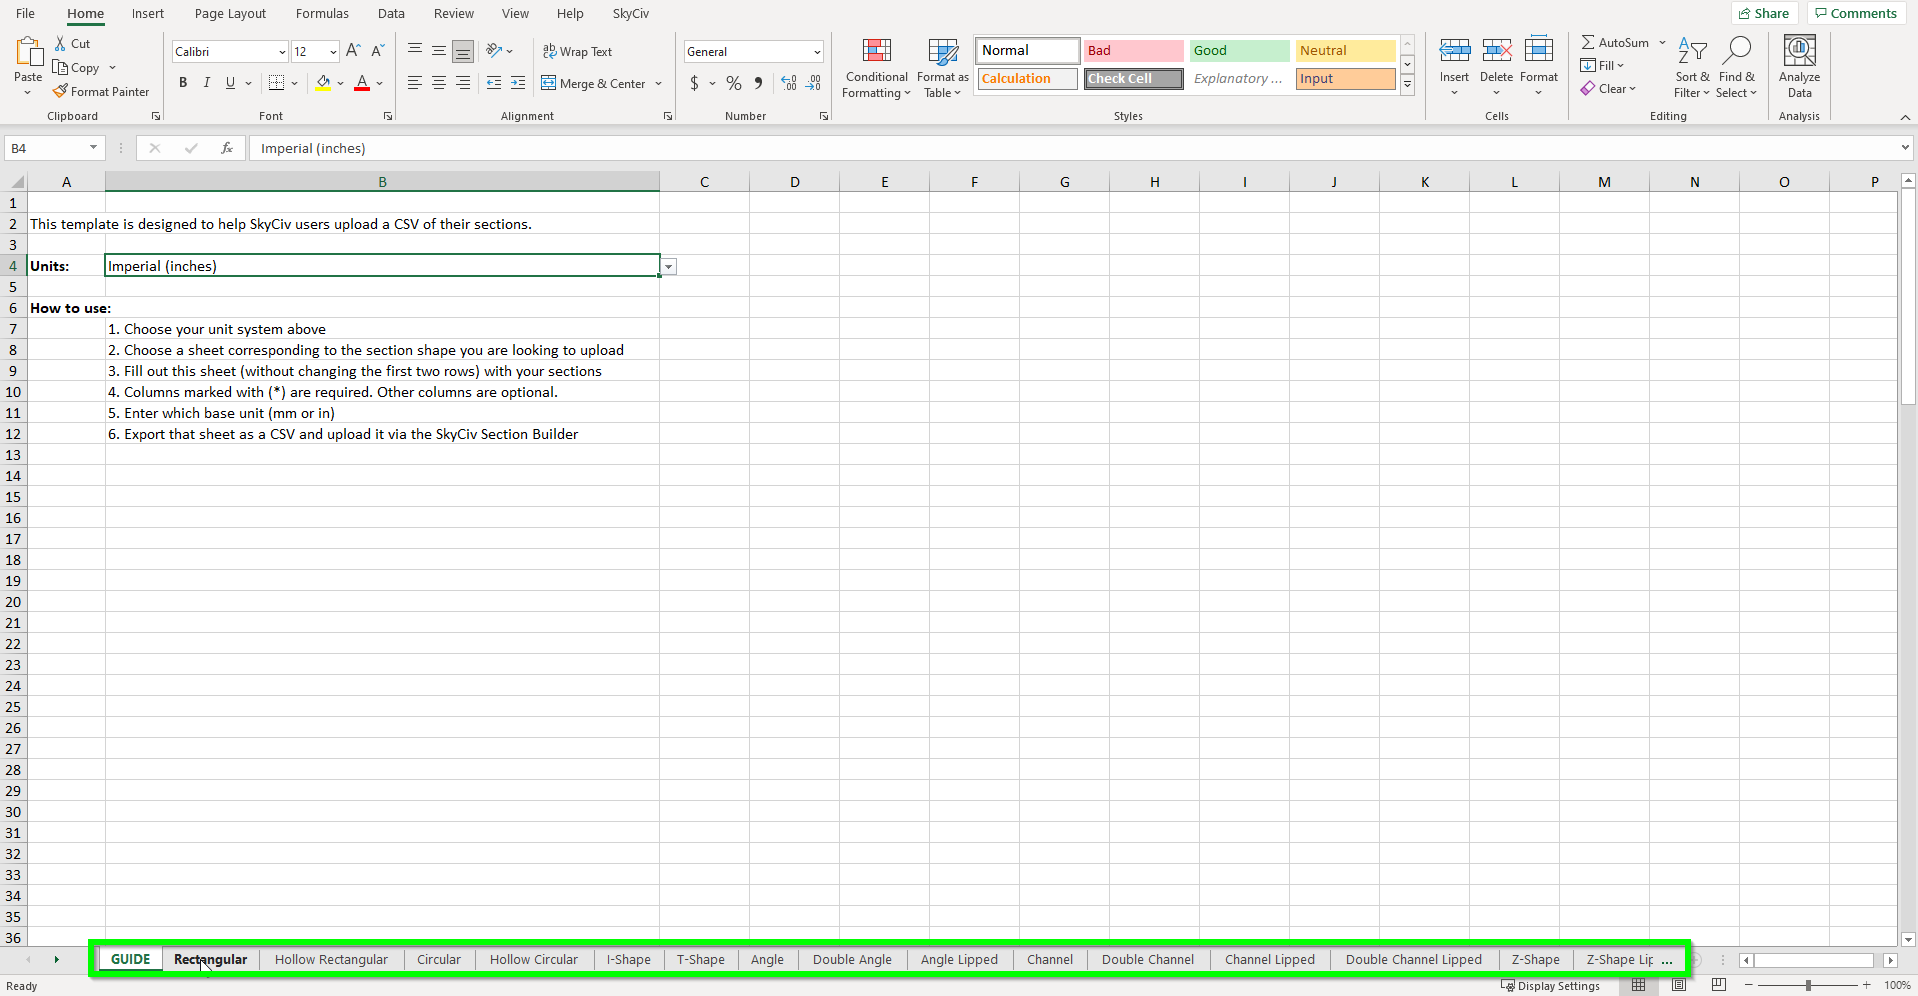
The template spreadsheet can be opened in Microsoft Excel. Visit the “GUIDE” sheet to select your unit system for your sections. All sections in the CSV database have to be the same shape and unit system. If you require multiple units and shape databases, you can create multiple CSV and upload them separately.
Currently, the section template spreadsheet supports the following shapes:
- Rectangular
- Hollow Rectangular
- Circular
- Hollow Circular
- I-Shape
- T-Shape
- Angle (L-Shape)
- Double Angle (L-Shape)
- Angle Lipped (L-Shape)
- Channel
- Double Channel
- Double Channel Lipped
- Box Girder
- Z-Shape
- Lipped Z-Shape
- Hat Shape
Each of these shapes has a unique spreadsheet in the template. Select the option you want at the bottom of the template spreadsheet to begin building your library.
Editing the template
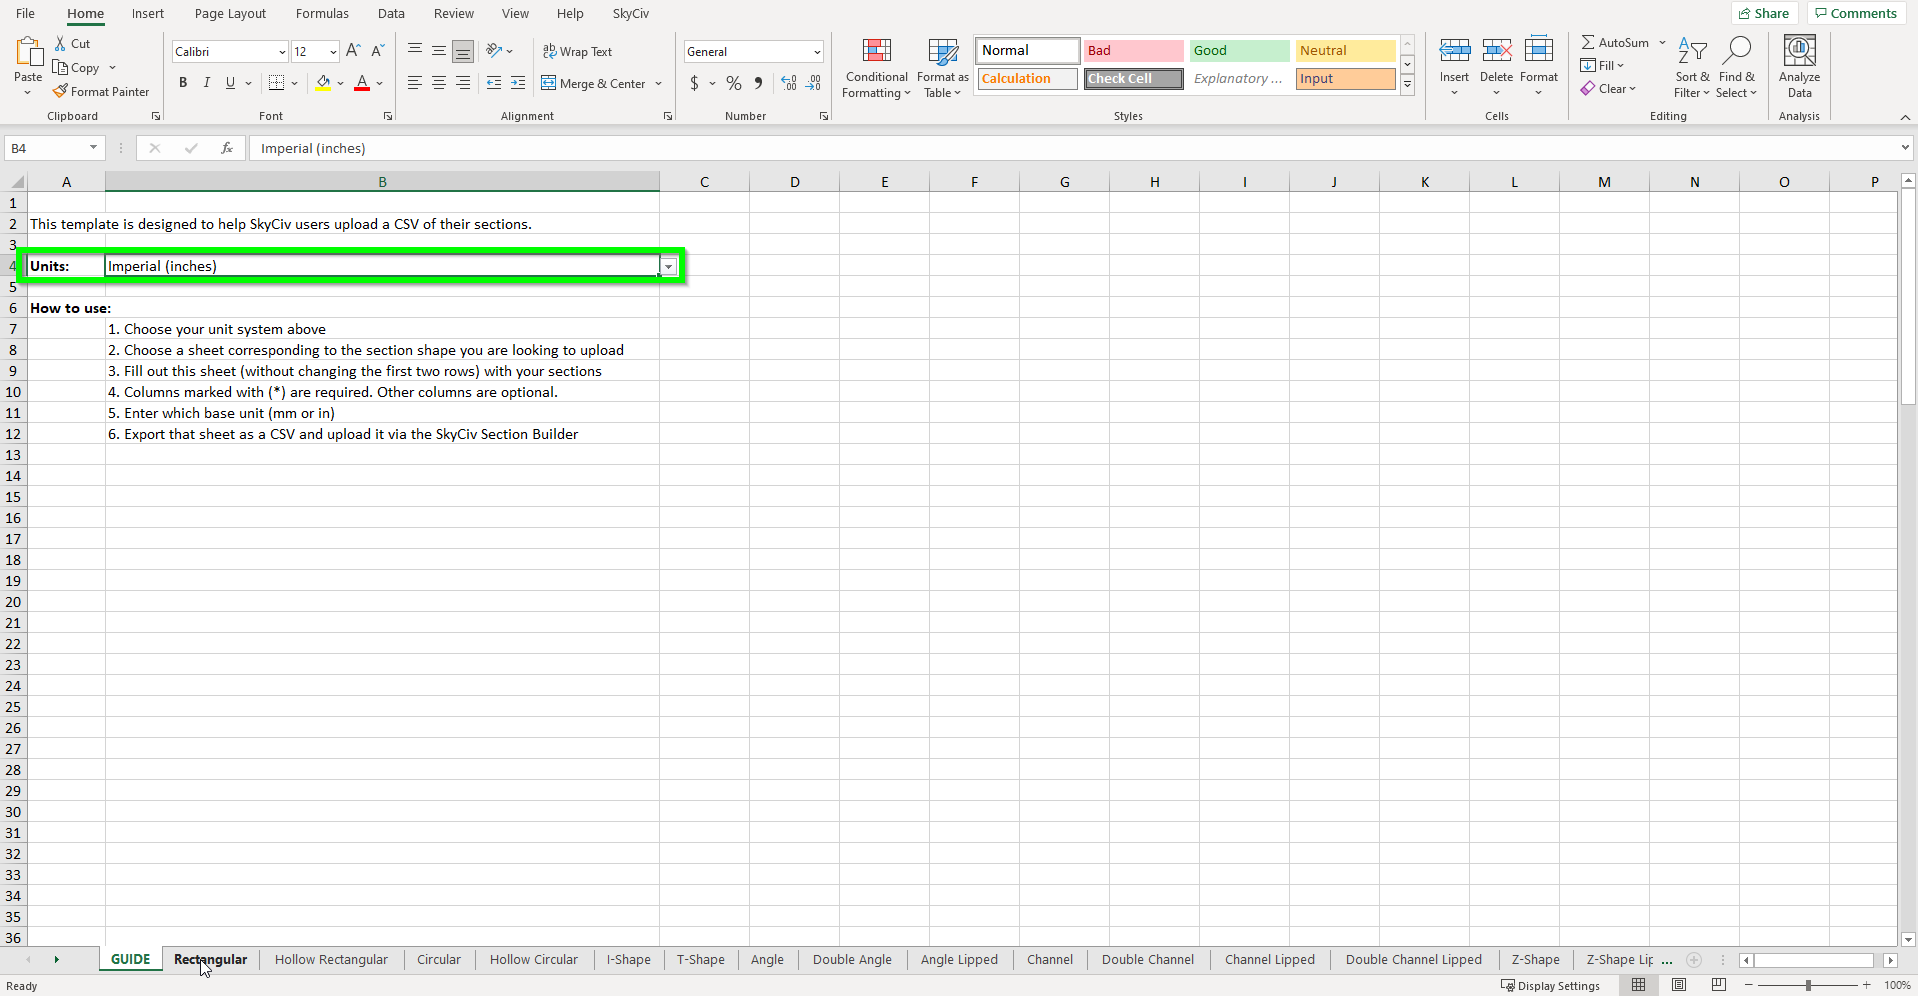
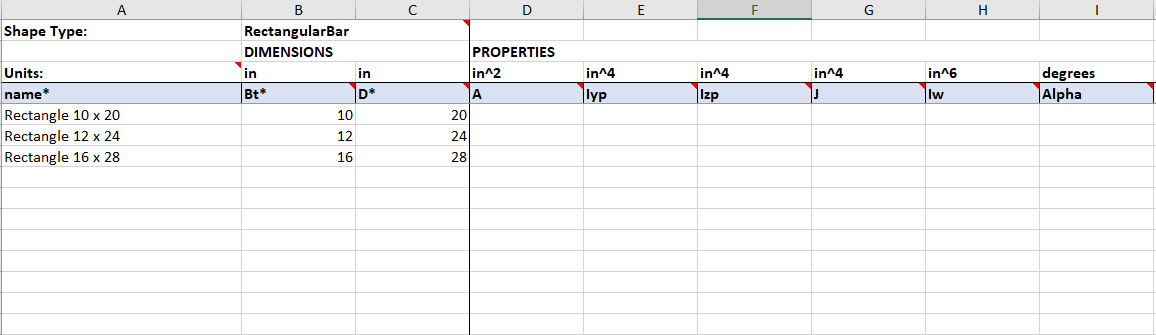
Once you have selected the section shape you desire, you can begin building your database. Do not edit the first four rows of the spreadsheet; otherwise, your CSV upload will not work. If you need to change your unit system, return to the “GUIDE” sheet and use the dropdown in B4 to update all dimensions to the correct units.
Each section you upload will require a unique name. Each section row has two sets of data. The first set is the shape dimensions with required fields highlighted with an Asterix (*). Each row also lists the base units for that section property. The second set of data is the section properties. These fields are not required and can be left blank to be calculated by the section builder. If you wish to provide a value for a select property, override the fill in the required field, and the SkyCiv Section Builder will use it in place of the calculated result.
Once you have filled out all your dimensions and properties for that shape, the spreadsheet must be exported as a CSV file.
To do this in Microsoft Excel, visit File > Export > Change File Type and select CSV as the file type. Click Save As and choose a location to save your file. You may receive a warning about multiple sheets. Select OK to export the current selected/active sheet.
Uploading CSV Libraries to SkyCiv Section Builder
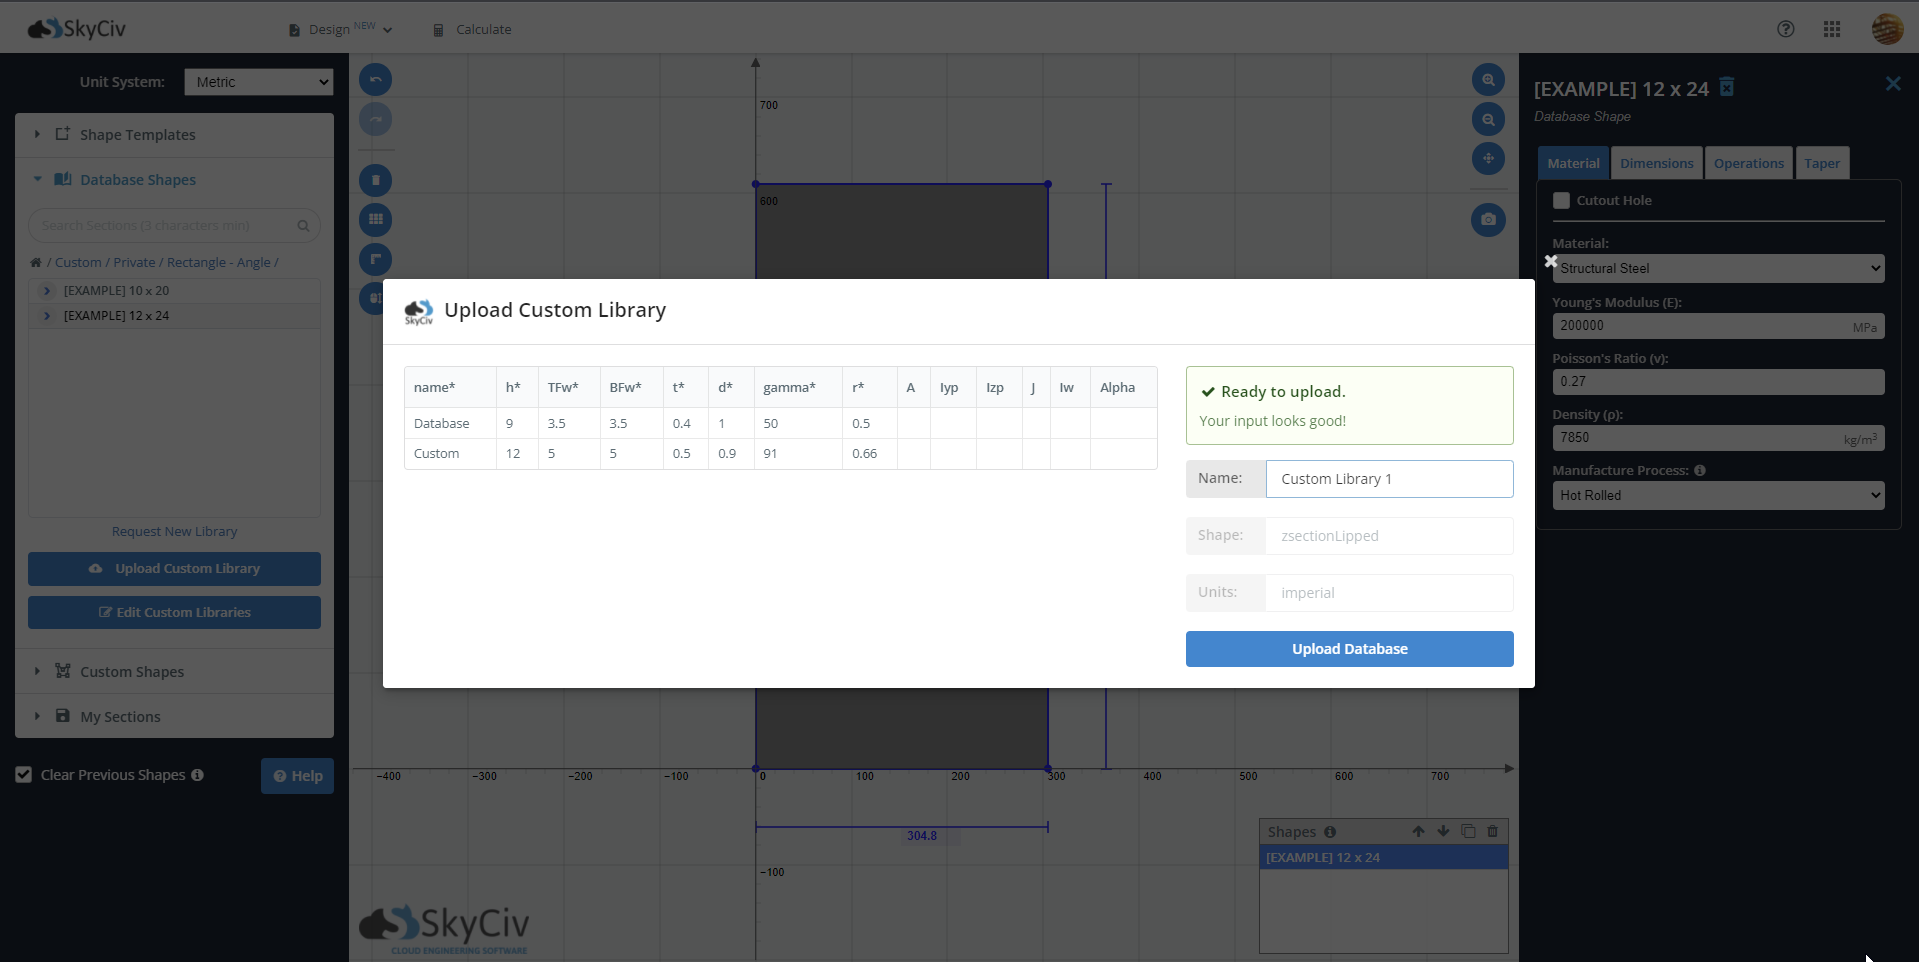
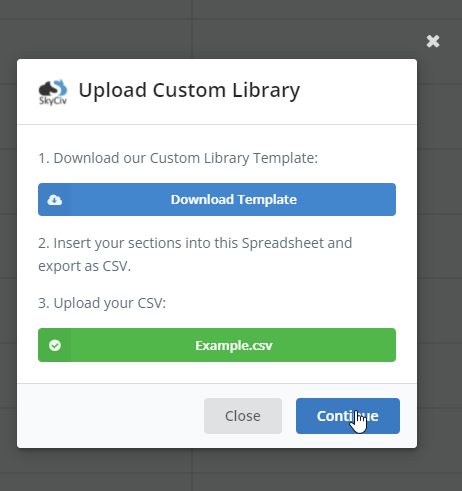
To begin uploading your CSV file open the Database Shapes option in the left menu of the section builder. At the bottom of the library, selection panel click the Upload Custom Library to open the uploader. Select the Upload CSV button and attach the CSV you created in the previous step. The button will turn green once a valid CSV is uploaded. Select continue to proceed.
In the new window, a table will list all the properties of your custom library. If all required fields are correct and valid, you will see a “Ready to upload” message. If not, the uploader will list the errors you need to correct before submitting your library. Remember to give your library a name before uploading.
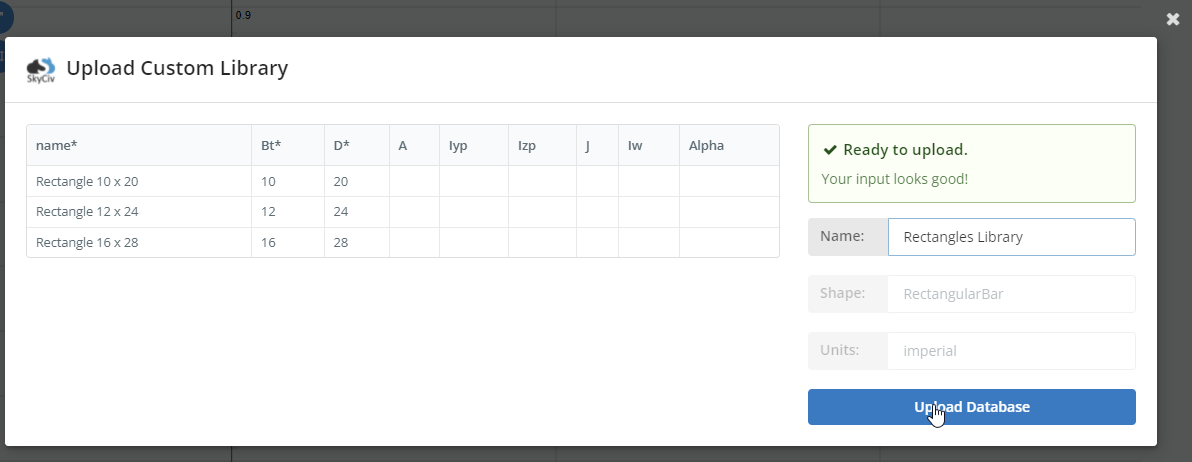
Once you are happy with your data, select Upload Database to finish the process.
Using Custom Library Shapes
Once you have successfully uploaded your custom library, you will find it in the Database Shapes selector in the “Custom” option. To open yours shapes select Custom > Private > Library Name > Shape Name.

Delete Library or Edit Library Name
To edit your library open the Custom directory and select the Edit Custom Library option to rename your library or delete your library.