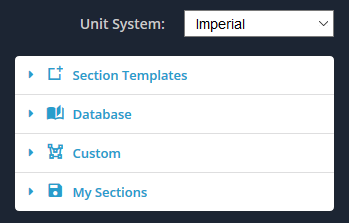
- Section Templates
- Database
- Custom
- My Sections
Each of these four ways are grouped in their own menu as shown below.
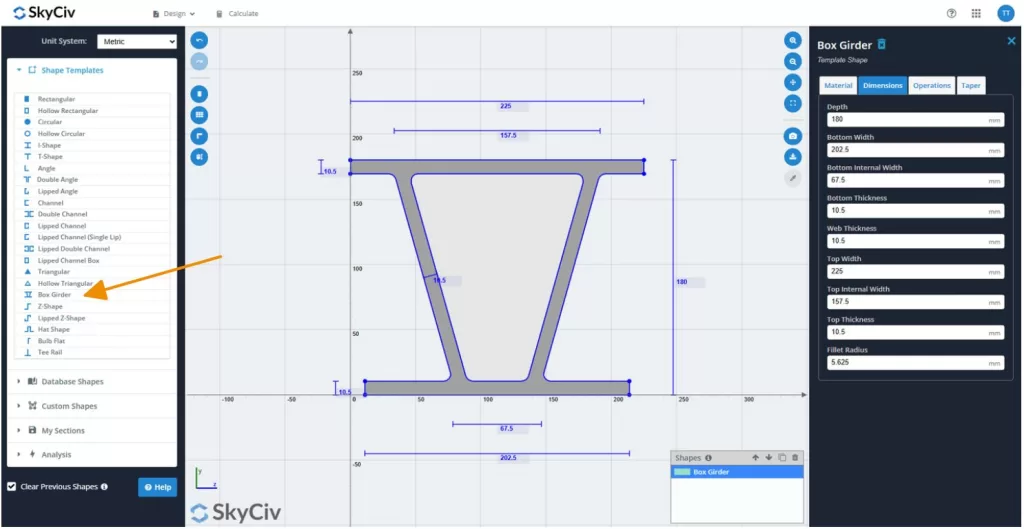
Section Templates
The Templates menu allows you to use one of the 18 standard shape templates. It is the quickest and easiest way to add a shape onto the design area. Simply adjust the dimensions to suit the shape you are after.
Choose from:
- Rectangular/Square
- Hollow Rectangular/Square
- Circular
- Hollow Circular
- I-Shape
- T-Shape
- Angle
- Double Angle
- Lipped Angle
- Channel
- Double Channel
- Lipped Channel
- Lipped Channel (Single Lip)
- Lipped Double Channel
- Lipped Channel Box
- Triangular
- Hollow Triangular
- Box Girder
- Z-Shape
- Lipped Z-Shape
- Hat Shape
- Bulb Flat
- Tee Rail
To get started, expand the Section Templates menu, and select one of the template shapes. You can click your selection to add the shape onto the board.
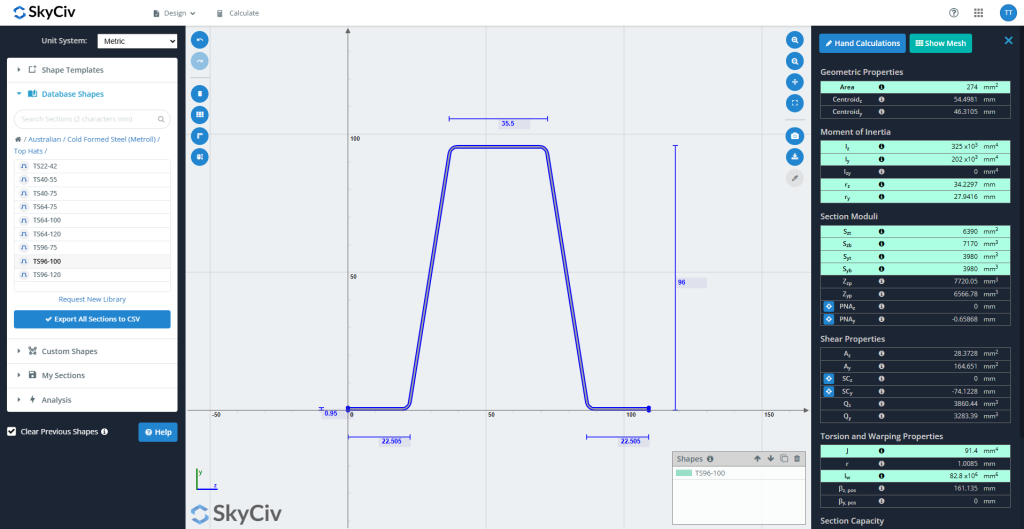
Database Shapes
SkyCiv’s Database Shapes provide users with access to thousands of pre-defined structural sections from around the world. The dimensions and properties of these shapes are sourced directly from official documents—whether industry standards or manufacturer publications.
Since transferring data between sources can introduce errors, and because the quality and completeness of source documents can vary widely, SkyCiv follows a standardized process to ensure all imported data is accurate and reliable.
Importing Section Properties
Many source documents include tables of pre-calculated section properties. However, these often omit key values needed for structural analysis. SkyCiv imports all relevant properties provided in the source—except in specific cases (outlined below)—and automatically calculates any missing values. Imported properties are displayed in teal within the Section Builder.
For example, in the screen capture below, the following properties were imported from the source:
Area, Iz, Iy, rz, ry, Szt, Szb, Syt, Sbt, J, and Iw.
Data Parsing
Once a decision is made to incorporate a new set of sections or materials into the Database Shapes, the data entry process begins. A SkyCiv engineer converts the dimensions into a format compatible with SkyCiv’s database templates. This step requires technical judgment, particularly in the following areas:
- Simplifying complex geometries: Shapes with features like lips, bends, or stiffeners can complicate later calculations. These are simplified in a way that retains key structural properties, while maintaining as much geometric accuracy as possible. For example, for a standard beam, an engineer might slightly reduce the height of the section to preserve the strong-axis moment of inertia.
- Choosing which properties to import or calculate: While SkyCiv generally imports all relevant section properties from the source, exceptions occur.
Example: If only strong-axis properties are provided, it is typically better to calculate both strong and weak-axis properties to ensure consistency. - Resolving discrepancies: If a significant mismatch (>20%) is found between source values and SkyCiv’s calculated values, the engineer will reach out to the document’s author for clarification. If an error (e.g., a misplaced decimal) is clearly present, it may be corrected immediately. If no response is received, a user-facing warning is issued to advise caution.
Quality Assurance
Once data entry is complete, a second engineer performs a full quality assurance (QA) review using the original source documents to verify accuracy and catch any transfer errors.
Following approval, the shapes are published to the live database. As a final safeguard, the QA engineer performs one last check on the client-facing platform to ensure the data remains 100% accurate and consistent.
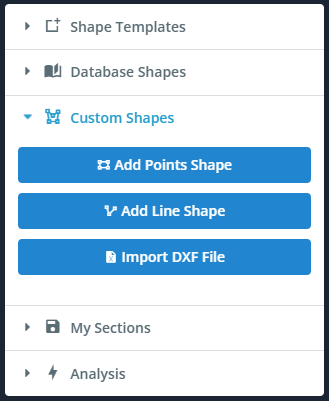
Custom
The Custom menu allows you to create your own shapes. This is a useful feature when the shape you are after does not exist in the templates. We provide three ways for you to create shapes.
- Points Shape – Define a shape by its points. Specify a fillet at any of the points.
- Line Shape – Define a shape by a line path and thickness. Specify a uniform fillet.
- Import DXF File – Sketch your shape in any CAD package and then save the file in DXF to be imported.
The way to use each of these features will be explored in detail in their own documentation section.
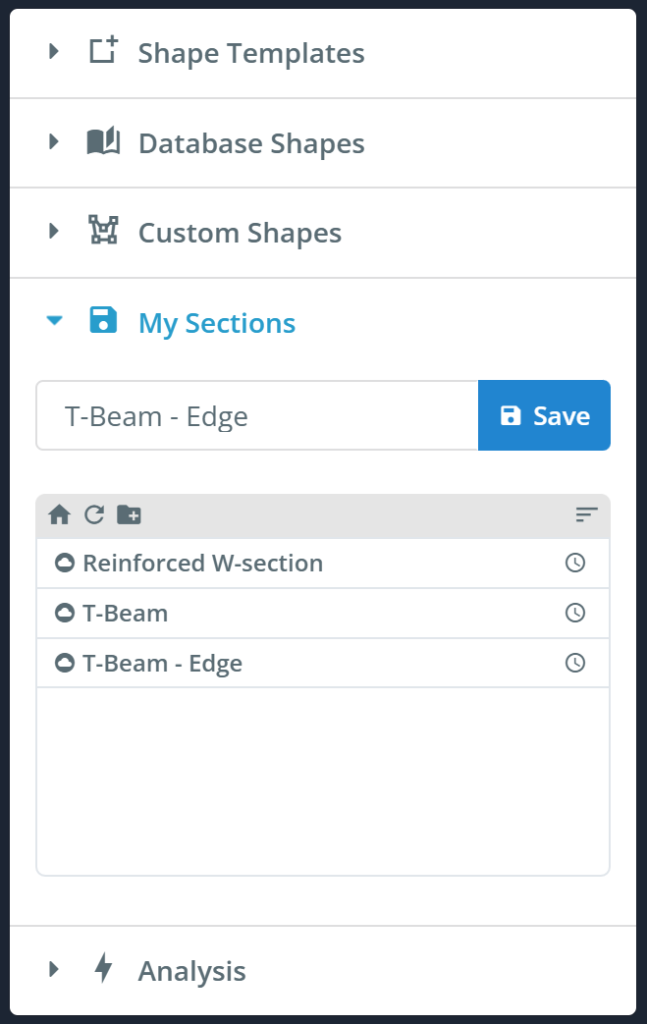
My Sections
The My Sections menu allows you to save, load, and delete your sections. This will allow you to quickly and easily reuse or continue to work on your sections in the future.
Note: Cross section assignment to member
It is important to note that when a member gets assigned to a cross section, the line of the member always acts through the centroid of the section. This is to clarify that the (0,0) coordinate (origin) of the section builder is not by default the centroid.
You can sketch and translate your section anywhere on the z-y cartesian plane, and the member will be assigned to the true centroid. Translations and rotations of shapes allow for relative positioning of shapes when creating a section that is made up of more than one shape. If you don’t want the line of the member to pass through the centroid, then you can use the “Offset A” and Offset B” of the member.
Requesting New Libraries or Sections
SkyCiv is always expanding its database based on user needs. If you require a specific manufacturer, standard, or custom section that isn’t currently available, feel free to reach out to our team.
You can submit your request directly through Request New Library shown under the Database Shapes tab as shown below, or contact us via email at [email protected].
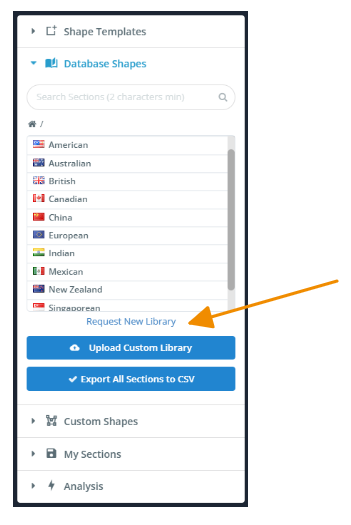
We’re happy to review your request and can prioritize additions based on demand or project needs. Whether it’s a full library or just a single shape, we’re here to help ensure the database meets your requirements.