What is a node and how to add nodes in SkyCiv Structural Analysis Software
This page explains what nodes are in SkyCiv Structural 3D and the different ways to add nodes to your structural model: the Nodes form, the datasheet and the pen tool. Nodes are points in space which specify the location of features such as members, plates, loads, and supports.
Each node is defined by its X, Y and Z coordinates, and is given a Node ID. You can enter nodes in a form or in a datasheet, or draw them with the pen tool. They are shown as a blue dot in the graphical area, with the node number next to it.
Nodes are what connect all the elements of your structure, so every node should be connected to at least one member or plate. Nodes that are not used by any member or plate are flagged as unused nodes by Repair Model, which can remove them for you before you solve.
Nodes are used to specify the location of these features:
- Members: specify a start node and an end node to define a member.
- Plates: specify 3 or more nodes to define a plate.
- Point Loads: specify a node to apply a point load. Point loads can also be applied along a member.
- Moments: specify a node to apply a moment. Moments can also be applied along a member.
- Supports: specify a node to apply a support.
Different Ways to Add Nodes in S3D
There are a few different ways you can add nodes into Structural 3D, so you can pick the one that suits your workflow:
Nodes Form
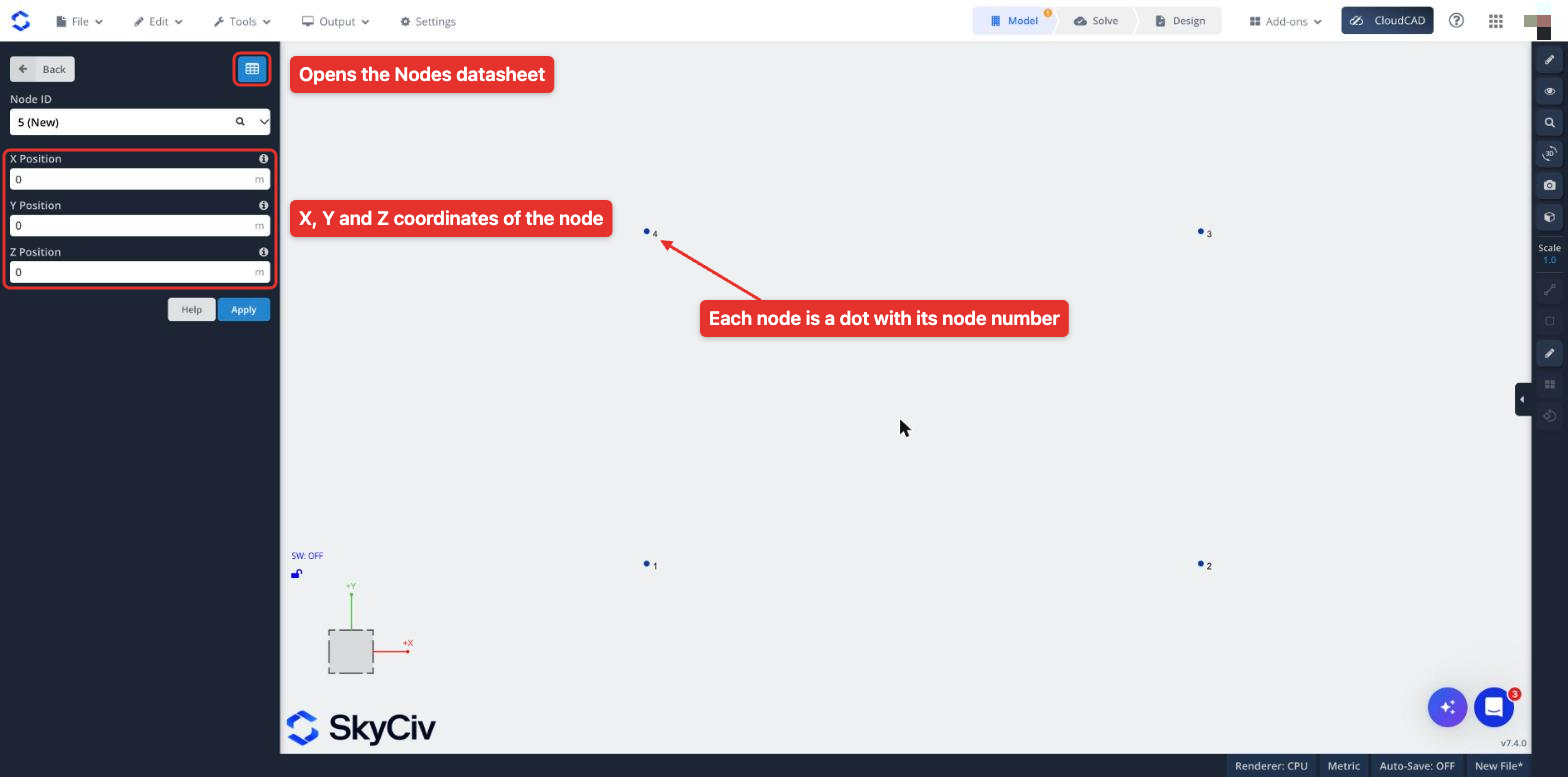
Click Nodes in the Model section of the left menu. This opens a form where you enter the X Position, Y Position and Z Position of the node, in the length units of your model. The Node ID field shows the number the new node will get, for example 5 (New). Click Apply to add the node: the form then moves on to the next new node, so you can enter the next set of coordinates straight away.
To edit an existing node, pick its number in the Node ID dropdown, change its coordinates and click Apply.
You can enter in equations and formula (for instance, -100cos(30)) into SkyCiv input boxes, and we’ll actually evaluate and enter the value (-86.602) to save you time. Use this for quick calcs, and to save you entering long and tedious numbers manually. Some other examples are:[icon icon=’info’] Quick Tip
Datasheet Entry
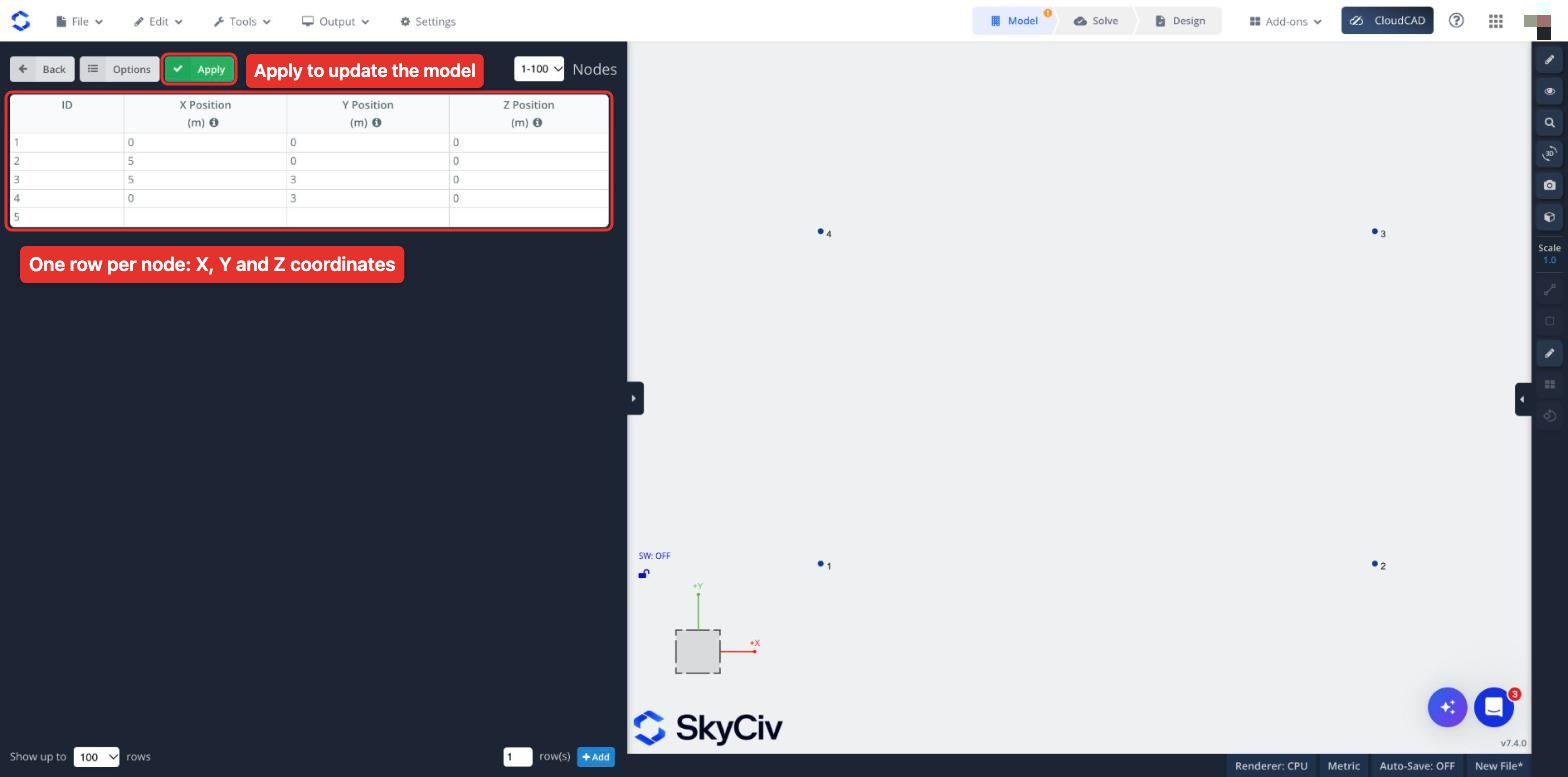
SkyCiv’s datasheet allows you to enter in a great number of nodes in a quick and easy tabulated format. Use Enter and Tab keys for quick entry, click and drag to repeat cells and sort the table by clicking the column headings. You can even copy and paste values from Excel. The datasheet is particularly useful if you need to be able to see all your other node coordinates as a reference.
To open the Nodes datasheet, click Nodes on the left menu and then the blue grid button at the top right of the form. Each row of the datasheet is a node, with its ID and its X, Y and Z Position. Click Apply at the top of the datasheet to update the model with your changes.
Pen Tool
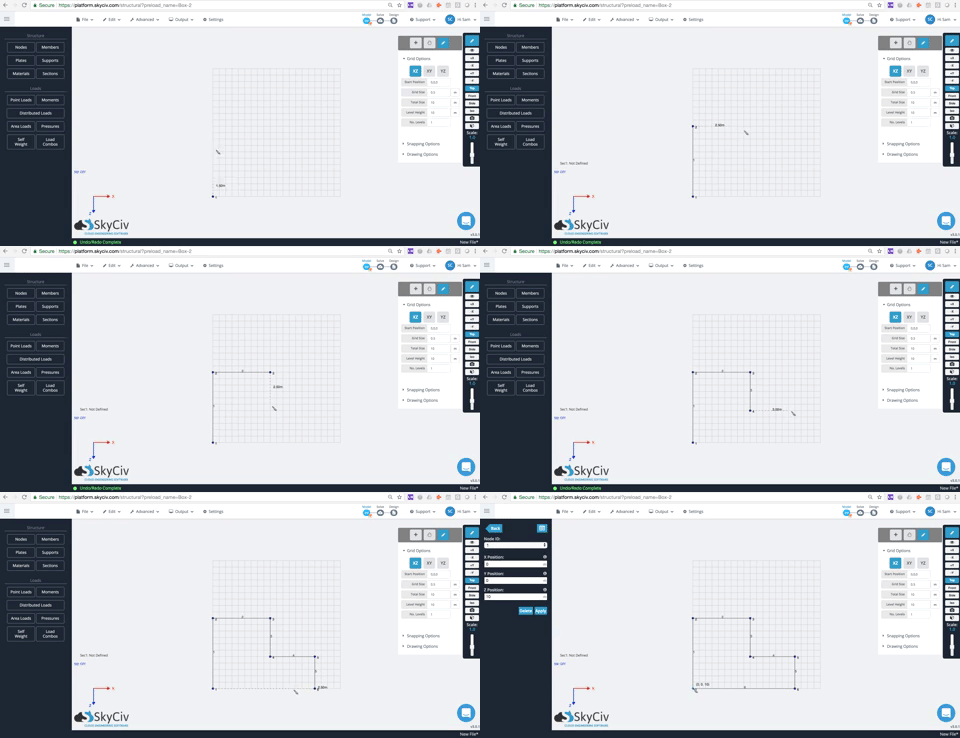
Want the freedom to plot nodes on a grid or along a particular axis? SkyCiv has a great set of pen tool and grid features that makes this easy.