Assembly Templates are structure templates, made up of nodes and arbitrary members, that users can modify and place into their project to even further accelerate the modelling process in SkyCiv Structural Analysis Software (S3D). For common structures or repeatable work, Assembly Templates give users an even further head start on their projects by taking out the node and member modeling process. More than one Assembly Template can be used for the same project.
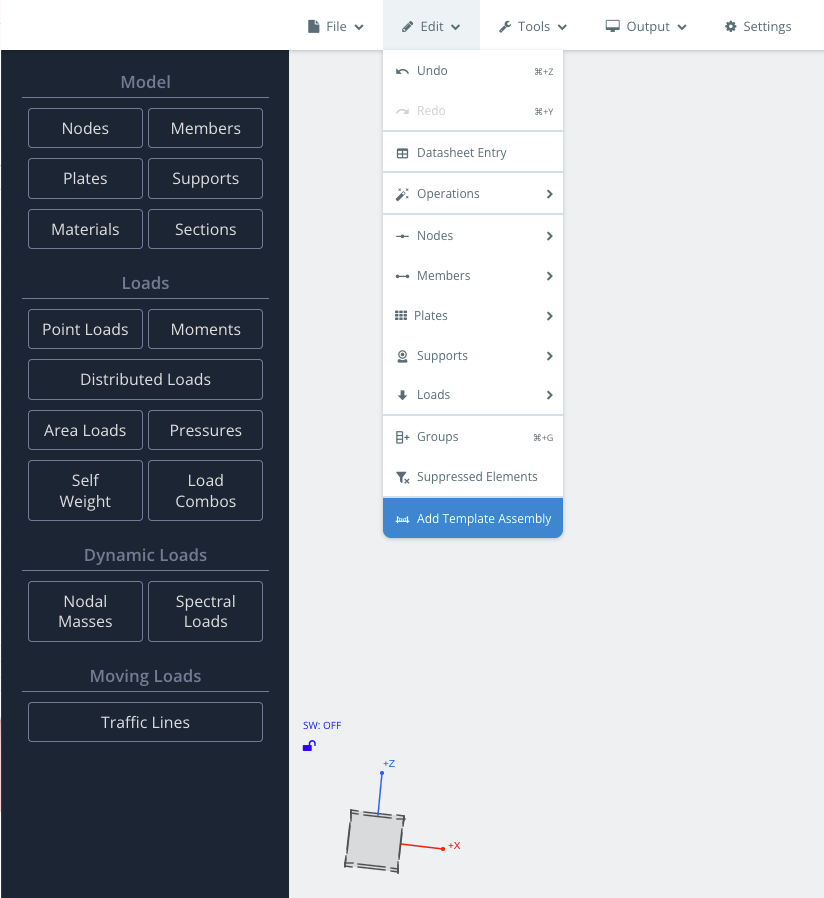
Users can use Assembly Templates by clicking edit and selecting ‘Add Template Assembly’ from the drop down menu.
Adding & Editing an Assembly Template
When adding an assembly, the Assembly Template window will look like this:
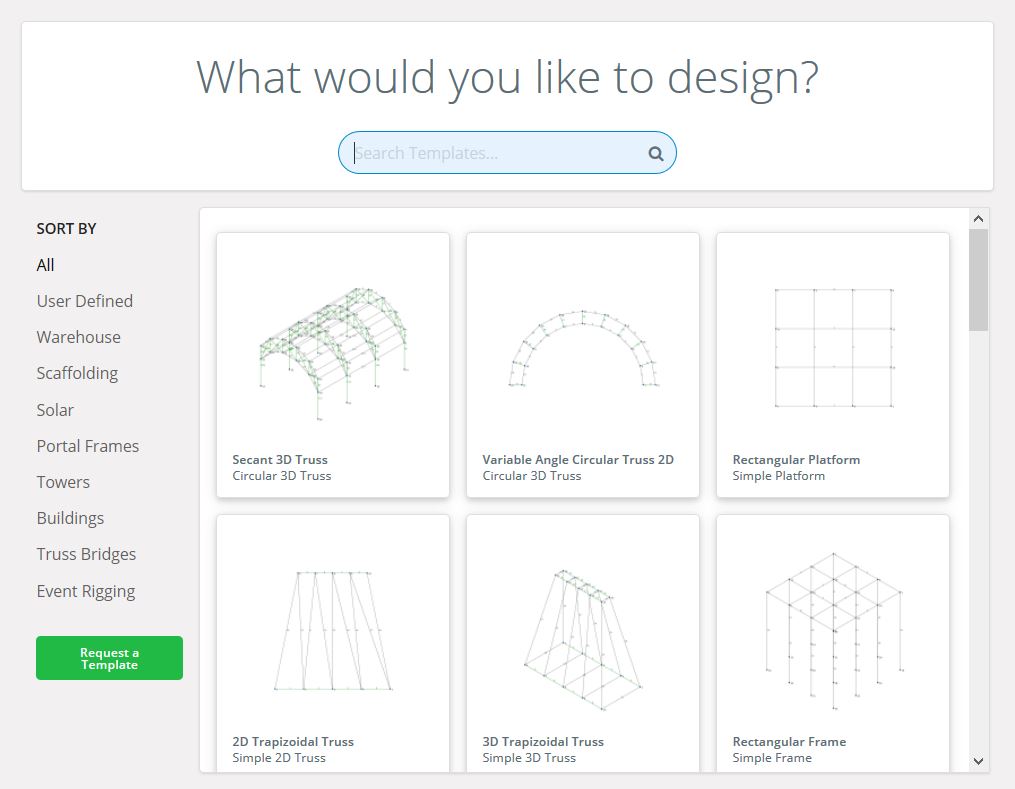
Any assembly can be selected simply by clicking on the button, each showing a preview of the template. Template names can also be searched using the search bar on top of the window. Categories of templates are also shown on the left hand side.
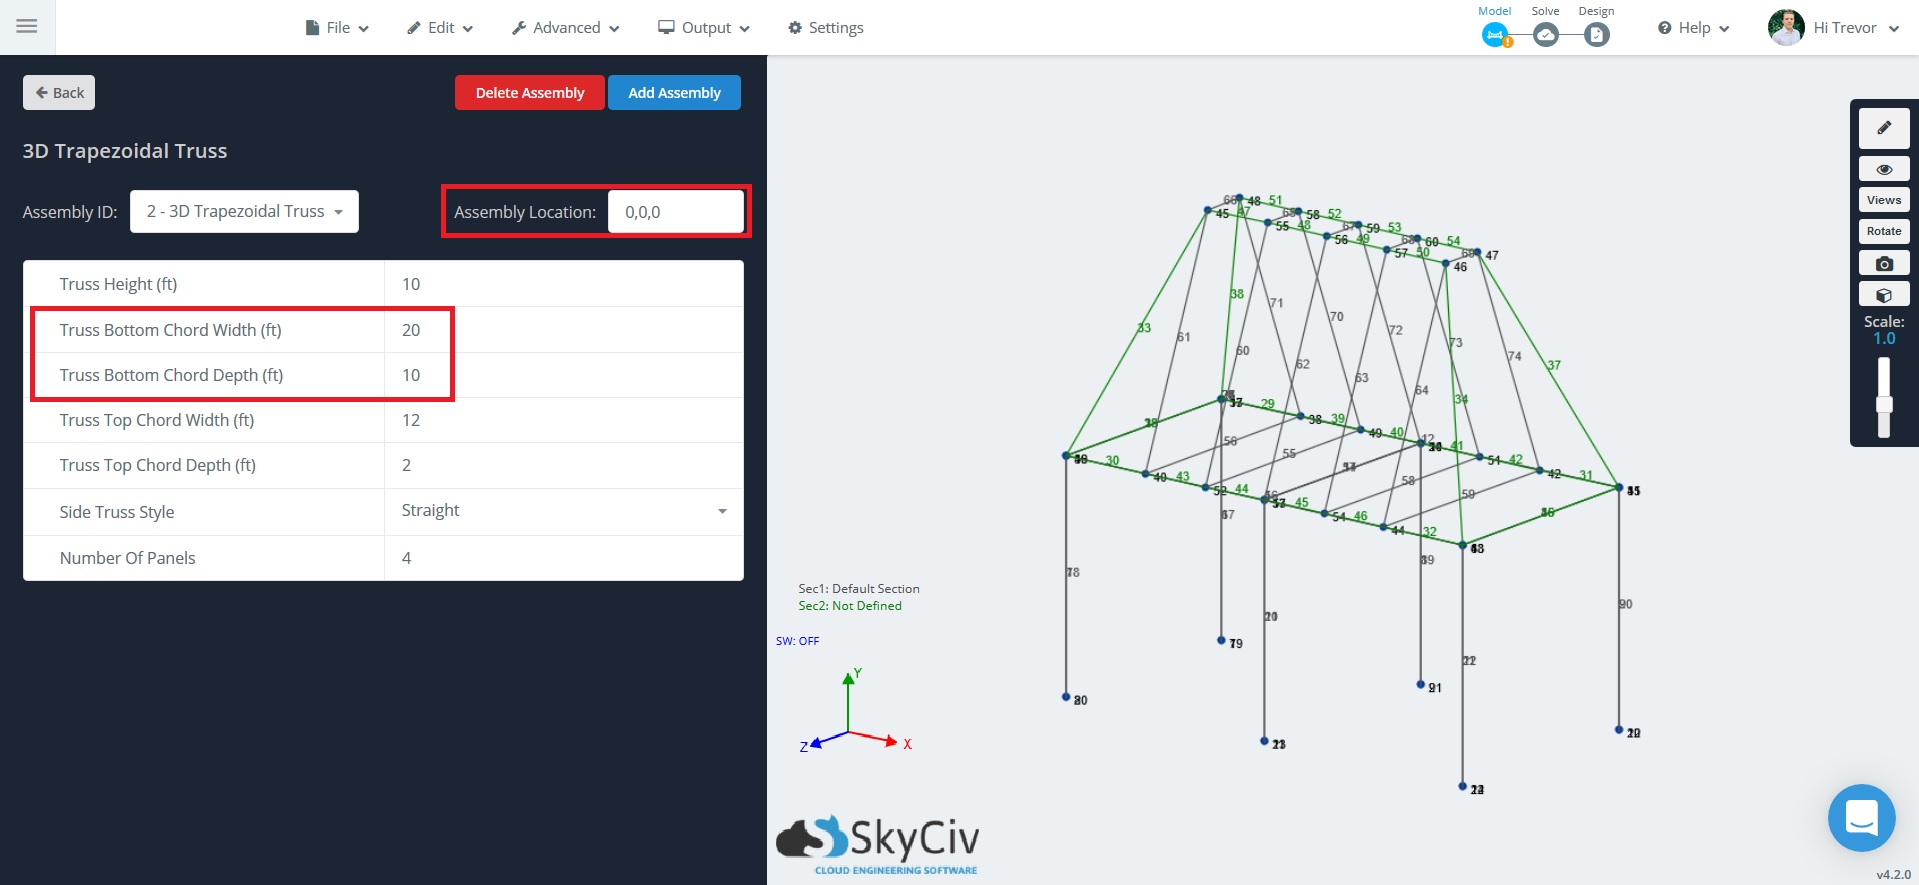
After a template is selected, the nodes and members will be generated in the model space. These nodes and members will edit live as the user changes the values in the fields as shown:
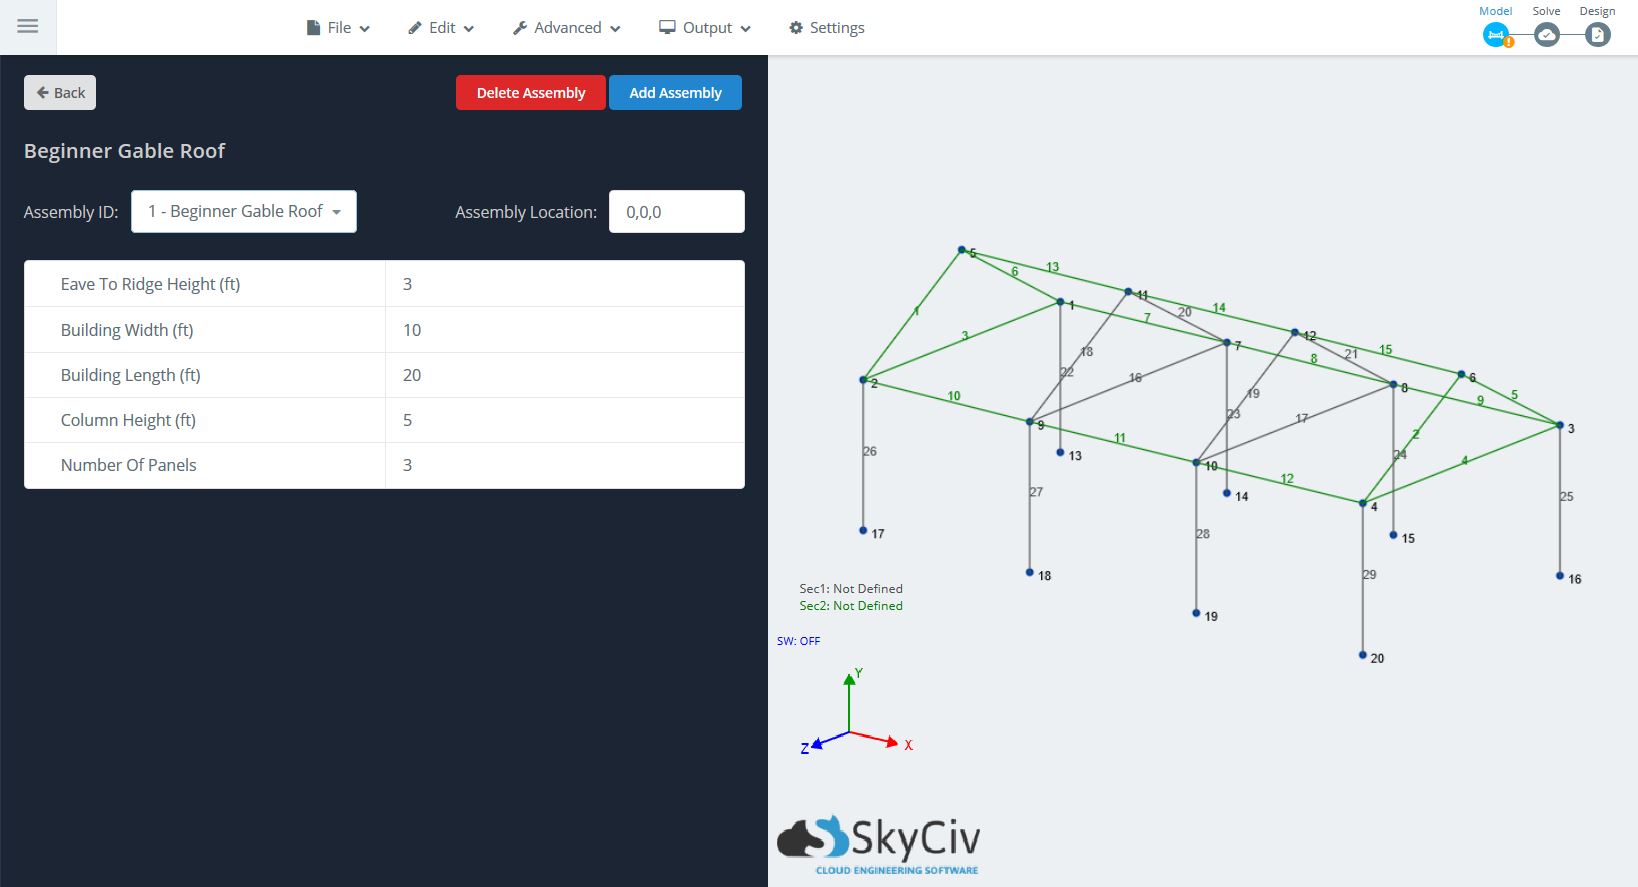
As shown above, the various fields of an Assembly Template are as follows:
- Assembly ID – The name of the assembly describing the structure type.
- Assembly Location – Location of the first node of the assembly, useful when adding assemblies to each other (as shown above, Node 1 would be at 0,0,0).
- Assembly Inputs – Column height, Building width, Number of Panels, etc. These inputs are the editable fields that users can use to morph and form their assembly to meet their needs.
- Delete/Add Assembly – Use these buttons to either delete the current assembly shown in the Assembly ID, or add another assembly to your project.
After you are satisfied with your assembly, you can click the ‘Back’ button to go back to the usual Structural 3D window. From here, the workflow is the same to continue modelling your structure. You will need to add materials, supports, loads, and identify sections for the members of the assembly.
You can also add more nodes and members manually; the Assembly Templates are a great start point for a large number of projects. Nodes and Members generated from the Assembly Template can also be edited manually.
Combining Multiple Assembly Templates
There are endless possibilities of structures that can be generated without ever drawing a member or inputting a node. Since you can have more than one assembly present in your project, assemblies can be “combined” together into a larger/more complex structure.
Example
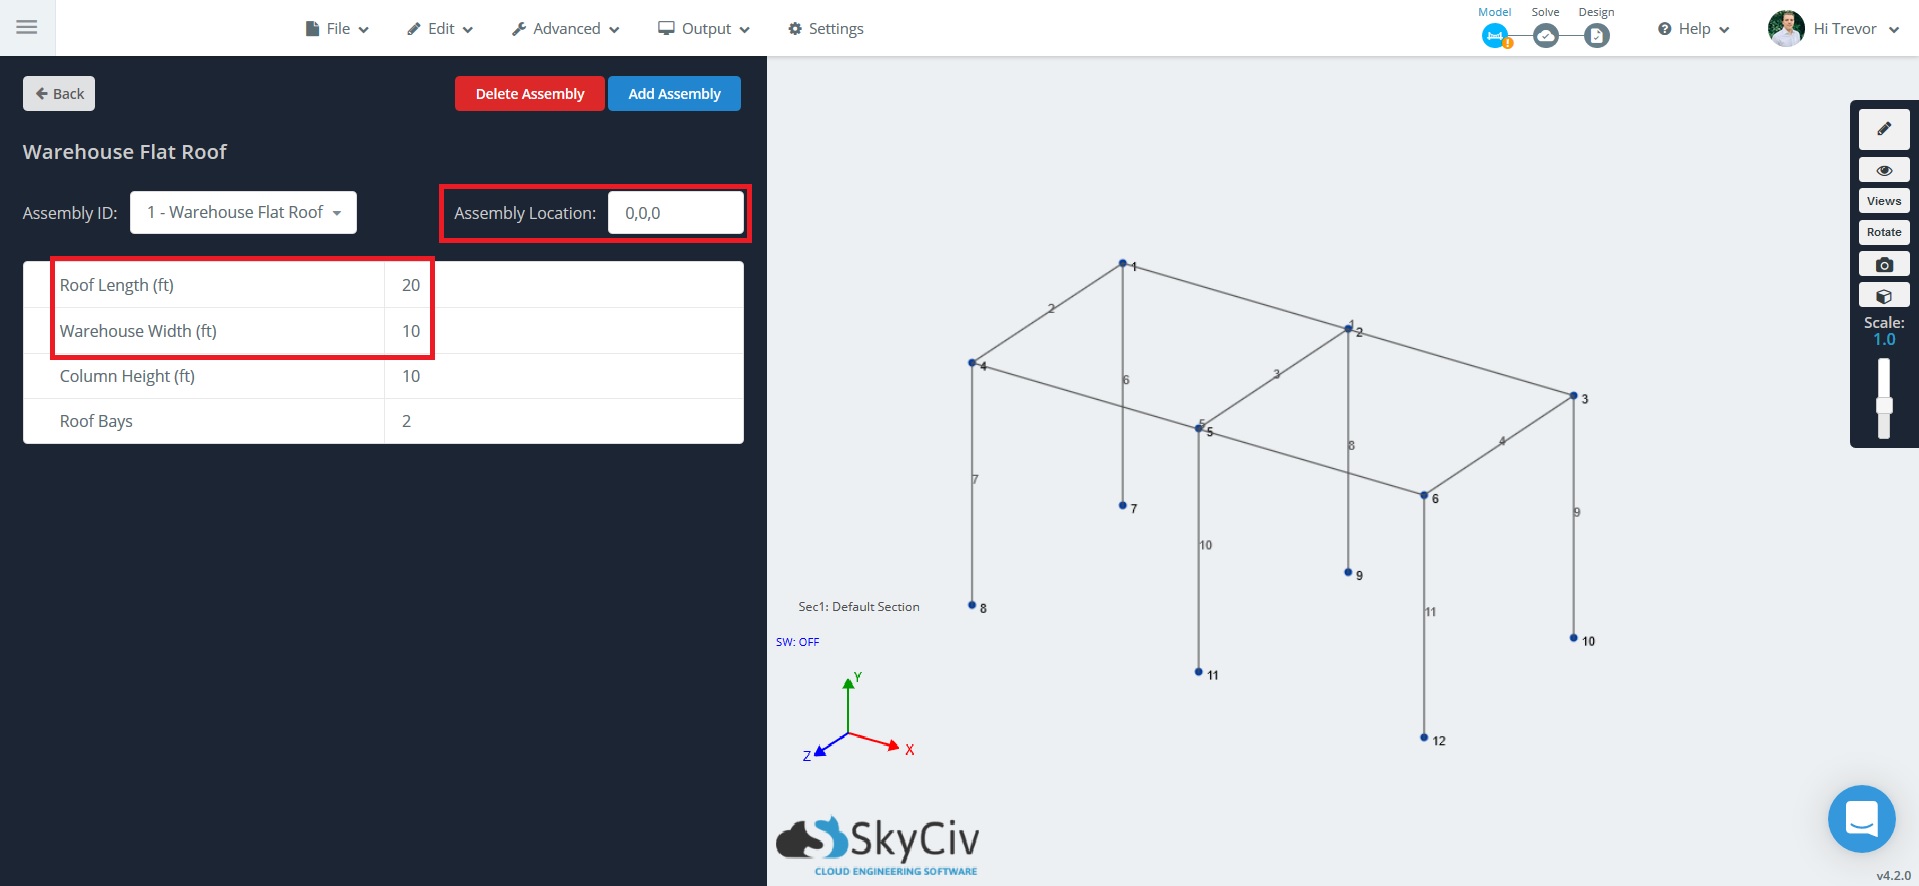
- To show this function, first pick a simple template. For this example, use Warehouse Flat Roof. Keep the default values, and make note of the assembly start location (0,0,0), and the length and width values.

- Next, click on Add Assembly. This will bring up the assembly prompt again. Find the 3D Trapezoidal Truss assembly, and click on it. Adjust the “Truss Bottom Chord Length” and “Truss Bottom Chord Length” values to match the dimensions of the previous assembly. Make sure that the Assembly start location is also set as (0,0,0).

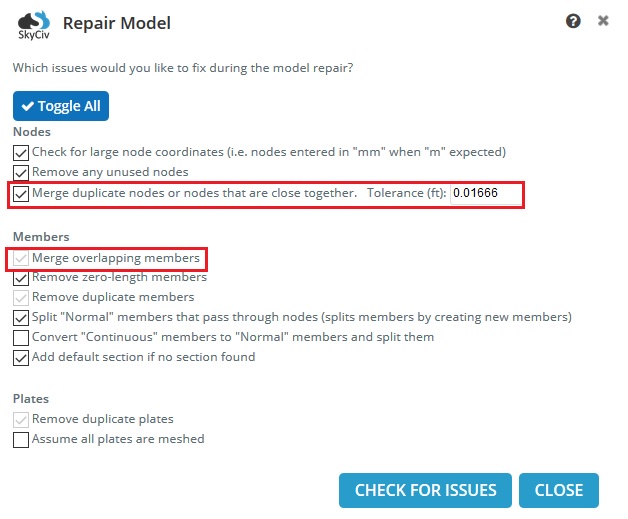
- Note, when adding assemblies, you will most likely have overlapping members or nodes. Go to Advanced > Repair Model to explore the repair functions, including merge node and merge members functions:
Request an Assembly Template
Not seeing a template that you would like to? Click on the green “Request a Template” button while in the Assembly Template window to request a template that you would like to see implemented into SkyCiv Structural 3D. Our team will make our best efforts in bringing new templates to the software.