SkyCiv’s 3D space allows users to maneuver around their model in various ways to allow for the optimal modeling experience.
Grouping in SkyCiv Structural 3D (S3D) gives the user power to highlight and isolate groups of members, nodes, and plates to give a clear picture of what is going on in the model. In addition, groups make it easier to design a few member groups rather than each individual member within the 3D model space.
The Hide function offered through Structural 3D allows the user to isolate their view down to a smaller proportion of members and nodes when desirable. This function is especially helpful when an entire structure is modeled, but the user wants to look at a single frame within the structure.
These two functions in combination make it easy to de-clutter models with similar visuals as the model shown below:
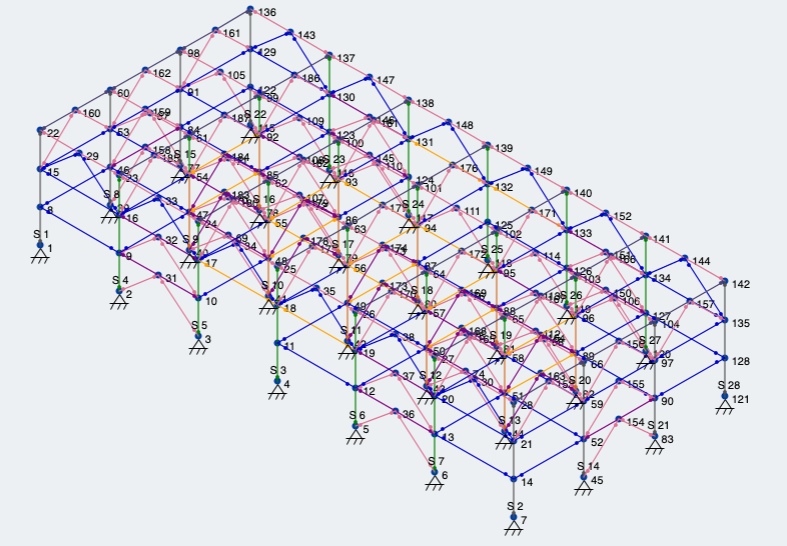
Figure 1: Real project done through SkyCiv with multiple sections and orientations
Grouping
To access your models groups tab, either press CTRL + G, or click on Groups under the Advanced Tab.
Adding a new Group
To make a new group, simply click on Add Group. Select what you would like to group: Nodes, Members or Plates. Then, identify that 3D element type in the ID’s field, separated by commas. You can also rename the group to better describe the elements.
Merge Groups
If you want to consolidate two or more groups into one, simply CTRL + Click the groups you want, and then click the Merge Groups button. This is particularly useful if you have multiple groups of members that you would like to design as one size.
Auto Grouping
One of the most useful tools in S3D is the Auto Grouping tool. SkyCiv will scan your model and group members automatically using criteria such as length, directions/orientations, and section properties. To Auto Group your model, simply go to Groups and click the Auto Group button
Example
Lets look at the model in Figure 1. First, lets use the Auto Grouping feature to obtain some member groups. As a result, the SkyCiv tool gives us 16 different member groups, as shown below in Figure 2.
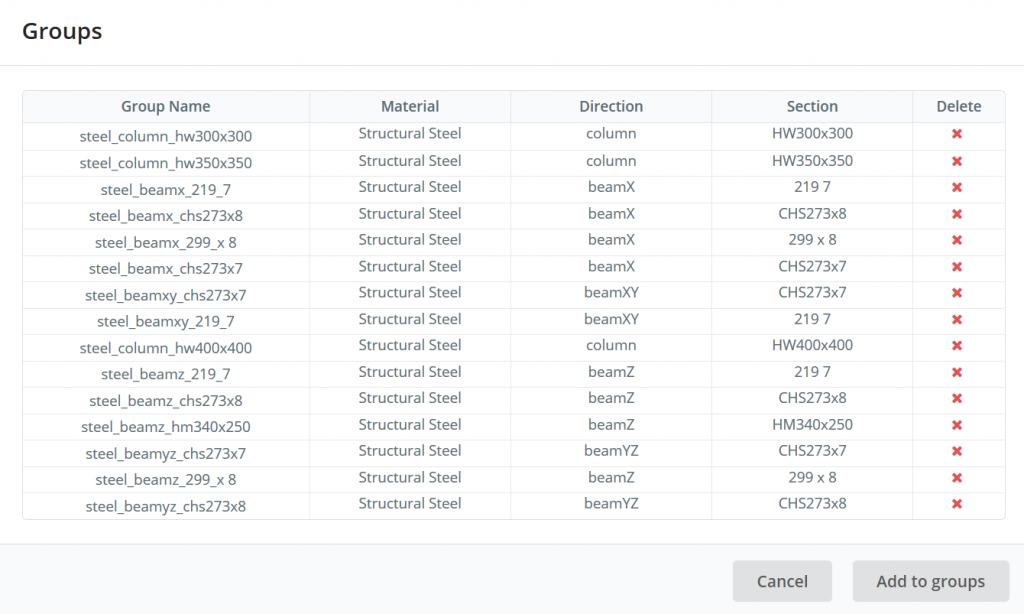
Figure 2: Auto Grouping of all of the different members in Figure 1
Now that we have some member groups, lets take a look at them in the model space. Simply click on a group in the table and those members will highlight and the remaining structure will be faint. Toggle the member and node labels off to get an even more clear picture. This is illustrated in Figure 3 below:

Figure 3: A group of columns highlighted in the model space using the Groups tool
Next, lets consolidate all of the column groups to create one group. CTRL and click the groups with the column prefix in their name, then press Merge Groups. Note, when you consolidate groups, the section properties to not merge. However, because they can all easily be selected at once, you can change the section for the entire group. Our result as shown in Figure 4:

Figure 4: The consolidation of all of our column groups into one group.
Visibility Settings and Tools
The 3D model space in SkyCiv Structural 3D allows the user unlimited customization when it comes to what you want to see. Lets go over some of the visibility settings and tools in the 3D modeler.
Model Views
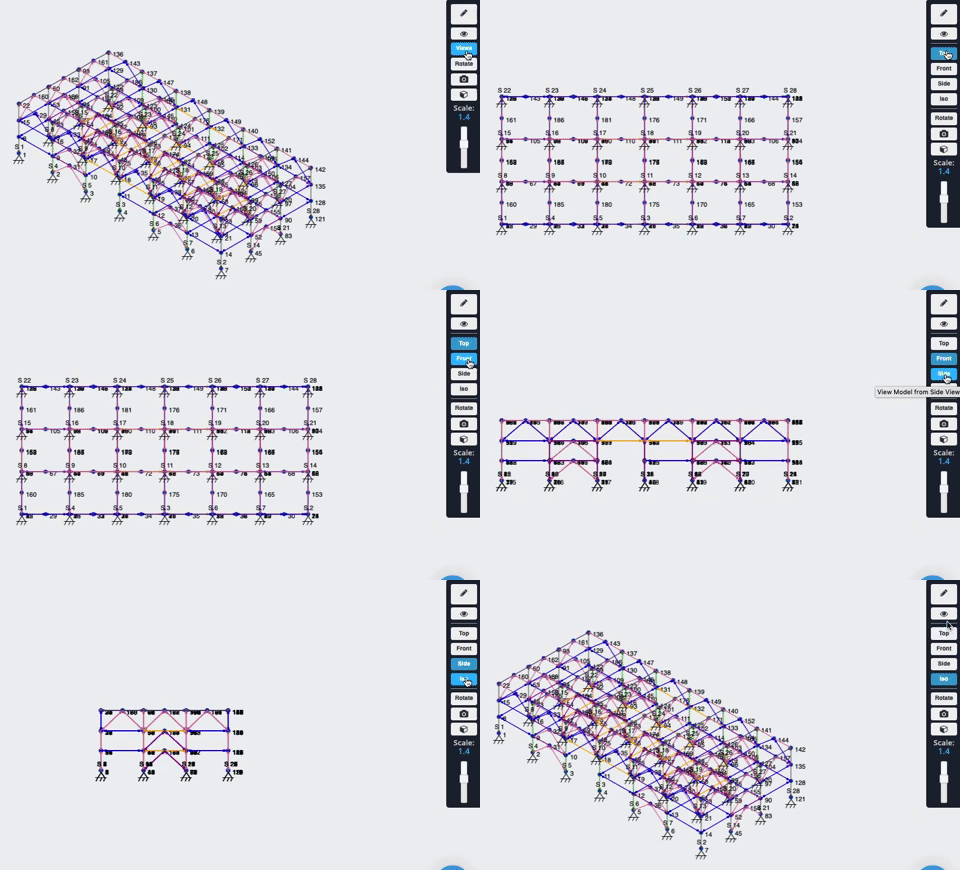
To quickly go to one of the preset views of your model, go to the toolbar on the right side of the model space and click on the Views button. You can then select one of the preset views to clearly understand your model:
Toggling Item Visibility
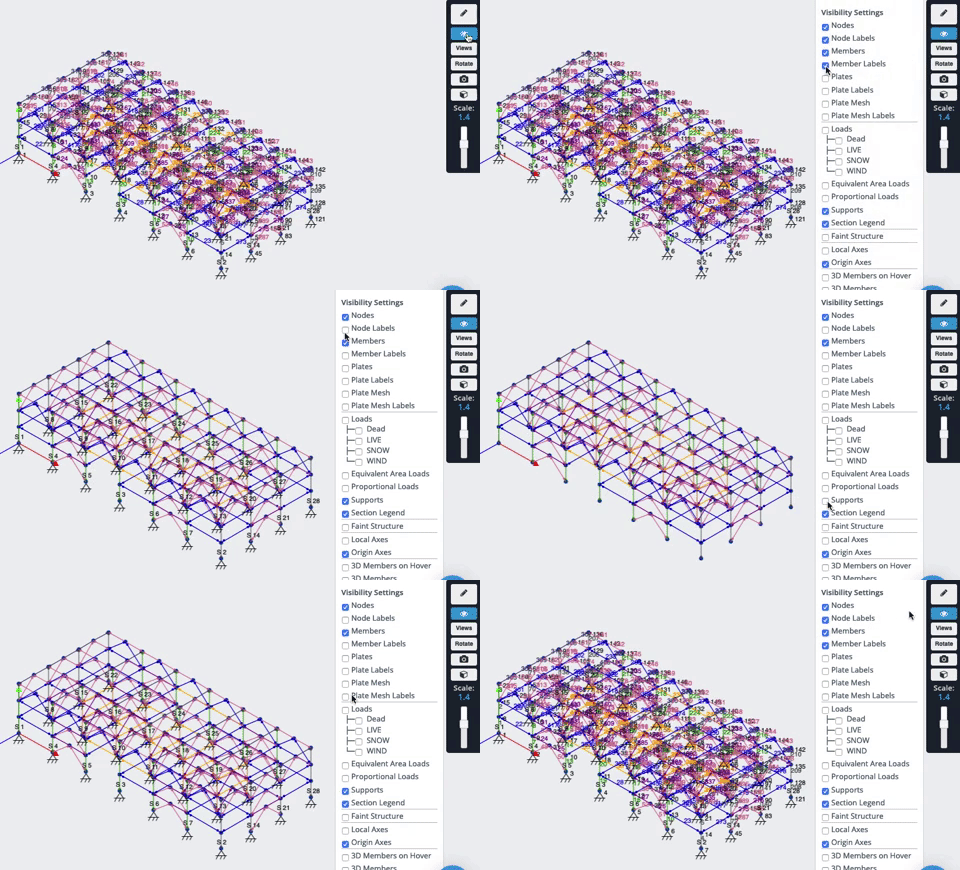
When your model has amassed a large number of nodes, members, and loads, the 3D space can look cluttered when all of these items are visible: To toggle the view of certain items on and off, go to the right toolbar and click on the Eye Symbol, otherwise known as the Visibility Settings. A list of items should appear that you can now select or deselect to further hone in what you are trying to look at in your model.
An example of toggling loads on and off in your model:
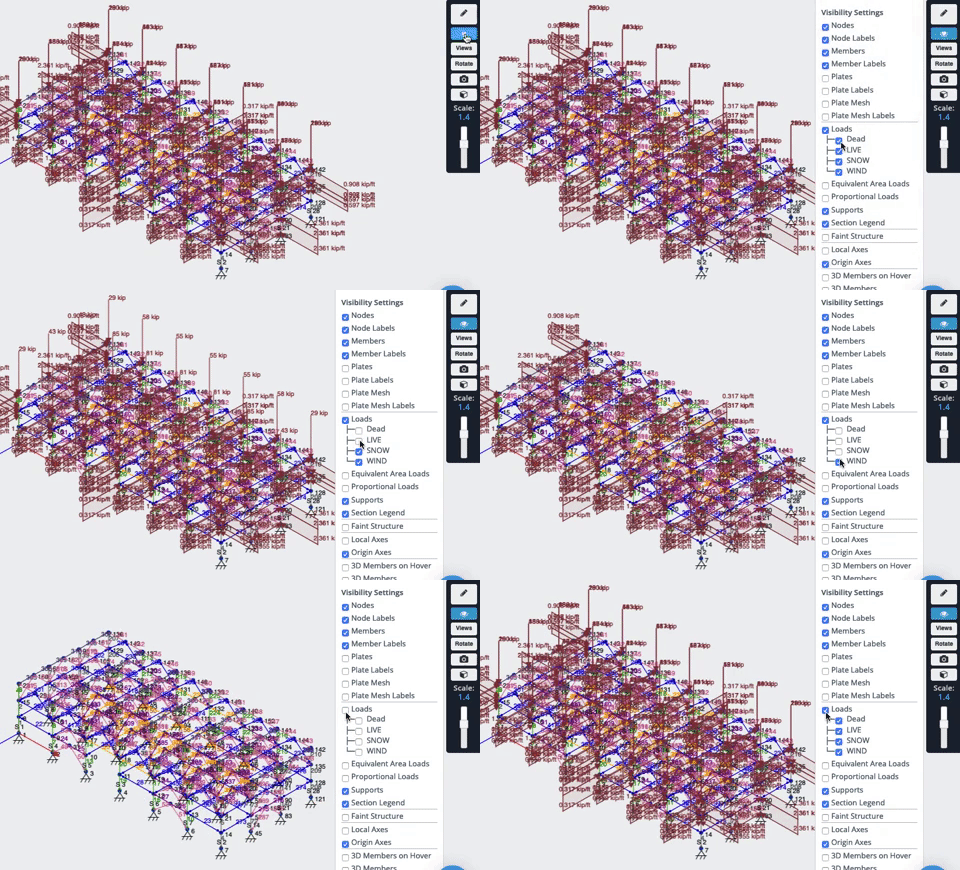
You can then further de-clutter by turning on member, node labels, supports, or a combination:
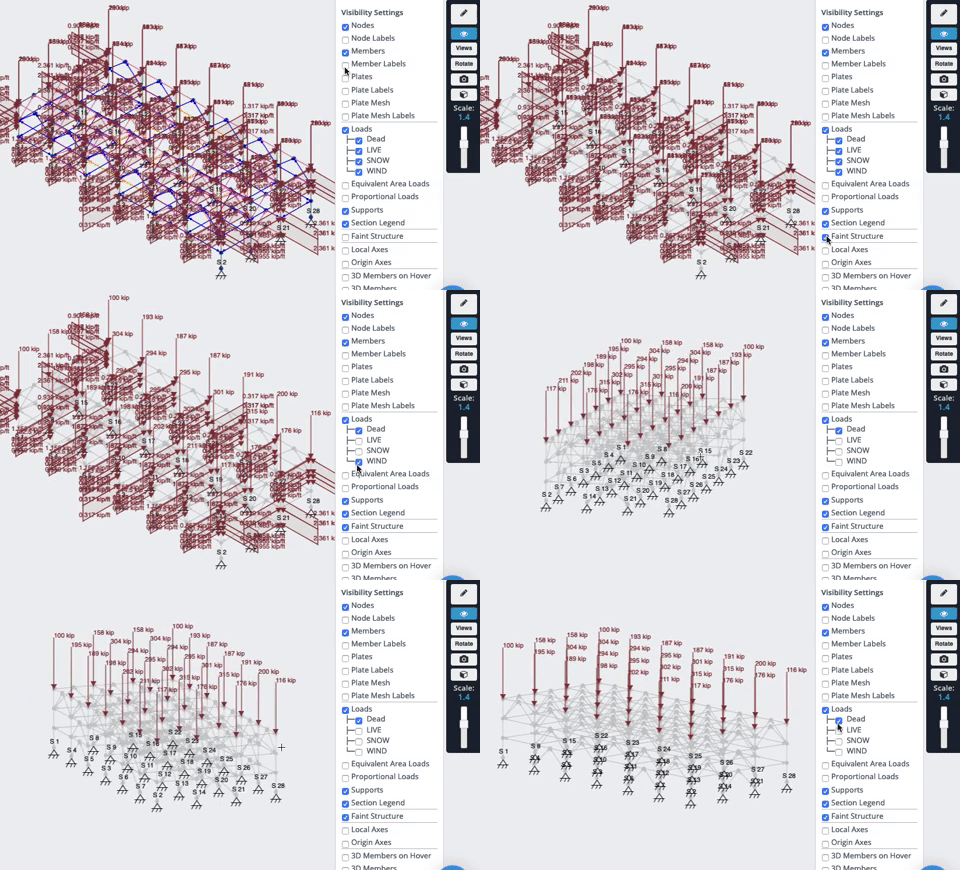
Another useful toggle is fainting the structure to look at loads:
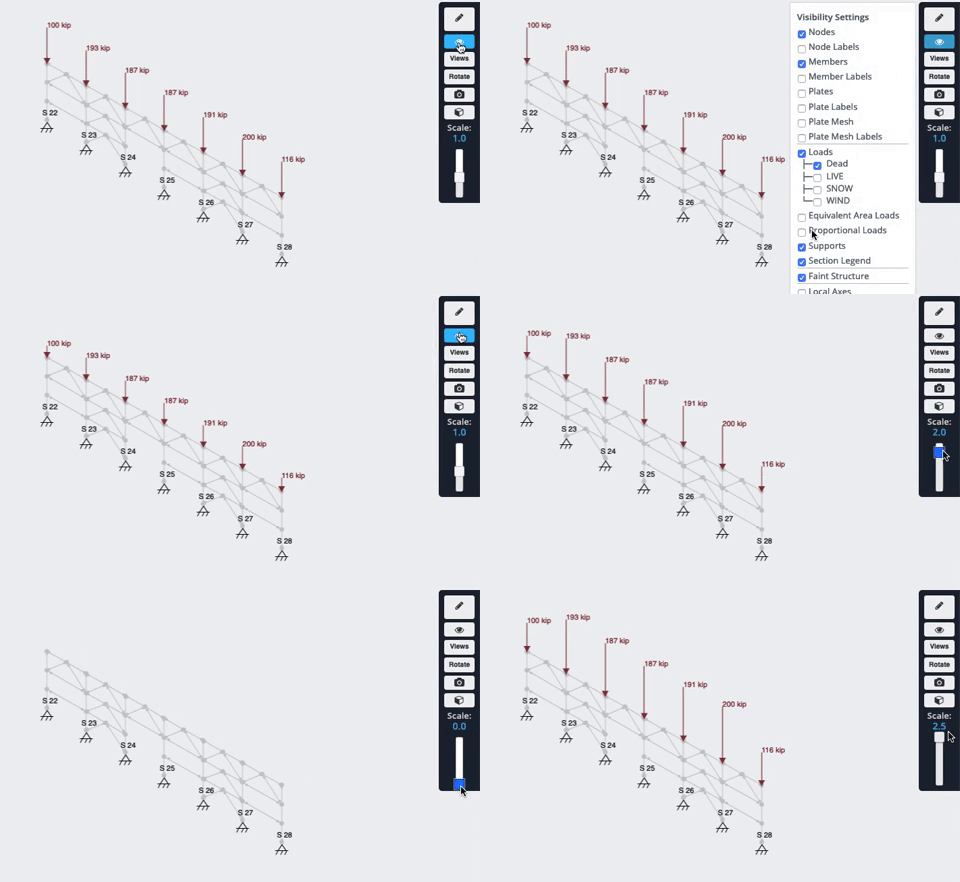
While looking at loads, you can toggle their proportionality and adjust their scale. The overall scale is shown on the toolbar and can be adjusted with the slider as shown:
Hide/Show and Selecting
To Hide anything in the model space, simply select it, then either press CTRL + H, or Right Click to show a variety of options available including Hide Selection.
Selecting and Hiding Multiple Items
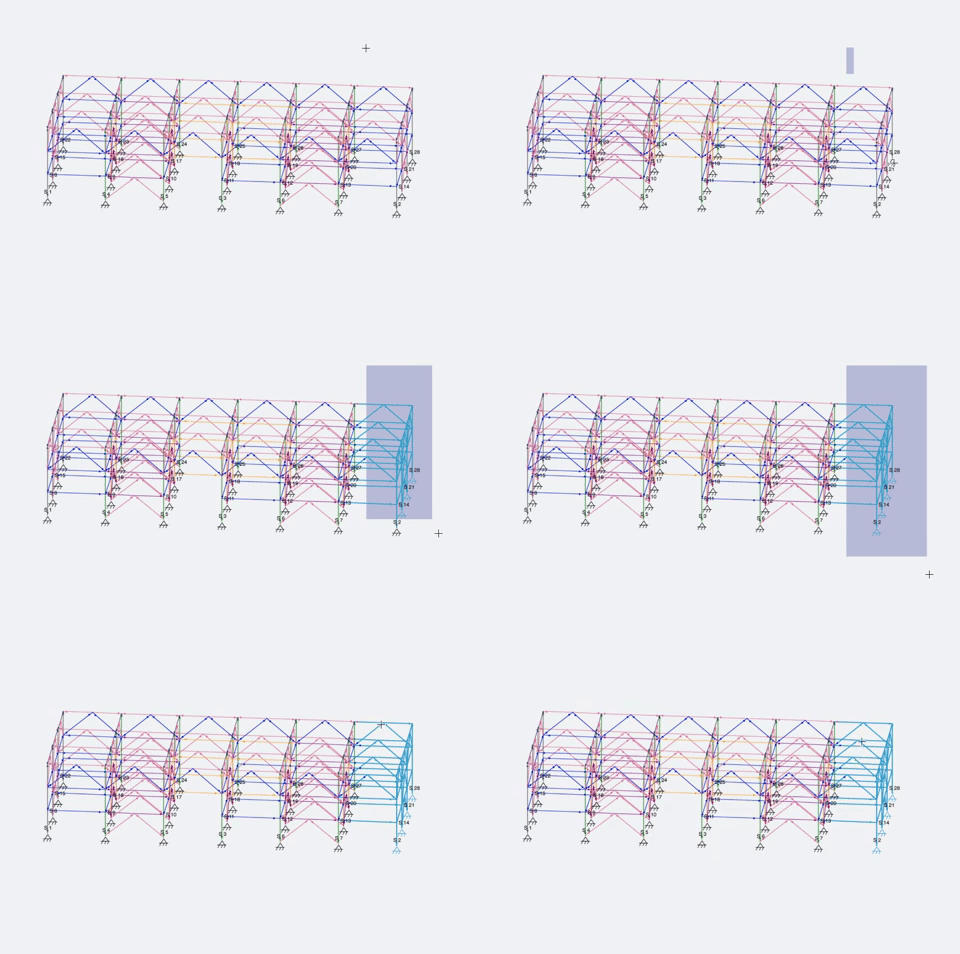
Efficiency in hiding objects comes from selecting multiple items at once and then hiding them, rather than hiding items one at a time. You can individually select items one a time by press and holding CTRL and then clicking on the additional members you want to select. A entire window of items can be selected by holding CTRL and then click and dragging your mouse to create a rectangular window to encompass members.
Hold CTRL + Click to select individual items
Hold CTRL, Click and Drag cursor from Right to Left to select items contained entirely in the window:
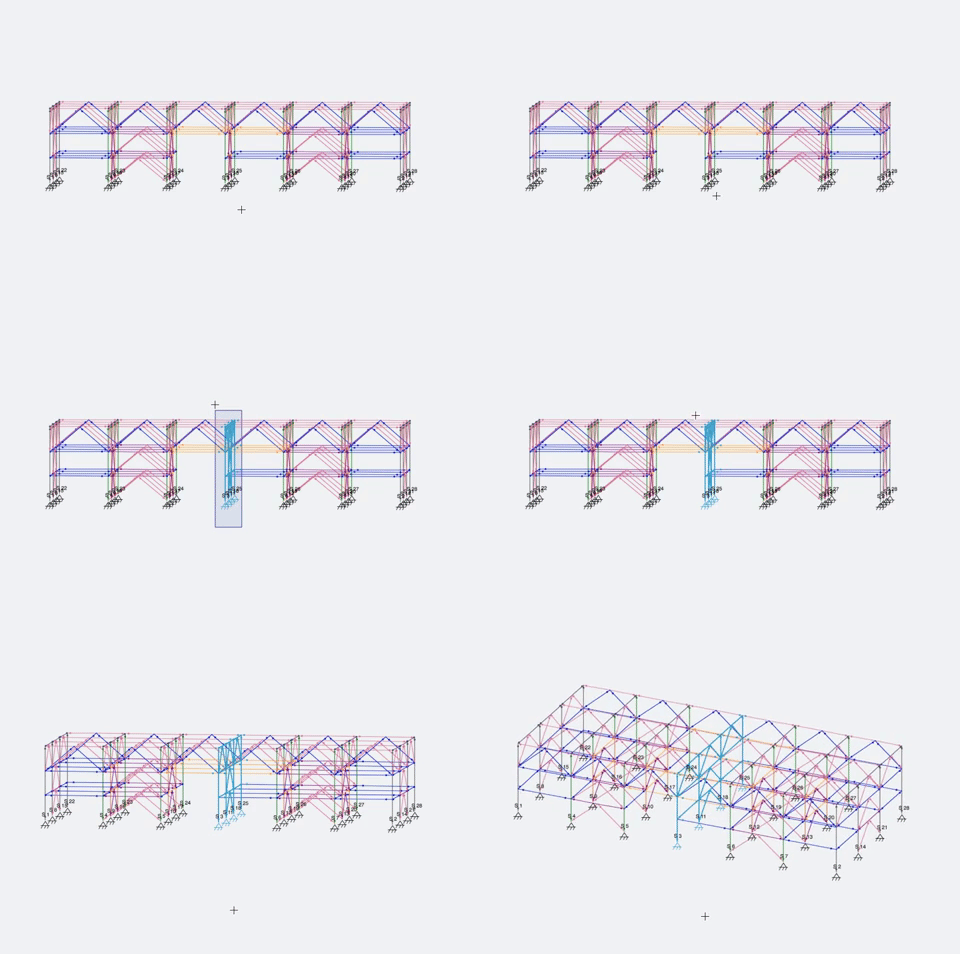
Hold CTRL, Click and Drag cursor from Left to Right to to select items touching the window:
Showing Hidden Items
To show hidden items, right click anywhere in the model space and select “Show All” in the popup menu.
Isolating Items
If you want to hide everything except for a few model items, there are a couple of ways to isolate them in the model space.
Go through the various model views, Front, Side, Top, etc, and hide things that you do not want to see by first selecting the members, and then hiding them:
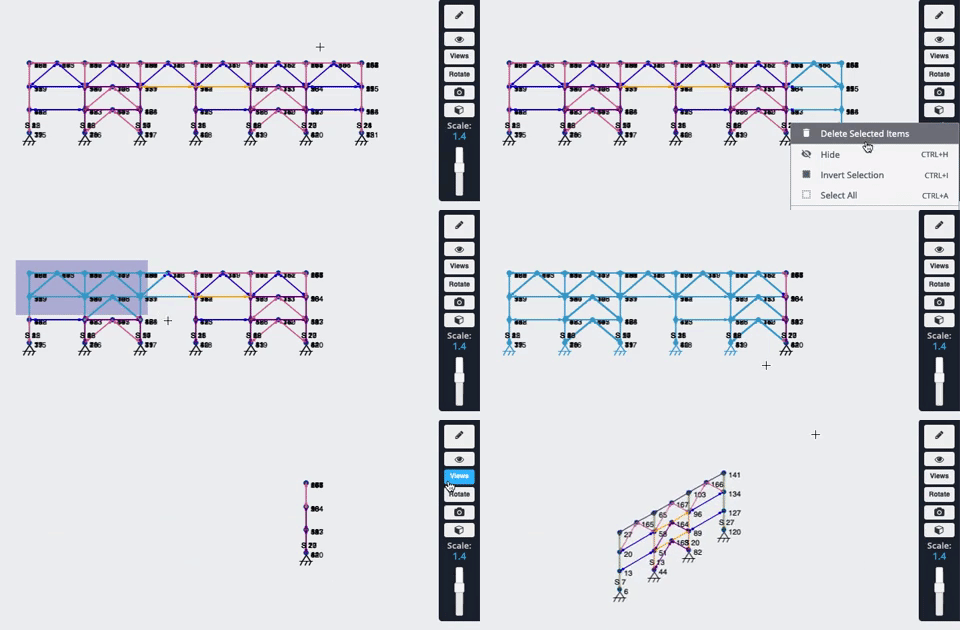
CTRL + Click all of the model pieces you want to isolate so that they all show up selected at one time. Then, either press CTRL + I, or Right Click and press Invert Selection to invert the selection. Finally, either press CTRL + H, or Right Click and press Hide Selection.
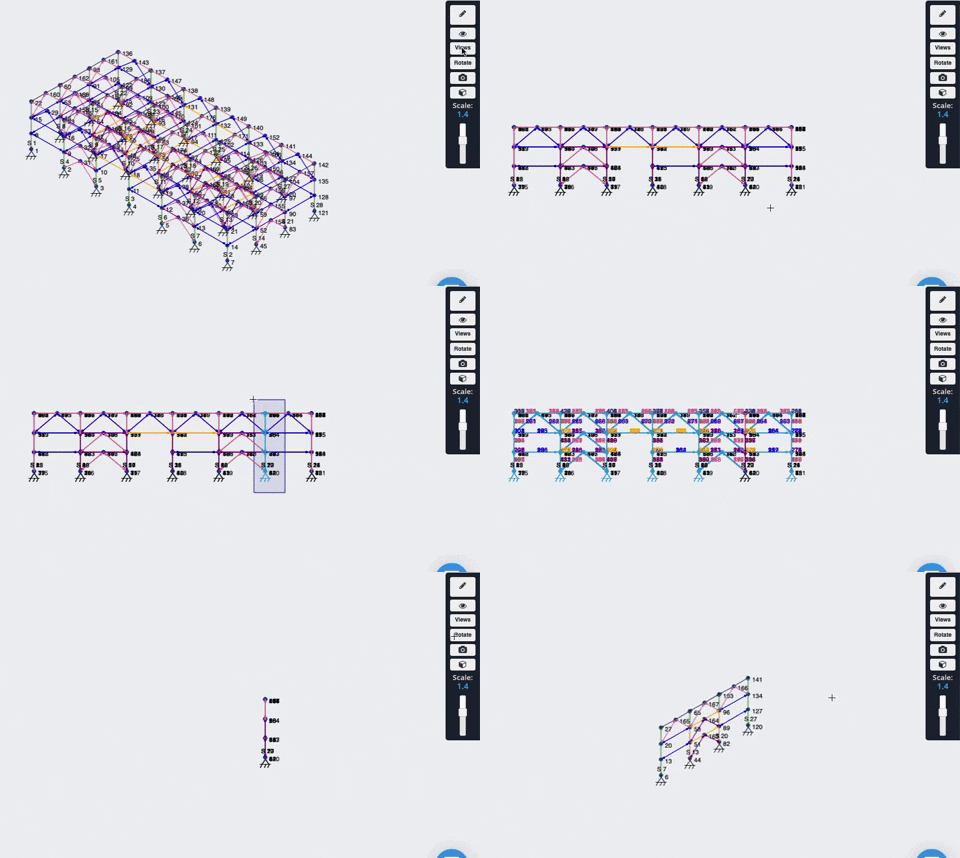
The result should be the refined number of 3D elements you identified.
Together, Grouping and Hiding accelerate the modelling of your real structure and let the user focus on the analysis and design.


