Integration between SkyCiv Structural 3D and Load Generator helps bridge the gap between load calculation and load application. With this integration, users can automatically generate loads in the Load Generator module, then apply them directly to their model in Structural 3D. This functionality is integrated directly in Structural 3D, so no need to go to any separate modules before hand. Subsequently, SkyCiv recommends completing the modeling stage of your structure before engaging in any Load Generator applications, as it will increase the overall accuracy of the process.
The following types of code-generated loads are available to be directly applied to models in Structural 3D
- Wind Loads
- Snow Loads (balanced case)
- Seismic Loads (as spectral loads)
Before going into this article, SkyCiv HIGHLY recommends going through the Software Documentation on Modeling in Structural 3D, Area & Wind Loads, as well as be familiar with the use of the standalone Load Generator, as all of those functions are relevant. This documentation will focus on the application of the loads using the integrated version of the Load Generator while operating in Structural 3D. Consequently, this documentation won’t go into depth on how to calculate each individual load, as they are very reliant on which code you are using. As mentioned, please go through linked documentation on the Load Generator and the prevailing building code, before going through this article.
To use the integrated Load Generator, finish modeling your structure, then go to Area Loads on the left input tab while operating in Structural 3D. Then, click on the “Autogenerate loads from design codes…“button.
Note: The simpler the structure is, the easier the integrated application will be. The more complex the model, the less accurate the application of the loads will be.
Applying Wind Loads from the Load Generator
At first glance you will notice that the full standalone version of the Wind Load generator now inhabits the left input side of the screen. Users enjoy all of the same functionality in the integrated version as they do in the standalone version. Things such as saving your calculation and printing site and wind load reports can be accomplished here. In the integrated Load Generator, the Structural 3D model will always be displayed on the right hand side of the screen.
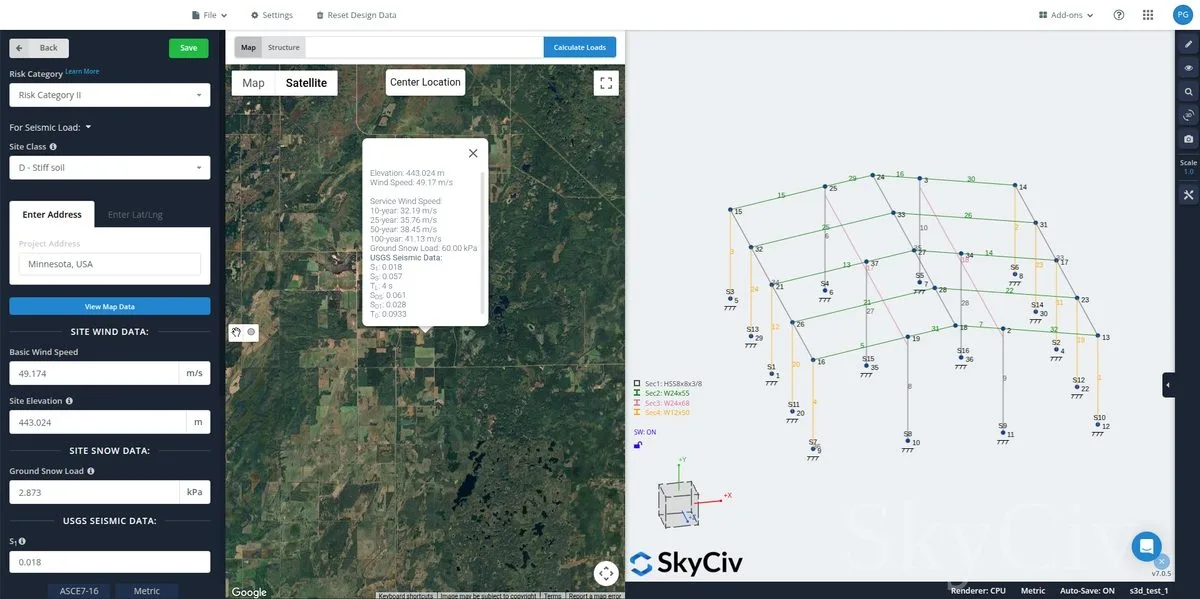
As you go through the inputs for the structure data, especially for Buildings, you have the option to automatically detect the dimensions of the model by selecting the wind orientation axis that the wind direction arrow will be parallel to. Once you selected an option for this, you can click the “Detect Building Dimensions” button to fill the detected structure dimensions from the model. Note that you will still need to double check these values to make sure that these values are correct. An option is to measure distances in the model by clicking-and-dragging between 2 nodes.

Once all the load parameters are complete, click on the Generate Loads button. There results will appear on different tabs, for wind, snow, or seismic load.
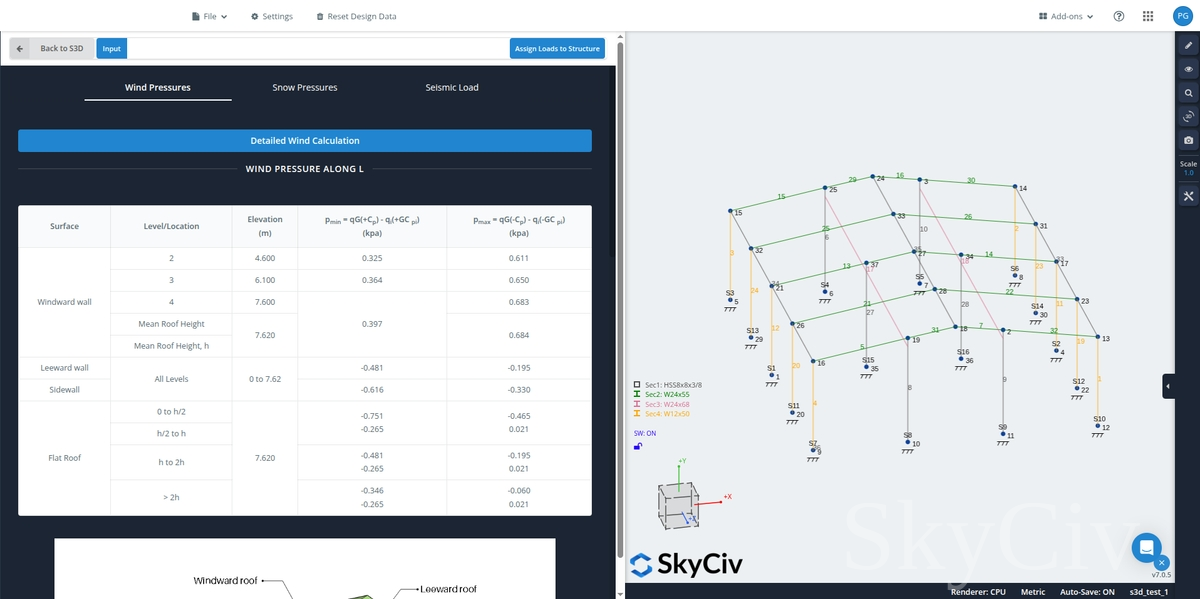

There will be a prompt that will ask you if you want to apply the loads for wind and snow loads. For seismic load, the option is to copy the generated design spectra to the Spectral Loads of the S3D.
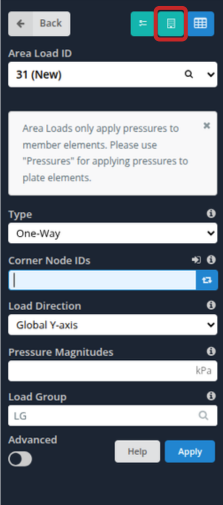
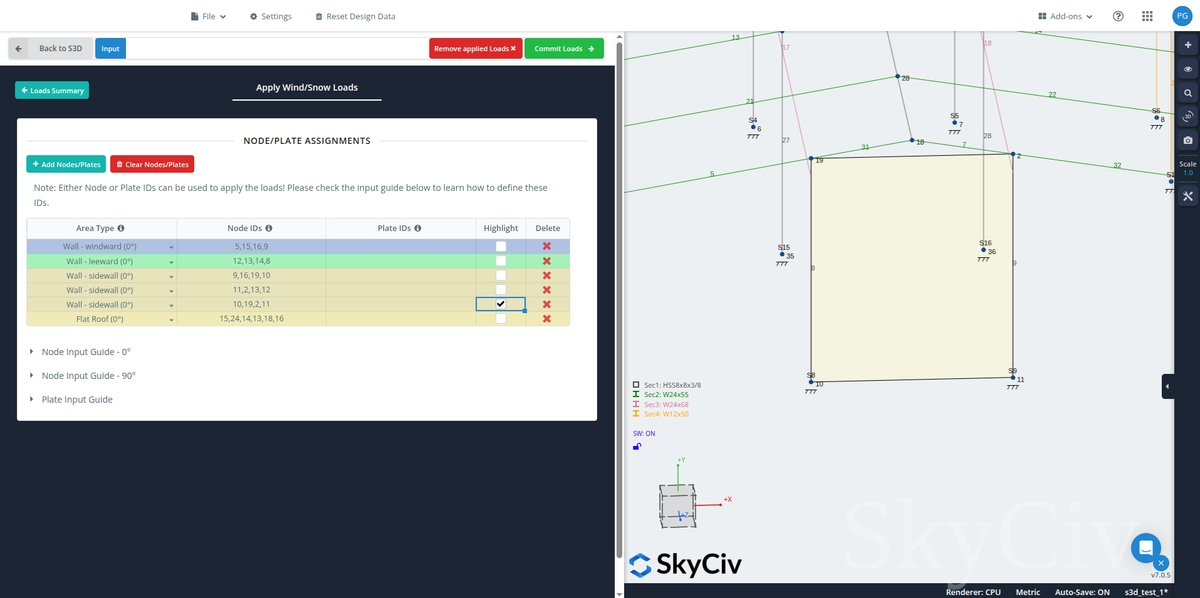
In applying the area loads for wind and snow loads, the node input guide for specific area type must be followed in order to apply the pressures correctly. These guide are shown at the bottom of the node entry table.
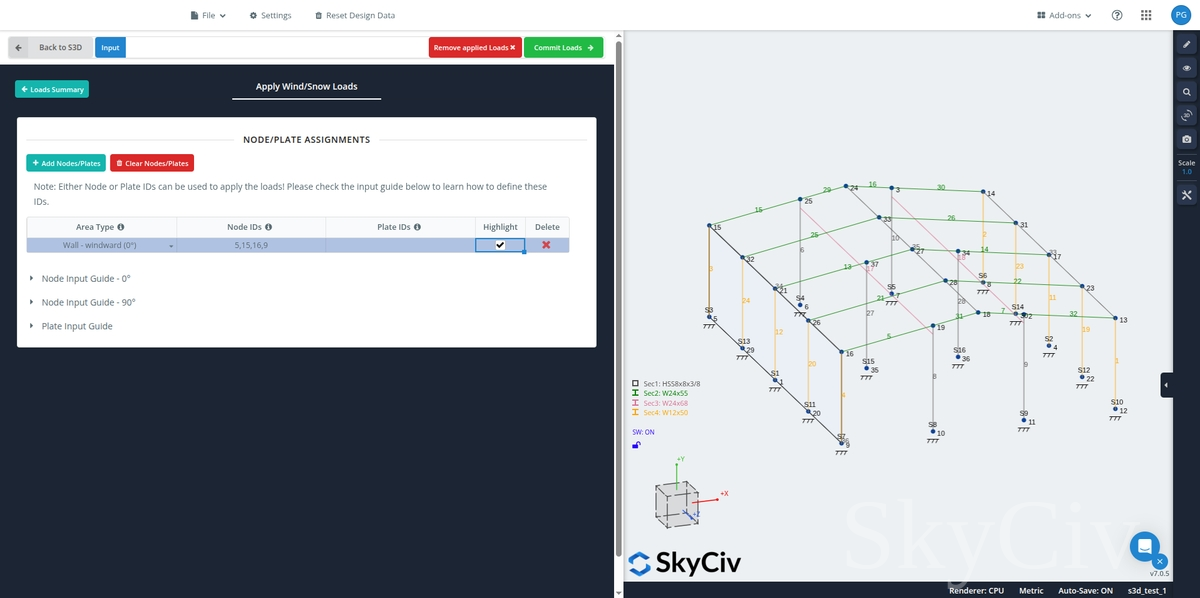
In the area type column, there are several options for wall and roof surfaces (for 0 degree):
- Windward Wall
- Leeward Wall
- Sidewall

- Windward/Upwind Roof
- Leeward/Downwind Roof
- Monoslope roof
- Flat roof (roof pitch angle less than 10 degrees)

Here are just some of the node area types that are needed to be defined in the Apply Loads section. In general, it is suggested that the node IDs create a quadrilateral surface. You can do an approximation of the total area as shown below:
With version 6.1.2, users should now be able to add 5 node IDs (bounded by five-sided polygon). Also, users will now be able to synchronize the edited node IDs of the applied pressure loads from the Load Generator in S3D especially if manual editing of the node input is needed to fix the area load variance.
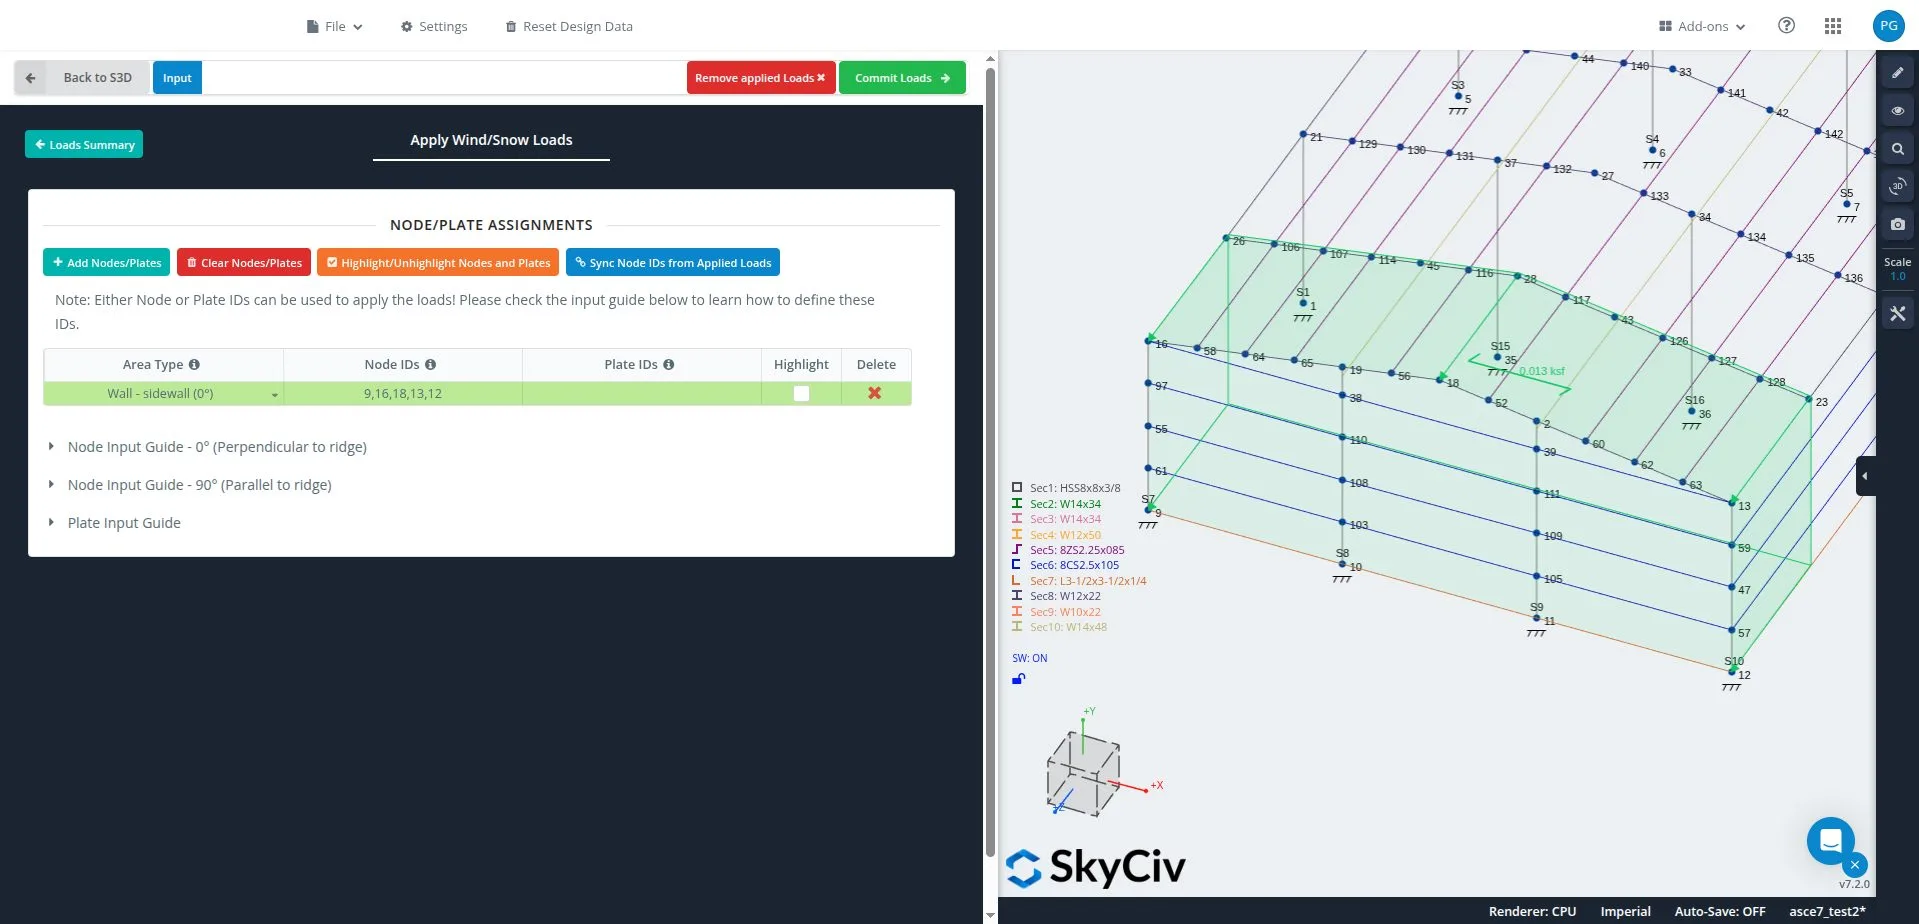
A sample of node input are shown below for the given structure with the corresponding assigned area type/surfaces:
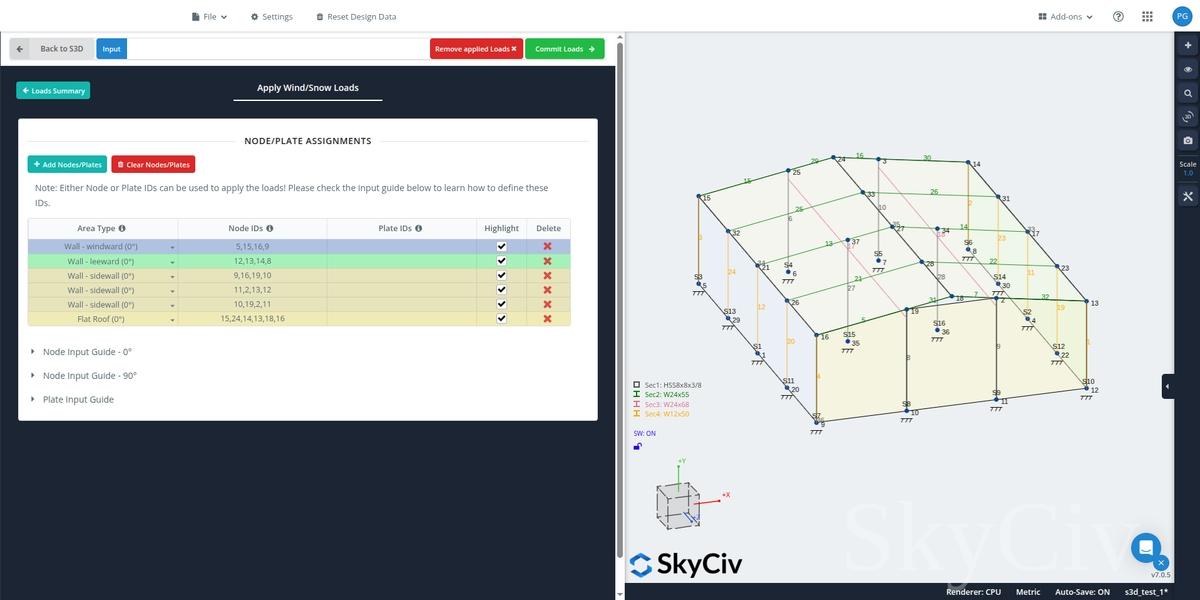
Once the area types are all defined, you should be able to apply the loads by clicking the “Commit Loads” button:
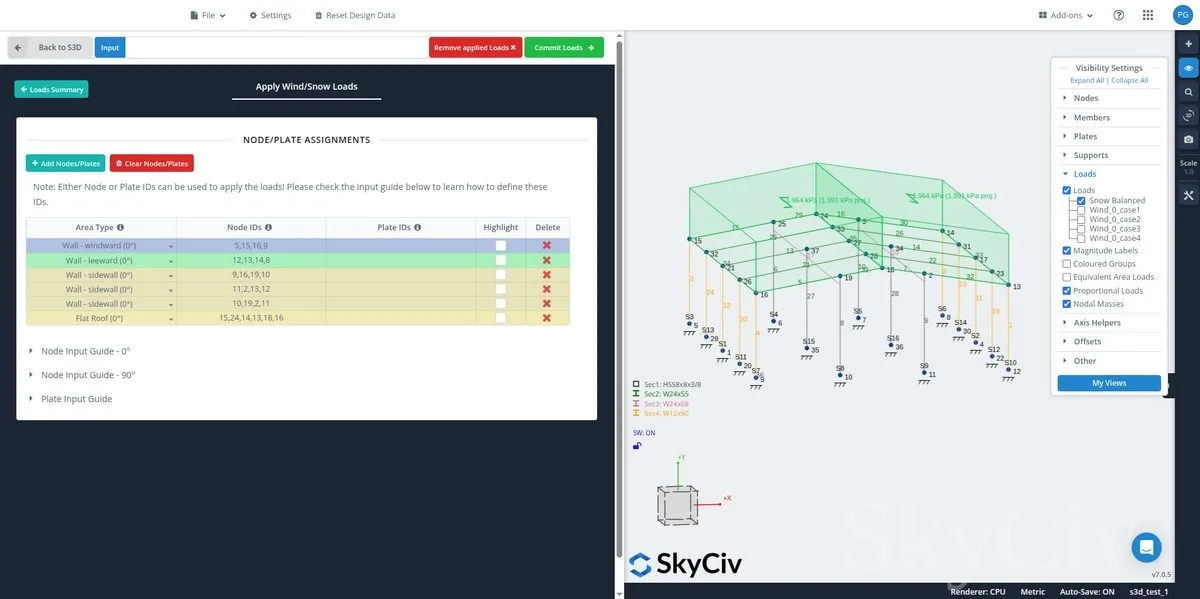
You should see that loads that were able to be generated and applied will show up in the 3D model space directly on your model. Each load case will be shown at the same time, so it might be harder to see what is going on. At the same time as the generator being open, you can toggle on and off the different load cases as well as hide or isolate members in the model space using the same visibility settings and tools available in Structural 3D.
An important note about Generated Wind Loads:
SkyCiv highly recommends checking out the Area and Wind Loads Software Documentation article for more in-depth information about the created area loads from the Load Generator.
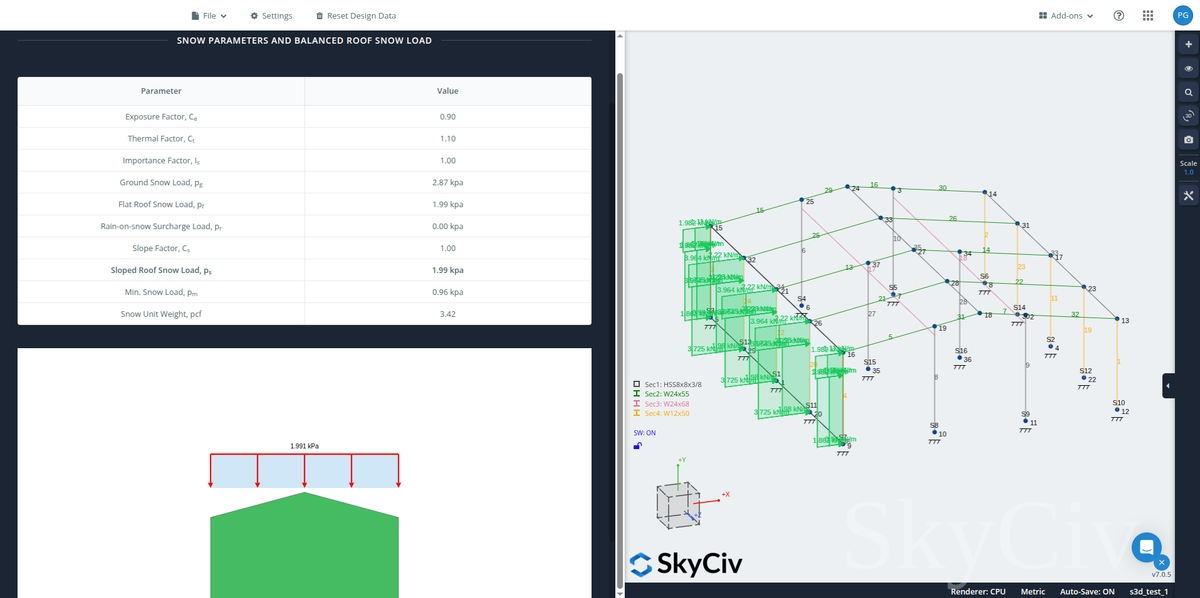
Applying Generated Snow Loads
In using the SkyCiv Load Generator inside the S3D, the balanced/undrifted case will be applied based on the selected roof profile as long as the roof area types are defined in the node entry table. Note that this load is applied as projected load.
Applying Generated Seismic Loads
In applying the seismic loads, the suggested method is to export the generated Design Spectrum for the structure to our Spectral Loads. Just click the “Export Response Spectrum Data to Spectral Loads” button!
Modifying or Resetting Loads
If at any point during the application of these generated loads you want to change the underlying parameter values, or start over, you may do so. To change or reset the loads, go to Area Loads > Load Generator as if you were going to apply the loads the in the first place, and you should see this message:
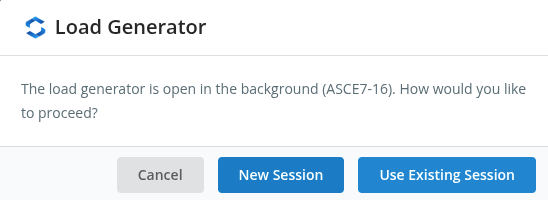
- To start over, hit the New Session button.
- To adjust the values for previously calculate loads, hit the Use Existing Session button.
Both options will bring you back to the integrated load generator page.