Video tutorial on how to build and design a Boomilever structure for Science Olympiad
As a proud sponsor of Science Olympiad, SkyCiv is offering students an exclusive offer to get access to our software to help them design their Boomilever structures using a fun and interactive software called SkyCiv Structural 3D (S3D)
1. Model the Structure
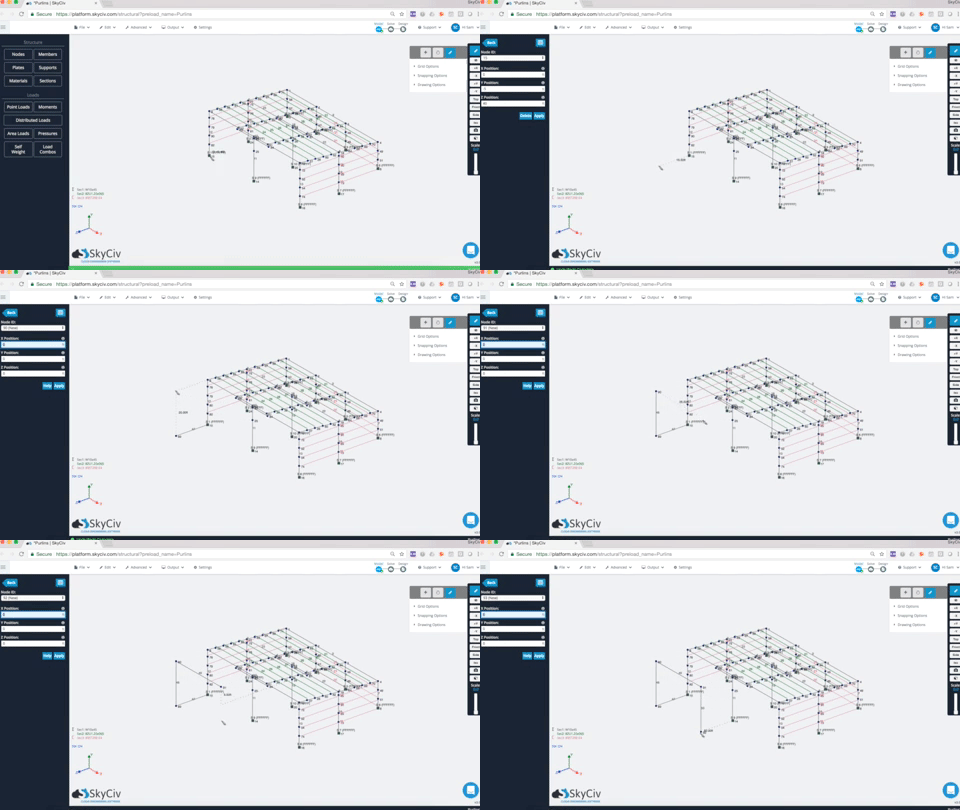
Start by modeling (building) your structure in SkyCiv Structural 3D (S3D). To do this, you can enter the node locations, or use the pen tool to draw out the nodes and members of your Boomilever structure. As an example, I will build mine in the x-direction, then up in the y. A few things to remember here:
- Use Nodes to define the start and end location of all nodes
- Nodes are in the global X, Y, Z coordinates
- Make sure all members are connected by nodes
- Add supports (pinned) where you plan to anchor your structure
- Use the pen tool to quickly add nodes and members

2. Add your Balsa Wood Material
The main Science Olympiad Material used is Balsa Wood. So we need to know the material properties of Balsa Wood in order to understand its strength. We will be assuming American Balsa Wood, with the following material properties. To add a material click Materials then enter in the following material properties:
| American Balsa Wood Properties | |
|---|---|
| Density | 130 kg/m3 |
| Young’s Modulus | 3,000 MPa |
| Poisson’s Ratio | 0.231 Assumes µTR, 12% moisture |
| Compressive Strength | 7 MPa |
| Tensile Strength: Ultimate (UTS) | 14 MPa |
3. Add your Section
Once you are happy with the shape of the structure, it’s time to define how big the cross section is. In the competition, you can use multiple sizes, in this example we will make the base 10 x 10mm sticks and the internal members 5 x 5mm. The 5mm sticks will be set as Section ID 1 and the 10mm sticks will be Section ID 2.
4. Add Loads!
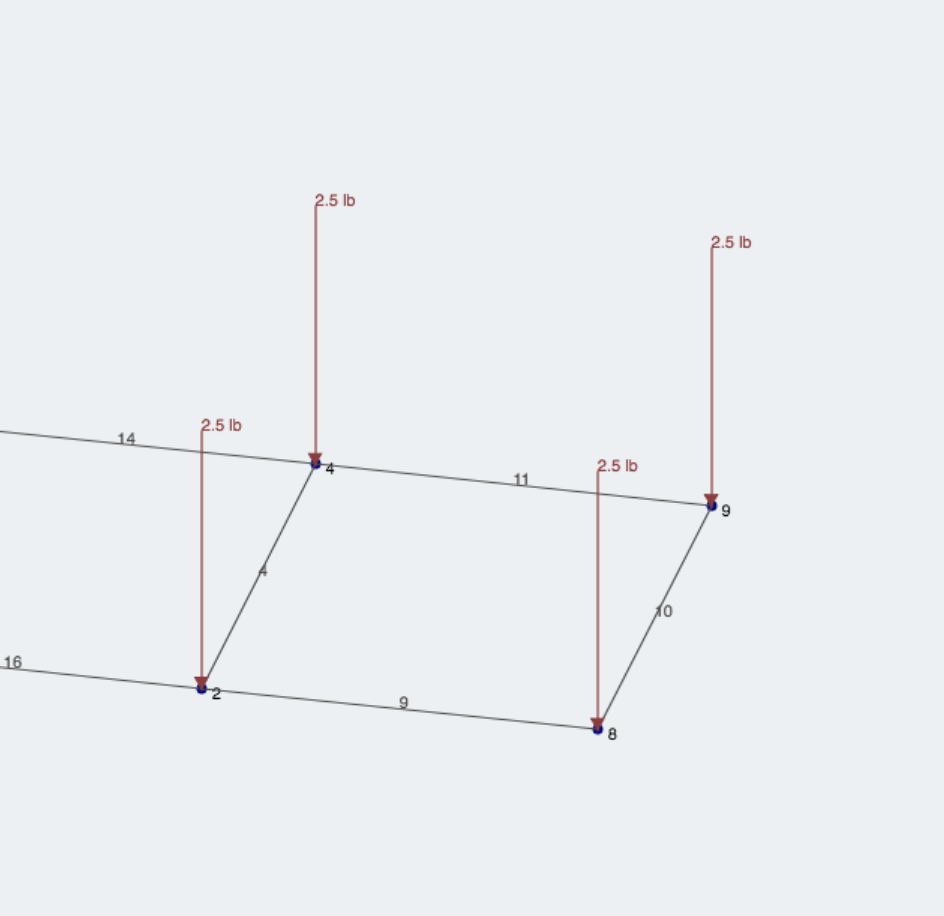
Time to see how much your structure can hold! We are going to aim for a structure that can hold 4kg. I will apply these loads over 4 nodes at the end. This will mimic the actual behavior, where the force is distributed across different points. Finally, I will toggle on the Self Weight of the Structure by clicking Self Weight -> ON.
Finally, we want to add the 4kg load to the end of the structure. To do this, I’m going to split it into 4 parts and apply the 1kg loads to the nodes like so:

5. Review the Results
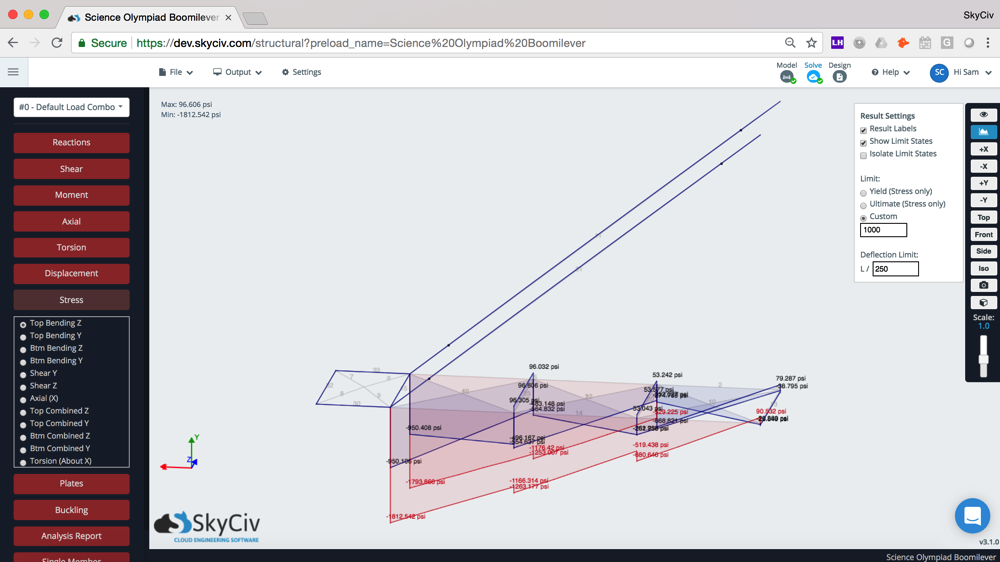
It’s time to see if your structure held up! A structure will generally fail because the stress on a member exceeds the material’s strength. Let’s look at our stress results and determine where and why our structure failed:

6. Get the Structure Weight
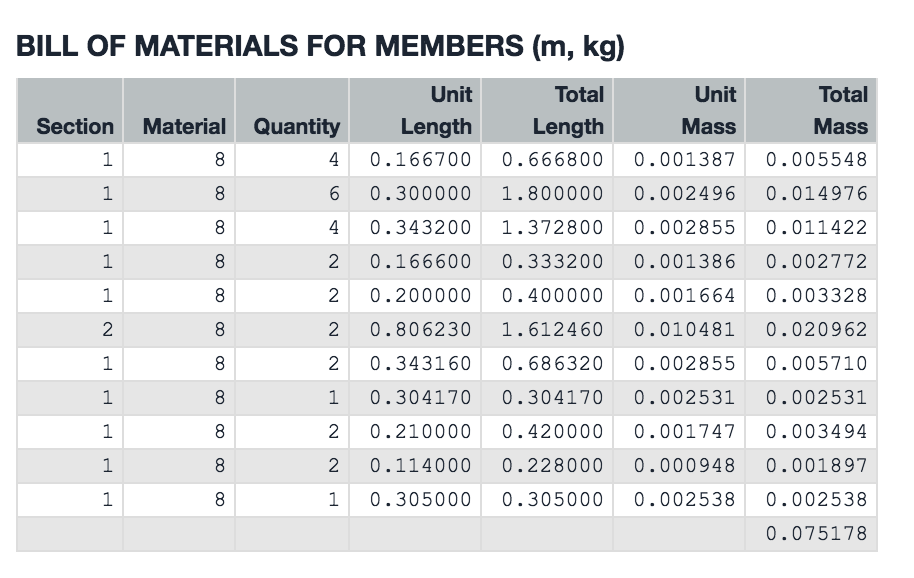
With SkyCiv you can even get the weight of your structure before you build it. It will even give you the Bill of Materials so you know how long to cut each piece, and how many pieces you need to cut. After you have solved simply click Analysis Report to get a report with the Bill of Materials:

TIP: Experiment!
The best way to get the best design is to experiment. But you don’t need to keep building and destroying your structure to test new designs. Sign up for a SkyCiv Science Olympiad Account and start using SkyCiv for your designs today!
Original Source: https://skyciv.com/education/how-to-design-a-boomilever/


