Τι είναι οι γραμμές κυκλοφορίας?
Εάν θέλετε να λάβετε γραμμές επιρροής για τυχόν υπολογισμένες τιμές σε τμήματα και κόμβους του μοντέλου, πρέπει πρώτα να ορίσετε τις διαδρομές κίνησης για ένα φορτίο μονάδας στον προεπεξεργαστή. Το εργαλείο Traffic Lines σάς επιτρέπει να το κάνετε αυτό.
Πως δουλεύει
Ένα σύντομο παράδειγμα βίντεο 1
Ένα σύντομο παράδειγμα βίντεο 2
Το κουμπί για να ανοίξετε το παράθυρο παραμέτρων Traffic Lines βρίσκεται στον αριστερό πίνακα διεπαφής στην ενότητα Moving Loads.
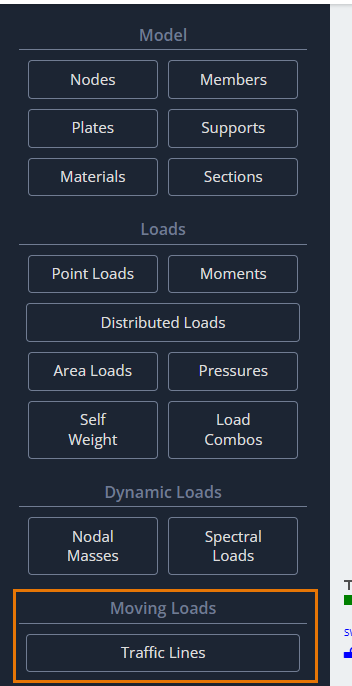
Αφού κάνετε κλικ σε αυτό το κουμπί, θα εμφανιστεί το παράθυρο διαλόγου Traffic Lines στην περιοχή μοντελοποίησης για να ορίσετε τις παραμέτρους του.
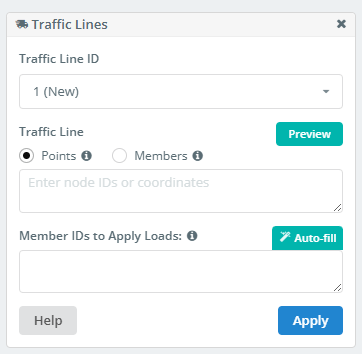
Αναγνωριστικό γραμμής κυκλοφορίας
Μια λίστα με όλες τις γραμμές κυκλοφορίας που ορίζονται στο μοντέλο. Μπορείτε να επιλέξετε, επεξεργασία, ή διαγράψτε ένα εάν δεν χρειάζεται πλέον.
Μια γραμμή κυκλοφορίας είναι μια γραμμή στο διάστημα. Αυτή η γραμμή δεν χρειάζεται να είναι ευθεία. Υπάρχουν δύο μέθοδοι για τον καθορισμό μιας τέτοιας γραμμής. Η πρώτη μέθοδος χρησιμοποιεί υπάρχοντα σημεία στο μοντέλο ή άμεση είσοδο συντεταγμένων για τις κορυφές της γραμμής.
Καθορισμός γραμμών κυκλοφορίας με χρήση σημείων
Πόντοι
Αν η γραμμή κυκλοφορίας είναι ευθεία, αρκεί να ορίσουμε δύο σημεία: την αρχή και το τέλος.
- Να ορίσετε με σημεία, καθορίστε τα αναγνωριστικά κόμβων σε αυτήν τη μορφή:
1;4 - Κατά τον ορισμό σημείων με συντεταγμένες, πρέπει να εισαχθούν σε αυτή τη μορφή:
0,2.3,0; 210,2.3,0
Αναγνωριστικά μελών για την εφαρμογή φορτίων
Να ληφθούν οι τιμές των παραγόντων που μελετώνται, πρέπει να γίνει μια σειρά στατικών αναλύσεων. Το πρόγραμμα πρέπει να γνωρίζει πού να τοποθετήσει τη δύναμη μονάδας σε κάθε στατική φόρτιση. Για να το κάνω αυτό, πρέπει να ορίσετε ένα σύνολο μελών.
Θα εφαρμοστεί η μονάδα δύναμης και θα δημιουργηθούν περιπτώσεις φόρτωσης στα σημεία διασταύρωσης/επάθεσης αυτών των μελών με τη γραμμή κυκλοφορίας. Αυτή η διαδικασία πραγματοποιείται αυτόματα όταν εκτελείται η ανάλυση.
Όσες περισσότερες διασταυρώσεις έχετε, τόσο πιο ακριβής είναι η γραμμή επιρροής που θα έχετε. Ωστόσο, πάρα πολλές διασταυρώσεις θα οδηγήσουν σε μεγάλους χρόνους υπολογισμού. Επιλέξτε έναν λογικό αριθμό.
- Η λίστα των μελών εισάγεται στη μορφή:
1, 2, 3, 4 - Χρήση “Αυτόματη συμπλήρωση”. Η λίστα θα οριστεί αυτόματα και στη συνέχεια μπορεί να επεξεργαστεί χειροκίνητα.
Καθορισμός γραμμών κυκλοφορίας με χρήση μελών
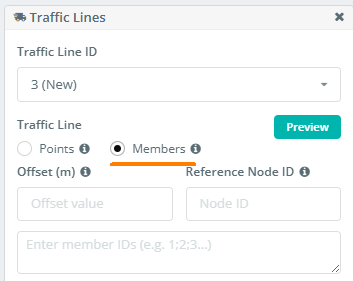
Εναλλακτικά, μπορείτε να ορίσετε τη διαδρομή γραμμής κυκλοφορίας χρησιμοποιώντας μια αλυσίδα μελών. Αυτή η προσέγγιση είναι ιδιαίτερα χρήσιμη όταν η επιδιωκόμενη διαδρομή είναι κυρτή και ακολουθεί την καμπυλότητα ενός δομικού μέλους (σαν δοκός γέφυρας, και τα λοιπά.).
Για να το κάνω αυτό, εισάγετε τα μέλη για τη διαδρομή στη λίστα με τη μορφή: 1;2;7;4;5;12… ή 1-25 αν τα μέλη της αλυσίδας είναι διαδοχικά.
Αντισταθμίζεται
Αυτό το πεδίο ορίζει την απόσταση μετατόπισης από την καθορισμένη αλυσίδα μελών. Επομένως, είναι χρήσιμο εάν η γραμμή κυκλοφορίας πρέπει να ακολουθεί το σχήμα της αλυσίδας μέλους αλλά όχι την ακριβή θέση της.
Αναγνωριστικό κόμβου αναφοράς
Εδώ, θα καθορίσετε το αναγνωριστικό του κόμβου που καθορίζει την κατεύθυνση της μετατόπισης για τη γραμμή κυκλοφορίας από την καθορισμένη αλυσίδα μέλους.
Τελικά, αφού καθορίσουμε όλες τις παραμέτρους, Συμπληρώστε τα πεδία Ισχύουν για να προσθέσετε τη γραμμή κυκλοφορίας στη λίστα.
Γραμμές επιρροής
Μετά την εκτέλεση της ανάλυσης στο μοντέλο με καθορισμένες γραμμές κυκλοφορίας, μπορείτε να αναλύσετε τα αποτελέσματα ως γραμμές επιρροής. Για να το κάνω αυτό, πρέπει να βρείτε το Γραμμές επιρροής κουμπί στον αριστερό πίνακα διεπαφής στον μετα-επεξεργαστή.
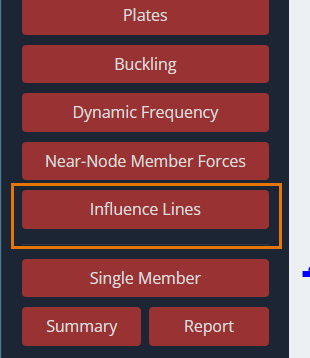
Αφού κάνετε κλικ σε αυτό το κουμπί, ο Γραμμή επιρροής Θα εμφανιστεί το πλαίσιο διαλόγου στην περιοχή μοντελοποίησης για να ορίσετε τις παραμέτρους του.
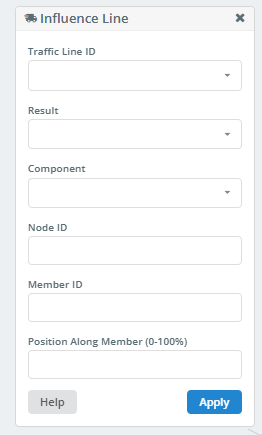
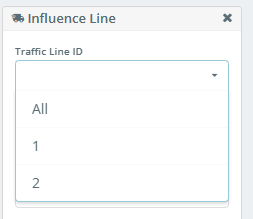
Αναγνωριστικό γραμμής κυκλοφορίας
Σε αυτήν την αναπτυσσόμενη λίστα, μπορείτε να επιλέξετε το αναγνωριστικό της γραμμής κυκλοφορίας για την οποία θα κατασκευαστεί η γραμμή επιρροής. Μπορείτε επίσης να δημιουργήσετε γραμμές επιρροής για όλες τις γραμμές κυκλοφορίας επιλέγοντας “Ολα”.
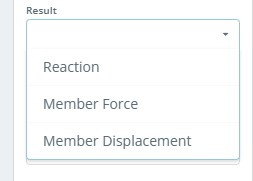
Αποτέλεσμα
Αυτή η λίστα σάς επιτρέπει να επιλέξετε τον τύπο αποτελέσματος για τη δημιουργία της γραμμής επιρροής.
Συστατικό
Αυτή η λίστα εμφανίζει τις προκύπτουσες τιμές για αντιδράσεις σε υποστηριζόμενους κόμβους, ή δυνάμεις και μετατοπίσεις σε τμήματα μελών. Τα περιεχόμενα αυτής της λίστας εξαρτώνται από την επιλογή στο “Αποτέλεσμα” λίστα.
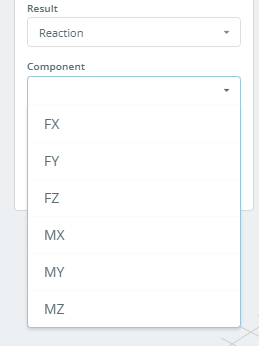
Αν “Αποτέλεσμα” Έχει οριστεί Αντίδραση, η λίστα θα μοιάζει με αυτό:
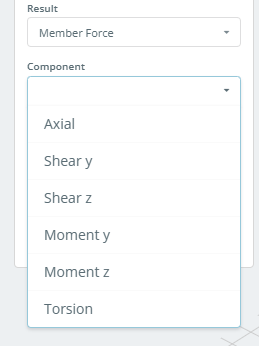
Αν “Αποτέλεσμα” Έχει οριστεί Δύναμη Μέλους, η λίστα θα μοιάζει με αυτό:
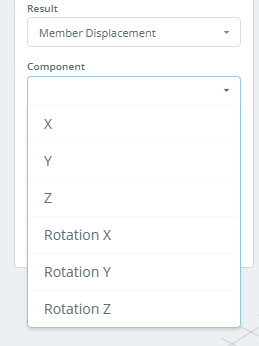
Αν “Αποτέλεσμα” Έχει οριστεί Μετατόπιση μελών, η λίστα θα μοιάζει με αυτό:
Αναγνωριστικό κόμβου
Αν “Αποτέλεσμα” Έχει οριστεί Αντίδραση, πρέπει να καθορίσετε το αναγνωριστικό του υποστηριζόμενου κόμβου για τον οποίο θα κατασκευαστεί η γραμμή επιρροής.
ταυτότητα μέλους
Αν “Αποτέλεσμα” Έχει οριστεί Δύναμη Μέλους ή Μετατόπιση μελών, πρέπει να καθορίσετε το αναγνωριστικό μέλους για το οποίο θα κατασκευαστεί η γραμμή επιρροής.
Θέση κατά μήκος μέλους (0-100%)
Αυτό το πεδίο καθορίζει τη θέση του τμήματος στο μέλος για το οποίο θα κατασκευαστεί η γραμμή επιρροής. Οι συντεταγμένες της ενότητας ορίζονται ως ποσοστό του συνολικού μήκους μέλους, μετριέται από την αρχή του μέλους.
Αφού κάνετε κλικ στο Ισχύουν κουμπί, η γραμμή επιρροής απεικονίζεται γραφικά στο μοντέλο.
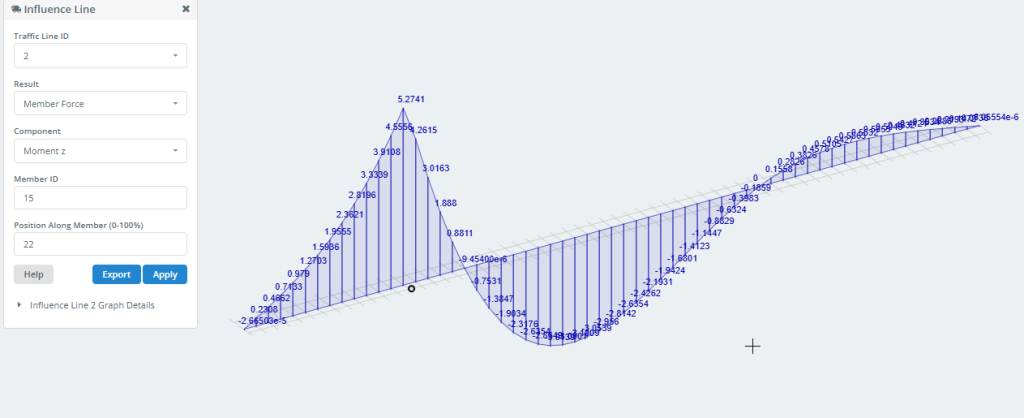
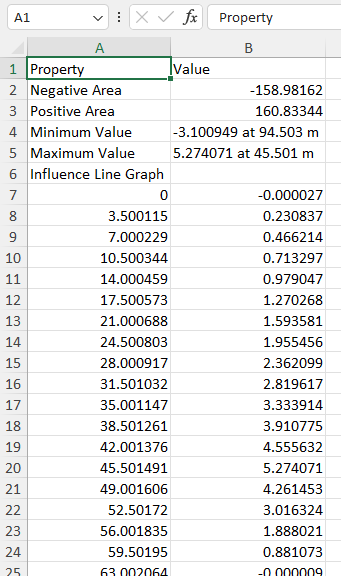
ο Εξαγωγή Το κουμπί σάς επιτρέπει να αποθηκεύετε τα δεδομένα γραμμής επιρροής στον υπολογιστή σας ως αρχείο Excel.
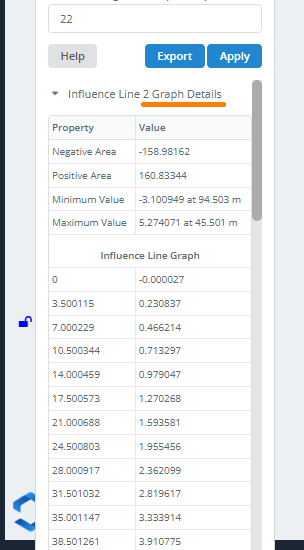
Μπορείτε επίσης να λάβετε αυτές τις πληροφορίες κάνοντας κλικ στο Λεπτομέρειες γραφήματος.
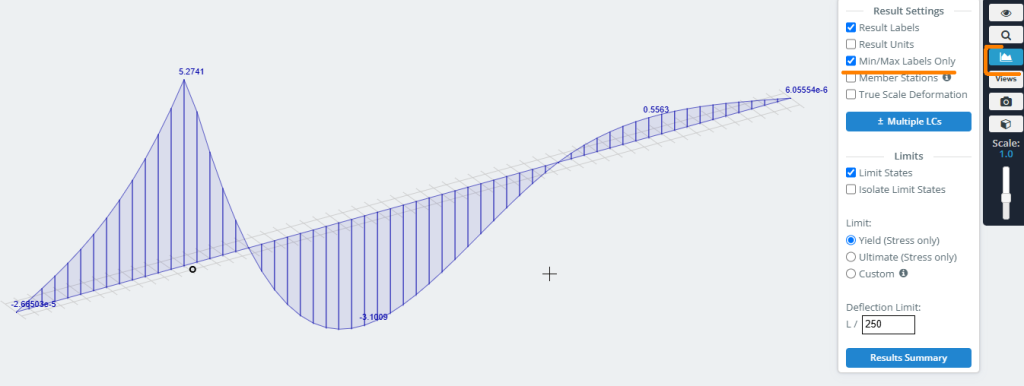
Για εμφάνιση μόνο των ελάχιστων/μέγιστων τιμών στο γράφημα, χρησιμοποιήστε τις παρακάτω ρυθμίσεις στο μενού της δεξιάς πλευράς: