Ο τομέας του SkyCiv σας επιτρέπει να ανεβάσετε τις δικές σας προσαρμοσμένες βιβλιοθήκες χρησιμοποιώντας επεξεργαστές υπολογιστικών φύλλων που δημιουργήθηκαν δεδομένα όπως το Microsoft Excel ή το Google Sheets και εξάγονται σε μορφή CSV. Τα πρότυπα τμήματος CSV μπορούν να μεταφορτωθούν μέσω του Οικοδόμος ενότητας SkyCiv και αποθηκεύονται στο χώρο αποθήκευσης σύννεφων, ώστε να μπορείτε να τα έχετε πρόσβαση σε οποιαδήποτε στιγμή με τον λογαριασμό σας στο SkyCIV.
Δημιουργία βιβλιοθηκών τμήματος σε μορφή CSV
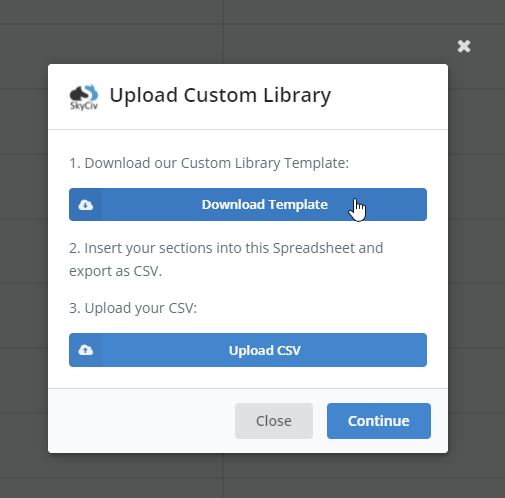
Ένα υπολογιστικό φύλλο έχει προβλεφθεί για τις βιβλιοθήκες κτιρίων για να εξασφαλιστεί ότι τα δεδομένα τμήματος είναι συμβατά με τον οικοδόμο του τμήματος SkyCIV. Μπορείτε να κατεβάσετε το υπολογιστικό φύλλο προτύπου από το Λήψη προτύπου κουμπί στο uploader ή από αυτό Σύνδεσμος.
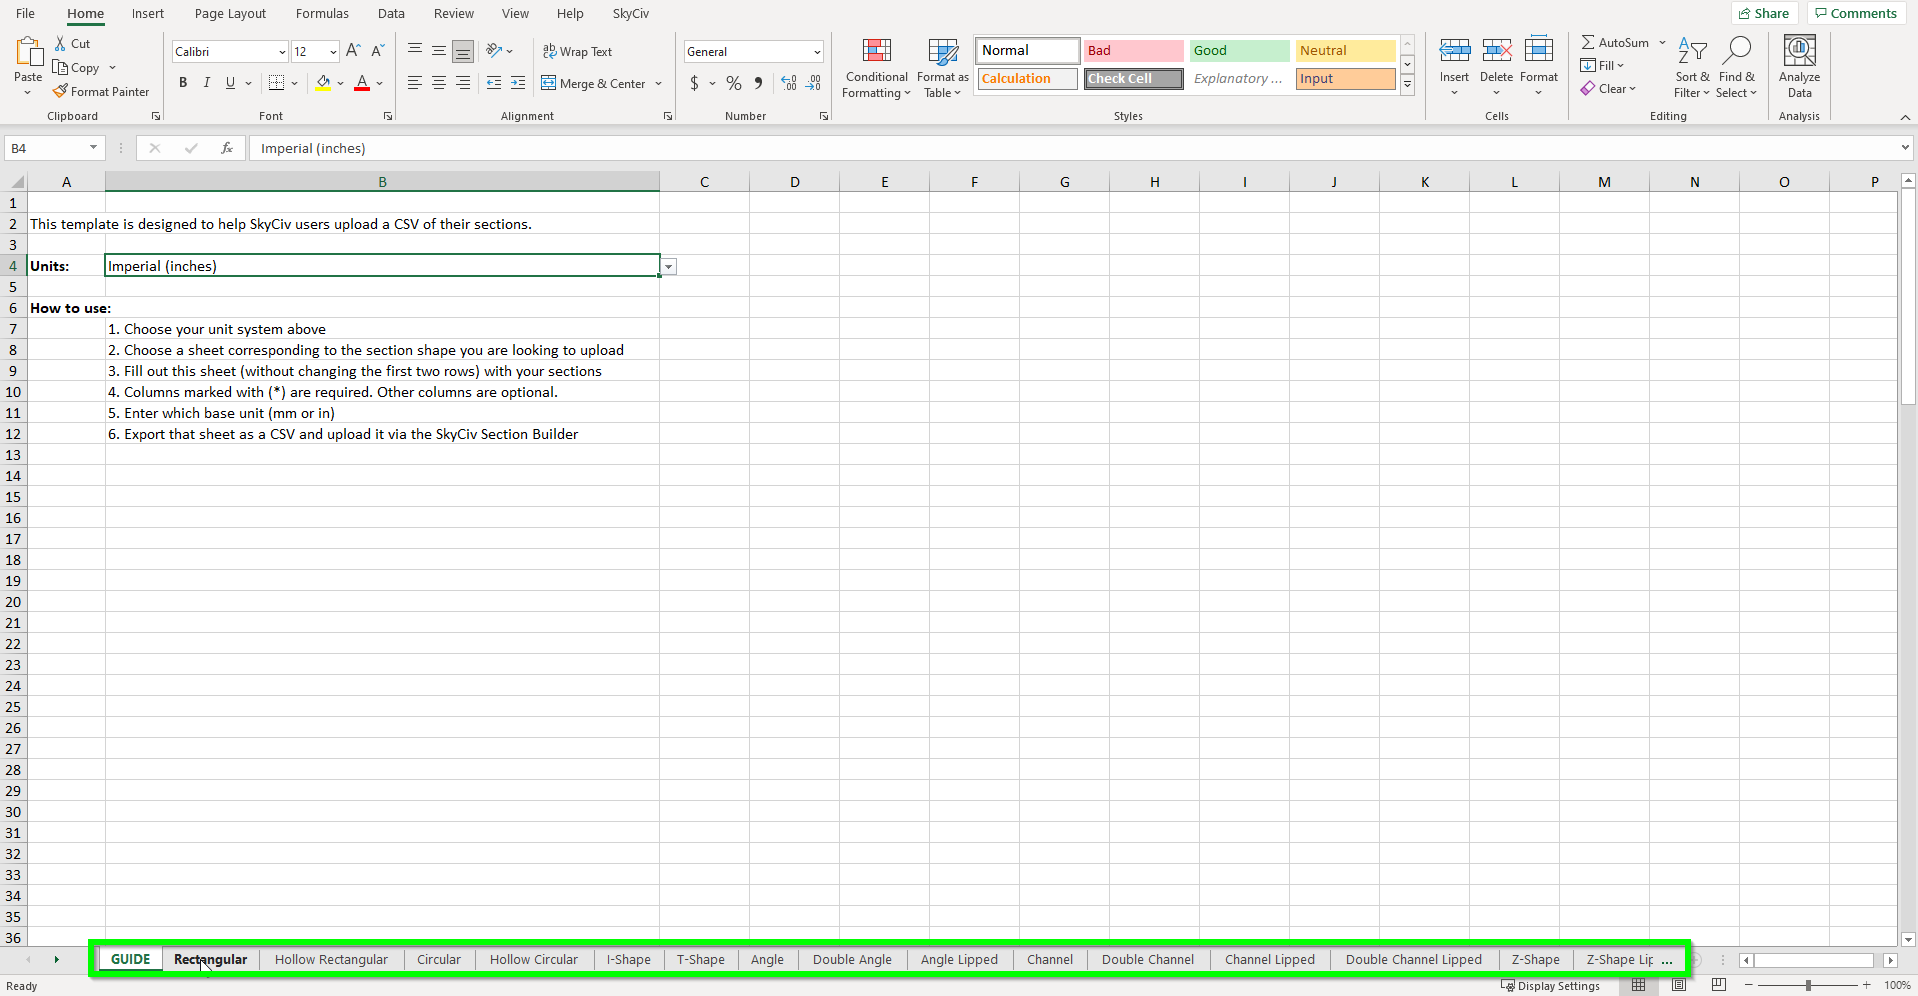
Το υπολογιστικό φύλλο προτύπου μπορεί να ανοίξει στο Microsoft Excel. Επισκεφτώ το "ΟΔΗΓΟΣ" φύλλο για να επιλέξετε το σύστημα μονάδας σας για τα τμήματα σας. Όλα τα τμήματα στη βάση δεδομένων CSV πρέπει να είναι το ίδιο σχήμα και σύστημα μονάδων. Εάν χρειάζεστε πολλαπλές μονάδες και βάσεις δεδομένων σχήματος, Μπορείτε να δημιουργήσετε πολλαπλά CSV και να τα ανεβάσετε ξεχωριστά.
Επί του παρόντος, Το υπολογιστικό φύλλο προτύπου ενότητας υποστηρίζει τα ακόλουθα σχήματα:
- Ορθογώνιος
- Κοίλο ορθογώνιο
- Εγκύκλιος
- Κοίλη εγκύκλιος
- I-Shape
- T-Shape
- Γωνία (L-Shape)
- Διπλή γωνία (L-Shape)
- Γωνιά (L-Shape)
- Κανάλι
- Διπλό κανάλι
- Διπλό κανάλι LIP
- Κιβώτιο δοκού
- Z-Shape
- Lipped Z-Shape
- Καπέλο σε σχήμα
Κάθε ένα από αυτά τα σχήματα έχει ένα μοναδικό υπολογιστικό φύλλο στο πρότυπο. Επιλέξτε την επιλογή που θέλετε στο κάτω μέρος του υπολογιστικού φύλλου προτύπου για να ξεκινήσετε την οικοδόμηση της βιβλιοθήκης σας.
Επεξεργασία του προτύπου
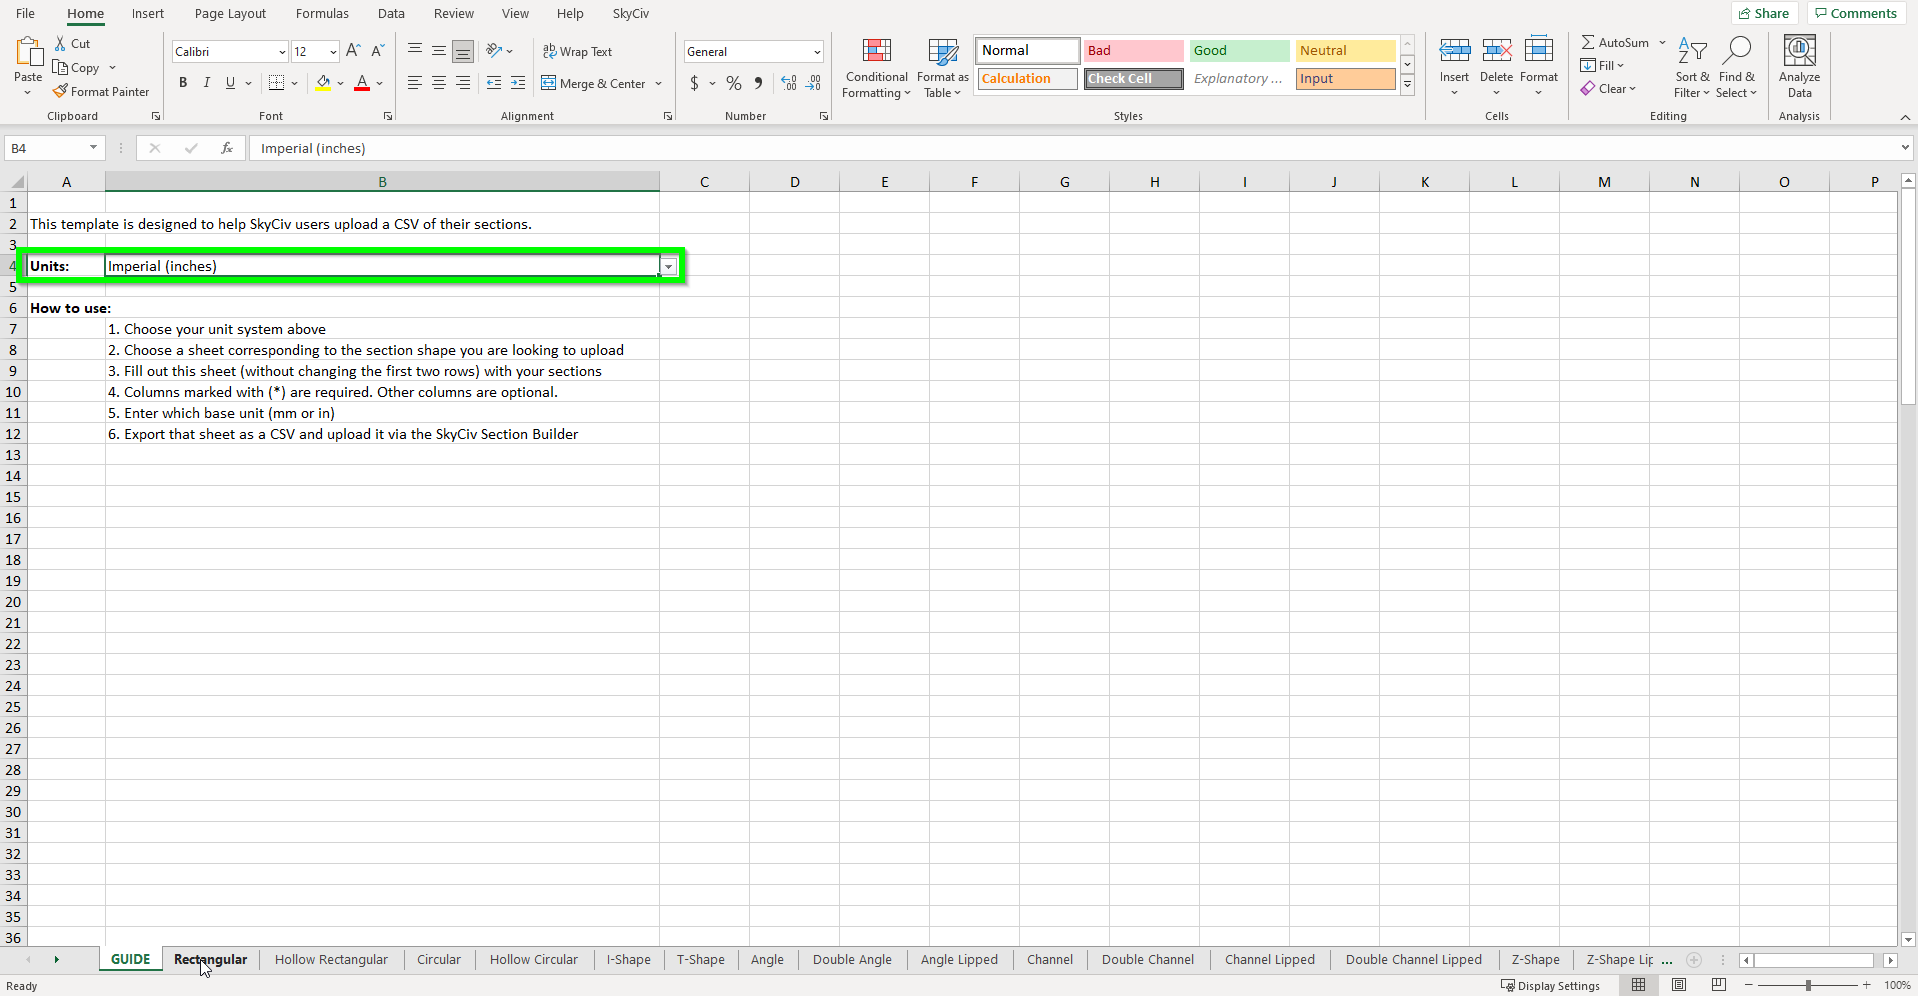
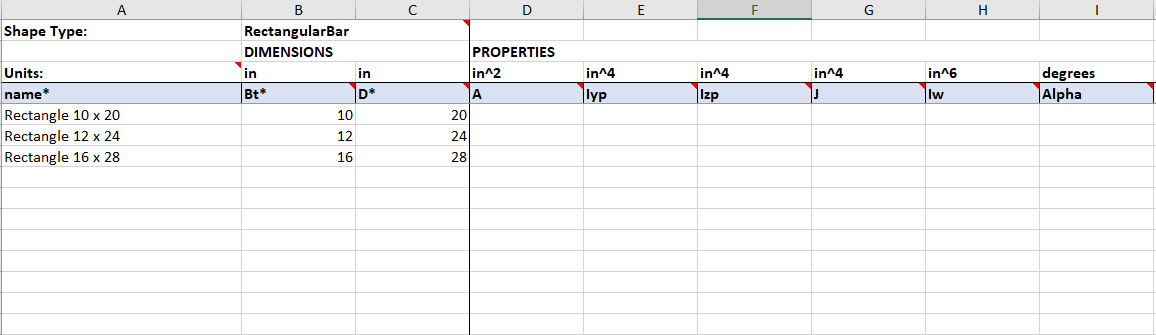
Μόλις επιλέξετε το σχήμα του τμήματος που επιθυμείτε, Μπορείτε να αρχίσετε να χτίζετε τη βάση δεδομένων σας. Μην επεξεργαστείτε τις πρώτες τέσσερις σειρές του υπολογιστικού φύλλου; σε διαφορετική περίπτωση, Η μεταφόρτωση CSV δεν θα λειτουργήσει. Εάν πρέπει να αλλάξετε το σύστημα μονάδας σας, επιστρέψτε στο “ΟΔΗΓΟΣ” φύλλο και χρησιμοποιήστε το μενού στο B4 για να ενημερώσετε όλες τις διαστάσεις στις σωστές μονάδες.
Κάθε ενότητα που ανεβάζετε θα απαιτήσει ένα μοναδικό όνομα. Κάθε σειρά τμήματος έχει δύο σύνολα δεδομένων. Το πρώτο σετ είναι οι διαστάσεις σχήματος με τα απαιτούμενα πεδία που επισημαίνονται με ένα Asterix (*). Κάθε σειρά παραθέτει επίσης τις βασικές μονάδες για αυτήν την ιδιότητα της ενότητας. Το δεύτερο σύνολο δεδομένων είναι οι ιδιότητες της ενότητας. Αυτά τα πεδία δεν απαιτούνται και μπορούν να μείνουν κενά για να υπολογιστούν από τον οικοδόμο της ενότητας. Εάν επιθυμείτε να δώσετε μια τιμή για μια ιδιότητα SELECT, Παράρτιση της συμπλήρωσης του απαιτούμενου πεδίου, και ο οικοδόμος του τμήματος SkyCIV θα το χρησιμοποιήσει στη θέση του υπολογιζόμενου αποτελέσματος.
Μόλις συμπληρώσετε όλες τις διαστάσεις και τις ιδιότητές σας για αυτό το σχήμα, Το υπολογιστικό φύλλο πρέπει να εξάγεται ως αρχείο CSV.
Για να το κάνετε αυτό στο Microsoft Excel, επίσκεψη Αρχείο > Εξαγωγή > Αλλαγή τύπου αρχείου και επιλέξτε CSV ως τύπο αρχείου. Κάντε κλικ Αποθήκευση ως και επιλέξτε μια τοποθεσία για να αποθηκεύσετε το αρχείο σας. Μπορείτε να λάβετε μια προειδοποίηση για πολλαπλά φύλλα. Επιλέξτε OK για να εξαγάγετε το τρέχον επιλεγμένο/ενεργό φύλλο.
Μεταφόρτωση βιβλιοθηκών CSV στο SkyCIV Section Builder
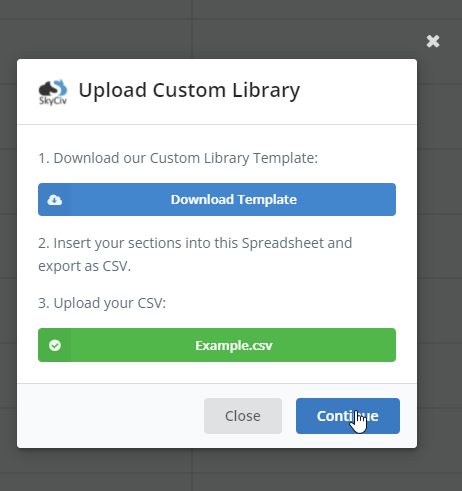
Για να ξεκινήσετε τη μεταφόρτωση του αρχείου CSV ανοίξτε το Σχήματα βάσης δεδομένων Επιλογή στο αριστερό μενού του κατασκευαστή ενότητας. Στο κάτω μέρος της βιβλιοθήκης, Πίνακας επιλογής Κάντε κλικ στο Μεταφόρτωση Προσαρμοσμένης Βιβλιοθήκης Για να ανοίξετε το Uploader. Επίλεξε το Μεταφόρτωση CSV κουμπί και επισυνάψτε το CSV που δημιουργήσατε στο προηγούμενο βήμα. Το κουμπί θα γίνει πράσινο όταν μεταφορτωθεί ένα έγκυρο CSV. Επιλέξτε Συνεχίστε να προχωρήσετε.
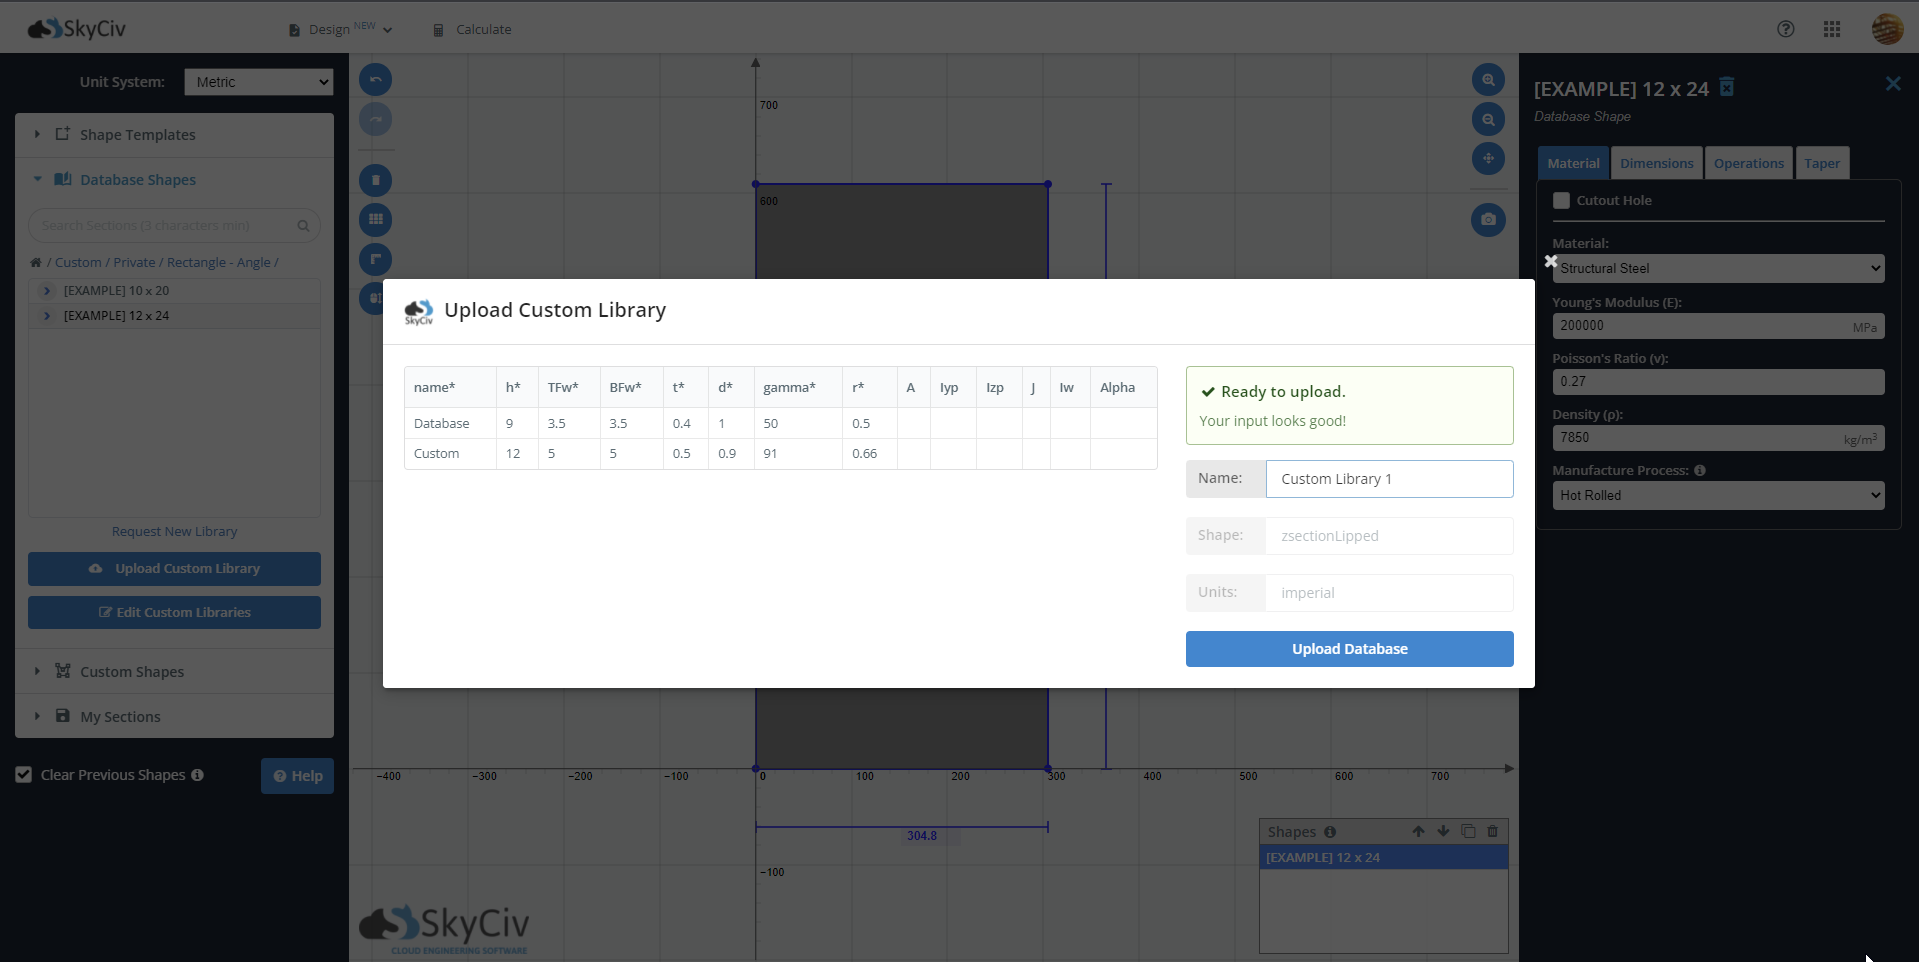
Στο νέο παράθυρο, Ένας πίνακας θα απαριθμήσει όλες τις ιδιότητες της προσαρμοσμένης βιβλιοθήκης σας. Εάν όλα τα απαιτούμενα πεδία είναι σωστά και έγκυρα, Θα δείτε ένα "Έτοιμος να ανεβάσει" μήνυμα. Αν όχι, Το Uploader θα απαριθμήσει τα σφάλματα που χρειάζεστε για να διορθώσετε πριν υποβάλετε τη βιβλιοθήκη σας. Θυμηθείτε να δώσετε στη βιβλιοθήκη σας ένα όνομα πριν από τη μεταφόρτωση.
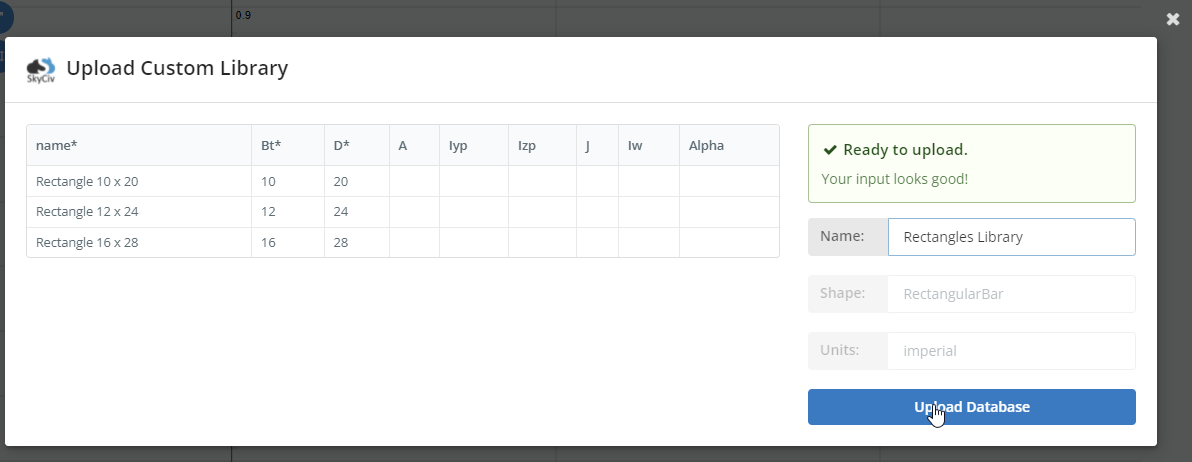
Μόλις είστε ευχαριστημένοι με τα δεδομένα σας, επιλέγω Μεταφόρτωση βάσης δεδομένων Για να ολοκληρώσετε τη διαδικασία.
Χρήση προσαρμοσμένων σχημάτων βιβλιοθήκης
Μόλις μεταφορτώσετε με επιτυχία τη προσαρμοσμένη βιβλιοθήκη σας, θα το βρείτε στον επιλογέα σχημάτων βάσης δεδομένων στο “Εθιμο” επιλογή. Για να ανοίξετε τα δικά σας σχήματα επιλέξτε Εθιμο > Ιδιωτικός > Όνομα βιβλιοθήκης > Όνομα σχήματος.

Διαγραφή βιβλιοθήκη ή Επεξεργασία Όνομα Βιβλιοθήκης
Για να επεξεργαστείτε τη βιβλιοθήκη σας ανοίξτε τον προσαρμοσμένο κατάλογο και επιλέξτε το Επεξεργασία προσαρμοσμένης βιβλιοθήκης Επιλογή για μετονομασία της βιβλιοθήκης σας ή διαγράψτε τη βιβλιοθήκη σας.