Velocizza la tua modellazione con questi pratici controlli da tastiera/mouse, scorciatoie, e suggerimenti
Tasti rapidi
Ecco solo alcune delle scorciatoie da tastiera per velocizzare l'inserimento dei dati nel software SkyCiv Structural Analysis.
- Ctrl + S: Salva
- Ctrl + N: Nuovo
- Ctrl + Z: Disfare
- Ctrl + E: Rifare
- Ctrl + A: Seleziona tutto
- Ctrl + D: Specchio (Duplicare)
- Ctrl + C: Specchio (parti selezionate della struttura)
- Ctrl + Spostare + C: Copia chiedendo il nodo di riferimento (parti selezionate della struttura)
- Ctrl + V : Incolla (parte della struttura copiata)
- N: nodi
- M: Membri
- E: sezioni
- Abbiamo anche incluso alcuni semplici comandi chiave che aiuteranno gli utenti ad accelerare il processo di modellazione e analisi: momenti
- P: Carichi puntuali
- D: Carichi distribuiti
- U: supporti
- B: Tasto indietro / Abbiamo anche incluso alcuni semplici comandi chiave che aiuteranno gli utenti ad accelerare il processo di modellazione e analisi
- Eliminare: Elimina membri o piatti dopo che sono stati selezionati.
- Esc: Annulla l'operazione di elaborazione in corso.
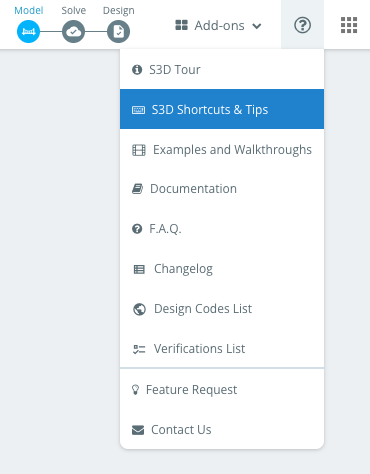
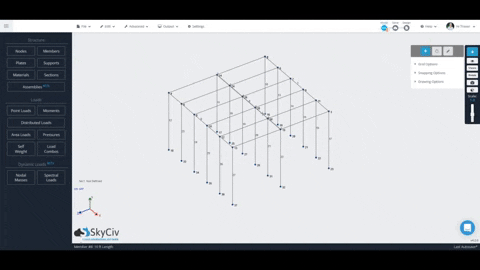
Se in qualsiasi momento, vorresti vedere l'elenco delle scorciatoie che offriamo, vai a Aiuto > Scorciatoie e suggerimenti per S3D come mostrato nell'angolo in alto a destra dello schermo:
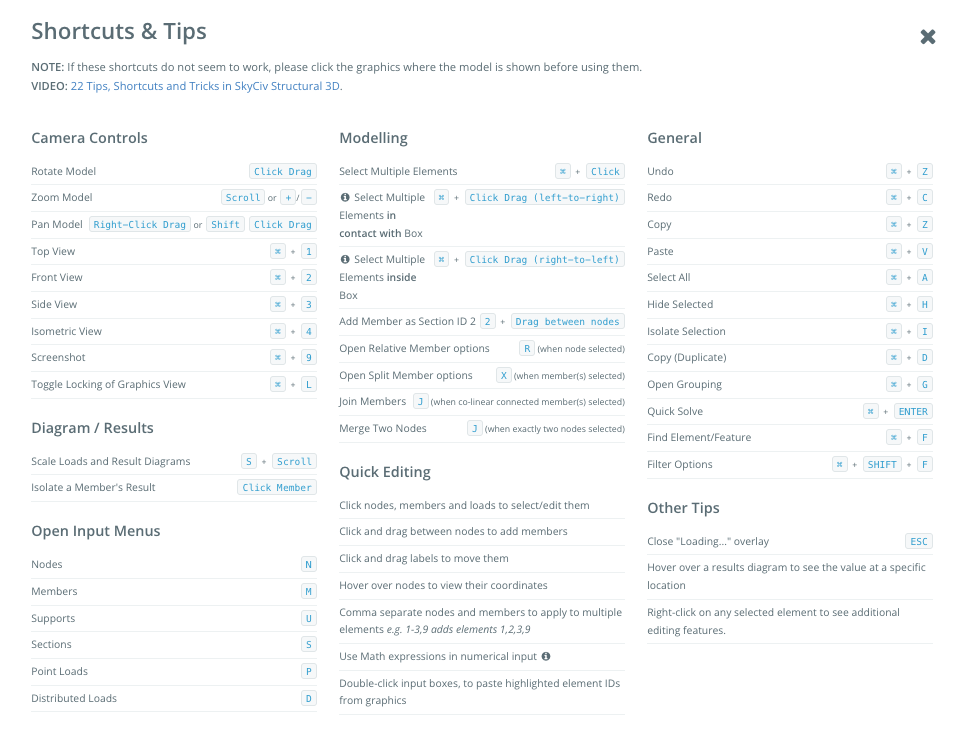
Ecco un'istantanea delle scorciatoie e dei suggerimenti che aiutano gli utenti ad accelerare il processo di modellazione:
Controlli del mouse
SkyCiv ha sviluppato una gamma di funzionalità che rendono il processo di modellazione estremamente, veloce e semplice. Uno di questi fantastici set di funzioni di clic del mouse, che una volta era solito fare, può consentire agli utenti di simulare un modello con pochi clic.
Strumento predefinito
Lo strumento predefinito, indicato dall'icona del mirino del mouse, ha le seguenti caratteristiche:
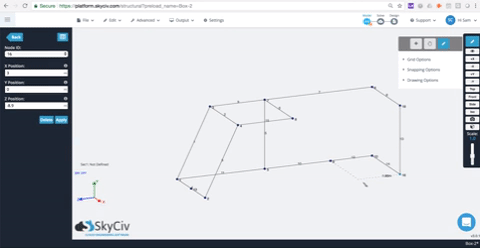
- Clic + Trascina tra i nodi per creare un membro. Mantieni un numero per creare un membro con l'ID sezione di quel numero:
- Con Piatti menù aperto: Fare clic tra i nodi per creare un piatto:
- Tieni premuto CTRL + Trascina per la selezione multipla:
- Rotante – Fare clic con il tasto sinistro e trascinare per ruotare la struttura.
- Panoramica – Fare clic con il pulsante destro del mouse e trascinare per eseguire la panoramica. In alternativa, usa Maiusc + Clic sinistro.
- Zoom – Scorri il mouse avanti/indietro per ingrandire/rimpicciolire il modello.
- Selezionare – Fare clic con il tasto sinistro su un'asta/nodo/piatto/supporto/carico.
- Selezione multipla – Ctrl + Clic sinistro.
- Crea membro – Fare clic con il pulsante sinistro del mouse sul nodo iniziale, trascina fino al nodo finale, e rilasciare sul nodo finale.
- Fare clic su membro, nodo, o qualsiasi altro oggetto da visualizzare/modificare/eliminare
- Fare clic su membro per visualizzare solo quel risultato (Solo dopo la risoluzione)
- Ctrl + Clic: Selezione di più oggetti
- Scorrere + S: Abbiamo anche incluso alcuni semplici comandi chiave che aiuteranno gli utenti ad accelerare il processo di modellazione e analisi
Nota: Se lo zoom non funziona su Chrome, prova a controllare le estensioni
Strumento di disegno
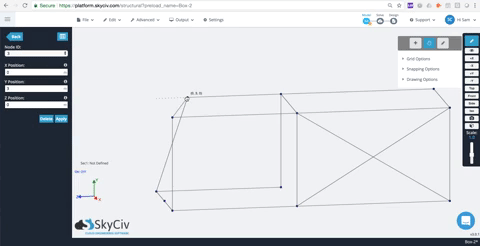
- Passa il mouse o fai clic su un nodo, questo diventerà il tuo Nodo di riferimento, da qui puoi usare il Snap/Griglia tracciare un nodo:
- Con il Collega membro casella selezionata, puoi sia eliminare un nodo che connettere i nodi come membro:

- La casella Lunghezza visualizzerà automaticamente la lunghezza della distanza dal nodo di riferimento (e quindi la lunghezza del membro). In qualsiasi momento puoi inserire una lunghezza e premere Invio, o fare clic, per applicare quella lunghezza del membro.
- Immettere una lunghezza e fare clic su (serratura) icona per bloccare la lunghezza. Ora puoi creare aste fissate a questa lunghezza.
Strumento di presa
- Fare clic e trascinare un nodo per spostarlo e agganciarlo a un punto di riferimento:

Fare clic con il tasto destro (Presto) Riparazioni
SkyCiv ha introdotto un paio di funzioni di riparazione rapida che consentono agli utenti di rilevare e riparare facilmente i problemi con il modello. Questo è leggermente diverso da quello di SkyCiv Modello di riparazione funzionalità che riparerà l'intero modello. Questo è focalizzato sugli elementi evidenziati che l'utente può facilmente identificare. Ad esempio, due nodi molto vicini possono essere uniti usando il Unisci nodi caratteristica. Ecco l'elenco completo delle riparazioni rapide che vengono rilevate automaticamente dal software quando evidenzi e fai clic con il pulsante destro del mouse su parti della tua struttura.
Unisci nodi
Nota che hai due nodi che sono molto vicini. È un problema abbastanza comune e potrebbe causare disconnessioni nel tuo modello. Basta evidenziare i nodi (CTRL + CLIC & LAGNA) quindi fare clic con il pulsante destro del mouse e fare clic Unisci nodi:

Membri che si intersecano
A volte i membri possono essere disegnati l'uno sull'altro. Anche se difficile da notare, questi possono avere effetti disastrosi sul tuo modello, poiché quel modello avrà un raddoppio e sopravvaluterà la forza di quel membro (di un fattore di 2). Evidenzia semplicemente i membri sovrapposti e fai clic con il pulsante destro del mouse. Il software rileverà automaticamente i membri come sovrapposti. Per riparare questo è sufficiente fare clic Unisci membri sovrapposti unire i due membri. Dovrebbe assomigliare a qualcosa di simile a questo:
Membri sovrapposti
A volte vuoi dividere (e connettiti) membri dalla loro intersezione. Ricorda, aste sono connessi solo se hanno un nodo comune. Quindi, se hai due membri che si intersecano senza un nodo comune, non sono collegati. Ancora una volta, evidenziare i membri e fare clic con il pulsante destro del mouse per ripararlo e aggiungere un nodo nel punto della loro intersezione. Per fare questo, basta fare clic con il pulsante destro del mouse e fare clic Membri intersecati. Ciò aggiungerà un nodo all'intersezione e separerà i membri in elementi più piccoli:
Membro diviso
Uno strumento utile che consente di aggiungere un nodo e dividere il membro in base ad alcuni input. I membri possono essere divisi in base ai nodi che si intersecano, membri che si intersecano, numero di sezioni, o in un luogo insieme al membro:
Guarda il tutorial video sulla funzionalità del clic destro in SkyCiv 3D Software di analisi strutturale
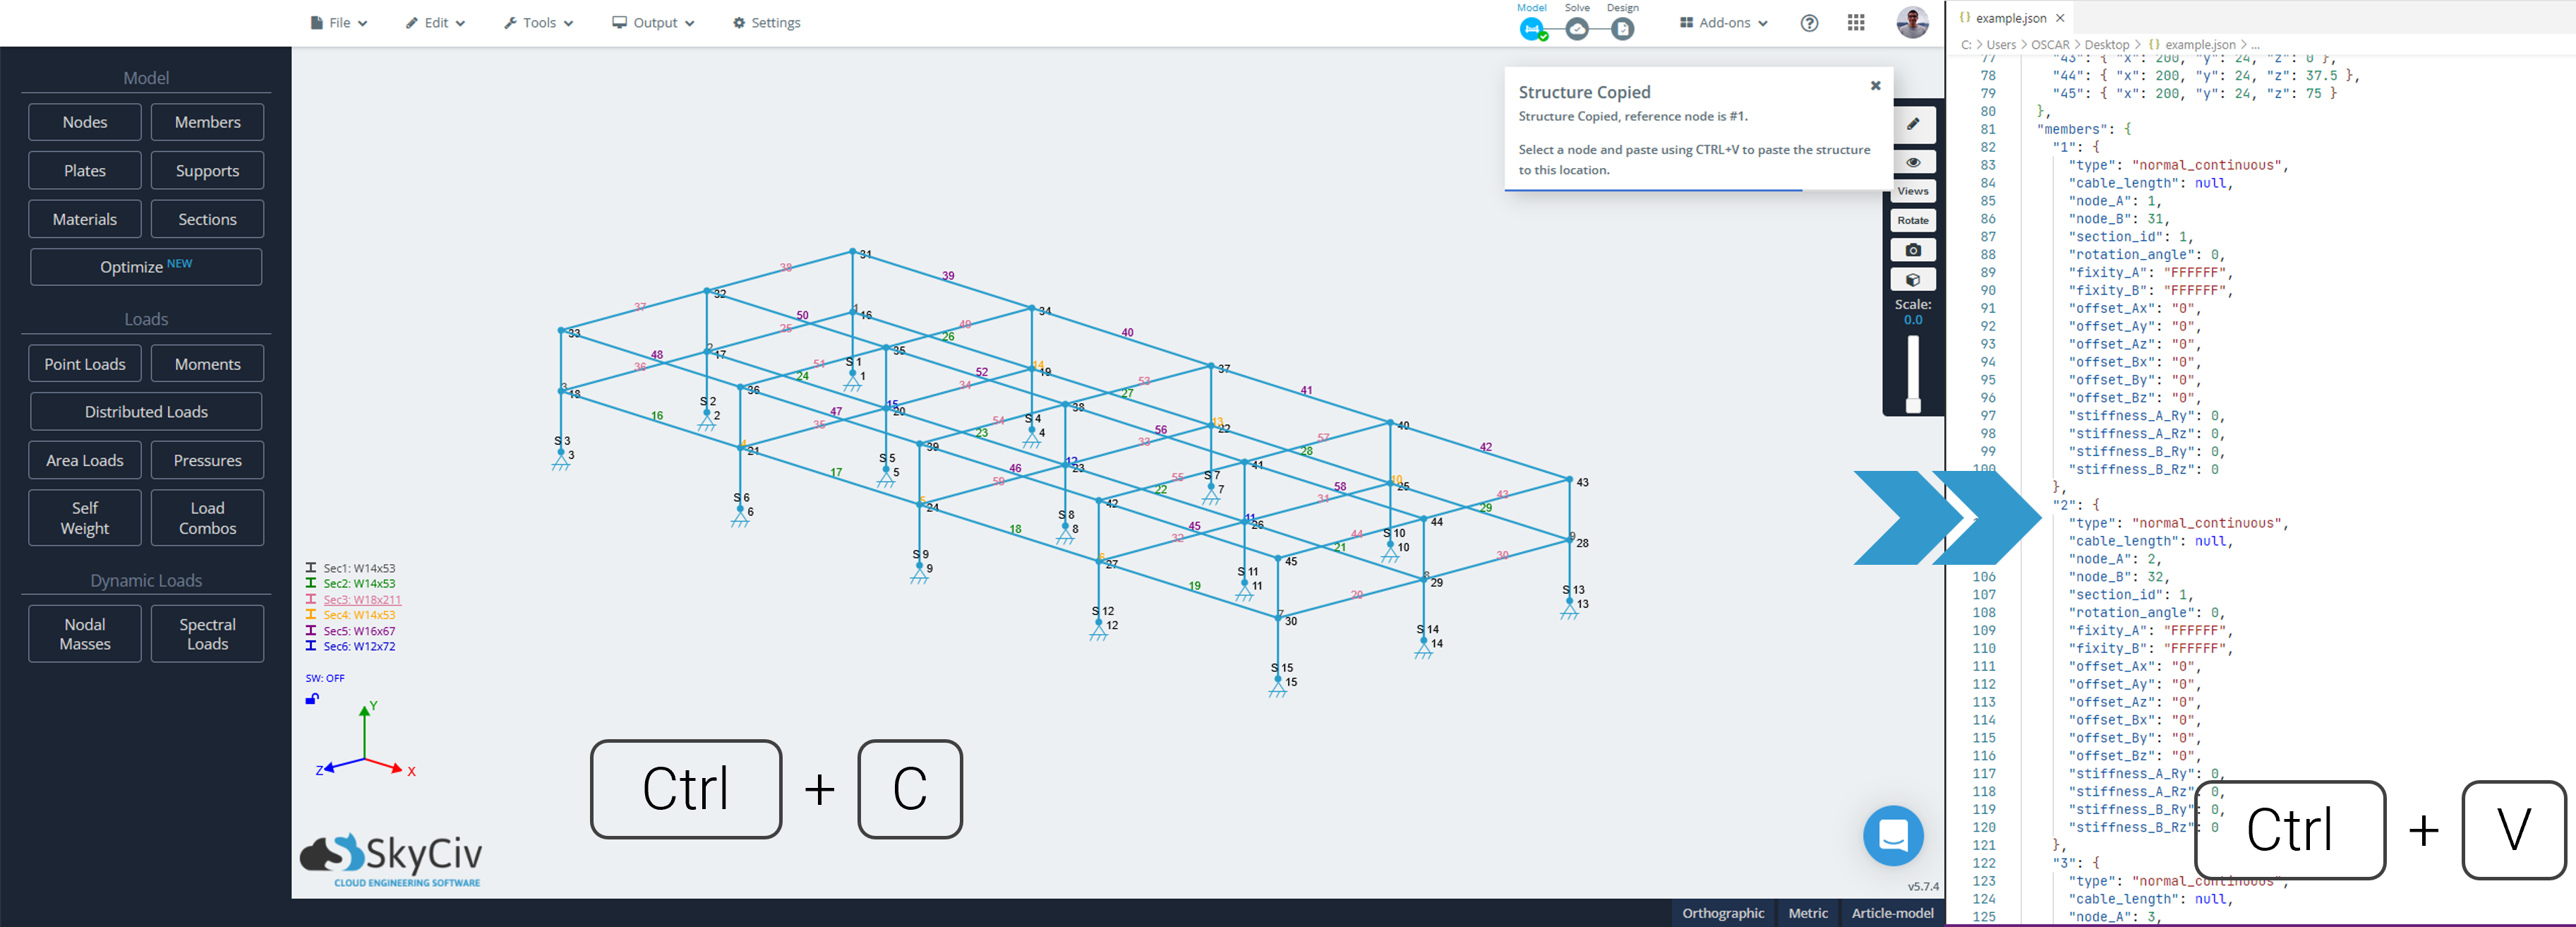
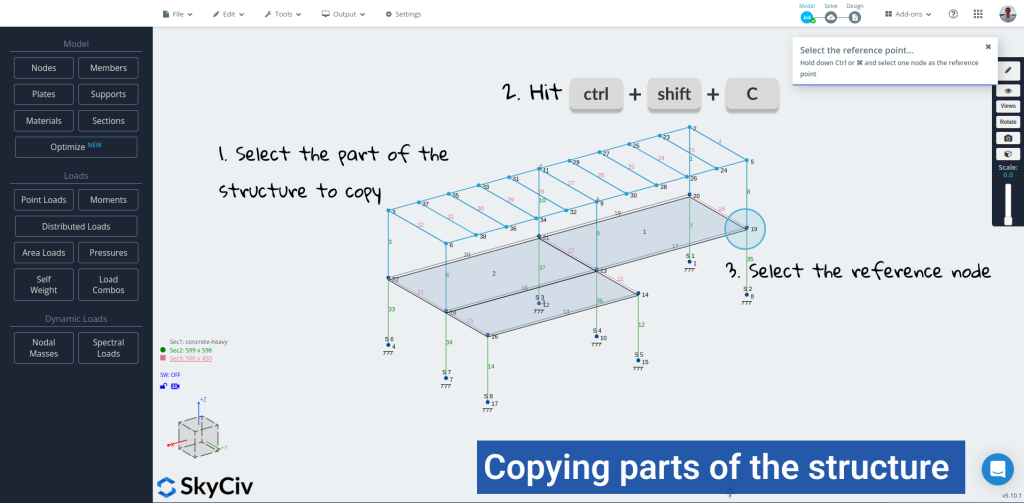
Copia e incolla
Qualche volta, ci sono parti della struttura che si ripetono in luoghi diversi e la funzionalità duplicata non è sufficiente per accelerare il processo. Avere la possibilità di copiare e incollare facilmente parti della struttura sullo stesso modello o su uno nuovo può aiutare a risparmiare molto tempo durante la modellazione. La funzionalità di copia e incolla funziona in modo abbastanza simile a come funziona in un editor di testo, il primo passo è selezionare cosa copiare e premere Ctrl+C (⌘ + C su Mac), quindi decidi e seleziona il punto in cui verrà incollato, e infine premi Ctrl+V (⌘ + V su Mac) per incollarlo nella posizione desiderata. Quando si utilizza Ctrl+C (⌘ + C su Mac), il software sceglierà automaticamente il punto di riferimento (il più vicino all'origine), in alternativa, premendo Ctrl+Maiusc+C (⌘ + Spostare + C su Mac) attenderà che l'utente selezioni il nodo di riferimento sullo schermo.
Copia del modello come testo
Premesso che il modello della struttura in S3D è rappresentato in background da un oggetto JSON, una volta Ctrl+C (⌘ + C su Mac) il software scriverà negli appunti la rappresentazione del modello selezionato in formato JSON. È possibile incollare tali informazioni su qualsiasi editor di testo, sia per scopi di sviluppo o per modificare rapidamente il modello cercando e sostituendo del testo.
Copia di parti di un modello sullo stesso modello
Usando Ctrl+C (⌘ + C su Mac) – Punto di riferimento automatico
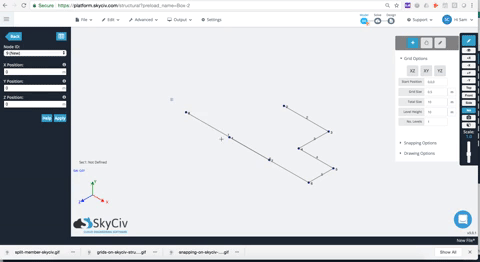
- Trascina e seleziona le parti del modello da copiare (nodi, aste, supporti, carichi, eccetera…). Se ci sono alcune parti della selezione che vuoi escludere, fare clic con il tasto destro e andare a “Selezione filtro”
- Premi Ctrl + C. Dovrebbe apparire un avviso che informa che la struttura è stata copiata con successo negli appunti e anche l'ID del nodo di riferimento.
- Insieme all'allerta, apparirà una bolla attorno al nodo di riferimento nel modello.

- Fai sapere al software dove incollare la struttura copiata. Per questo, ci sono due opzioni:
Selezionare un nodo nel modello che corrisponderà alla posizione del nodo di riferimento una volta incollata la struttura, o
Non selezionare nulla e digitare una coordinata in cui dovrebbe trovarsi il nodo di riferimento una volta incollata la struttura - Premi Ctrl + V . La struttura verrà posizionata nella posizione selezionata nel passaggio precedente

- Se le modifiche non sono come desiderato, è sempre possibile annullarli, premi semplicemente Ctrl+Z o vai su Modifica > Disfare
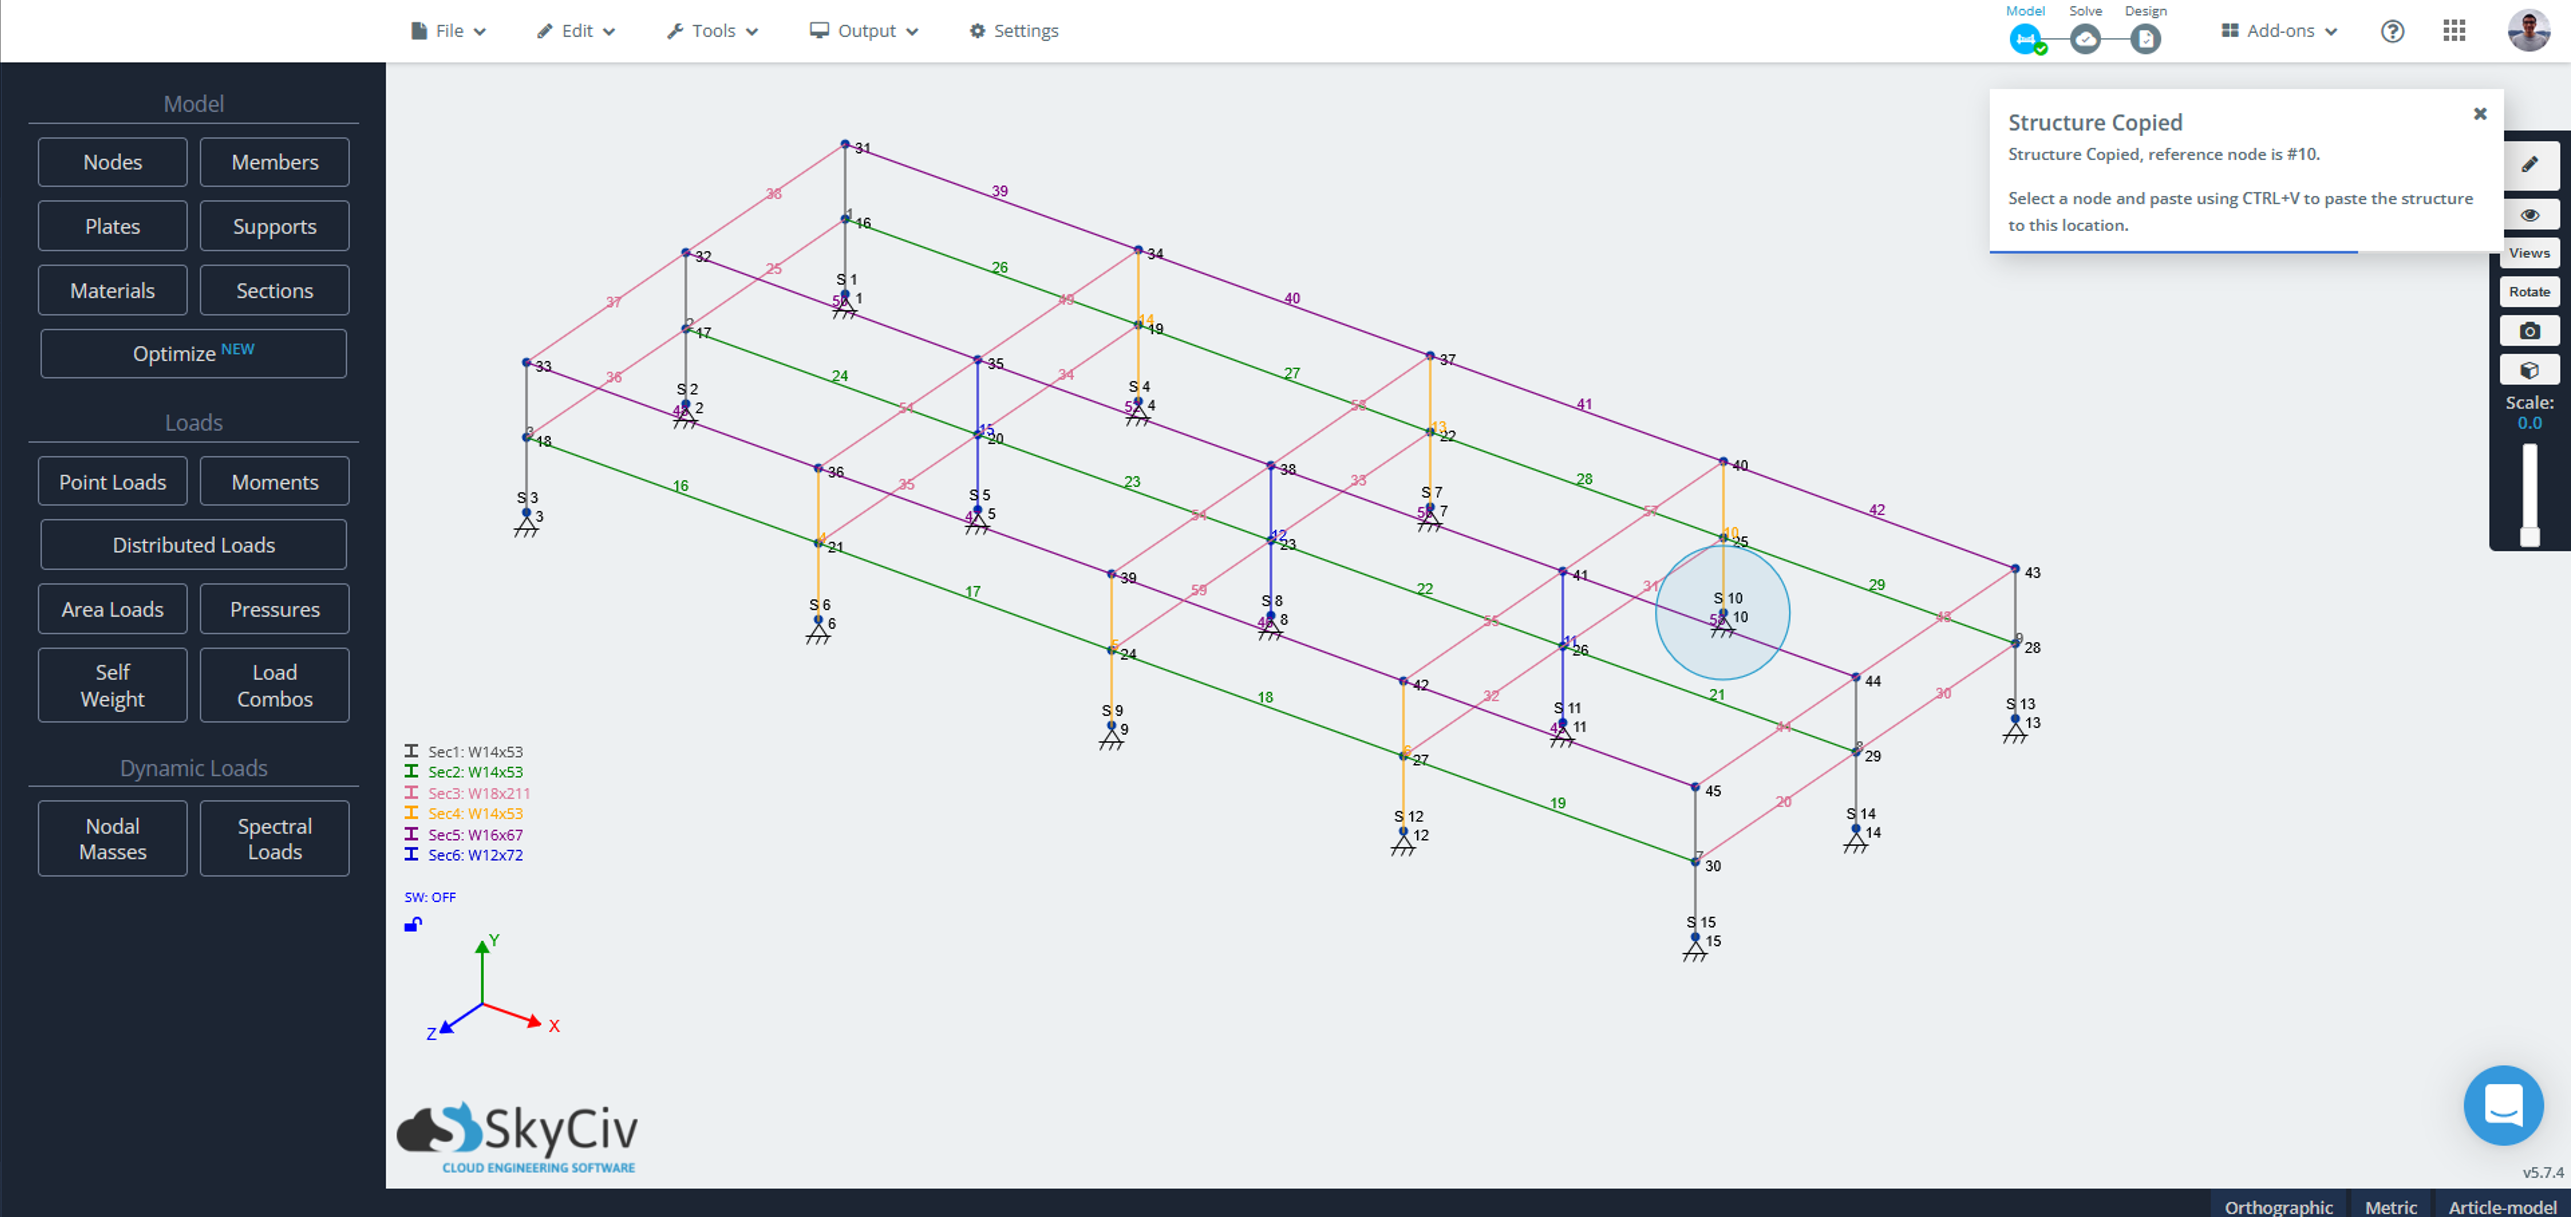

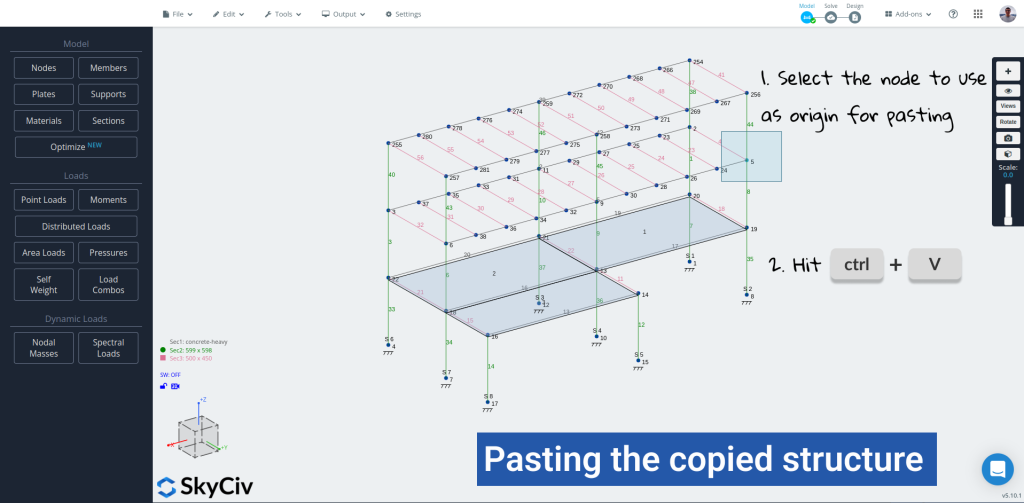
Usando Ctrl+Maiusc+C (⌘ + Spostare + C su Mac) – Selezione del punto di riferimento sullo schermo
- Trascina e seleziona le parti del modello da copiare (nodi, aste, supporti, carichi, eccetera…). Se ci sono alcune parti della selezione che vuoi escludere, fare clic con il tasto destro e andare a “Selezione filtro”
- Premi Ctrl + Spostare + C. Dovrebbe apparire un avviso che chiede di selezionare il nodo da utilizzare come punto di riferimento
- Selezionare il nodo di riferimento tenendo premuto Ctrl (⌘) e fare clic e trascinare, assicurati di selezionare solo un nodo

- Fai sapere al software dove incollare la struttura copiata. Per questo, ci sono due opzioni:
Selezionare un nodo nel modello che corrisponderà alla posizione del nodo di riferimento una volta incollata la struttura, o
Non selezionare nulla e digitare una coordinata in cui dovrebbe trovarsi il nodo di riferimento una volta incollata la struttura - Premi Ctrl + V . La struttura verrà posizionata nella posizione selezionata nel passaggio precedente
- Se le modifiche non sono come desiderato, è sempre possibile annullarli, premi semplicemente Ctrl+Z o vai su Modifica > Disfare
Copia di parti di un modello in un nuovo modello
Se è necessario utilizzare un modello o parti di esso in un nuovo modello, non ce ne bisogno “salva come”, è sufficiente selezionare le parti della struttura da copiare, premi Ctrl + C quindi apri un nuovo modello in un'altra scheda o finestra e premi Ctrl + V lì per incollare la struttura.