Ce logiciel Opérations Le groupe dans la barre d'outils de droite contient des outils d'édition de géométrie pour le découpage, extension, scission, adhésion, mise à l'échelle, et correspondance de propriété.
La plupart des opérations fonctionnent sur la géométrie sélectionnée. Utilisez l'actif instantané paramètres pour des choix précis et des points cibles.
Opérations
Les outils d'opérations sont regroupés dans des piles déroulantes dans la barre de droite. Cliquez sur le bouton de catégorie pour activer l'outil actuel, ou ouvrez la mini barre d'outils pour choisir un autre outil dans la même pile.
Propriétés de correspondance
Copier les propriétés de style et d'attribut d'un objet vers d'autres
Ce logiciel Propriétés de correspondance la commande applique les propriétés d'un objet source à des objets cibles compatibles.
Pas à pas
- 1Sélectionnez un objet source à partir duquel copier ses propriétés.
- 2Cliquez sur Propriétés de correspondance pour activer le mode pinceau.
- 3Cliquez sur les éléments cibles compatibles pour appliquer les propriétés instantanément.
- 4Continuez à cliquer, ou utilisez la sélection de clôture ou de fenêtre pour plusieurs cibles.
- 5presse Esc pour quitter le mode pinceau.
Pointe: Match Properties copie les propriétés visuelles telles que la couleur, épaisseur de ligne, style de ligne, et couche. Seules les propriétés compatibles avec le type d'objet cible sont appliquées.
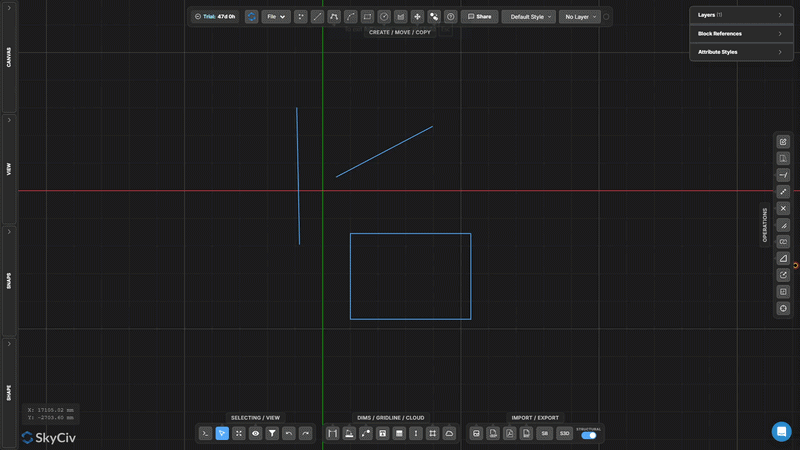
Extensible
Déplacer les sommets sélectionnés à l'aide d'une fenêtre de croisement ou d'un lasso
Extensible déplace les sommets tout en préservant la topologie autour de la géométrie connectée.
[__INSERT_IMAGE__]
Pas à pas
- 1Activer Extensible.
- 2Sélectionnez des sommets avec une fenêtre ou un lasso traversant de droite à gauche.
- 3Faites glisser la poignée centrale pour un déplacement libre, ou les poignées X/Y pour un mouvement contraint.
Pointe: Seuls les sommets à l'intérieur de la sélection de croisement sont déplacés; les lignes connectées aux sommets en dehors de la sélection sont étirées pour maintenir la connectivité.
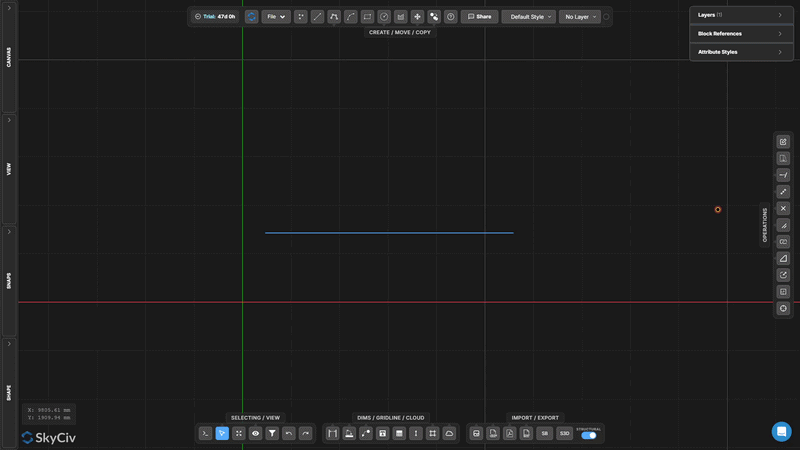
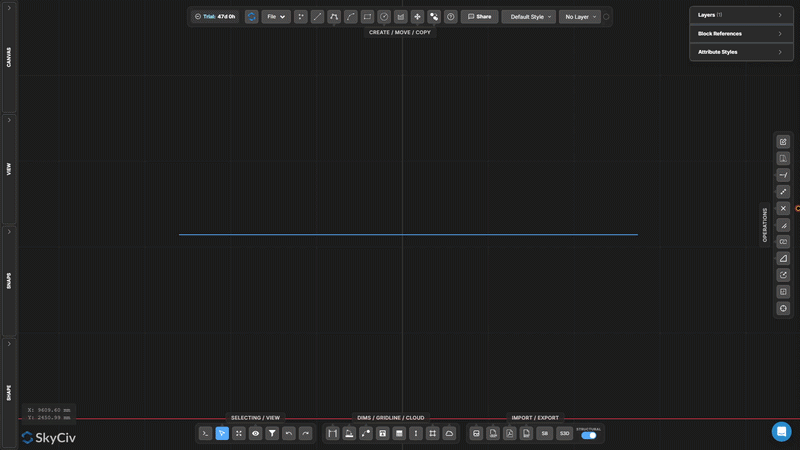
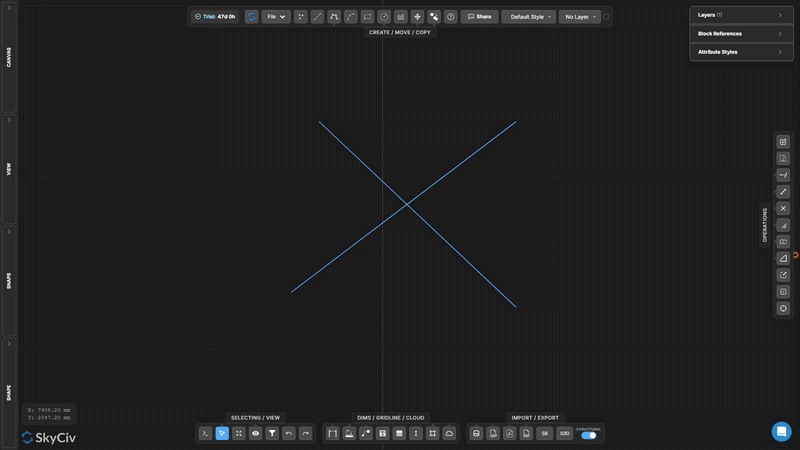
Prolonger la ligne
Prolongez une ligne jusqu'à ce qu'elle rencontre une ligne ou un point cible
Prolonger la ligne allonge une ligne sélectionnée pour atteindre une limite cible. La ligne est prolongée dans sa direction existante jusqu'à ce qu'elle croise la cible sélectionnée..
Pas à pas
- 1Activer Prolonger la ligne.
- 2Cliquez sur la ligne pour prolonger (vers la fin tu veux grandir).
- 3Cliquez sur la ligne ou le point cible vers lequel étendre.
Pointe: Cliquez près de la fin de la ligne que vous souhaitez prolonger – l'outil s'étend du point final le plus proche en direction de la cible.
Garniture
Supprimer les segments de ligne ou d'arc définis par les arêtes coupantes
Garniture supprime des portions de lignes ou d'arcs en utilisant une autre géométrie comme arêtes de coupe. Sélectionnez d'abord les arêtes de coupe, confirmez-les, puis cliquez ou clôturez les segments que vous souhaitez supprimer.
Pas à pas
- 1Activer Garniture.
- 2Sélectionnez la géométrie de l'arête de coupe (lignes, arcs, les cercles).
- 3presse Entrer ou Barre d'espace pour confirmer les arêtes de coupe.
- 4Cliquez ou clôturez les segments à supprimer.
Pointe: Vous pouvez utiliser une sélection de fenêtre ou de clôture pour découper plusieurs segments simultanément après avoir confirmé les arêtes de coupe..
Diviser la ligne en segments
Diviser une ligne en N segments égaux
Diviser la ligne en segments divise une seule ligne en un nombre spécifié de segments de longueur égale. Chaque segment résultant est un élément de ligne indépendant.
Pas à pas
- 1Activer l'outil.
- 2Cliquez sur la ligne à diviser.
- 3Entrez le nombre de divisions et appuyez sur Entrer.
Pointe: Utile pour créer des points de support équidistants le long d'une poutre ou pour diviser une travée pour l'analyse de la répartition des charges.
Fractionner la ligne par intervalle
Diviser une ligne en intervalles répétés de longueur fixe
Fractionner la ligne par intervalle divise une ligne en segments d'une longueur fixe spécifiée. Un segment restant est créé à la fin si la longueur de la ligne n'est pas un multiple entier de l'intervalle.
Pas à pas
- 1Activer l'outil.
- 2Cliquez sur la ligne à diviser.
- 3Entrez la longueur de l'intervalle et appuyez sur Entrer.
Pointe: Utilisez-le pour créer des nœuds intermédiaires régulièrement espacés le long d'un élément continu à un espacement connu. (i.e., tous 500 mm pour disposition des solives).
Diviser par position le long de la ligne
Diviser une ligne à une distance décalée de l'une de ses extrémités
Répartir par poste insère un point de rupture à une distance mesurée d'une extrémité de la ligne sélectionnée, créer deux segments distincts à cette position de décalage.
Pas à pas
- 1Activer l'outil.
- 2Cliquez sur une ligne (la position du clic détermine le point final à partir duquel mesurer).
- 3Entrez la distance de décalage et appuyez sur Entrer.
Pointe: Cliquez à proximité du point final à partir duquel vous souhaitez mesurer – l'outil utilise le point final le plus proche comme référence pour la distance de décalage.
Diviser les lignes aux intersections
Diviser automatiquement toutes les lignes sélectionnées aux points de croisement
Diviser les lignes aux intersections trouve tous les points où les lignes sélectionnées se croisent et insère des nœuds divisés à chaque intersection. Aucune valeur d'entrée n'est requise – l'opération est entièrement automatique.
Pas à pas
- 1Sélectionnez les lignes à traiter.
- 2Cliquez sur Diviser les lignes aux intersections.
- 3Toutes les intersections sont détectées et divisées automatiquement.
Pointe: Exécutez ceci avant d'utiliser Sélection conjointe ou effectuer des opérations dépendantes de la topologie – il garantit que les lignes qui se croisent partagent les points de nœuds réels.
Cible divisée
Diviser les objets cibles présélectionnés à l'aide d'une géométrie de séparation distincte
Cible divisée est une division en deux étapes dans laquelle vous marquez d'abord les objets à diviser (cibles), puis sélectionnez séparément la géométrie pour les diviser avec (diviseurs). Seuls les objets cibles sont coupés.
[__INSERT_IMAGE__]
Pas à pas
- 1Présélectionner les objets cibles à diviser.
- 2Activer Cible divisée.
- 3Sélectionnez la géométrie du séparateur.
- 4presse Entrer pour diviser les cibles aux intersections avec des séparateurs.
Pointe: Utilisez Split Target lorsque vous souhaitez diviser des lignes spécifiques avec un tranchant mais que vous devez conserver la géométrie de coupe intacte. (contrairement à Trim, ce qui modifie également le cutter).
Diviser aux chevauchements
Détecter et séparer les segments de ligne colinéaire qui se chevauchent
Diviser aux chevauchements recherche des segments de lignes sélectionnées qui sont colinéaires et se chevauchent, puis les divise pour que les régions qui se chevauchent deviennent discrètes, géométrie sélectionnable individuellement.
[__INSERT_IMAGE__]
Pas à pas
- 1Sélectionnez les lignes qui peuvent avoir des parties colinéaires qui se chevauchent.
- 2Cliquez sur Diviser aux chevauchements.
- 3Les régions qui se chevauchent sont divisées en segments distincts.
Pointe: Combiner avec Sélectionnez les doublons pour identifier et supprimer les lignes redondantes qui se chevauchent dans les fichiers DXF importés.
Exploser la polyligne
Diviser une polyligne en segments de ligne ou d'arc indépendants
Exploser la polyligne décompose une polyligne multi-segments en segments indépendants individuels. Utile lorsque vous devez modifier, supprimer, ou appliquer des opérations à une partie seulement d'une polyligne.
[__INSERT_IMAGE__]
Pas à pas
- 1Sélectionnez la polyligne à exploser.
- 2Cliquez sur Exploser la polyligne.
- 3Chaque segment devient individuellement sélectionnable et modifiable.
Pointe: L’opération inverse est Joindre des lignes et des arcs, qui fusionne les segments connectés en une seule polyligne.
Joindre des lignes et des arcs
Fusionner les lignes et les arcs connectés en une seule polyligne
Joindre des lignes et des arcs combine une chaîne de segments connectés en un seul objet polyligne continu. Les lignes et les arcs doivent partager des extrémités pour être joints.
Pas à pas
- 1Sélectionnez des lignes et des arcs partageant des extrémités.
- 2Cliquez sur Joindre des lignes et des arcs.
- 3Les segments connectés fusionnent en une seule polyligne continue.
Pointe: Tous les segments sélectionnés doivent former une seule chaîne continue. Si les segments présentent des espaces, utilisation Accrocher aux extrémités de ligne et l'outil Déplacer le point d'abord pour fermer les points finaux.
Créer un congé
Arrondir un coin pointu entre deux lignes avec un arc
Créer un congé remplace un coin pointu entre deux lignes par un arc tangent d'un rayon spécifié. Les extrémités de la ligne d'origine sont coupées pour s'adapter à l'arc.
Pas à pas
- 1Activer Créer un congé.
- 2Définir le rayon du congé dans la boîte de dialogue.
- 3Cliquez sur le coin (zone d'intersection) des deux lignes à appliquer.
Pointe: Le rayon doit être suffisamment petit pour tenir dans les longueurs des deux lignes à partir du coin. Un aperçu en direct s'affiche avant de confirmer.
Créer un chanfrein
Créer une coupe en biseau droite dans un coin
Créer un chanfrein coupe un biseau diagonal droit sur un coin entre deux lignes. Définissez la distance du chanfrein pour contrôler à quelle distance du coin chaque ligne est coupée.
Pas à pas
- 1Activer Créer un chanfrein.
- 2Définir la distance du chanfrein dans la boîte de dialogue.
- 3Cliquez sur la géométrie du coin pour appliquer le chanfrein.
Pointe: Le chanfrein coupe de manière égale sur les deux lignes par défaut. Pour un biseau asymétrique (distances différentes de chaque côté), définir deux valeurs de chanfrein distinctes dans la boîte de dialogue.
Mettre à l'échelle des objets
Mettre à l'échelle la géométrie sélectionnée par un facteur à partir d'un point pivot
Mettre à l'échelle des objets redimensionne la géométrie sélectionnée selon un facteur d'échelle uniforme par rapport à un point pivot choisi. Une boîte de dialogue vous permet de choisir si les annotations (dimensions, texte, dirigeants, quadrillage, tableaux) sont également à l'échelle.
Pas à pas
- 1Sélectionnez les objets à mettre à l'échelle.
- 2Cliquez sur Mettre à l'échelle des objets et configurez les options d'échelle d'annotation dans la boîte de dialogue.
- 3Cliquez sur le canevas pour définir le pivot de l'échelle (origine) point.
- 4Tapez le facteur d'échelle et appuyez sur Entrer (1.0 = pas de changement, 0.5 = la moitié, 2.0 = double).
Pointe: Utilisez la boîte de dialogue Options d'échelle pour contrôler si les tailles d'annotation (dimensions, texte, dirigeants, tableaux) évoluer avec la géométrie ou rester à leur taille actuelle.
Cadre d'échelle
Créer une zone d'échelle locale persistante avec un cadre visible
Cadre d'échelle crée une zone rectangulaire persistante avec un facteur d'échelle associé. La géométrie dessinée ou placée à l'intérieur du cadre est rendue à cette échelle locale. Utile pour les légendes de détail à une échelle de dessin différente.
[__INSERT_IMAGE__]
Pas à pas
- 1Activer Cadre d'échelle.
- 2Cliquez sur le premier coin, puis le coin opposé pour définir le cadre.
- 3Tapez le facteur d'échelle dans l'entrée et appuyez sur Esc postuler.
Pointe: Le cadre persiste sur la toile après la création. Sélectionnez-le et supprimez-le lorsqu'il n'est plus nécessaire. L'entrée d'échelle reste disponible pour une édition ultérieure pendant que le cadre est sélectionné.
Origine de la mise à jour
Déplacer l'origine des coordonnées du dessin (0,0) vers un nouvel emplacement
Origine de la mise à jour déplace le système de coordonnées de référence du dessin. Toutes les valeurs de coordonnées (X, Y) affichés dans le canevas et exportés dans les données sont recalculés par rapport à la nouvelle origine.
[__INSERT_IMAGE__]
Pas à pas
- 1Activer Origine de la mise à jour.
- 2Cliquez sur le nouvel emplacement d'origine sur le canevas.
- 3Coordonner la mise à jour des lectures immédiatement par rapport au nouveau (0,0) point.
Pointe: Accrochez-vous à un nœud existant pour une nouvelle origine précise. Pour les dessins structurels, s'accrocher à une colonne ou à une intersection de référence connue pour aligner les coordonnées avec la grille de référence du projet.
Débloquez votre
gratuits Compte
Inscrivez-vous à un compte gratuit et accédez à une analyse puissante + logiciel de conception:
✓ Logiciel d'analyse puissant
✓ Accès à 90+ Outils de conception
✓ ASCE, AS, EN, Générateur de charges NBCC
✓ Acier, Charpente, Béton, Aluminium