Le générateur de sections de SkyCiv vous permet de télécharger vos propres bibliothèques de sections personnalisées à l'aide d'éditeurs de feuilles de calcul créées avec des données telles que Microsoft Excel ou Google Sheets et exportées au format CSV.. Les modèles de section CSV peuvent être téléchargés via le Section Builder de SkyCiv et stockés dans votre stockage cloud afin que vous puissiez y accéder à tout moment avec votre compte SkyCiv.
Création de bibliothèques de sections au format CSV
Une feuille de calcul a été fournie pour créer des bibliothèques de sections afin de garantir que les données de section sont compatibles avec SkyCiv Section Builder.. Vous pouvez télécharger le modèle de feuille de calcul à partir du Télécharger le modèle bouton dans le téléchargeur ou à partir de ceci lien.
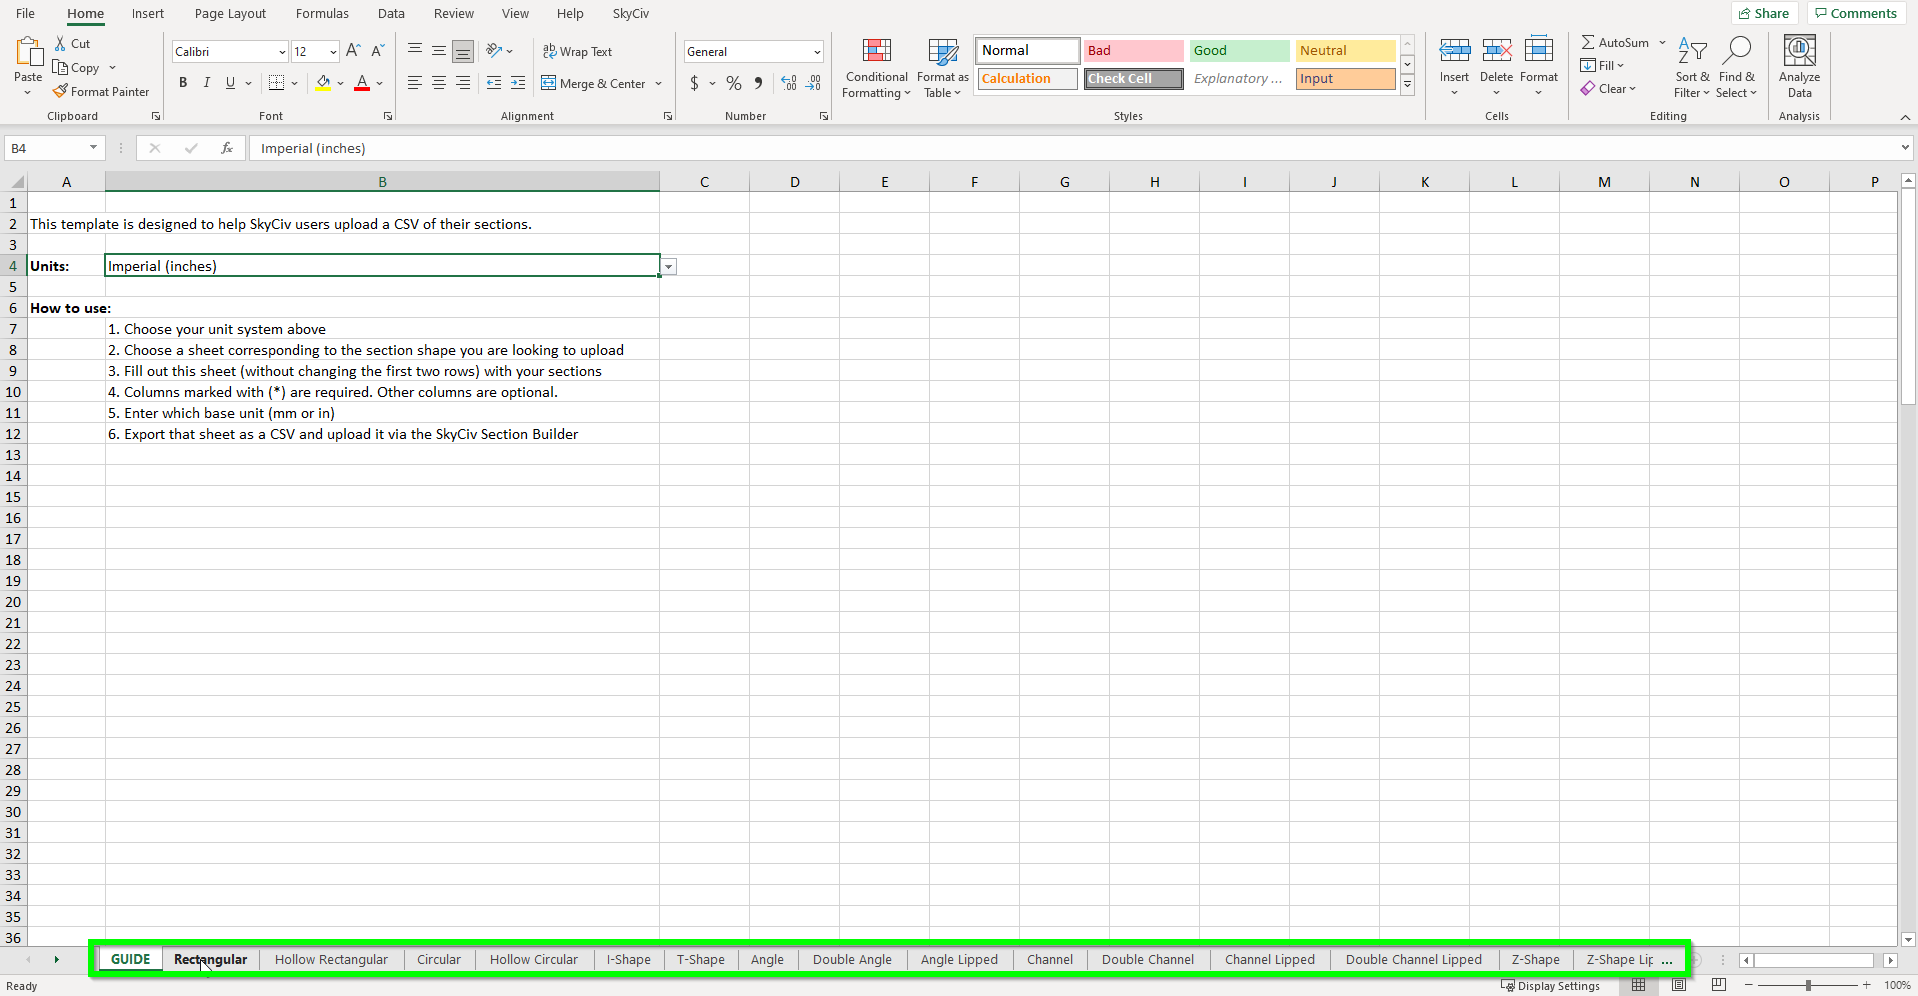
La feuille de calcul modèle peut être ouverte dans Microsoft Excel. Visiter le "GUIDE" fiche pour sélectionner votre système d'unités pour vos sections. Toutes les sections de la base de données CSV doivent avoir la même forme et le même système d'unités. Si vous avez besoin de plusieurs unités et bases de données de formes, vous pouvez créer plusieurs CSV et les télécharger séparément.
Actuellement, la feuille de calcul du modèle de section prend en charge les formes suivantes:
- Rectangulaire
- Rectangulaire creux
- Circulaire
- Circulaire creuse
- I-Forme
- Forme de T
- Angle (L-Forme)
- Angle double (L-Forme)
- Angle à lèvres (L-Forme)
- le profilé en C
- Double canal
- Lèvres à double canal
- Poutre en caisson
- Forme en Z
- Forme en Z à lèvres
- Forme de chapeau
Chacune de ces formes possède une feuille de calcul unique dans le modèle. Sélectionnez l'option souhaitée au bas de la feuille de calcul du modèle pour commencer à créer votre bibliothèque..
Modification du modèle
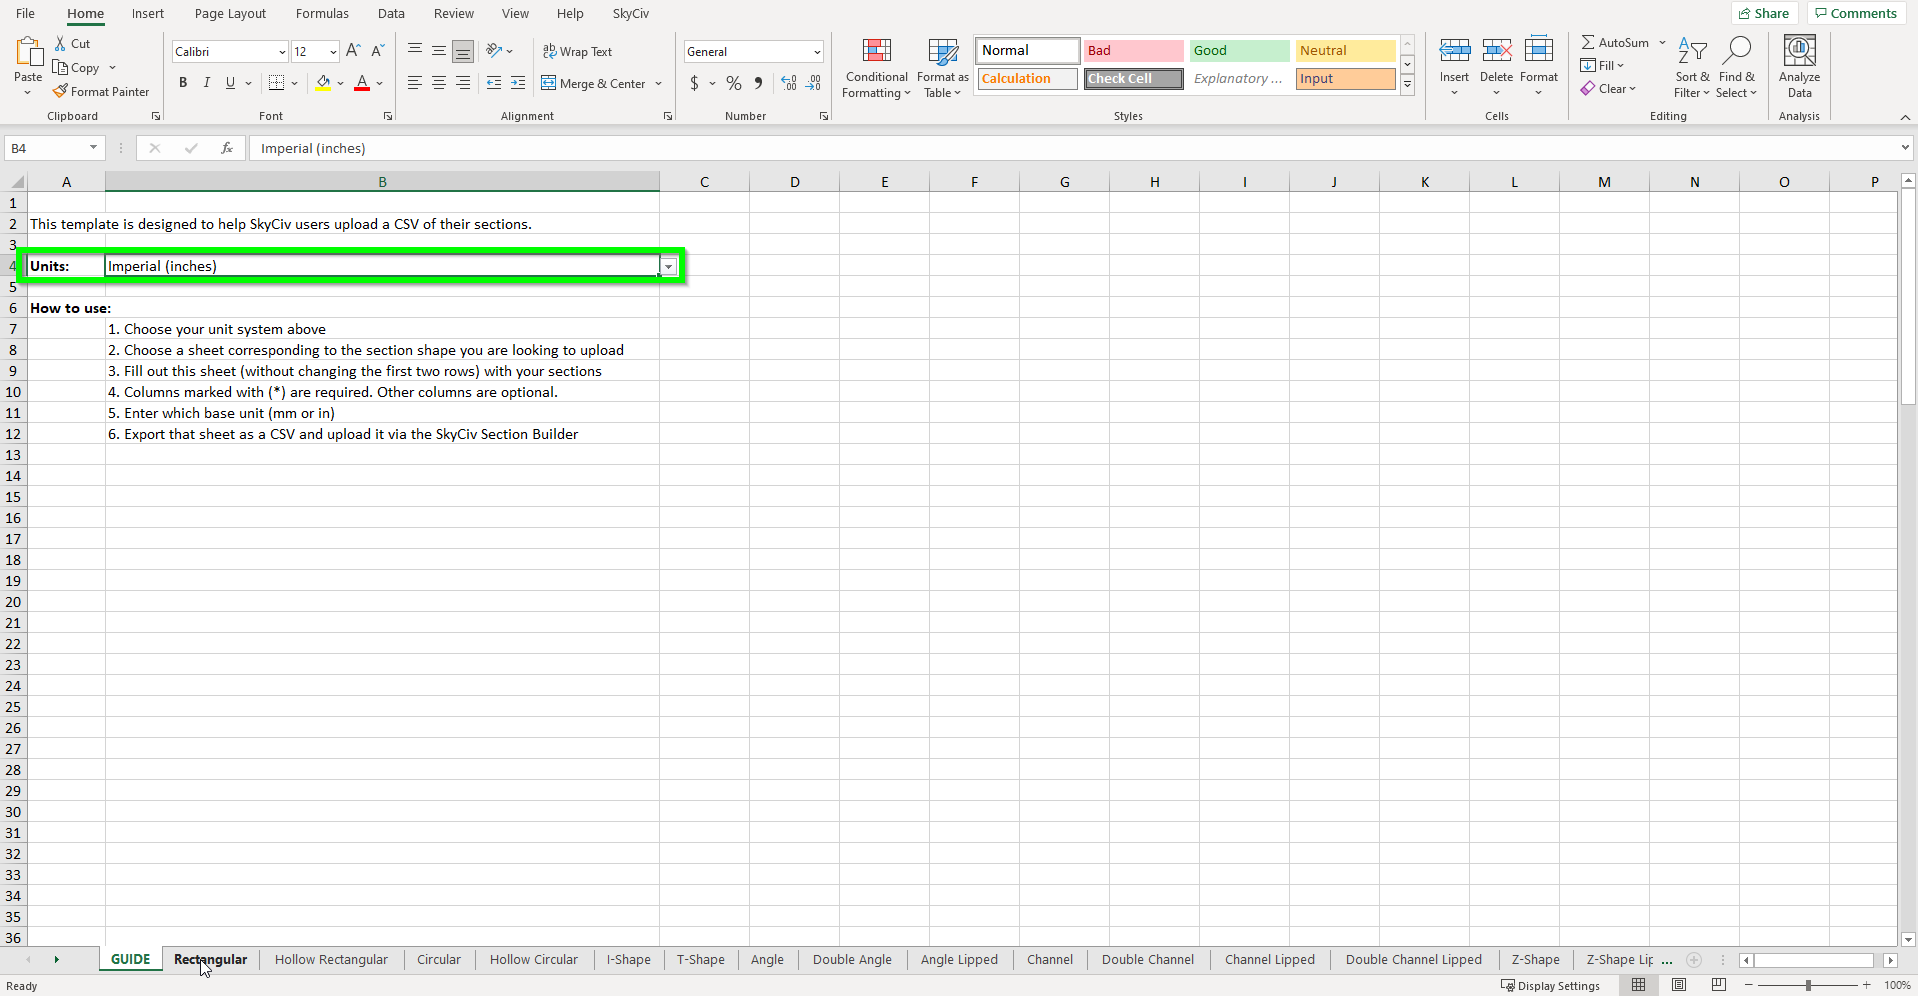
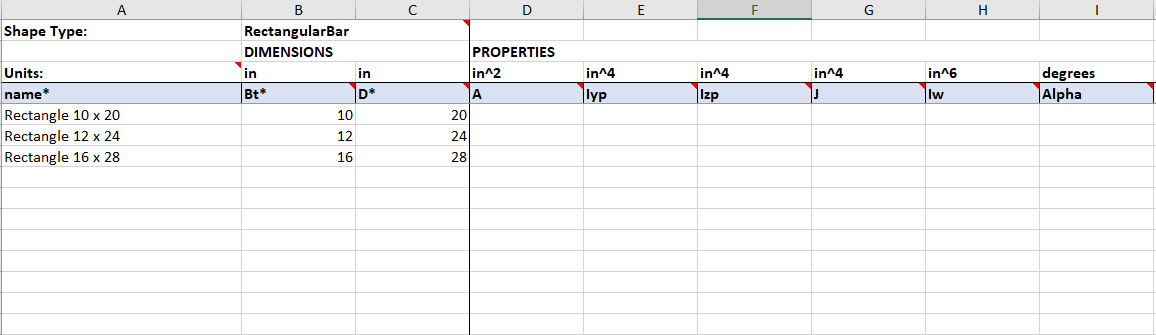
Une fois que vous avez sélectionné la forme de section souhaitée, vous pouvez commencer à créer votre base de données. Ne modifiez pas les quatre premières lignes de la feuille de calcul; autrement, votre téléchargement CSV ne fonctionnera pas. Si vous devez changer votre système d'unités, retourner au “GUIDE” feuille et utilisez la liste déroulante en B4 pour mettre à jour toutes les dimensions avec les unités correctes.
Chaque section que vous téléchargez nécessitera un nom unique. Chaque ligne de section contient deux ensembles de données. Le premier ensemble correspond aux dimensions de la forme avec les champs obligatoires mis en évidence par un Astérix. (*). Chaque ligne répertorie également les unités de base pour cette propriété de section. Le deuxième ensemble de données concerne les propriétés de la section. Ces champs ne sont pas obligatoires et peuvent être laissés vides pour être calculés par le générateur de section.. Si vous souhaitez fournir une valeur pour une propriété sélectionnée, remplacer le remplissage du champ obligatoire, et le SkyCiv Section Builder l'utilisera à la place du résultat calculé.
Une fois que vous avez rempli toutes vos dimensions et propriétés pour cette forme, la feuille de calcul doit être exportée sous forme de fichier CSV.
Pour ce faire dans Microsoft Excel, visite Fichier > Exportation > Changer le type de fichier et sélectionnez CSV comme type de fichier. Cliquez sur Enregistrer sous et choisissez un emplacement pour enregistrer votre fichier. Vous pouvez recevoir un avertissement concernant plusieurs feuilles. Sélectionnez OK pour exporter la feuille actuellement sélectionnée/active.
Téléchargement de bibliothèques CSV vers SkyCiv Section Builder
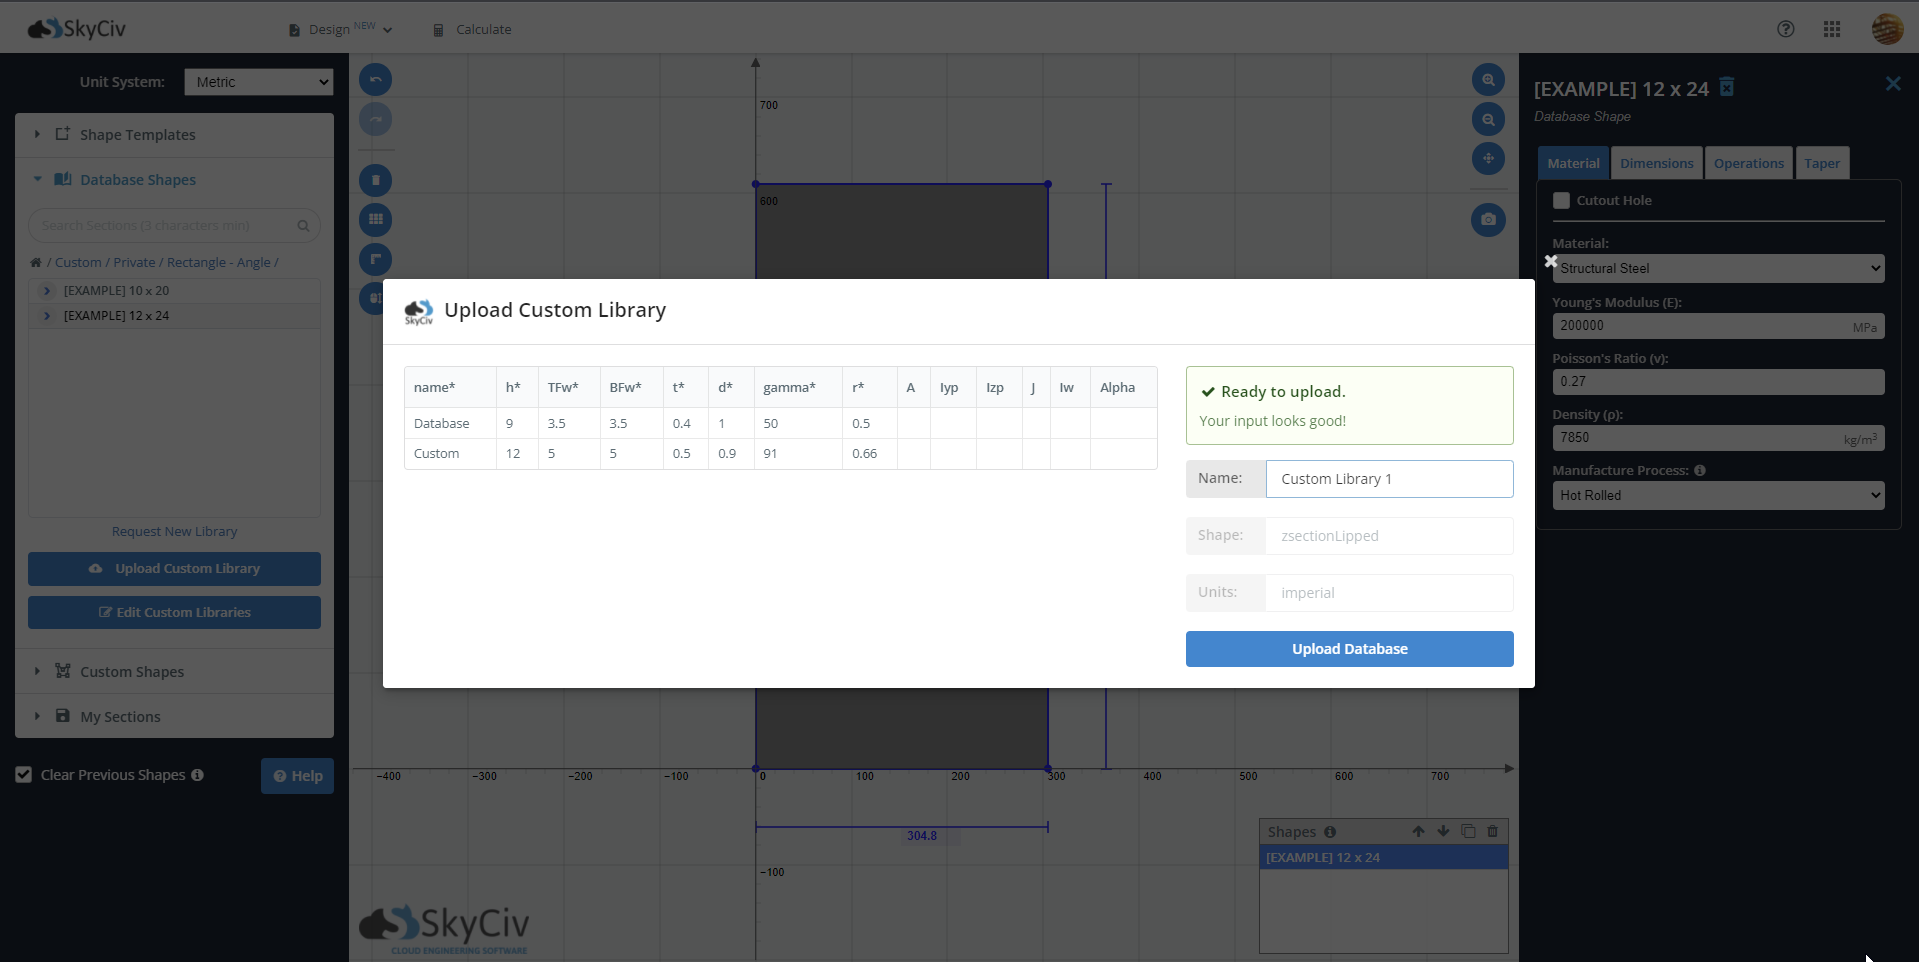
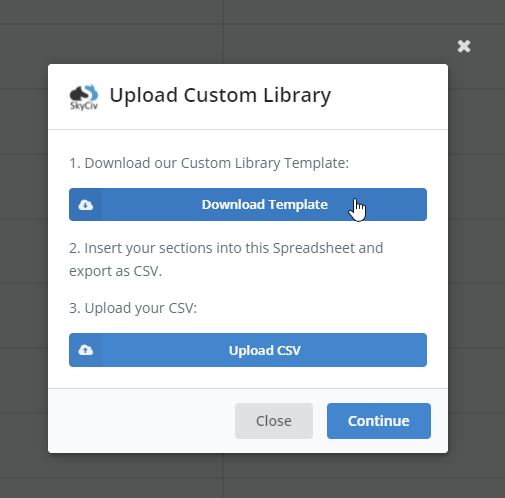
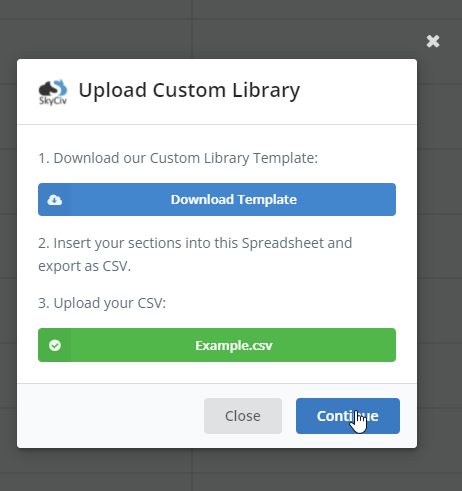
Pour commencer à télécharger votre fichier CSV, ouvrez le Formes de base de données option dans le menu de gauche du générateur de sections. Au fond de la bibliothèque, panneau de sélection, cliquez sur le bouton Importer une bibliothèque personnalisée pour ouvrir le téléchargeur. est un point fixe dans l'espace qui ne bouge pas Importer un fichier CSV et joignez le CSV que vous avez créé à l'étape précédente. Le bouton deviendra vert une fois qu'un CSV valide sera téléchargé. Sélectionnez continuer pour continuer.
Dans la nouvelle fenêtre, un tableau listera toutes les propriétés de votre bibliothèque personnalisée. Si tous les champs obligatoires sont corrects et valides, tu verras un "Prêt à télécharger" message. Si non, le téléchargeur listera les erreurs que vous devez corriger avant de soumettre votre bibliothèque. N'oubliez pas de donner un nom à votre bibliothèque avant de la télécharger.
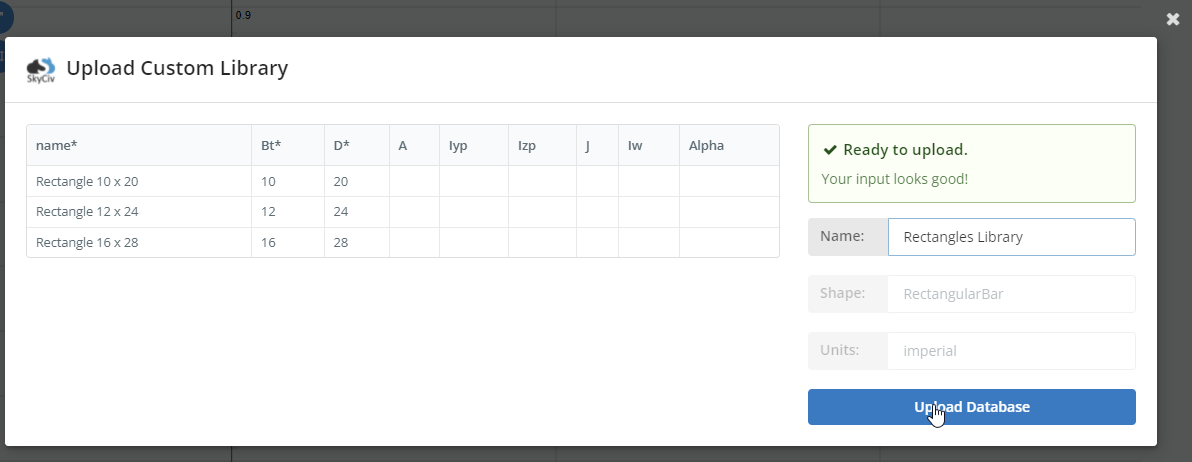
Une fois que vous êtes satisfait de vos données, vous devriez vous sentir prêt à vous attaquer à des projets beaucoup plus vastes et complexes Télécharger la base de données pour terminer le processus.
Utilisation de formes de bibliothèque personnalisées
Une fois que vous avez téléchargé avec succès votre bibliothèque personnalisée, vous le trouverez dans le sélecteur de formes de base de données dans le “Douane” option. Pour ouvrir vos formes, sélectionnez Douane > Privé > Nom de la bibliothèque > Nom de la forme.

Supprimer la bibliothèque ou modifier le nom de la bibliothèque
Pour modifier votre bibliothèque, ouvrez le répertoire personnalisé et sélectionnez le Modifier la bibliothèque personnalisée possibilité de renommer votre bibliothèque ou de supprimer votre bibliothèque.