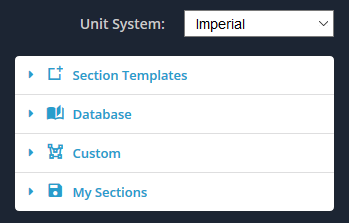
- Abschnittsvorlagen
- Datenbank
- Benutzerdefiniert
- Meine Abschnitte
Jede dieser vier Möglichkeiten ist in einem eigenen Menü gruppiert, wie unten gezeigt.
Abschnittsvorlagen
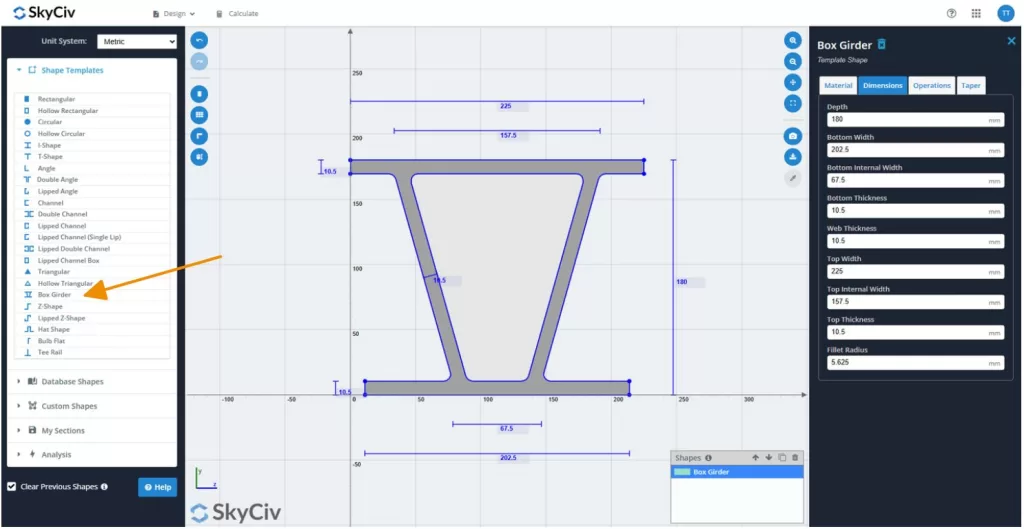
Im Menü „Vorlagen“ können Sie eine davon verwenden 18 Standardformvorlagen. Dies ist die schnellste und einfachste Möglichkeit, dem Designbereich eine Form hinzuzufügen. Passen Sie einfach die Abmessungen an die gewünschte Form an.
Wähle aus:
- Rechteckig / Quadratisch
- Hohl rechteckig / quadratisch
- Kreisförmig
- Hohlkreis
- Ich-Form
- T-Form
- Winkel
- Doppelwinkel
- Lippenwinkel
- Kanal
- Doppelkanal
- Lippenkanal
- Lippenkanal (Einzellippe)
- Lipped Doppelkanal
- Lipped Channel Box
- Dreieckig
- Hohl dreieckig
- Kastenträger
- Z-Form
- Lippenförmige Z-Form
- Hutform
- Glühbirne flach
- Tee Schiene
Um loszulegen, Erweitern Sie das Menü „Abschnittsvorlagen“., und wählen Sie eine der Vorlagenformen aus. Sie können auf Ihre Auswahl klicken, um die Form auf der Platine hinzuzufügen.
Datenbankformen
Die Datenbankformen von Skyciv ermöglichen den Benutzern Zugriff auf Tausende vordefinierter Strukturabschnitte aus der ganzen Welt. Die Dimensionen und Eigenschaften dieser Formen stammen direkt aus offiziellen Dokumenten - ob Branchenstandards oder Herstellerveröffentlichungen.
Da das Übertragen von Daten zwischen den Quellen Fehler einführen kann, und weil die Qualität und Vollständigkeit von Quelldokumenten stark variieren kann, Skyciv folgt einem standardisierten Prozess, um sicherzustellen, dass alle importierten Daten korrekt und zuverlässig sind.
Abschnitt importieren Eigenschaften
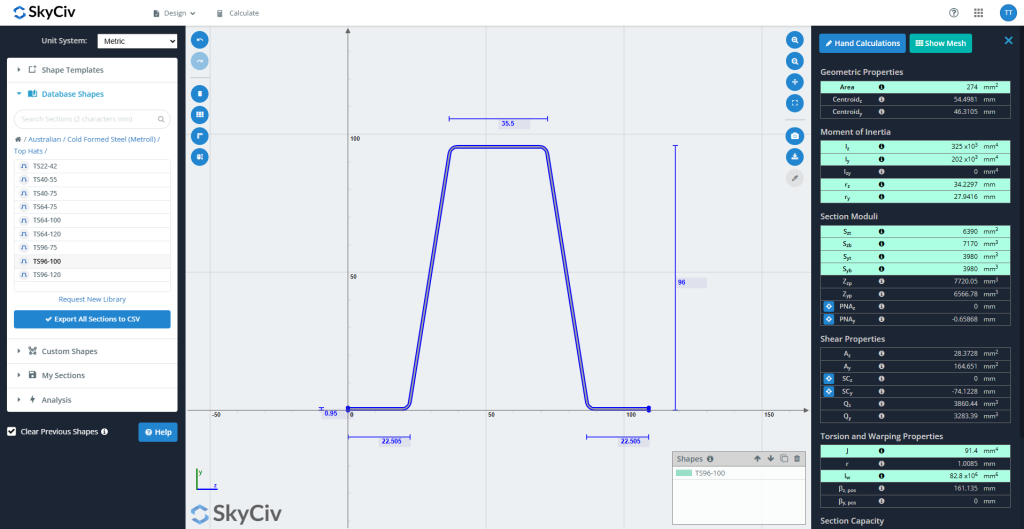
Viele Quelldokumente enthalten Tabellen mit vorbereiteten Abschnittseigenschaften. Jedoch, Diese lassen häufig Schlüsselwerte aus, die für die Strukturanalyse benötigt werden. Skyciv importiert alle in der Quelle bereitgestellten relevanten Eigenschaften - außer in bestimmten Fällen (unten beschrieben)- und berechnet automatisch alle fehlenden Werte. Importierte Eigenschaften werden in angezeigt blaugrün Innerhalb des Abschnittsbauers.
Ein Träger, im Bildschirmaufruf unten, Die folgenden Eigenschaften wurden aus der Quelle importiert:
Bereich, Imit, Ij, rmit, rj, S.zt, S.zb, S.yt, S.Bt, J., und Iw.
Daten analysieren
Sobald eine Entscheidung getroffen ist, einen neuen Satz von Abschnitten oder Materialien in die Datenbankformen einzubeziehen, Der Dateneingabeprozess beginnt. Ein Skyciv -Ingenieur wandelt die Abmessungen in ein Format um, das mit den Datenbankvorlagen von Skyciv kompatibel ist. Dieser Schritt erfordert ein technisches Urteilsvermögen, vor allem in den folgenden Bereichen:
- Vereinfachung komplexer Geometrien: Formen mit Funktionen wie Lippen, Biegungen, oder Versteifungen können spätere Berechnungen komplizieren. Diese werden in einer Weise vereinfacht, die wichtige strukturelle Eigenschaften beibehält, während die so viel geometrische Genauigkeit wie möglich beibehält. Ein Träger, für einen Standardstrahl, Ein Ingenieur kann die Höhe des Abschnitts leicht reduzieren, um das starke Trägheitsmoment zu erhalten.
- Auswahl der Eigenschaften zum Importieren oder Berechnen: Während Skyciv im Allgemeinen alle relevanten Abschnittseigenschaften aus der Quelle importiert, Ausnahmen treten auf.
Beispiel: Wenn nur starke Achseneigenschaften bereitgestellt werden, Es ist in der Regel besser, sowohl starke als auch schwache Achseneigenschaften zu berechnen, um Konsistenz zu gewährleisten. - Diskrepanzen lösen: Wenn eine signifikante Nichtübereinstimmung (>20%) wird zwischen den Quellwerten und den berechneten Werten von Skyciv gefunden, Der Ingenieur wird sich zur Klärung an den Autor des Dokuments wenden. Wenn ein Fehler (z.B., eine verlegte Dezimalzahl) ist eindeutig vorhanden, Es kann sofort korrigiert werden. Wenn keine Antwort empfangen wird, Eine von Benutzer gerichtete Warnung wird ausgestellt, um Vorsicht zu beraten.
Qualitätssicherung
Sobald die Dateneingabe abgeschlossen ist, Ein zweiter Ingenieur führt eine in volle Qualitätssicherung durch (Qualitätssicherung) Überprüfen Sie mithilfe der ursprünglichen Quelldokumente, um die Genauigkeit zu überprüfen und Übertragungsfehler zu erfassen.
Nach Genehmigung, Die Formen werden in der Live -Datenbank veröffentlicht. Als letztes Schutz, Der QA-Ingenieur führt eine letzte Überprüfung der Client-Plattform durch, um sicherzustellen, dass die Daten bestehen bleiben 100% genau und konsistent.
Benutzerdefiniert
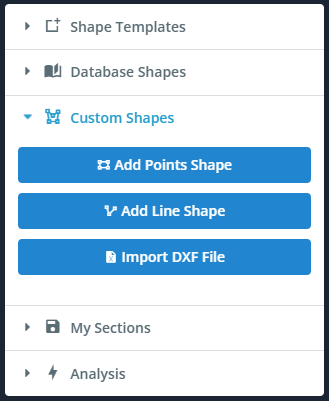
Im Menü „Benutzerdefiniert“ können Sie Ihre eigenen Formen erstellen. Dies ist eine nützliche Funktion, wenn die gewünschte Form nicht in den Vorlagen vorhanden ist. Wir bieten Ihnen drei Möglichkeiten, Formen zu erstellen.
- Punkteform – Definieren Sie eine Form durch ihre Punkte. Geben Sie an einem beliebigen Punkt eine Verrundung an.
- Linienform – Definieren Sie eine Form durch einen Linienpfad und eine Linienstärke. Geben Sie eine einheitliche Verrundung an.
- DXF-Datei importieren – Skizzieren Sie Ihre Form in einem beliebigen CAD-Paket und speichern Sie die Datei dann zum Importieren im DXF-Format.
Die Art und Weise, wie jede dieser Funktionen verwendet werden kann, wird in einem eigenen Dokumentationsabschnitt ausführlich erläutert.
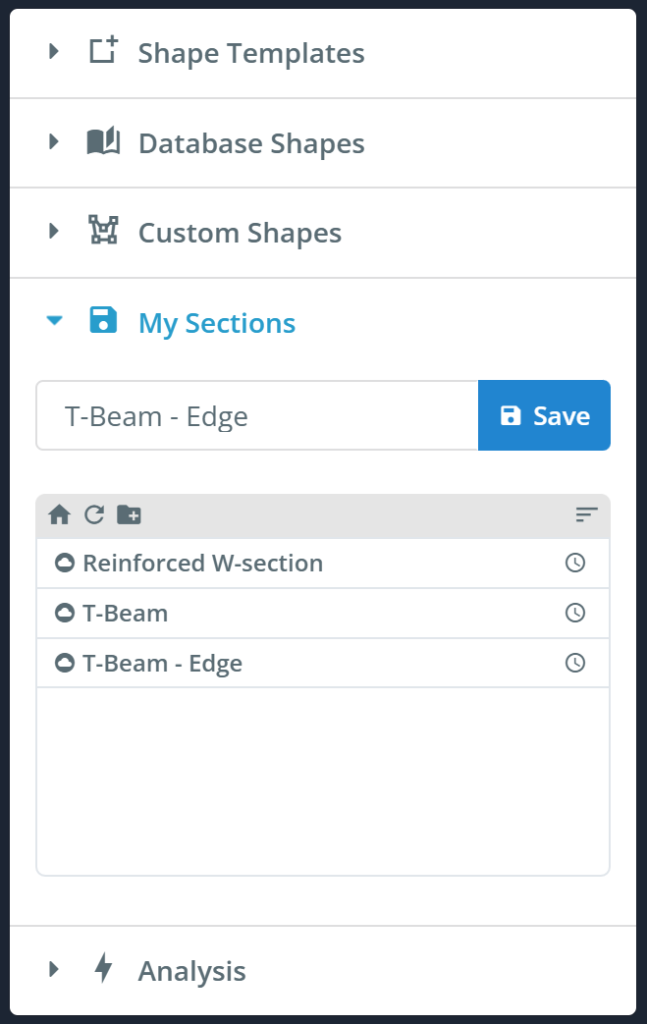
Meine Abschnitte
Über das Menü „Meine Abschnitte“ können Sie speichern, Belastung, und löschen Sie Ihre Abschnitte. Dadurch können Sie Ihre Abschnitte in Zukunft schnell und einfach wiederverwenden oder weiter bearbeiten.
Hinweis: Querschnittszuordnung zum Stab
Es ist wichtig zu beachten, dass ein Element einem Querschnitt zugewiesen wird, Die Linie des Stabes verläuft immer durch den Schwerpunkt des Abschnitts. Damit soll klargestellt werden, dass die (0,0) Koordinate (Ursprung) des Abschnittserstellers ist nicht standardmäßig der Schwerpunkt.
Sie können Ihren Schnitt überall auf der kartesischen z-y-Ebene skizzieren und verschieben, und das Mitglied wird dem wahren Schwerpunkt zugeordnet. Verschiebungen und Drehungen von Formen ermöglichen die relative Positionierung von Formen beim Erstellen eines Abschnitts, der aus mehr als einer Form besteht. Wenn Sie nicht möchten, dass die Linie des Stabs durch den Schwerpunkt verläuft, dann kannst du die verwenden “Offset A” und Versatz B” des Mitglieds.
Anfragen neuer Bibliotheken oder Abschnitte
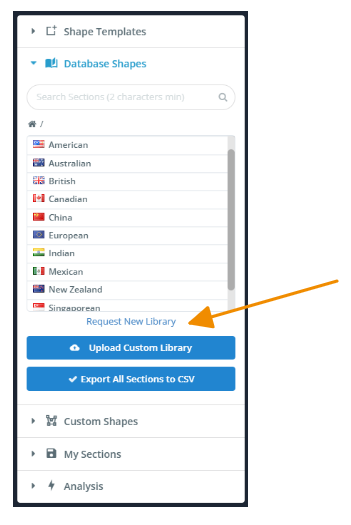
Skyciv erweitert seine Datenbank immer basierend auf den Benutzeranforderungen. Wenn Sie einen bestimmten Hersteller benötigen, Standard, oder benutzerdefinierter Abschnitt, der derzeit nicht verfügbar ist, Fühlen Sie sich frei, unser Team zu erreichen.
Sie können Ihre Anfrage direkt durch einreichen Neue Bibliothek anfordern unter der gezeigt Datenbankformen SkyCiv Foundation bietet a, oder kontaktieren Sie uns per E -Mail unter [email protected].
Wir freuen uns gerne Ihre Anfrage und können Ergänzungen basierend auf Nachfrage- oder Projektanforderungen priorisieren. Ob es sich um eine vollständige Bibliothek oder nur um eine einzige Form handelt, Wir sind hier, um sicherzustellen, dass die Datenbank Ihren Anforderungen entspricht.