Beispiel: I-Form mit T-Profil verstärkt
In diesem Beispiel, Wir werden einen Abschnitt erstellen, der aus einer I-Form besteht, die am unteren Flansch mit einer umgedrehten T-Form verstärkt ist. Für dieses Beispiel verwenden wir die entsprechenden Standardformen in den Abschnittsvorlagen.
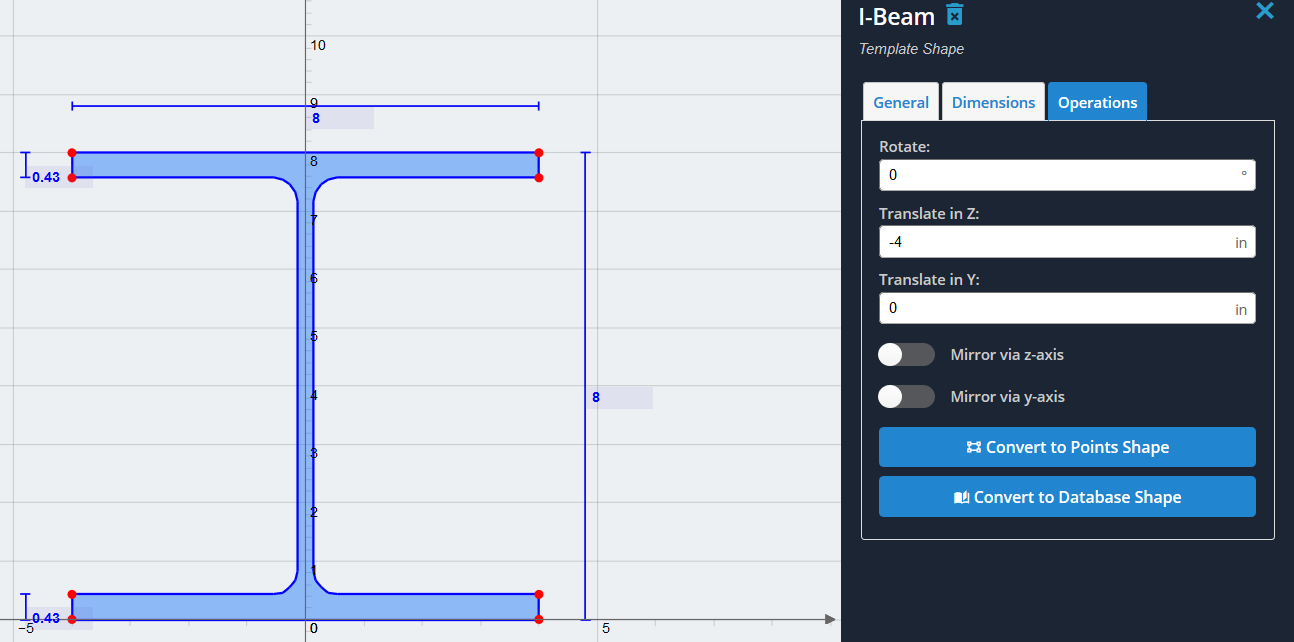
1) Fügen Sie zunächst die I-Form hinzu Abschnittsvorlagen Speisekarte. Wählen Sie „I-Form“.’ aus dem Menü und klicken Sie auf „Hinzufügen“.
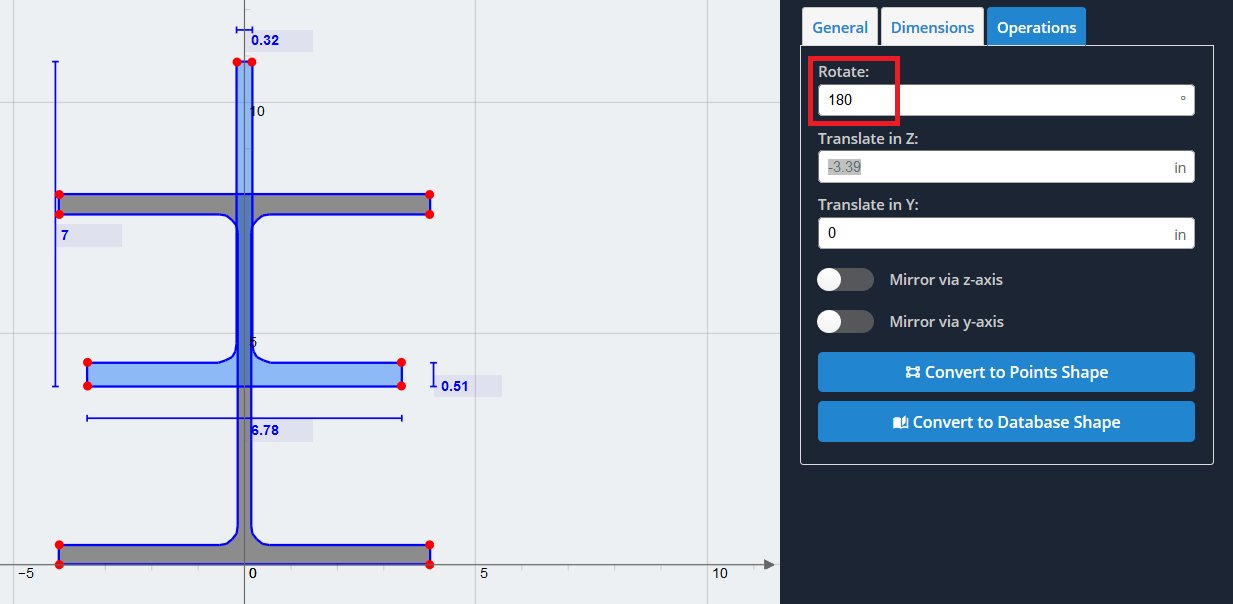
2) Der Einfachheit halber, Verschieben wir die I-Form so, dass sie auf der Y-Achse zentriert ist. Um dies zu tun, Wir möchten die Form um die Hälfte ihrer Flanschbreite in die negative Z-Richtung verschieben (8/2 = 4 Baustahlelemente werden durch Füllelemente oder Verbinder, die Winkelprofile sein können, miteinander verbunden). Einstellen (-4) im „Übersetzen in Z.“’ Feld unter „Operationen“.’ Tab’
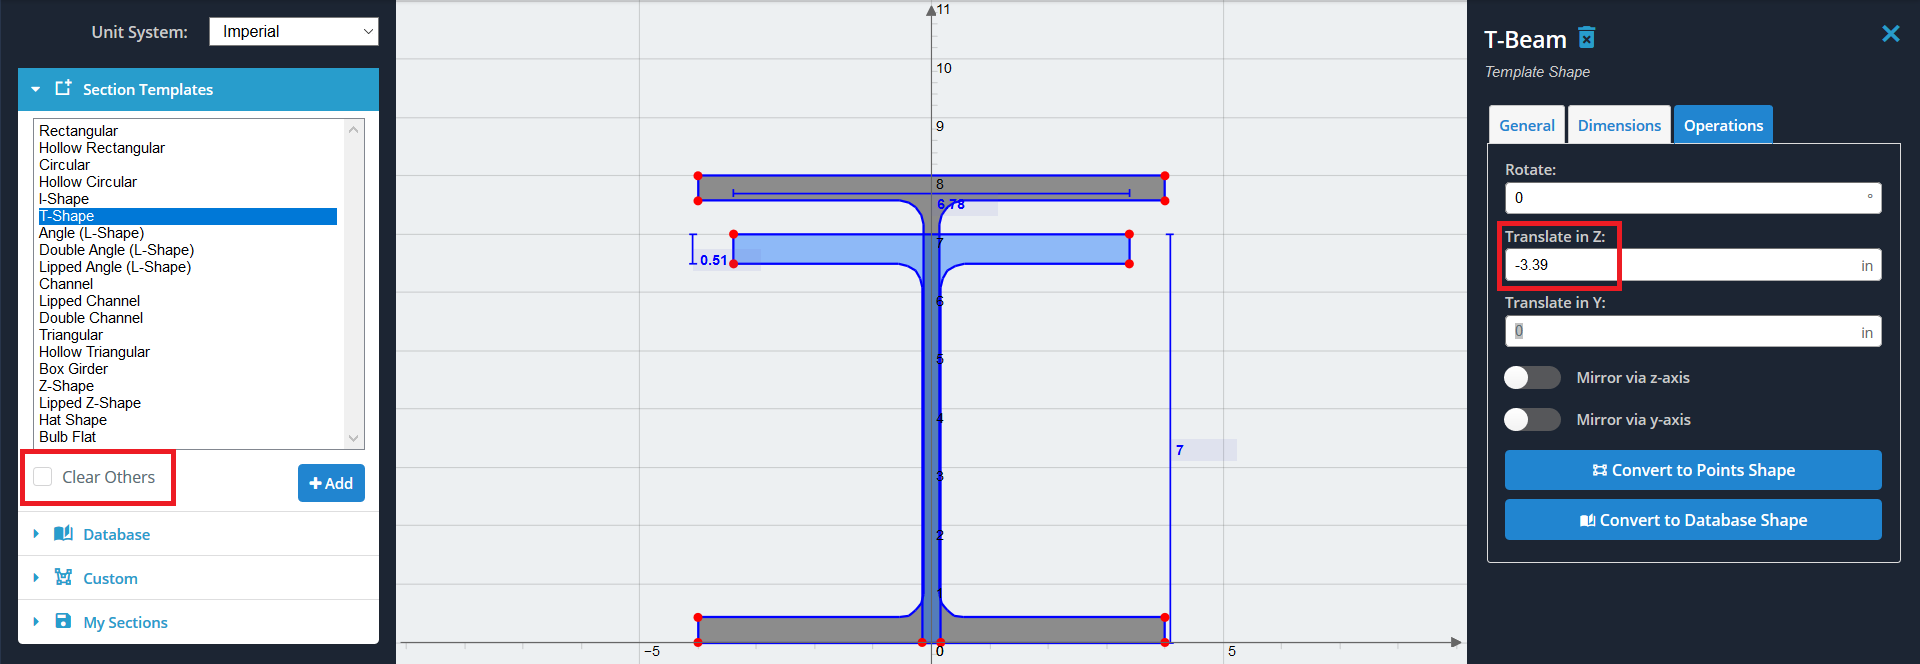
3) Fügen wir nun die T-Form hinzu und zentrieren sie auch auf der Y-Achse. Wählen Sie die „T-Form“.’ aus derselben Abschnittsvorlagenliste und klicken Sie auf „Hinzufügen“.. Verschieben Sie es um die Hälfte seiner gesamten Z-Abmessung in die negative Z-Richtung (6.78/2 = 3.39 Baustahlelemente werden durch Füllelemente oder Verbinder, die Winkelprofile sein können, miteinander verbunden). Beide Formen sollten nun wie gezeigt auf der Y-Achse zentriert sein:
Hinweis: Stellen Sie sicher, dass die Option „Andere löschen“ aktiviert ist’ Option ist ungeprüft, Andernfalls wird die gerade erzeugte Ich-Form gelöscht.
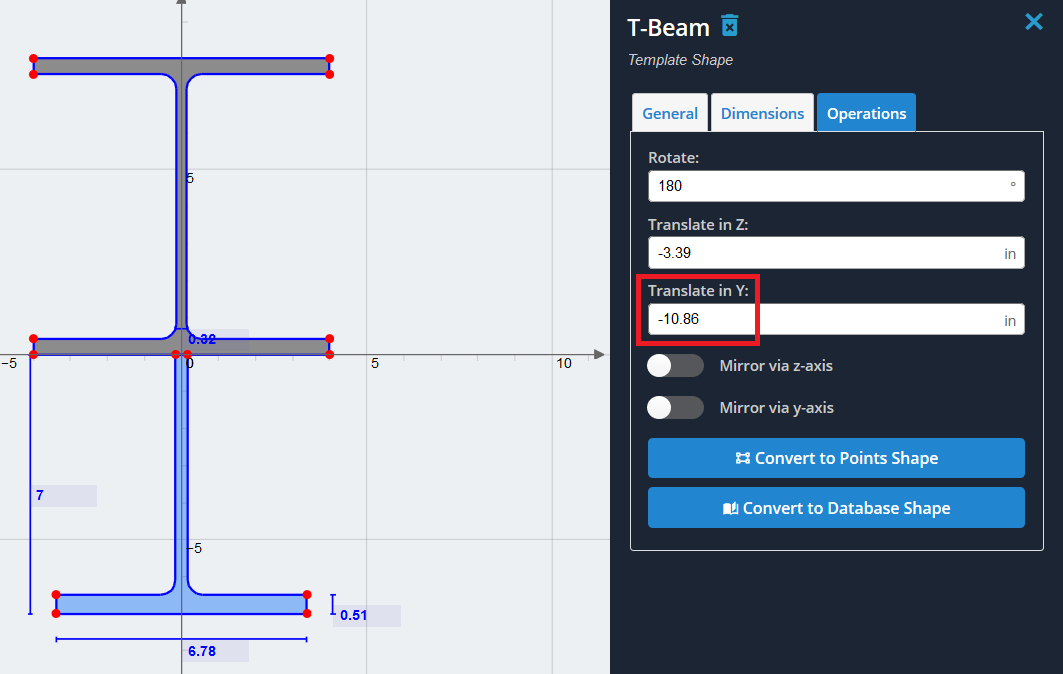
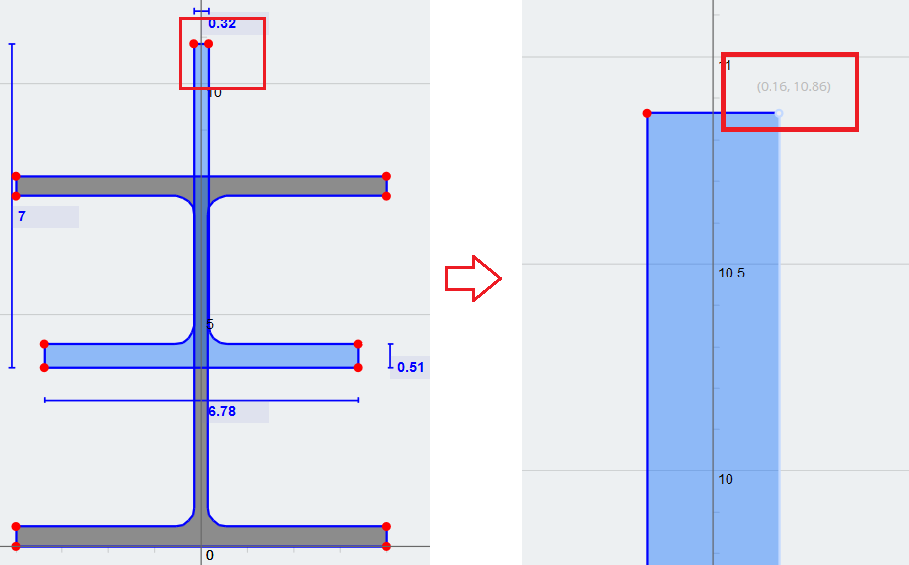
5) Jetzt müssen wir die umgedrehte T-Form nach unten versetzen, damit sie richtig ist “in Verbindung gebracht” bis zur Unterseite des unteren Flansches der I-Form. Weil wir möchten, dass diese oberen Punkte einen Y-Achsenwert von Null haben, wir wollen es durch seine aktuelle Position ausgleichen. Um die Position eines beliebigen Punktes anzuzeigen, der mit einem roten Punkt gekennzeichnet ist, fahren Sie mit der Maus darüber. In unserem Fall, Der Y-Achsenwert der T-Form beträgt (10.86)
6) Schließlich, einstellen (-10.86) als Wert für „In Y übersetzen“.’ Feld, um unsere gewünschte Kombination von Formen zu erhalten. Sie können nun die Abschnittseigenschaften mit der Funktion „Berechnen“ berechnen’ Schaltfläche in der oberen Symbolleiste, und bringen Sie es zur weiteren Analyse in andere Module.