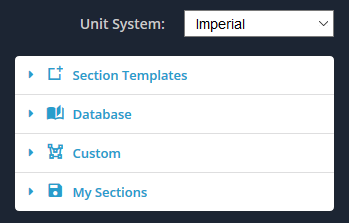
- Modelos de seção
- Base de dados
- Personalizado
- Minhas seções
Cada uma dessas quatro formas é agrupada em seu próprio menu, conforme mostrado abaixo.
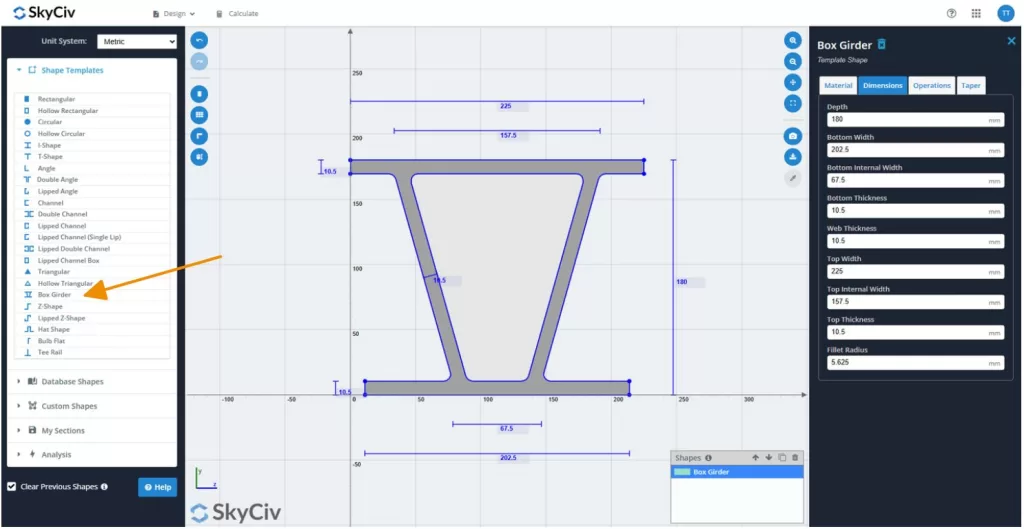
Modelos de seção
O menu Modelos permite que você use um dos 18 modelos de formato padrão. É a maneira mais rápida e fácil de adicionar uma forma à área de design. Basta ajustar as dimensões para se adequar à forma que você procura.
Escolha de:
- Retangular / Quadrado
- Oco Retangular / Quadrado
- Circular
- Circular Oco
- Forma de I
- Formato T
- Ângulo
- Ângulo Duplo
- Ângulo labial
- o canal
- Canal Duplo
- Canal labial
- Canal labial (Lip único)
- Canal duplo emplacado
- Caixa de canal Lipped
- Triangular
- Oco Triangular
- Viga de caixa
- Formato Z
- Lábios em forma de Z
- Forma de chapéu
- Bulbo plano
- TRILHO DE TEE
Para começar, expanda o menu Modelos de seção, e selecione uma das formas de modelo. Você pode clicar em sua seleção para adicionar a forma à placa.
Formas de banco de dados
As formas de banco de dados da Skyciv fornecem aos usuários acesso a milhares de seções estruturais predefinidas de todo o mundo. As dimensões e propriedades dessas formas são provenientes diretamente de documentos oficiais - sejam padrões do setor ou publicações do fabricante.
Como a transferência de dados entre fontes pode introduzir erros, e porque a qualidade e a integridade dos documentos de origem podem variar amplamente, Skyciv segue um processo padronizado para garantir que todos os dados importados sejam precisos e confiáveis.
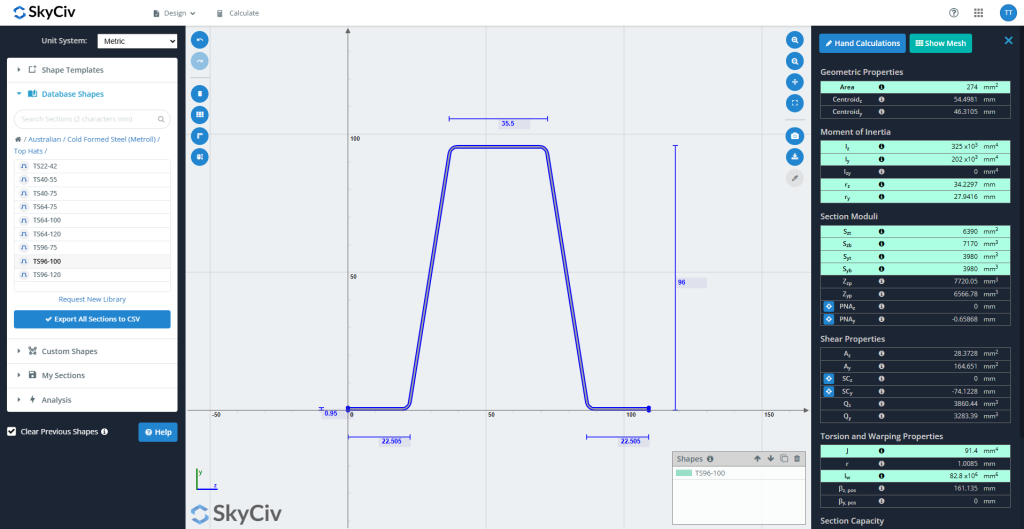
Seção de importação Propriedades
Muitos documentos de origem incluem tabelas de propriedades de seção pré-calculadas. Contudo, Estes geralmente omitem os principais valores necessários para a análise estrutural. Skyciv importa todas as propriedades relevantes fornecidas na fonte - exceto em casos específicos (descrito abaixo)- e calcula automaticamente quaisquer valores ausentes. Propriedades importadas são exibidas em cerceta dentro do construtor de seções.
Por exemplo, na captura de tela abaixo, As seguintes propriedades foram importadas da fonte:
Área, Iz, IY, rz, rY, Szt, Spor exemplo., Syt, Sbt, J, e IC.
Parsing de dados
Uma vez tomada uma decisão para incorporar um novo conjunto de seções ou materiais nas formas de banco de dados, O processo de entrada de dados começa. Um engenheiro Skyciv converte as dimensões em um formato compatível com os modelos de banco de dados da Skyciv. Esta etapa requer julgamento técnico, particularmente nas seguintes áreas:
- Simplificando geometrias complexas: Formas com recursos como lábios, Soldar diretamente uma conexão em todas as direções cria um, ou reforçadores podem complicar os cálculos posteriores. Estes são simplificados de uma maneira que retém as principais propriedades estruturais, mantendo o máximo possível de precisão geométrica. Por exemplo, Para um feixe padrão, Um engenheiro pode reduzir levemente a altura da seção para preservar o momento de eixo forte da inércia.
- Escolhendo quais propriedades importar ou calcular: Enquanto Skyciv geralmente importa todas as propriedades de seção relevantes da fonte, exceções ocorrem.
Exemplo: Se apenas propriedades de eixo forte forem fornecidas, Normalmente é melhor calcular propriedades fortes e de eixo fraco para garantir a consistência. - Resolvendo discrepâncias: Se uma incompatibilidade significativa (>20%) é encontrado entre os valores de origem e os valores calculados do SkyCiv, O engenheiro entrará em contato com o autor do documento para esclarecimentos. Se um erro (por exemplo., um decimal equivocado) está claramente presente, pode ser corrigido imediatamente. Se nenhuma resposta for recebida, Um aviso voltado para o usuário é emitido para aconselhar o cuidado.
Garantia da Qualidade
Depois que a entrada de dados estiver concluída, Um segundo engenheiro realiza uma garantia de qualidade total (Controle de qualidade) Revise usando os documentos originais de origem para verificar a precisão e capturar erros de transferência.
Após a aprovação, As formas são publicadas no banco de dados ao vivo. Como uma salvaguarda final, O engenheiro de controle de qualidade executa uma última verificação na plataforma voltada para o cliente para garantir que os dados permaneçam 100% preciso e consistente.
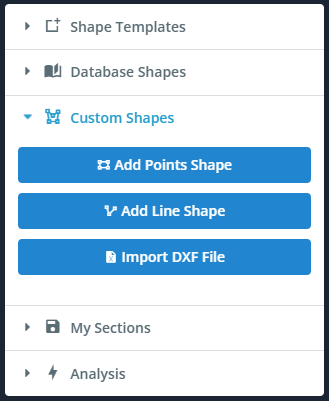
Personalizado
O menu Personalizado permite que você crie suas próprias formas. Este é um recurso útil quando a forma que você procura não existe nos modelos. Oferecemos três maneiras para você criar formas.
- Forma de pontos – Defina uma forma por seus pontos. Especifique um filete em qualquer um dos pontos.
- Forma de Linha – Definir uma forma por um caminho de linha e espessura. Especifique um filete uniforme.
- Importar Arquivo DXF – Esboce sua forma em qualquer pacote CAD e salve o arquivo em DXF para ser importado.
A maneira de usar cada um desses recursos será explorada detalhadamente em sua própria seção de documentação..
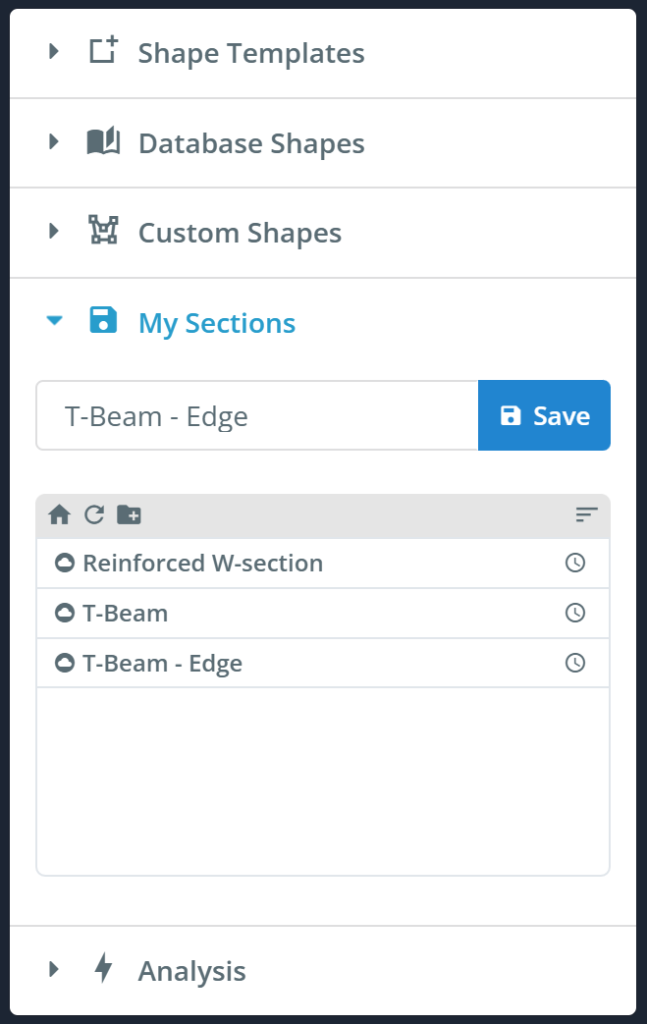
Minhas seções
O menu Minhas Seções permite que você salve, carregar, e exclua suas seções. Isso permitirá que você reutilize ou continue trabalhando em suas seções de forma rápida e fácil no futuro.
Observação: Atribuição de seção transversal ao membro
É importante notar que quando uma barra é atribuída a uma secção, a linha da barra sempre atua através do centróide da seção. Isso é para esclarecer que o (0,0) coordenada (origem) do construtor de seção não é por padrão o centróide.
Você pode esboçar e traduzir sua seção em qualquer lugar no plano cartesiano z-y, e o membro será atribuído ao centroide verdadeiro. As translações e rotações de formas permitem o posicionamento relativo de formas ao criar uma seção composta por mais de uma forma. Se você não quiser que a linha da barra passe pelo centróide, então você pode usar o “Deslocamento A” e Deslocamento B” do membro.
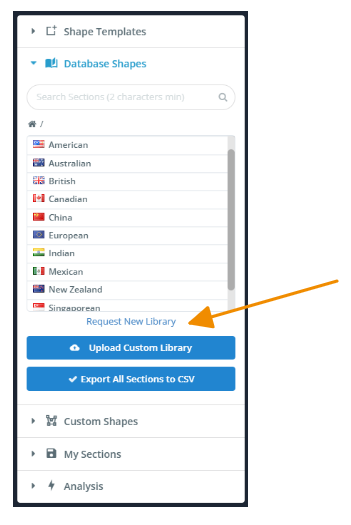
Solicitando novas bibliotecas ou seções
A Skyciv está sempre expandindo seu banco de dados com base nas necessidades do usuário. Se você precisar de um fabricante específico, padrão, ou seção personalizada que não está disponível no momento, Sinta -se à vontade para alcançar nossa equipe.
Você pode enviar sua solicitação diretamente através Solicite nova biblioteca mostrado em Formas de banco de dados guia como mostrado abaixo, ou entre em contato conosco por e -mail em [email protected].
Teremos prazer em analisar sua solicitação e podemos priorizar adições com base na demanda ou nas necessidades do projeto. Quer seja uma biblioteca completa ou apenas uma única forma, estamos aqui para ajudar a garantir que o banco de dados atenda aos seus requisitos.