SkyCiv Structural 3D 和 Load Generator 之间的集成有助于弥合载荷计算和载荷应用之间的差距. 通过这种整合, 用户可以在Load Generator模块中自动生成负载, 然后将它们直接应用到 Structural 3D 中的模型中. 此功能直接集成在 Structural 3D 中, 因此无需事先进入任何单独的模块. 后来, SkyCiv 建议在参与任何负载生成器应用程序之前完成结构的建模阶段, 因为它将提高过程的整体准确性.
以下类型的代码生成的载荷可直接应用于 Structural 3D 中的模型
- 风荷载
- 积雪 (平衡情况)
- 地震荷载 (作为光谱负载)
在进入本文之前, SkyCiv 强烈建议阅读以下软件文档 结构 3D 建模, 区 & 风荷载, 以及熟悉独立的使用 负载产生器, 因为所有这些功能都是相关的. 本文档将重点介绍在 Structural 3D 中操作时使用集成版本的负载生成器应用负载. 所以, 本文档不会深入讨论如何计算每个单独的负载, 因为它们非常依赖于您使用的代码. 如上所述, 请通过链接 有关负载生成器的文档 和现行的建筑规范, 在阅读本文之前.
使用集成负载生成器, 完成结构建模, 然后去 区域负荷 在 Structural 3D 中操作时位于左侧输入选项卡上. 然后, 点击 “从设计代码自动生成载荷…“纽扣.
注意: 结构越简单, 集成应用程序就越容易. 模型越复杂, 施加载荷的精确度越低.
从负载生成器应用风荷载
乍一看,您会注意到风荷载生成器的完整独立版本现在位于屏幕的左侧输入侧. 用户在集成版本中享受与独立版本中相同的所有功能. 诸如保存计算和打印站点以及风荷载报告之类的事情都可以在这里完成. 在集成负载生成器中, 结构 3D 模型将始终显示在屏幕的右侧.
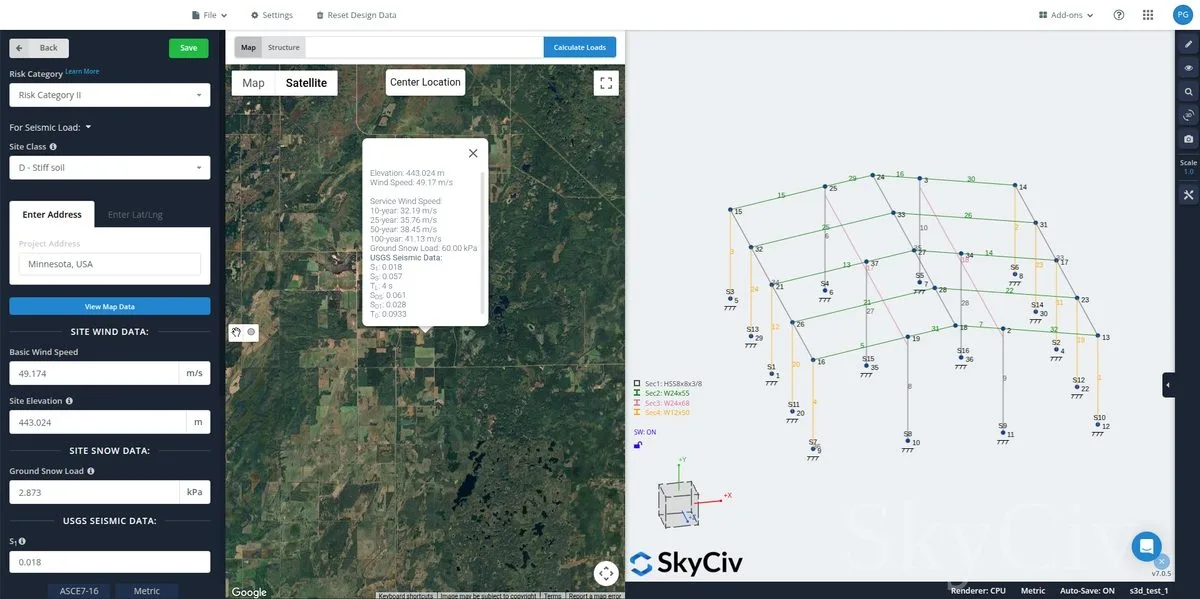
当您浏览结构数据的输入时, 特别适用于建筑物, 您可以选择通过选择风向箭头平行的风向轴来自动检测模型的尺寸. 一旦您为此选择了一个选项, 您可以单击 “检测建筑物尺寸” 按钮填充模型中检测到的结构尺寸. 请注意,您仍然需要仔细检查这些值以确保这些值正确. 一个选项是通过在模型之间单击并拖动来测量模型中的距离 2 节点.

所有负载参数完成后, 点击 生成载荷 纽扣. 结果将显示在不同的选项卡上, 用于风, 雪, 或地震荷载.
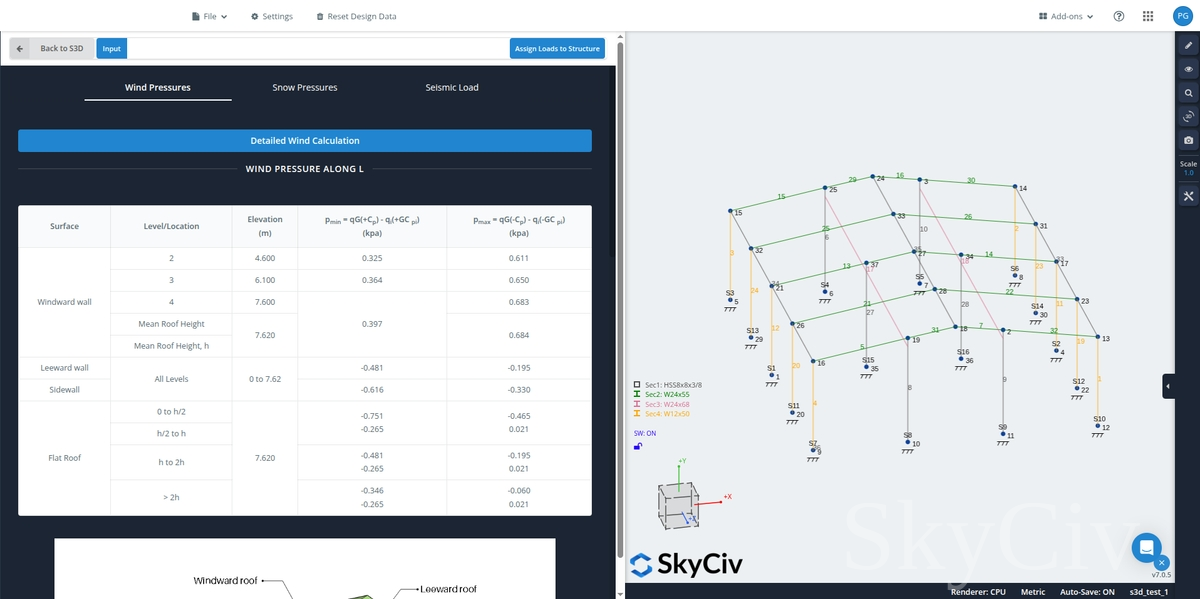

将会出现提示,询问您是否要应用风荷载和雪荷载. 对于地震荷载, 该选项是将生成的设计光谱复制到 S3D 的光谱负载.
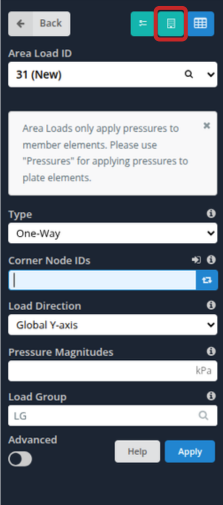
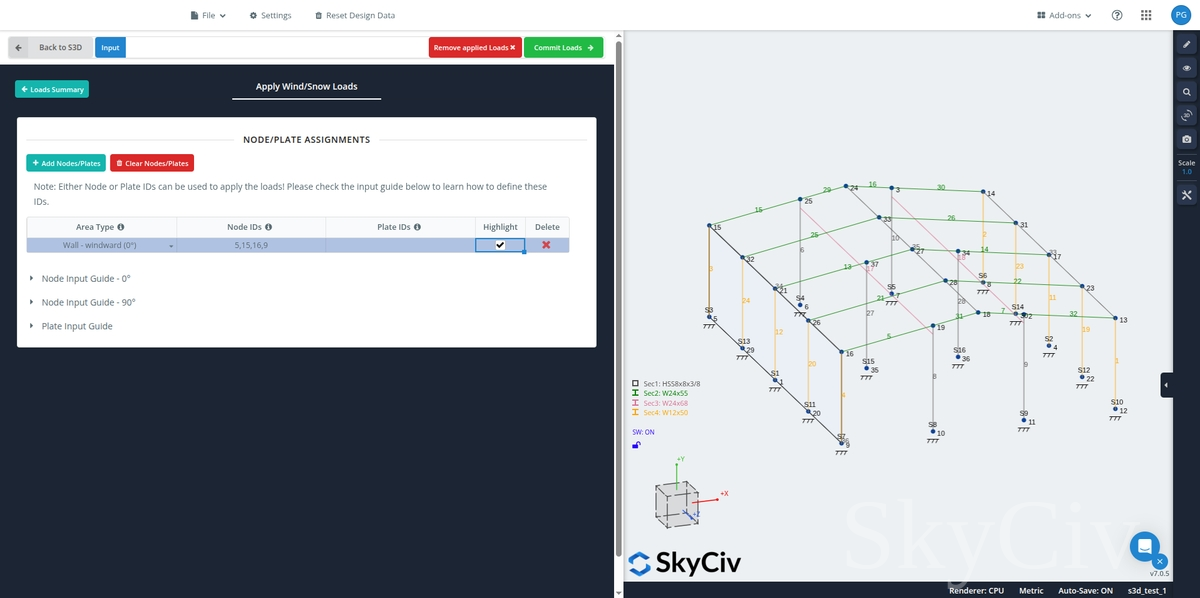
在应用风荷载和雪荷载的面积荷载时, 必须遵循特定区域类型的节点输入指南,以便正确施加压力. 这些指南显示在节点条目表的底部.
在区域类型栏中, 墙壁和屋顶表面有多种选择 (对于 0 首先介绍你自己和你申请的职位):
- 迎风墙
- 背风墙
- 侧墙

- 迎风/逆风屋顶
- 背风/下风屋顶
- 单坡屋顶
- 屋顶平台 (屋顶倾斜角小于 10 度数)

以下只是需要在“应用载荷”部分中定义的一些节点区域类型. 一般来说, 建议节点 ID 创建一个四边形表面. 您可以估算总面积,如下所示:
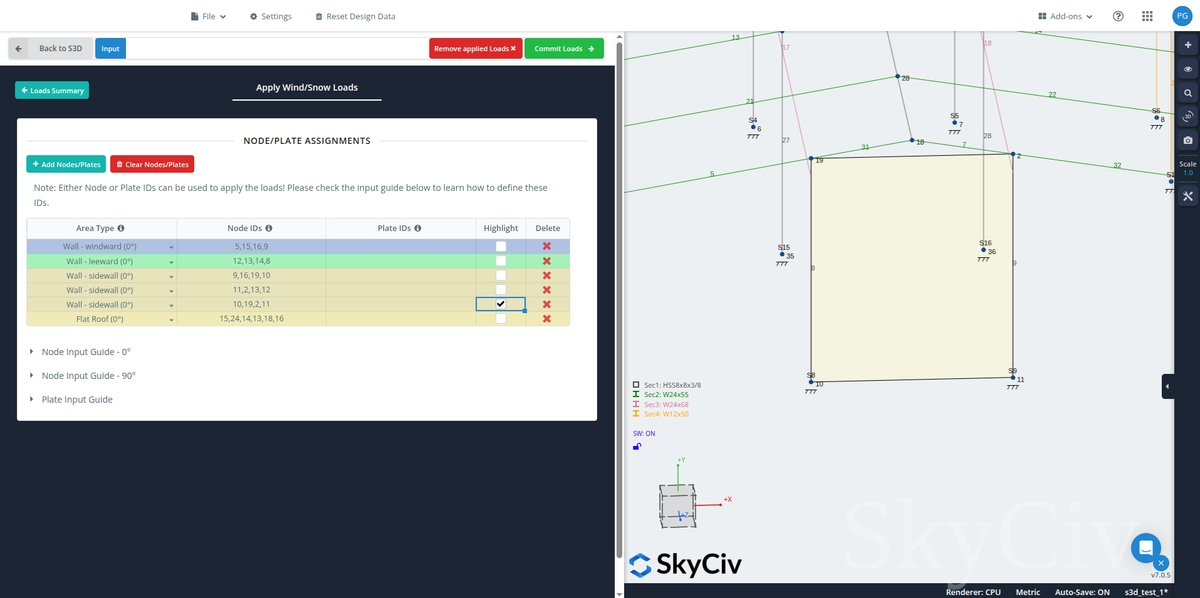
有版本 6.1.2, 用户现在应该能够添加 5 节点 ID (以五边形为界). 也, 用户现在将能够从 S3D 中的负载生成器同步已编辑的所施加压力负载的节点 ID,特别是在需要手动编辑节点输入来修复面积负载差异的情况下.
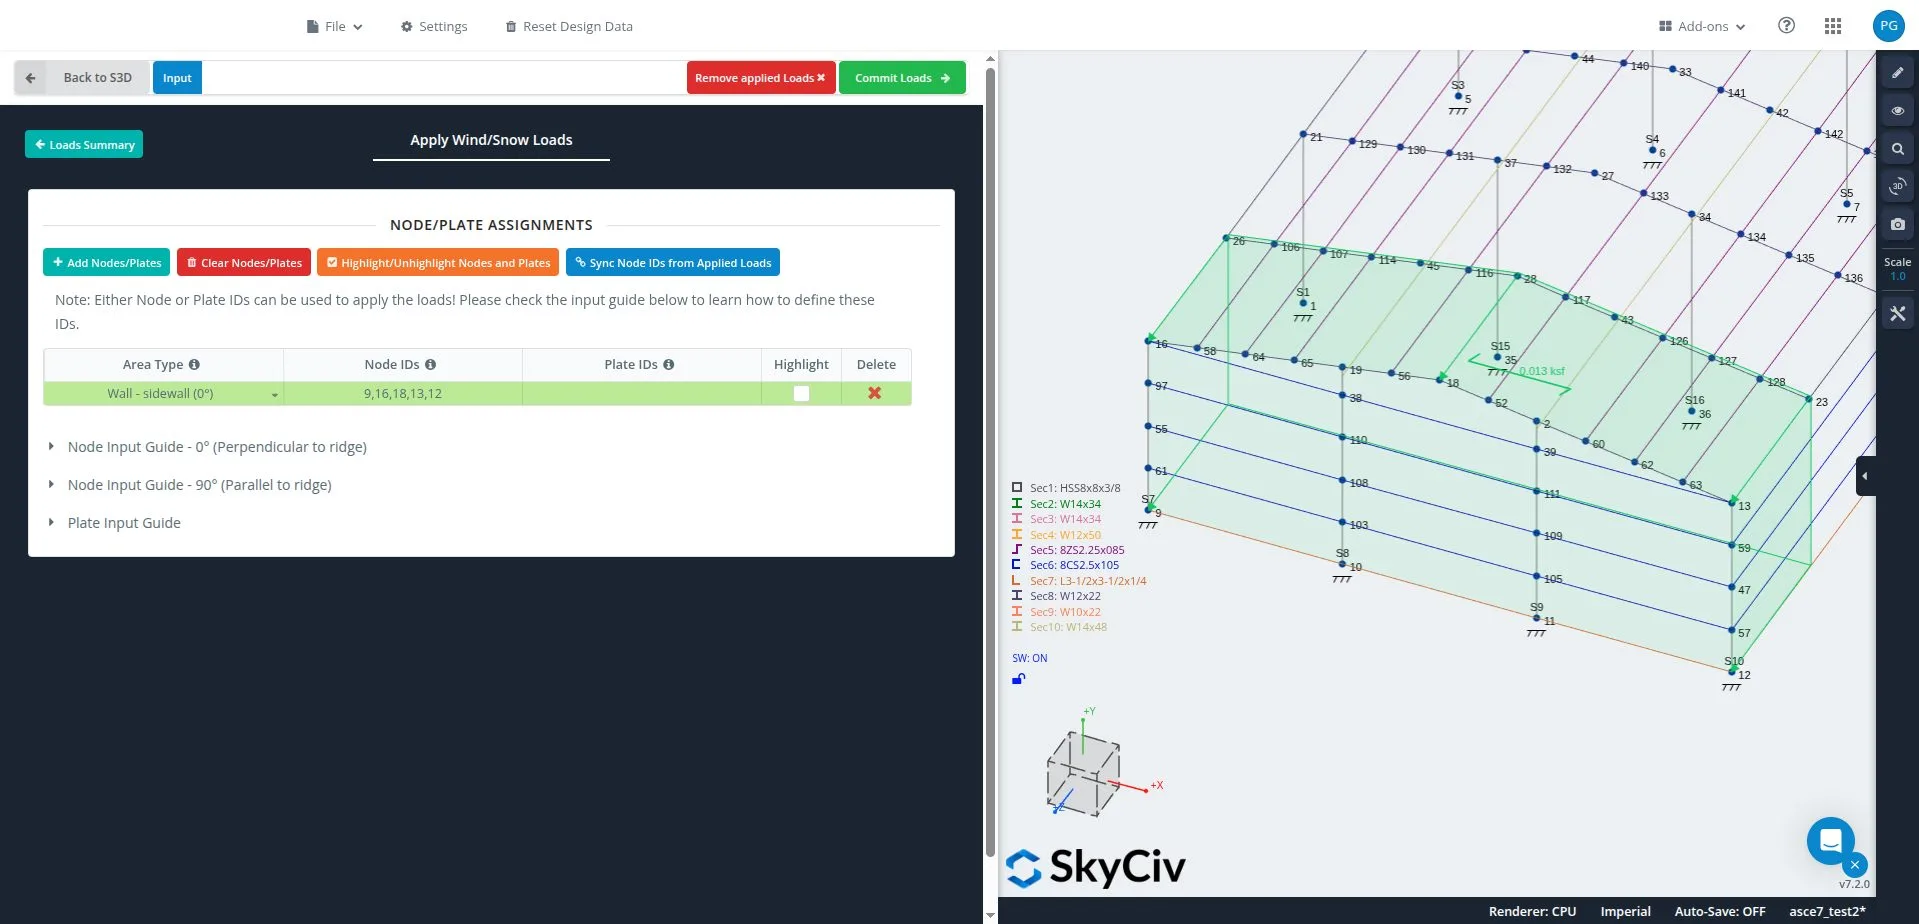
下面显示了给定结构的节点输入示例以及相应的指定区域类型/表面:
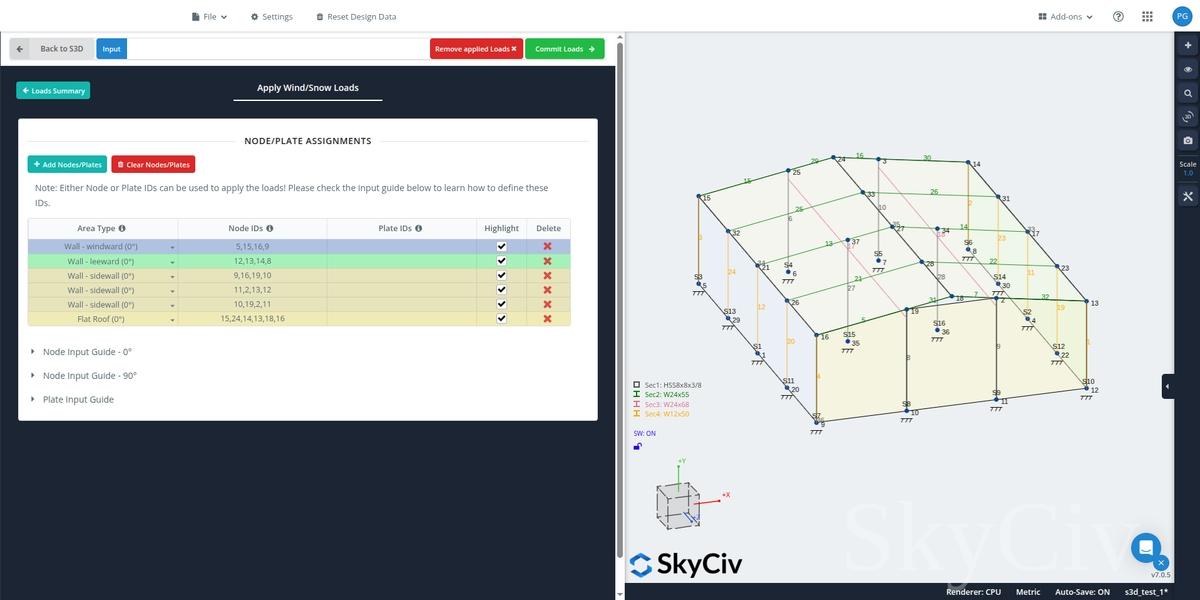
一旦区域类型全部定义完毕, 您应该能够通过单击来应用负载 “提交负载” 纽扣:
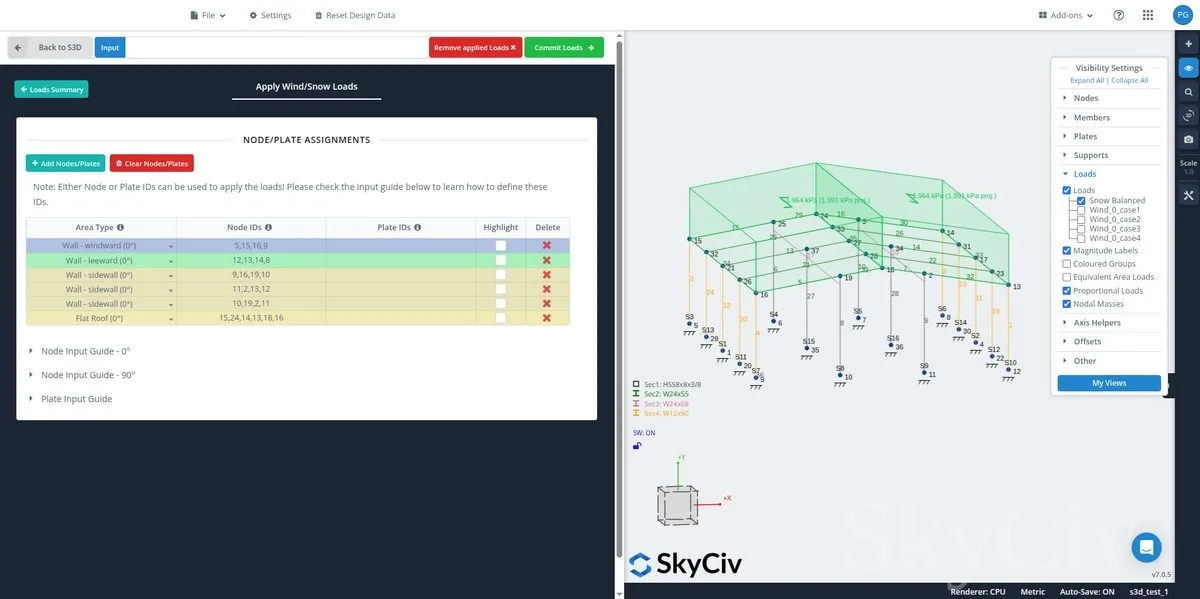
您应该看到能够生成和应用的载荷将直接显示在模型的 3D 模型空间中. 每个载荷工况将同时显示, 所以可能更难看出发生了什么. 发电机打开的同时, 您可以使用 Structural 3D 中提供的相同可见性设置和工具打开和关闭不同的荷载工况,以及隐藏或隔离模型空间中的成员.
一个 重要的提示 关于生成的风荷载:
SkyCiv 高度 推荐 检查 面积和风荷载 软件文档文章,了解有关从负载生成器创建的区域负载的更多深入信息.
应用生成的雪荷载
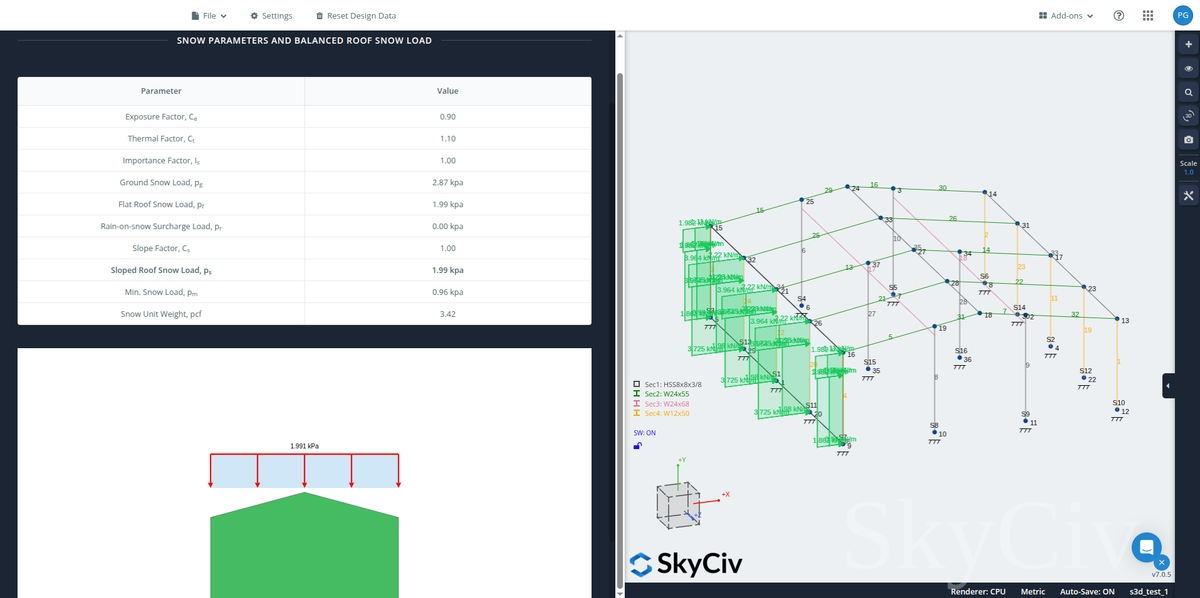
在 S3D 中使用 SkyCiv Load Generator, 只要节点条目表中定义了屋顶区域类型,就会根据所选屋顶轮廓应用平衡/无漂移情况. 请注意,该载荷作为预计载荷施加.
应用生成的地震载荷
在施加地震荷载时, 建议的方法是将生成的结构设计谱导出到我们的谱载荷. 只需单击 “将响应谱数据导出到谱负载” 纽扣!
修改或重置负载
如果在应用这些生成的负载期间的任何时候您想要更改基础参数值, 或重新开始, 你可以这样做. 更改或重置负载, 去 区域负荷 > 负载产生器 就好像您要首先施加负载一样, 你应该会看到这条消息:
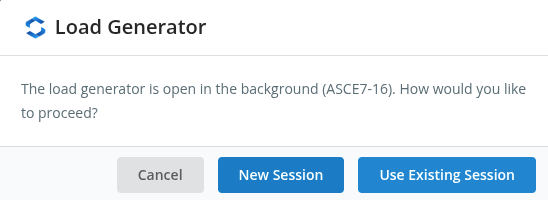
- 重新开始, 打 新会议 纽扣.
- 调整先前计算负载的值, 打 使用现有会话 纽扣.
这两个选项都会带您返回集成负载生成器页面.