ДИМС / ЛИНИЯ СЕТКИ / ОБЛАЧНЫЕ команды
В ДИМС / ЛИНИЯ СЕТКИ / ОБЛАКО группа панели инструментов содержит аннотацию, линия сетки, и инструменты разметки версий, используемые для черчения и документации в SkyCiv CAD..
Большинство инструментов используют размещение на основе щелчков и поддерживают активные настройки привязки для точного выравнивания..
Размеры
Используйте инструменты размеров для аннотирования линейных, прогнозируемый, угловой, и измерения радиуса прямо на холсте.
Создать измерение
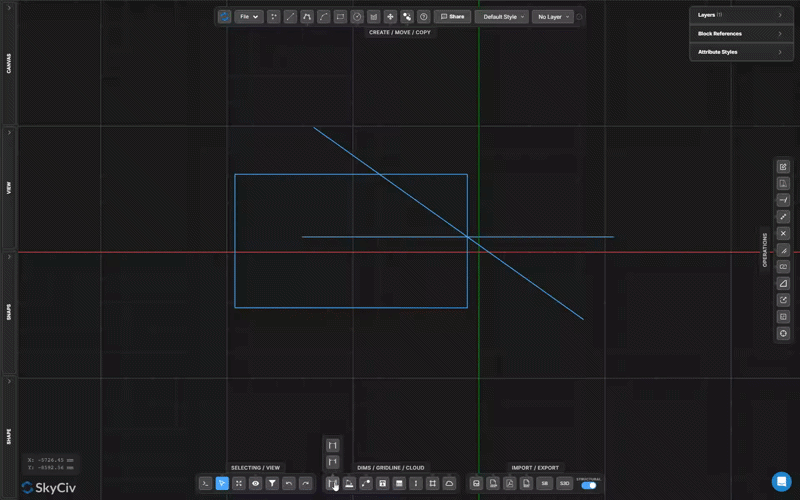
Поместите стандартный линейный размер расстояния между двумя точками.
В Создать измерение инструмент размещает линейный размер, показывающий истинное расстояние между двумя точками щелчка, в комплекте с удлинителями, размерная линия, стрелки, и метка измерения.
Шаг за шагом
- 1Активировать Создать измерение.
- 2Щелкните первую точку измерения.
- 3Нажмите вторую точку измерения.
- 4Переместите курсор, чтобы сместить размерную линию, затем нажмите, чтобы разместить его.
Поскольку мы хотим, чтобы другая сторона конструкции начиналась в этом месте: Привязки помогают точно выровнять конечные и средние точки для точных измерений.. Используйте аккордеон настроек размеров для управления стилем стрелок., смещение текста, и разрывы выносных линий.
Создать проекционный размер
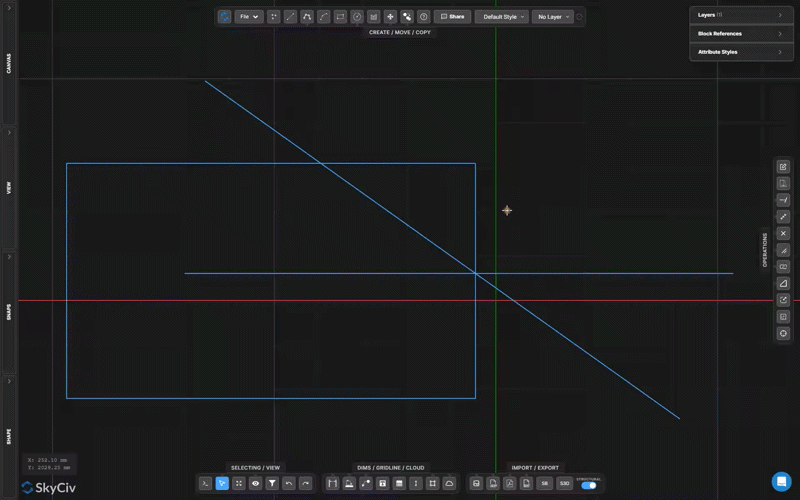
Показывать горизонтальное или вертикальное расстояние проекции между двумя точками
Проецируемый размер измеряет и аннотирует только горизонтальную или вертикальную составляющую расстояния между двумя точками – полезно для наклонных элементов, где вам нужен план или пролет высоты.
Шаг за шагом
- 1Активировать Создать проекционный размер.
- 2Нажмите на первую точку.
- 3Нажмите вторую точку.
- 4Нажмите, чтобы разместить проецируемый размер.
Поскольку мы хотим, чтобы другая сторона конструкции начиналась в этом месте: Проецируемый размер автоматически выбирает горизонтальный или вертикальный размер в зависимости от положения курсора при размещении.. Переместите курсор выше/ниже точек для горизонтального, или влево/вправо для вертикального.
Создать угловой размер
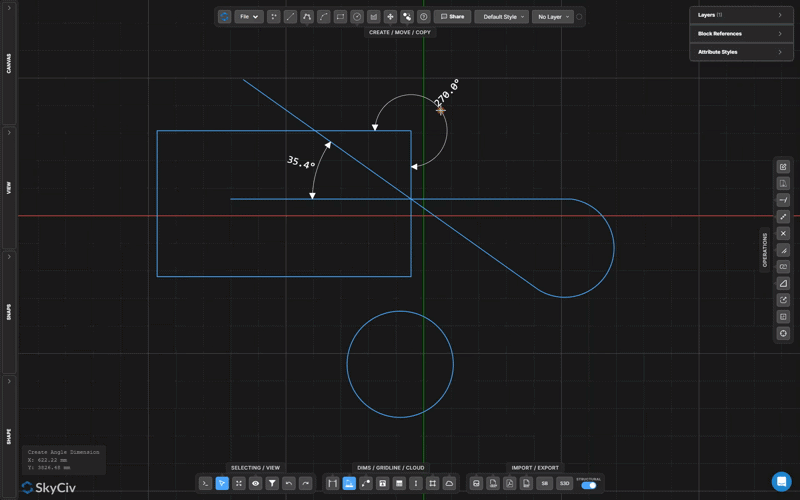
Измерьте и прокомментируйте угол между двумя линиями
Угловой размер помещает размер в форме дуги, показывающий угол между двумя выбранными линиями, с меткой измерения, расположенной вдоль дуги.
Шаг за шагом
- 1Активировать Создать угловой размер.
- 2Нажмите первую строку.
- 3Нажмите вторую строку.
- 4Переместите курсор и щелкните, чтобы разместить угловую дугу и метку..
Поскольку мы хотим, чтобы другая сторона конструкции начиналась в этом месте: Положение курсора при размещении определяет, какой из четырех возможных угловых секторов будет показан. – интерьер, экстерьер, или два дополнительных угла. Поместите курсор внутри нужного сектора.
Создать размер радиуса
Аннотирование радиуса дуги или круга
Размер радиуса размещает выноску из центра дуги или круга, показывая ее радиус, с линией-выноской и меткой с префиксом R.
Шаг за шагом
- 1Активировать Создать размер радиуса.
- 2Щелкните дугу или круг.
- 3Переместите курсор и щелкните, чтобы расположить выноску радиуса..
Поскольку мы хотим, чтобы другая сторона конструкции начиналась в этом месте: Используйте аккордеон настроек размеров, чтобы управлять стилем стрелки и показывать ли префикс R перед значением..
Текст и Лидер
Создать текст выноски
Добавьте стрелку, указывающую на объект с текстовой заметкой.
В Текст выноски инструмент создает стрелку, указывающую на определенное место на чертеже, и соединяет ее с текстовой выноской. Используется для примечаний к материалам., маркеры деталей, и справочные этикетки.
Шаг за шагом
- 1Активировать Создать текст выноски.
- 2Щелкните место кончика стрелки на объекте..
- 3Нажмите на место привязки текста.
- 4Введите текст аннотации и подтвердите.
Поскольку мы хотим, чтобы другая сторона конструкции начиналась в этом месте: Когда одно примечание применимо к нескольким местам, использовать Текст с несколькими выносками вместо этого соединить несколько стрелок с одним блоком выноски.
Создать текст с несколькими выносками
Создайте одну выноску с несколькими стрелками на выноске.
Текст с несколькими выносками создает один блок аннотаций с несколькими стрелками, указывающими на разные места. Используйте его, когда одна нота относится сразу к нескольким объектам или позициям..
Шаг за шагом
- 1Активировать Создать текст с несколькими выносками.
- 2Нажмите на точку привязки текста.
- 3Нажмите на каждое место наконечника стрелки..
- 4Введите текст аннотации и нажмите неподвижная точка в пространстве, которая не движется чтобы подтвердить.
Поскольку мы хотим, чтобы другая сторона конструкции начиналась в этом месте: После размещения, вы можете перемещать как точку привязки, так и отдельные кончики стрелок независимо друг от друга, выбирая аннотацию и перетаскивая маркеры..
Создать текст
Размещение стилизованных текстовых меток с помощью шрифта, размер, и контроль выравнивания
В Создать текст инструмент размещает отдельную текстовую метку на холсте. Шрифт, размер, жирный/курсивный стиль, выравнивание, и цвет настраиваются до или после размещения.
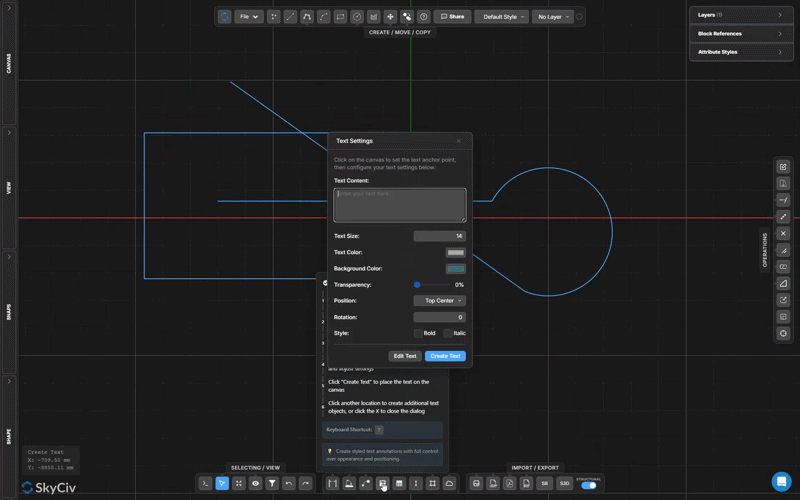
Шаг за шагом
- 1Активировать Создать текст.
- 2Щелкните опорную точку на холсте, чтобы открыть текстовое диалоговое окно..
- 3Введите текстовое содержимое и настройте шрифт, размер, и выравнивание.
- 4Нажмите Создать текст разместить метку.
Поскольку мы хотим, чтобы другая сторона конструкции начиналась в этом месте: Текстовые объекты привязываются к позиции курсора; позволяющий Привязка для выравнивания позволяет легко выравнивать метки по горизонтали или вертикали с существующей геометрией.
Создать таблицу
Вставьте аннотацию отформатированной таблицы непосредственно в чертеж.
В Создать таблицу инструмент вставляет таблицу структурированных данных в виде аннотации к чертежу. Используйте его для расписаний, свойства раздела, таблицы загрузки, или общие справочные данные в таблице.
Шаг за шагом
- 1Активировать Создать таблицу.
- 2Щелкните опорную точку для размещения таблицы..
- 3Настроить содержимое таблицы, ряды, и стиль в диалоге.
- 4Подтвердите вставку таблицы.
Поскольку мы хотим, чтобы другая сторона конструкции начиналась в этом месте: После размещения, дважды щелкните таблицу, чтобы снова открыть редактор и изменить содержимое ячейки., добавить строки, или отрегулируйте ширину столбцов.
Линия сетки и строительство
Создать линию сетки
Нарисуйте помеченные справочные линии структурной сетки.
Линии сетки обозначаются справочными осями, используемыми на чертежах конструкций для определения сетки здания.. Они отображают пузырьковые метки на каждом конце и поддерживают привязку с помощью Привязка к линиям сетки вариант.
Шаг за шагом
- 1Активировать Создать линию сетки.
- 2Установите метку линии сетки на панели «Настройки»..
- 3Щелкните первую конечную точку.
- 4Щелкните вторую конечную точку, чтобы разместить линию сетки..
Поскольку мы хотим, чтобы другая сторона конструкции начиналась в этом месте: Линии сетки с одинаковыми метками автоматически увеличиваются (А, А1, А2…). Давать возможность Привязка к линиям сетки на панели «Привязки», чтобы привязать геометрию к расширенным путям линий сетки..
Вертикальная строительная линия
Создавайте бесконечные вертикальные опорные линии, которые не отображаются при экспорте.
Вертикальные строительные линии представляют собой бесконечные вертикальные опорные линии, используемые для выравнивания и привязки.. Они видны на холсте, но исключены из всего экспорта..
Шаг за шагом
- 1Активировать режим вертикальной вспомогательной линии.
- 2Нажмите X-позицию на холсте, чтобы разместить линию..
- 3Продолжайте нажимать, чтобы разместить больше линий. Нажмите Esc выйти.
Поскольку мы хотим, чтобы другая сторона конструкции начиналась в этом месте: Давать возможность Привязка к вспомогательным линиям на панели «Привязки», чтобы использовать вспомогательные линии в качестве целей привязки при рисовании другой геометрии..
Горизонтальная строительная линия
Создавайте бесконечные горизонтальные опорные линии, которые не отображаются при экспорте.
Горизонтальные строительные линии представляют собой бесконечные горизонтальные опорные линии для выравнивания и привязки.. Как вертикальные строительные линии, они видны на холсте, но исключены из всего экспорта.
Шаг за шагом
- 1Активировать режим горизонтальной вспомогательной линии.
- 2Нажмите Y-позицию на холсте, чтобы разместить линию..
- 3Продолжайте нажимать, чтобы разместить больше линий. Нажмите Esc выйти.
Поскольку мы хотим, чтобы другая сторона конструкции начиналась в этом месте: Объедините горизонтальные и вертикальные вспомогательные линии, чтобы создать собственную справочную сетку., затем включите Привязка к вспомогательным линиям работать именно внутри него.
Угловая строительная линия
Создавайте бесконечные опорные линии под любым углом
Угловые строительные линии представляют собой бесконечные опорные линии, определяемые двумя точками щелчка. Они простираются бесконечно в обоих направлениях под углом, определяемым двумя кирками., поддержка привязки так же, как вертикальный и горизонтальный варианты.
Шаг за шагом
- 1Активировать режим наклонной вспомогательной линии.
- 2Нажмите на первую точку.
- 3Щелкните вторую точку, чтобы определить направление угла..
- 4Бесконечная линия создается через обе точки.
Поскольку мы хотим, чтобы другая сторона конструкции начиналась в этом месте: Используйте наклонную вспомогательную линию, чтобы определить опорное направление для наклонного элемента., затем используйте Привязка к параллельному режиму рисовать другую геометрию под тем же углом.
Облако ревизий
Создать облачный кадр редакции
Нарисуйте прямоугольное ревизионное облако из рамки, перетаскивая ее щелчком мыши.
В Редакция облачного кадра инструмент создает прямоугольную границу цепочки дуг путем перетаскивания ограничивающей рамки. Размер выпуклости дуги настраивается в аккордеоне фигур..
Шаг за шагом
- 1Активировать Создать облачный кадр редакции.
- 2Нажмите и перетащите, чтобы определить границы кадра.
- 3Выпустите для автоматического создания границы облака..
- 4При необходимости отрегулируйте радиус дуги в аккордеоне «Фигуры»..
Поскольку мы хотим, чтобы другая сторона конструкции начиналась в этом месте: Установите радиус редакционной дуги в аккордеоне «Фигуры». уравнения равновесия основаны на недеформированной геометрии рисунок, чтобы получить желаемую плотность облаков. Больший радиус = меньше, более круглые неровности; меньший радиус = больше неровностей по периметру.
Создание облака ревизий покадрово по кругу
Нарисуйте круглое ревизионное облако по центру и радиусу.
Облако, кадр за кругом создает границу облака из круговой дуговой цепи, определяемую центральной точкой и радиусом – идеально подходит для выделения круглой или точечной области на чертеже.
Шаг за шагом
- 1Активировать режим кругового облака.
- 2Нажмите на центральную точку.
- 3Переместите курсор наружу и щелкните, чтобы установить радиус..
- 4Облако создано в виде круговой рамки, состоящей из дуг и цепочек..
Поскольку мы хотим, чтобы другая сторона конструкции начиналась в этом месте: Введите числовой радиус и нажмите неподвижная точка в пространстве, которая не движется для точного размера круга вместо визуального щелчка.
Облако ревизий, нарисованное от руки
Нарисуйте границу пометочного облака произвольной формы
В Облако ревизий, нарисованное от руки позволяет рисовать контуры произвольной формы, которые автоматически преобразуются в границу облака с рельефной дугообразной цепочкой.. Отлично подходит для органических или асимметричных областей ревизии..
Шаг за шагом
- 1Активировать Облако ревизий, нарисованное от руки.
- 2Нажмите один раз, чтобы начать контур границы..
- 3Удерживайте и перетащите, чтобы нарисовать контур произвольной формы..
- 4Выпуск для завершения границы облака.
Поскольку мы хотим, чтобы другая сторона конструкции начиналась в этом месте: Делайте наброски медленно для получения более плавных результатов.. Частота скачка дуги соответствует Редактирование радиуса дуги настройка в гармошке Shapes – меньшие значения создают более плотные неровности.
Разблокировать свой
бесплатной Счет
Зарегистрируйтесь на бесплатную учетную запись и получите доступ к мощному анализу + программное обеспечение для проектирования:
✓ Мощное программное обеспечение для анализа
✓ Доступ к 90+ Инструменты проектирования
✓ Ассе, КАК, В, NBCC нагрузочный генератор
✓ Стали, лесоматериалы, бетон, SkyCiv предоставляет ряд предварительно настроенных по умолчанию