Het doel van SkyCiv is om de tijd die u besteedt aan het modelleren van uw structuur te verkorten door het instellen van nuttige functies in S3D. De volgende reeks muisklikfuncties vergemakkelijken dit doel door het modelleringsproces te stroomlijnen.
Rooster
Rasters kunnen worden ingeschakeld om overal in de modelruimte referentielijnen weer te geven. U kunt rasters gebruiken in combinatie met de teken gereedschap hier zeer effectief:
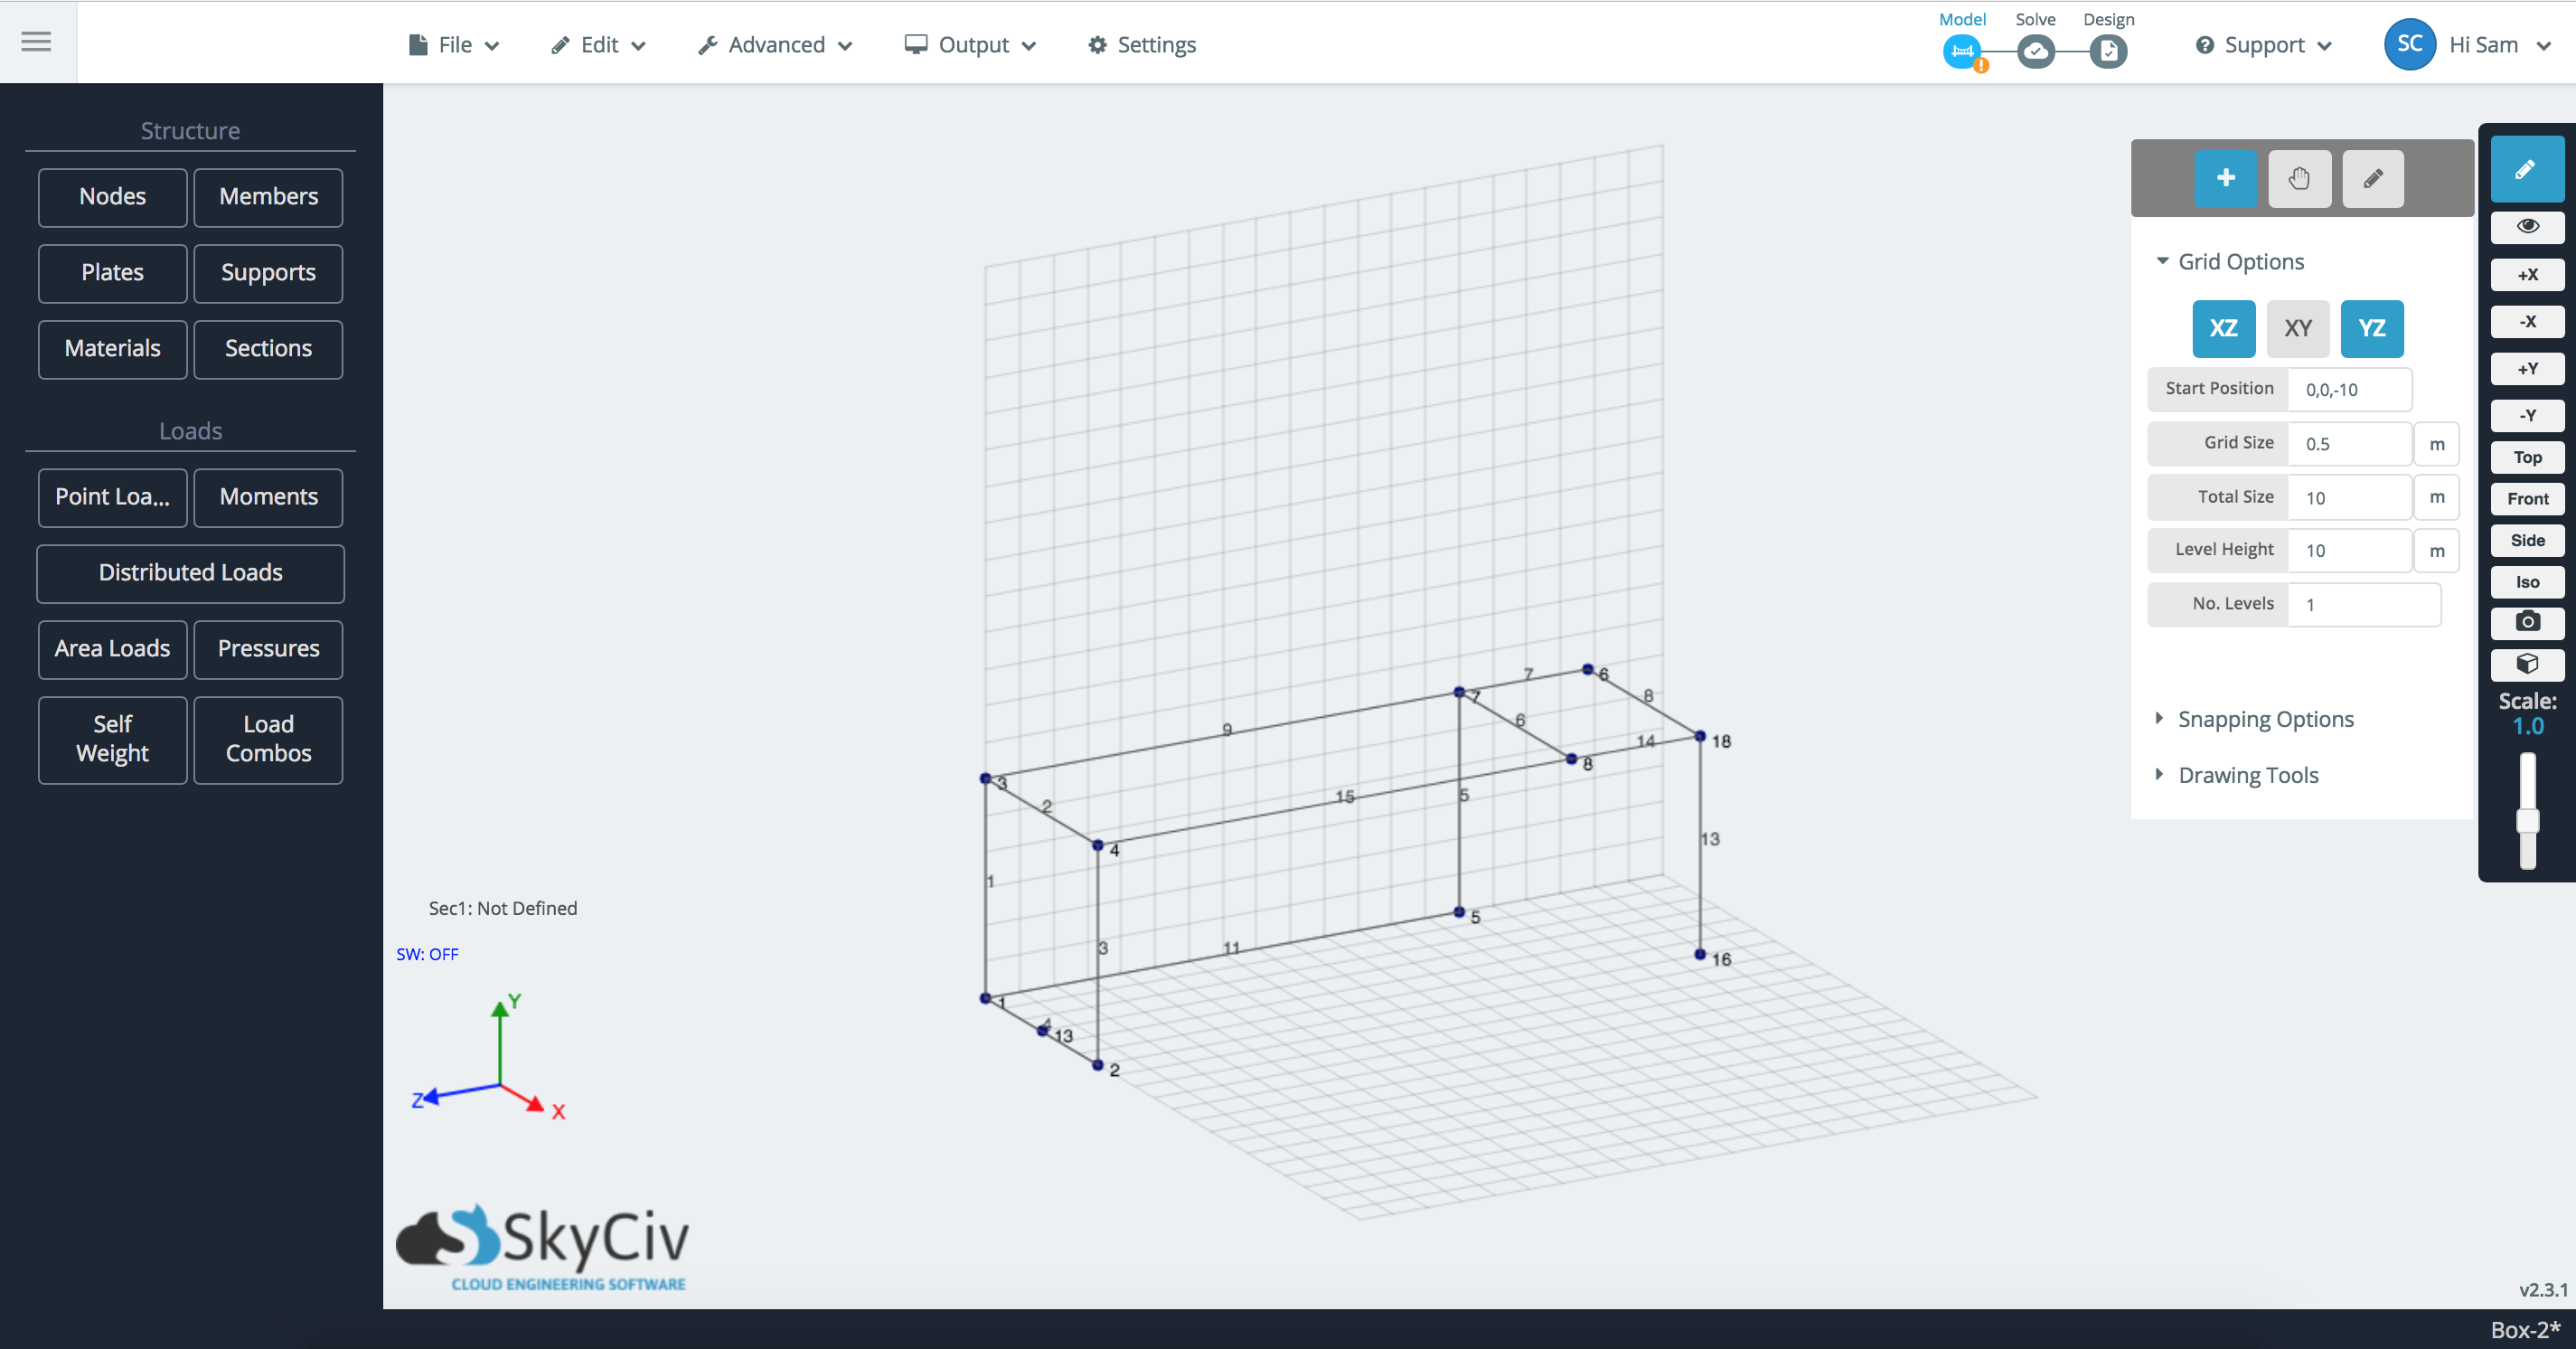
- Vliegtuigkiezer – De rasters zijn vereenvoudigd tot deze drie schakelknoppen voor elk 2D-vlak (XY, XZ, en YZ). Klik op dat vliegtuig om het in en uit te schakelen.
- Begin positie – De positie in de 3D-ruimte waar het raster begint op. Gebruik dit om het raster te pannen/verplaatsen naar een positie die logisch is voor u om vanuit te werken. Rechts (en hoger) voorbeeld, het raster begint vanaf het referentiepunt (0,0,-10).
- Rastergrootte – De grootte van elk vierkantje van het raster. Rechts (en hoger) voorbeeld, elk klein vierkant is 0,5 m x 0,5 m.
- Niveau Hoogte – Op welke afstand wilt u het raster naar boven repliceren?? Rechts (en hoger) voorbeeld is er alleen 1 niveau, dus niveauhoogte wordt niet toegepast.
- Aantal niveaus – Hoe vaak wil je het raster omhoog repliceren?? Rechts (en hoger) voorbeeld is er alleen 1 niveau.

Met de tekentool ingeschakeld, gebruikers kunnen over elk punt op het raster zweven en een knooppunt plotten. Als de instelling Toon coördinaten onder Snap-opties is aangevinkt, het toont de coördinaten van die rasterpositie, zodat u weet waar het knooppunt zal worden geplaatst.
Pengereedschap en opties voor snappen
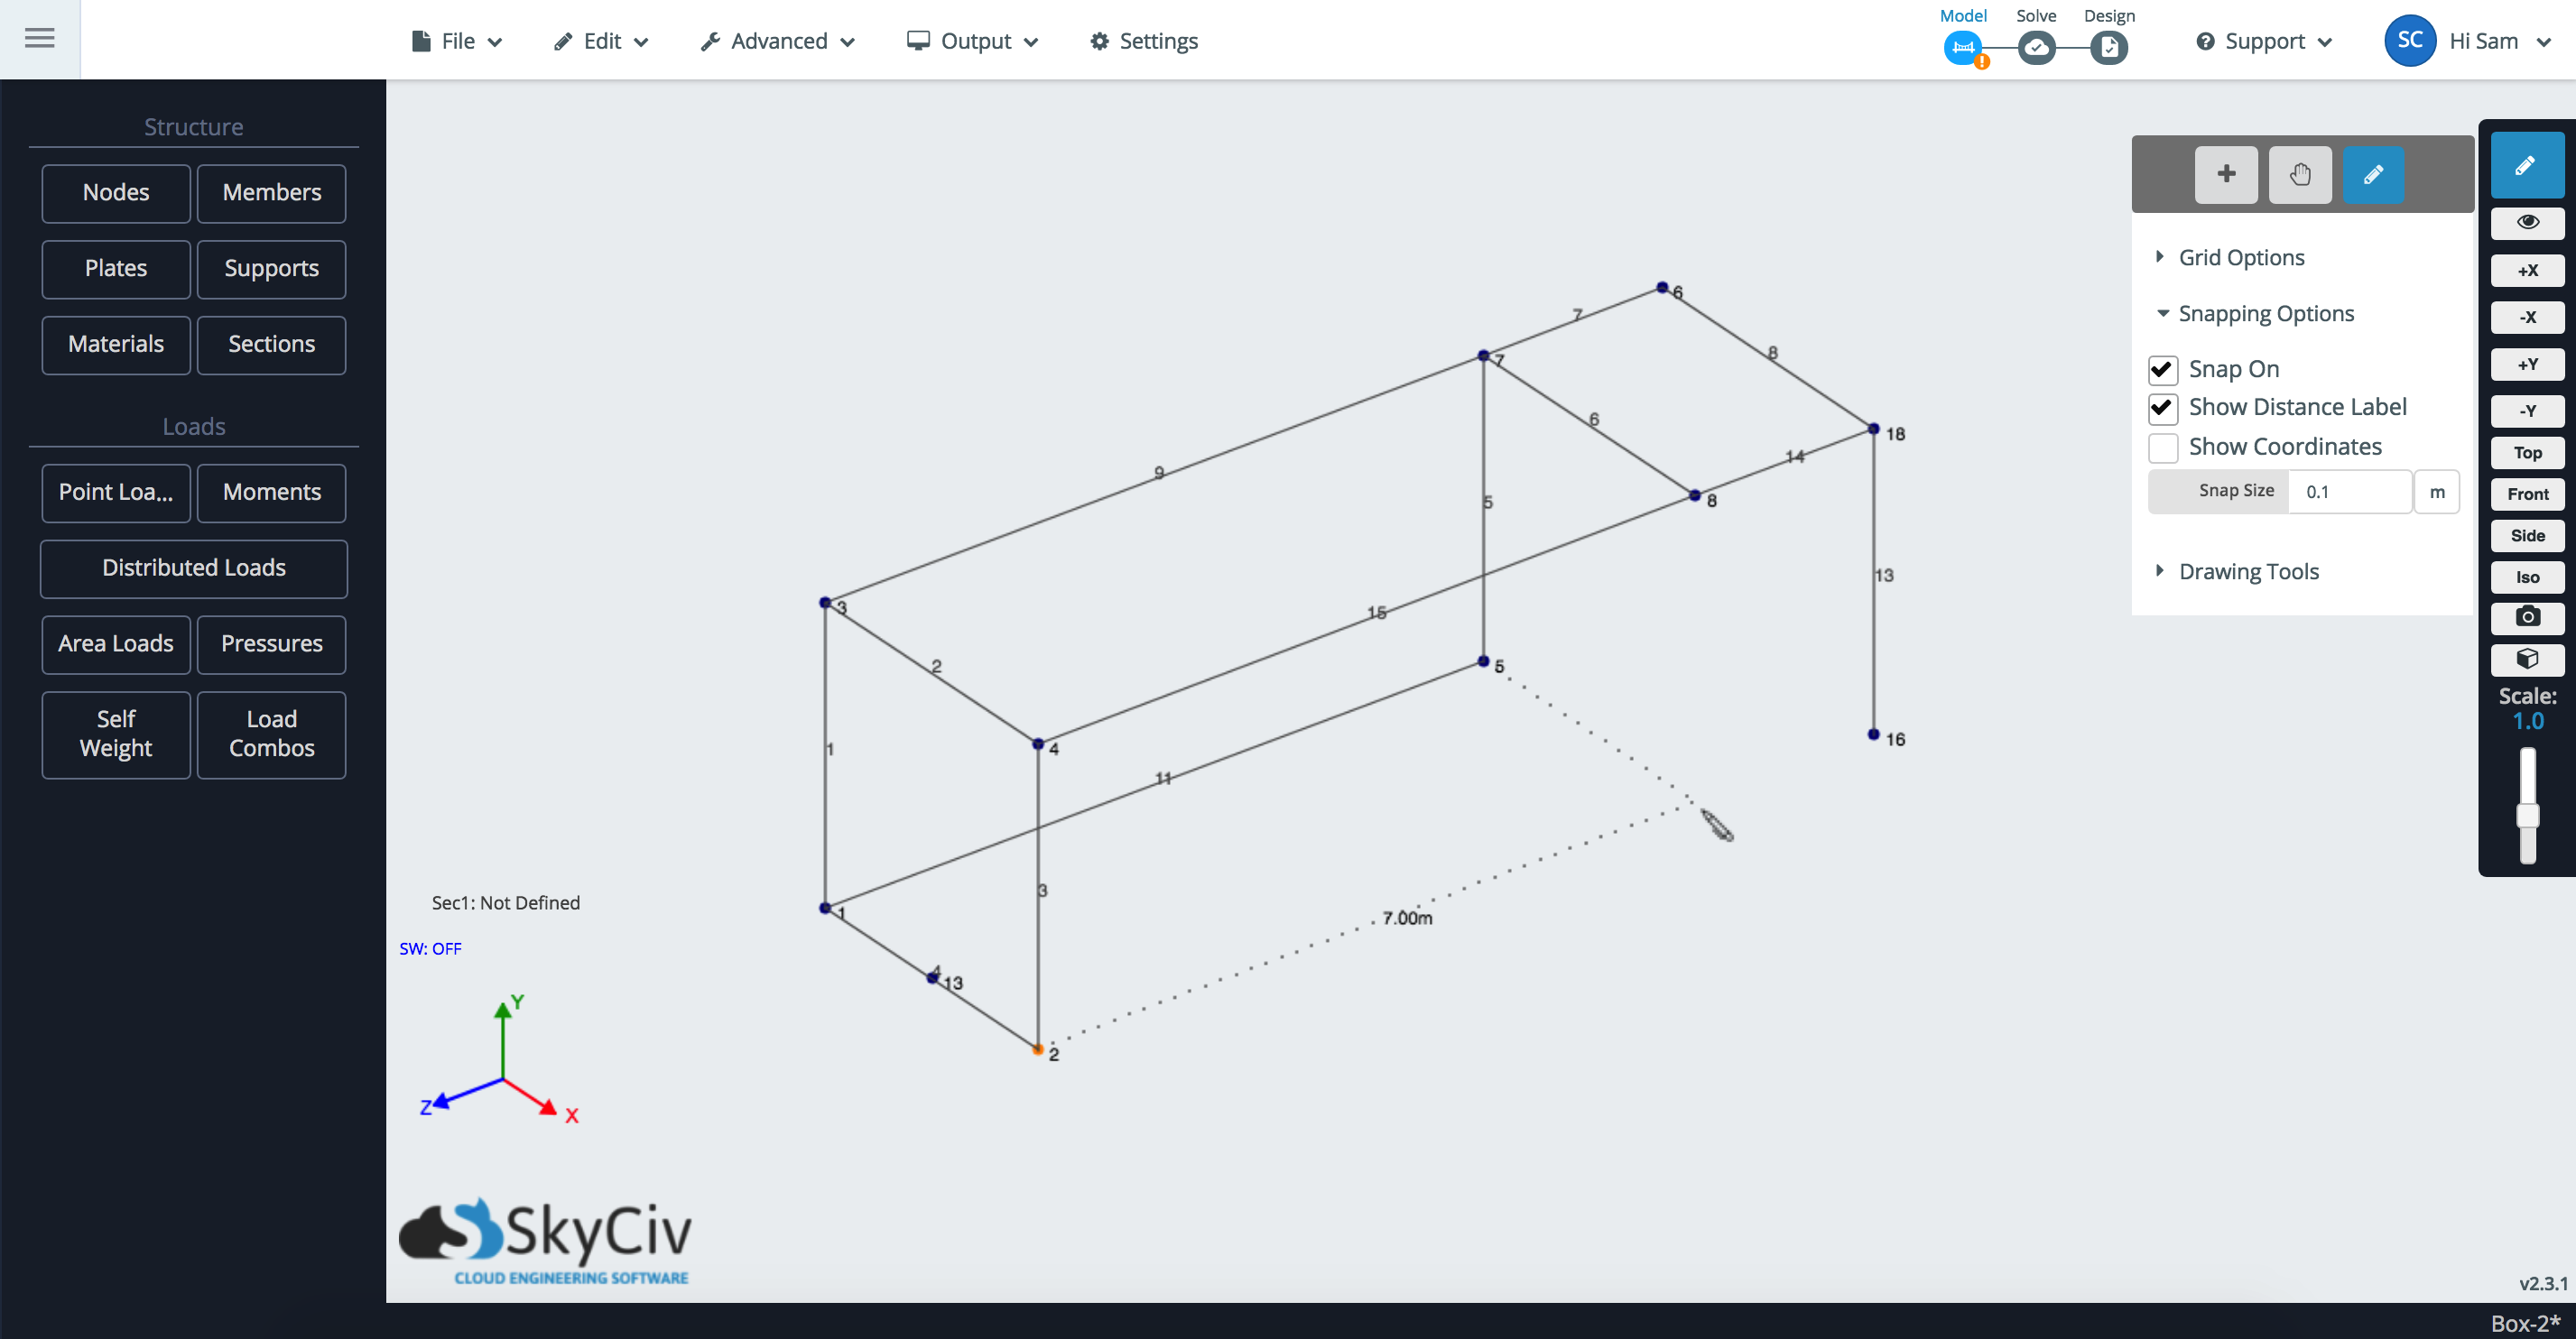
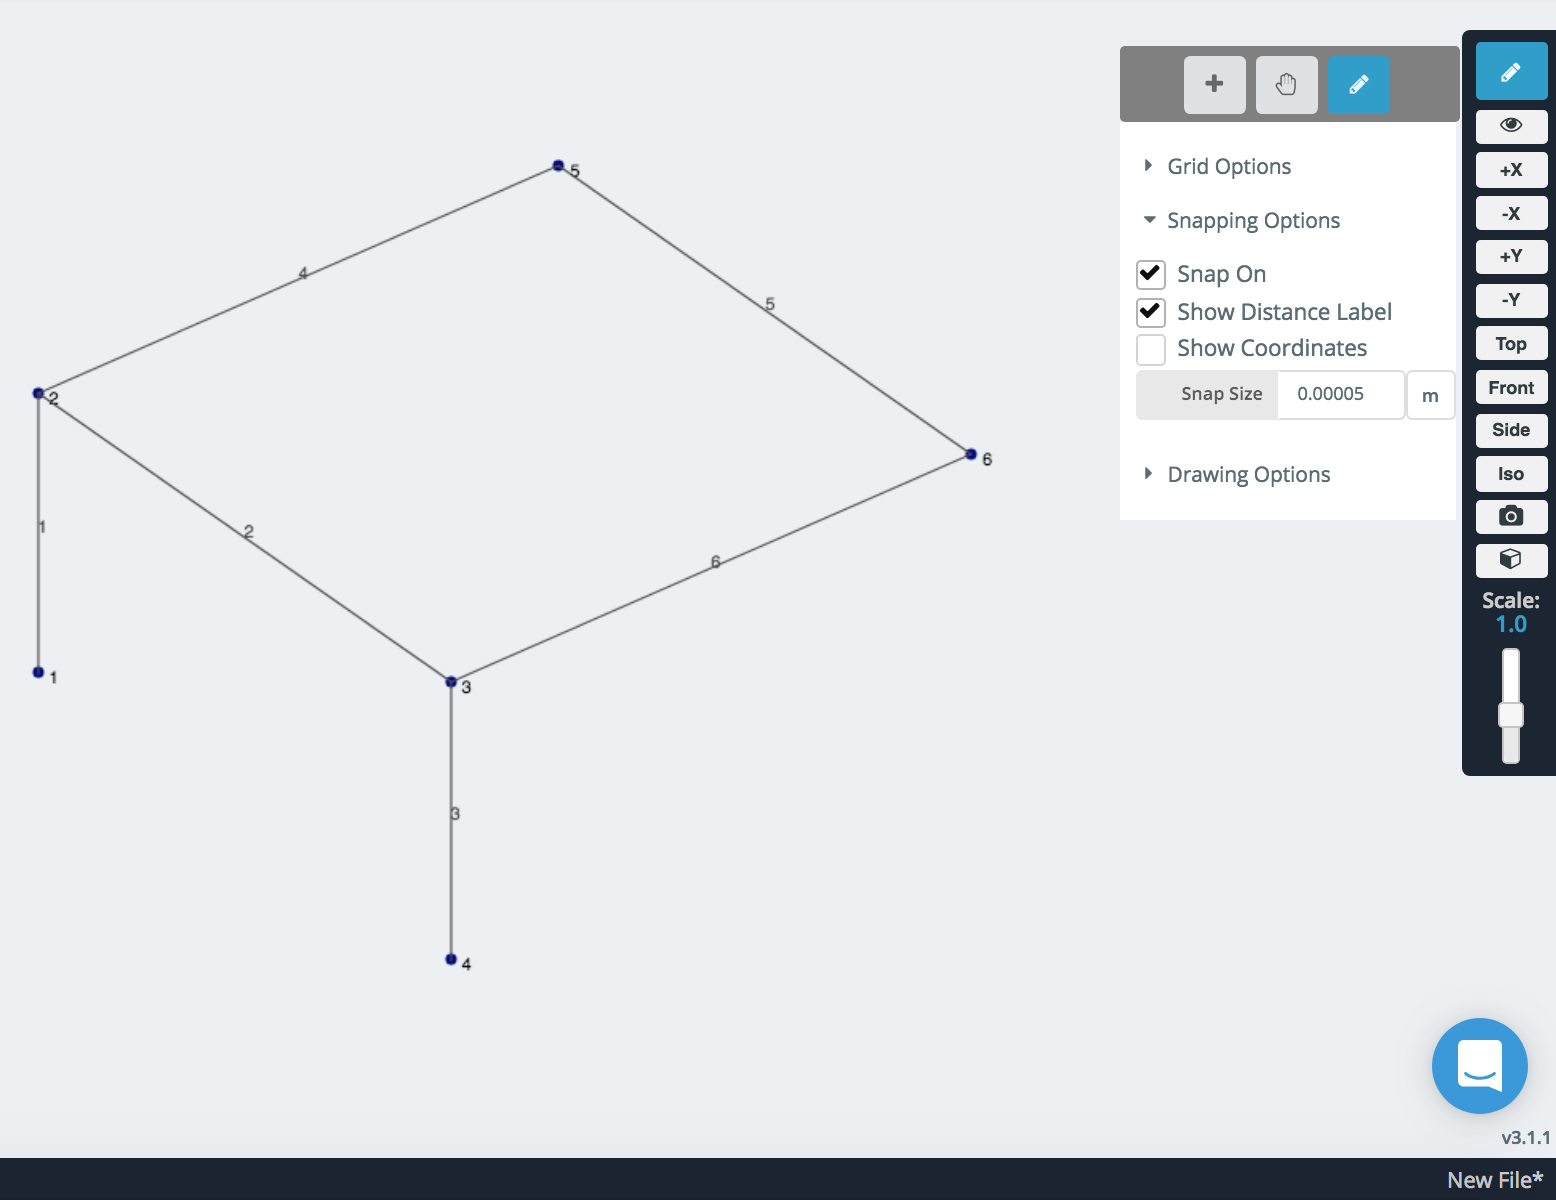
Snappen is een gemakkelijke manier om knooppunten te plotten en leden te genereren met behulp van de pen-tool. Gewoon zweven (of klik op) een knooppunt om dit knooppunt als referentiepunt te definiëren. Verplaats vervolgens uw cursor langs de globale X, EN, of Z-as en het zal naar die as snappen – weergegeven als een rode stippellijn, groente, of blauwe lijn, afhankelijk van op welke as wordt geklikt. Het snapgereedschap kan ook een secundaire as oppikken, zoals een uitlijning van een ander knooppunt. Om dat referentieknooppunt uit te schakelen, klik gewoon ergens dat niet is afgebroken of druk op Esc.
Hier is een voorbeeld van het uitlijnen van het pengereedschap naar de globale Z-as, met verwijzing naar knooppunt 2. Het neemt ook een secundaire as op van de Z-coördinaat van knooppunt 5:
- Beweeg of klik op een knooppunt, dit wordt jouw Referentieknooppunt, vanaf hier kunt u Snap/Grid gebruiken om een knooppunt te plotten:
- Met de Lid verbinden selectievakje geselecteerd, je kunt zowel een knooppunt neerzetten als de knooppunten verbinden als lid:

- Bij het snappen wordt ook een secundaire as gedetecteerd. Bijvoorbeeld, als u over de X-as van een knooppunt reist, het kan andere knooppunten met dezelfde X-as oppikken.
- Het vak Lengte geeft automatisch de lengte van de afstand vanaf het referentieknooppunt weer (en dus de lengte van het lid). U kunt op elk gewenst moment een lengte invoeren en op Enter drukken, of klik op, om die staaflengte toe te passen.
- Voer een lengte in en klik op de (slot) pictogram om de lengte te vergrendelen. Nu kunt u leden maken die op deze lengte zijn vastgelegd.
- Ga naar het middelpunt van een lid
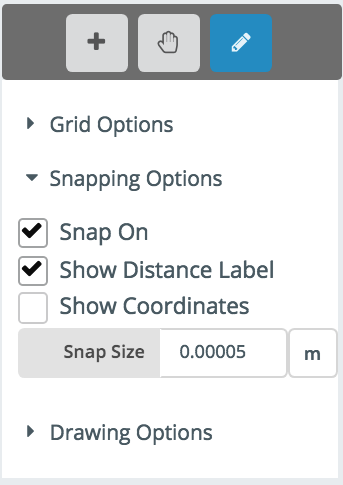
De snapopties
- Klik aan – Schakelt het snappen in en uit
- Toon afstandslabel – Als deze optie is aangevinkt, wordt de afstand van het voorgestelde knooppunt tot het referentiepunt weergegeven (in de meeste gevallen de lengte van het voorgestelde lid)
- Toon coördinaten – Toon de coördinaten van het voorgestelde snapknooppunt.
- Snapgrootte – In welke stappen wilt u dat het snappen plaatsvindt vanaf het referentiepunt?.
Controle van de grootte van de klik
De snap-grootte attribuut wijzigt rechtstreeks de grootte van de structuur die wordt weergegeven, zodat de gebruiker gemakkelijker naar de juiste stappen kan snappen. Bijvoorbeeld, een klein kiekje van 5 mm zal het model verkleinen tot een formaat dat het gemakkelijk maakt om mee te werken. Dit kan op elk moment worden gecontroleerd en is handig om het volgende gedrag te controleren:
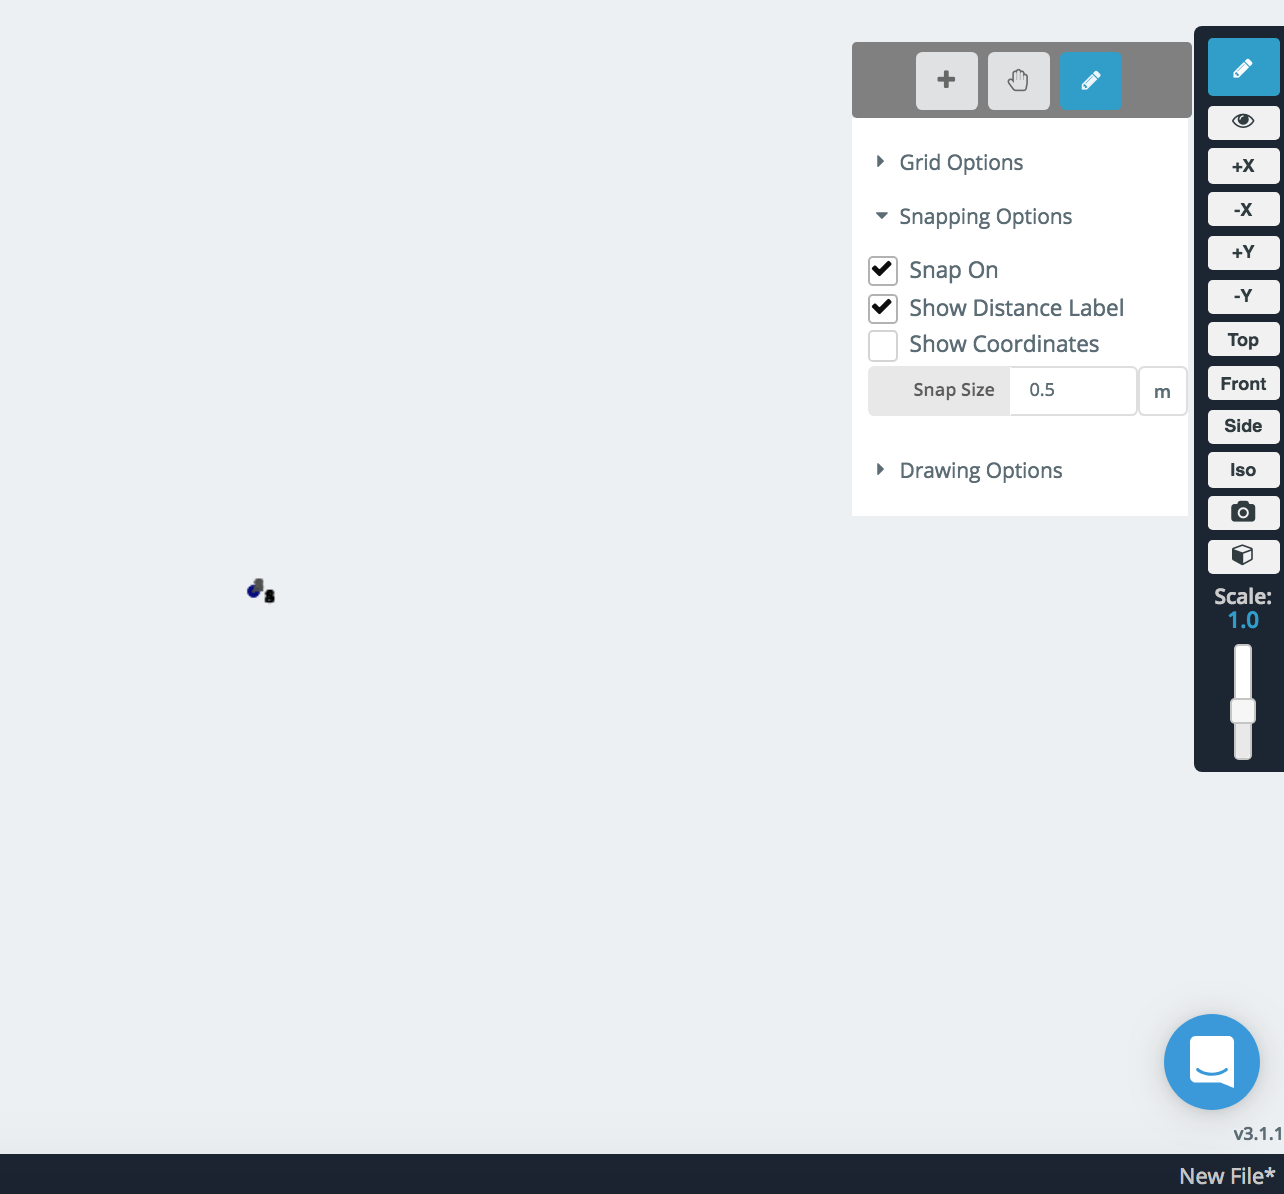
Een zeer kleine structuur met een grote klikgrootte
Dit kan worden opgelost door de snapgrootte te verkleinen