
Deze tutorial begeleidt u stap voor stap bij het ontwerpen van een verbinding in de SkyCiv Connection Design-module.
De ontwerp-UI heeft vijf hoofdtabbladen:
- Details
- Montage
- Armaturen
- Ladingen
- Resultaten
Werk ze in volgorde door. Ieder voedt de volgende, en het 3D-model wordt gaandeweg opnieuw weergegeven, zodat je kunt zien wat je aan het bouwen bent voordat je het oplost.
Details
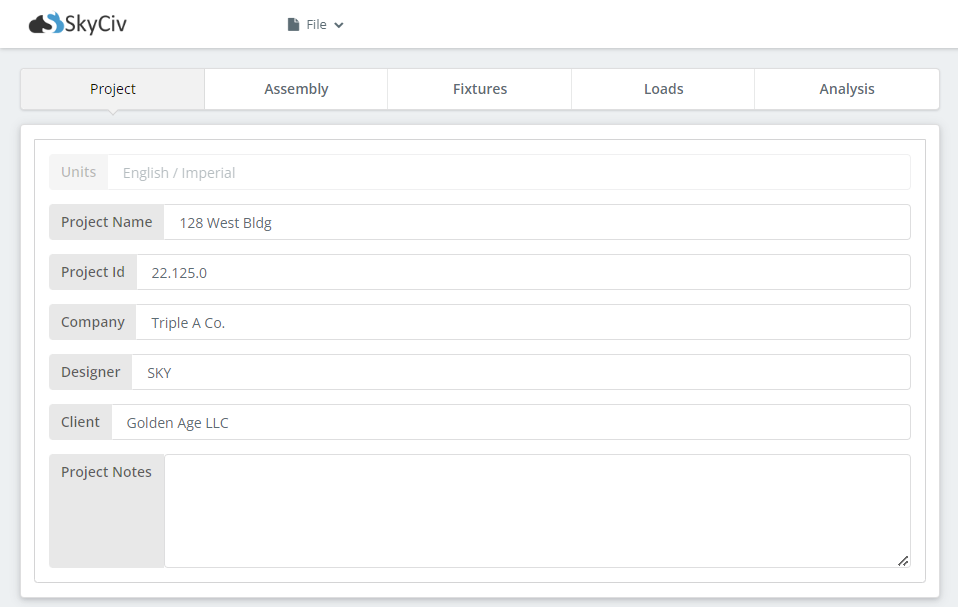
Op het tabblad Details legt u uw projectinformatie vast. Niets daarvan heeft invloed op de berekeningen, maar het loopt door in het rapport, Dat maakt een reeks ontwerpen maanden later traceerbaar:
- Naam van het project
- Project-ID
- Bedrijf
- Ontwerper
- Cliënt
- Projectnotities
Montage
Op het tweede tabblad bouwt u de verbinding zelf op.
Kolom
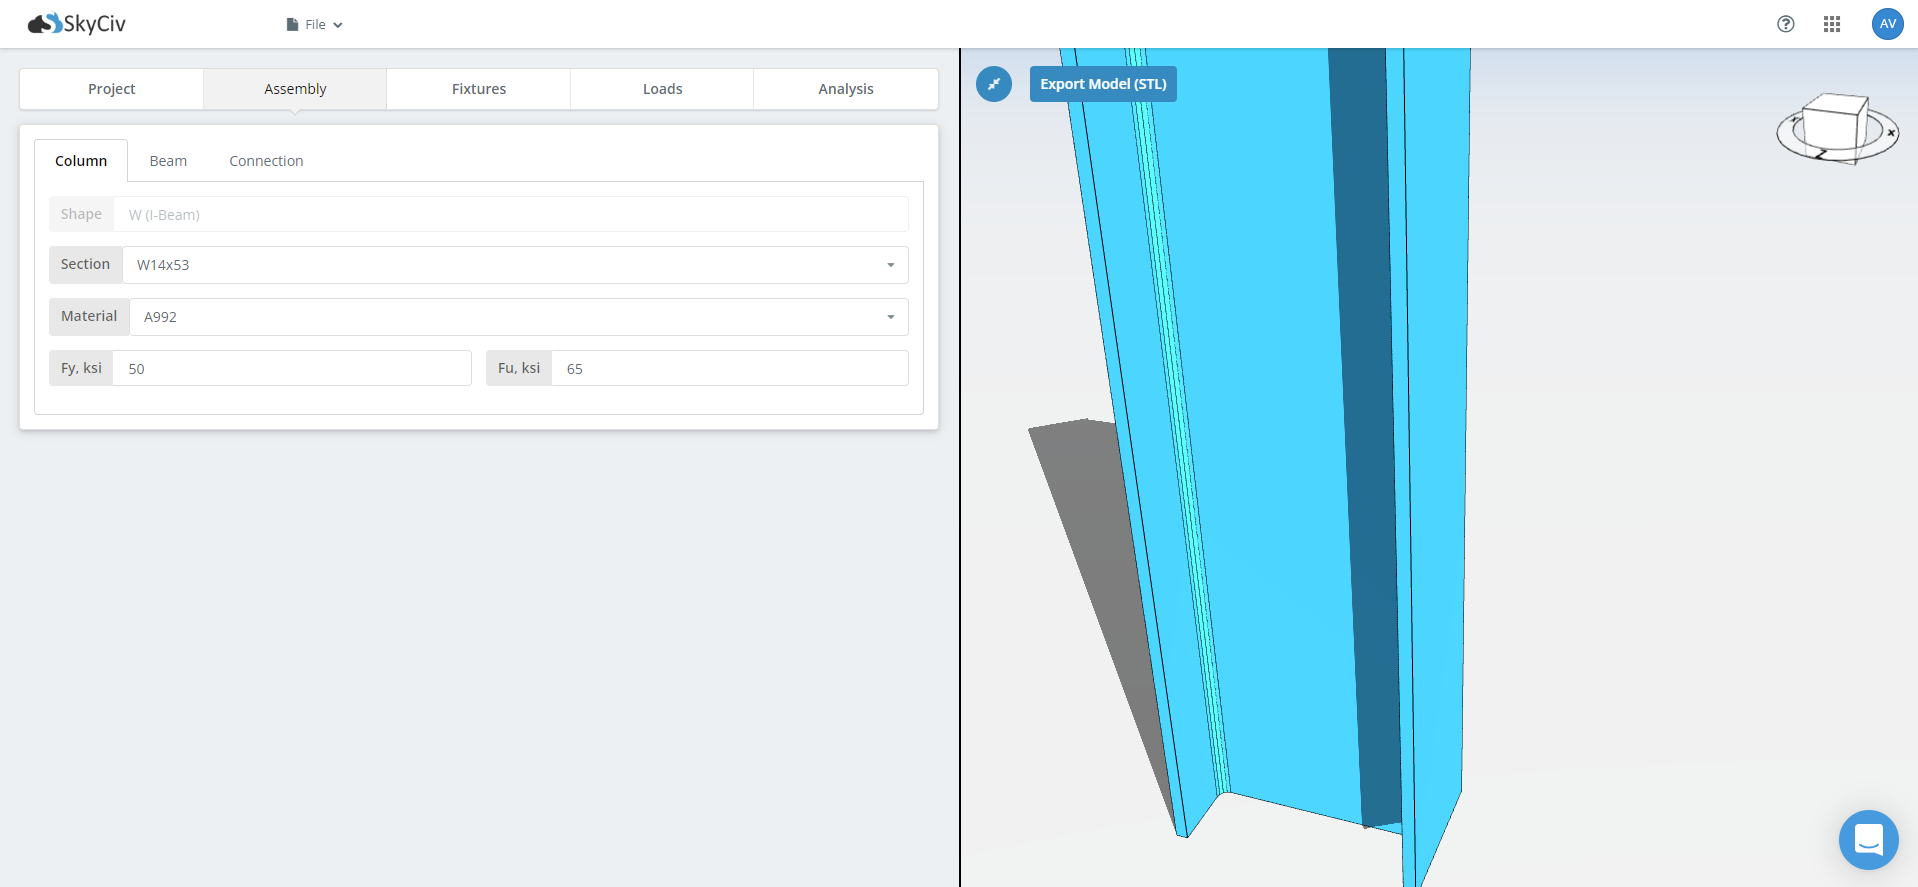
Begin met het ondersteunende lid, meestal een kolom. Kies de sectiegrootte uit de vervolgkeuzelijst naast het sectielabel, dan de materiaalkwaliteit. De gebruikelijke cijfers staan in de lijst; voor iets anders, typ uw eigen Fy en Fu in die velden. Controleer de eenheden die bij elk veld worden weergegeven voordat u typt.
Straal
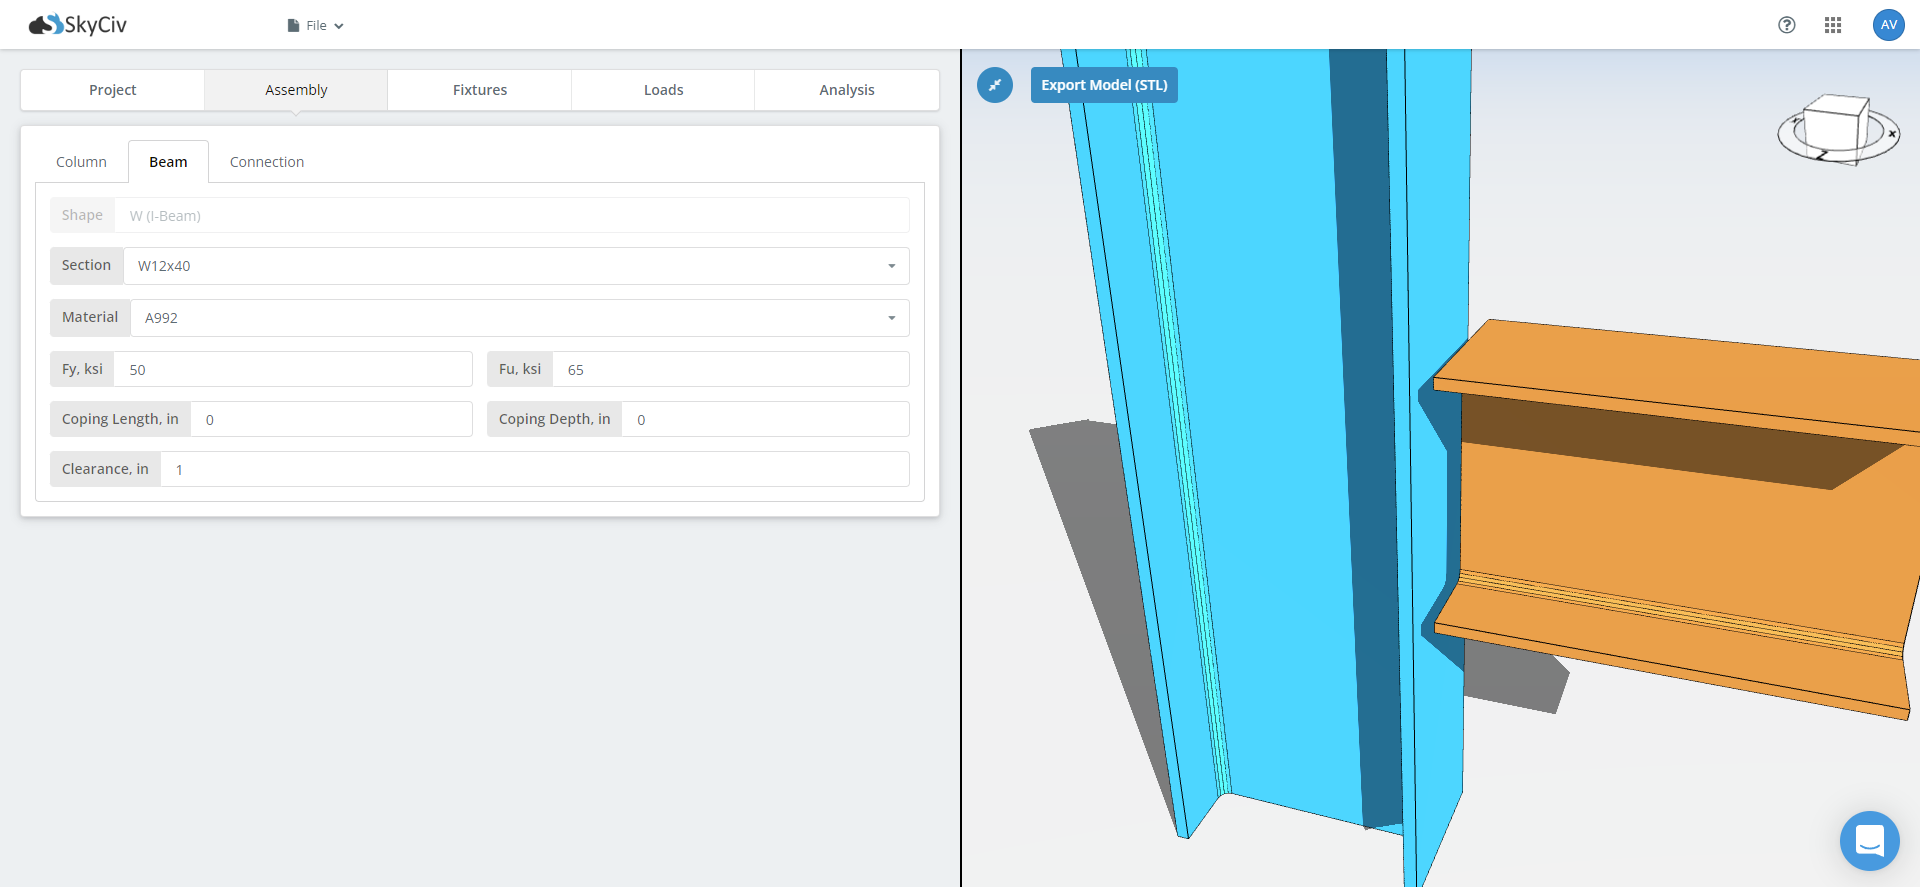
Vervolgens komt de balk. Geef de sectiegrootte en materiaalkwaliteit op dezelfde manier op. Dit tabblad bevat ook de afmetingen van de kap en de liggerafstand. Voeg een kap toe waar de balk omlijst tot een ondersteunende balk van vergelijkbare diepte en de bovenflens moet worden ingekort, aangezien het behandelde gedeelte een controle regelt, geldt dat niet voor het niet-afgehandelde gedeelte.
uit AISC-specificatietabel D3.1
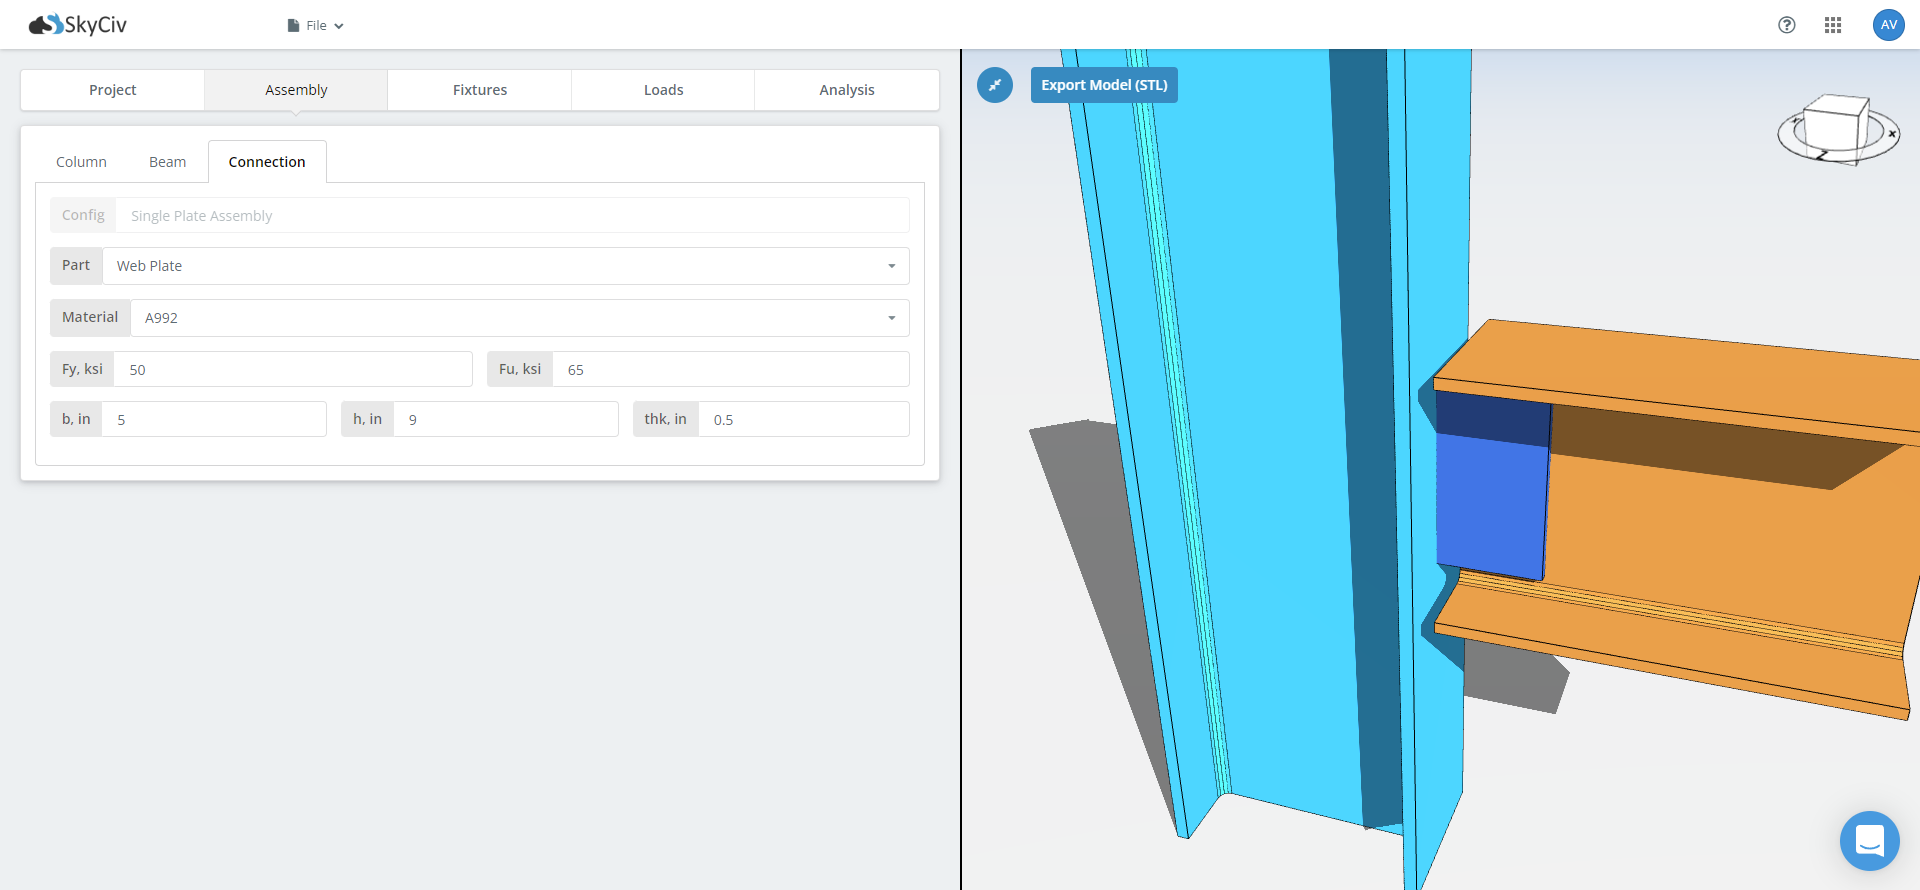
Als laatste komen de verbindingscomponenten: cijfers, diktes, breedtes en lengtes voor de platen of hoeken. Waar een verbinding zowel een flens als een lijfcomponent heeft, Vergeet niet om tussen de twee subtabbladen te schakelen en ze allemaal in te vullen. Een momentverbinding voert het moment doorgaans door de flenzen en de schaar door een afzonderlijke lijfplaat, dus beide moeten worden ingesteld.
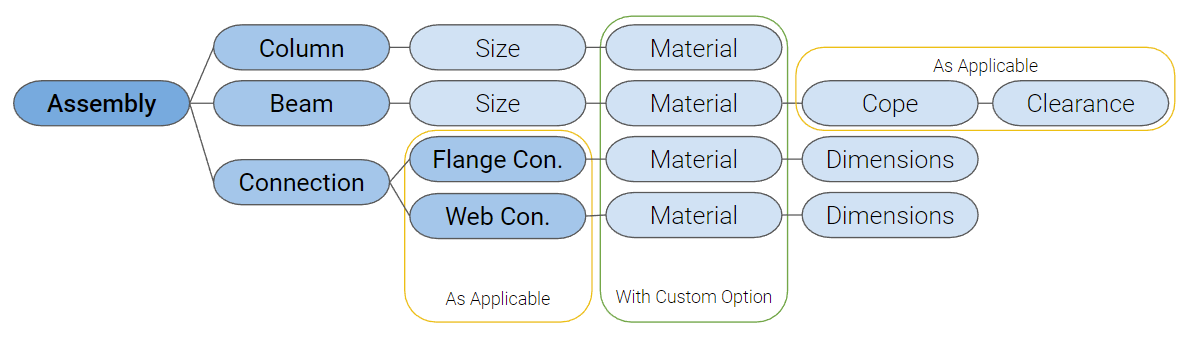
Zodra de velden voor elk tabblad zijn ingevuld, het model geeft de 3D-figuur automatisch weer. Je kunt dit zonder account proberen in de gratis tool.
Armaturen
Het tabblad Armaturen bevat de subgroepen van armaturen, genummerd, met een korte beschrijving onder elke tabbladnaam.
Begin met het kiezen van het armatuurtype. Er zijn er twee: geschroefd en gelast. Bij sommige verbindingen is het type vooraf geselecteerd en vergrendeld, omdat de configuratie maar één kant op werkt. Als het gewenste type niet beschikbaar is, stuur een functieverzoek aan het ondersteuningsteam van SkyCiv.
Bout
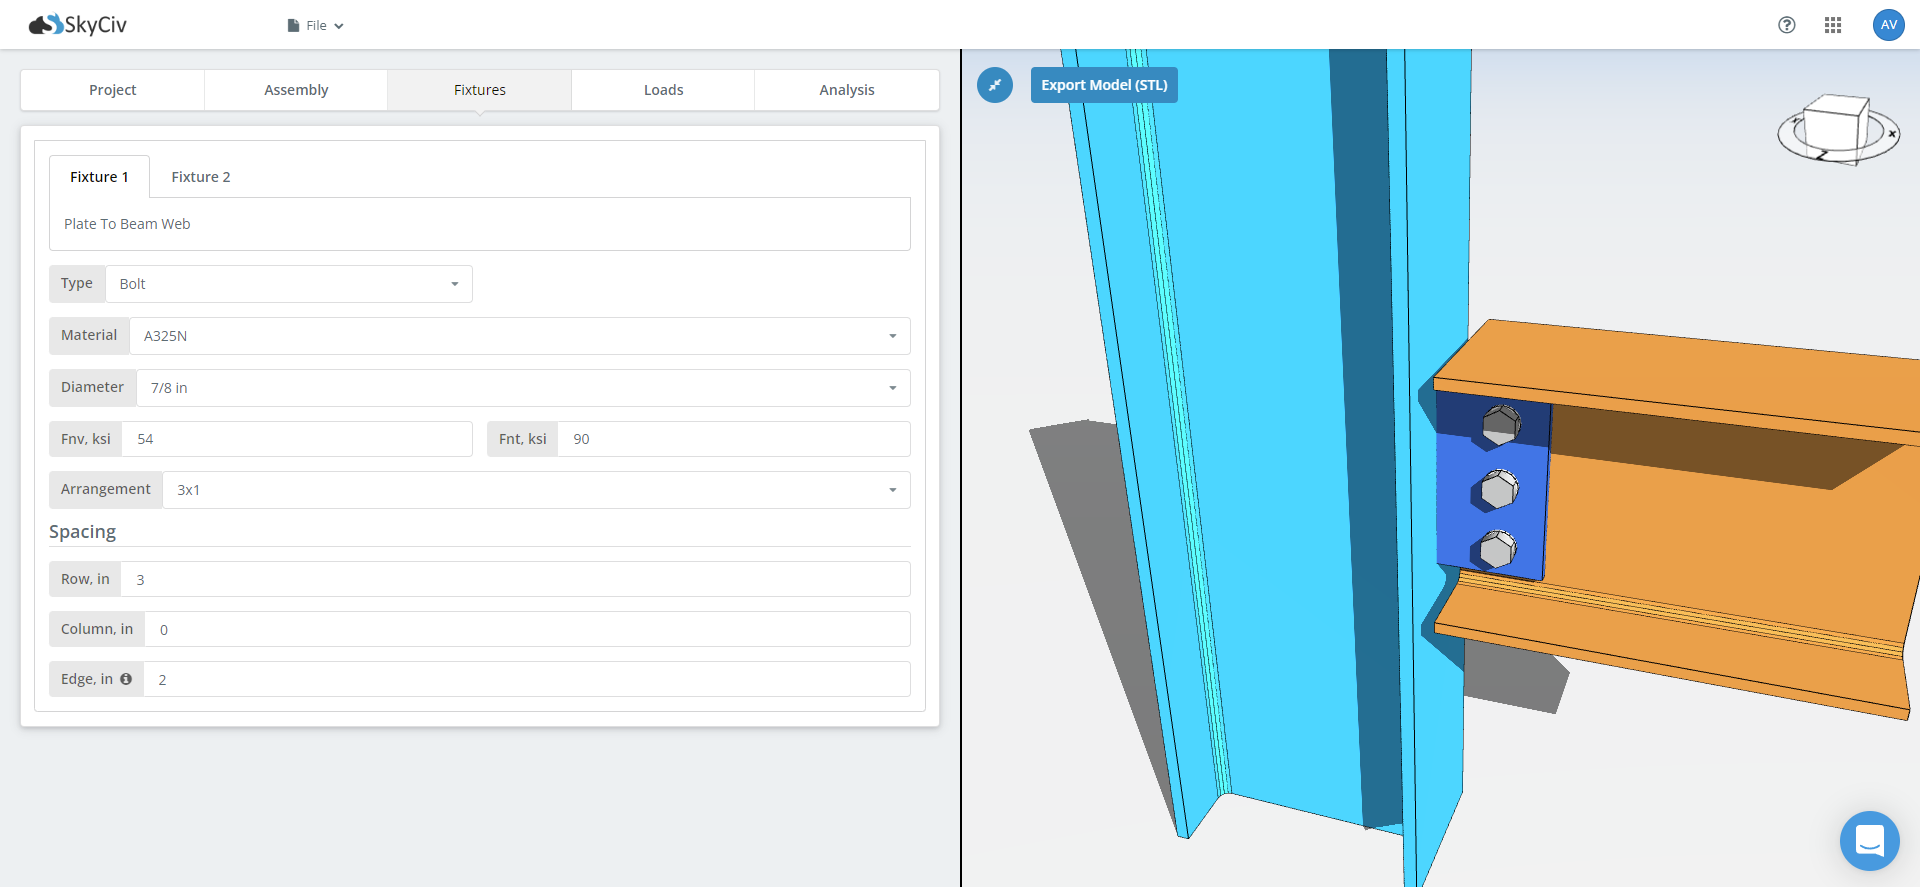
Voor een geschroefd armatuur levert u mee:
- Materiaal
- Diameter
- Boutafschuiving en treksterkte
- Gattype
- Regeling
- Rijafstand
- Kolomafstand
- Randafstand
De meeste hiervan zijn vervolgkeuzelijsten, en er is een tooltip over Randafstand waarin wordt uitgelegd vanaf welk punt het meet.
Zodra de verplichte velden zijn ingevuld, de bouten worden in het model weergegeven. Verander de boutmaat of open de afstand en de verbinding wordt bijgewerkt terwijl u toekijkt, Dit is de snelste manier om erachter te komen of een boutgroep daadwerkelijk past voordat de detailleringscontroles aangeven dat dit niet het geval is.
Lassen
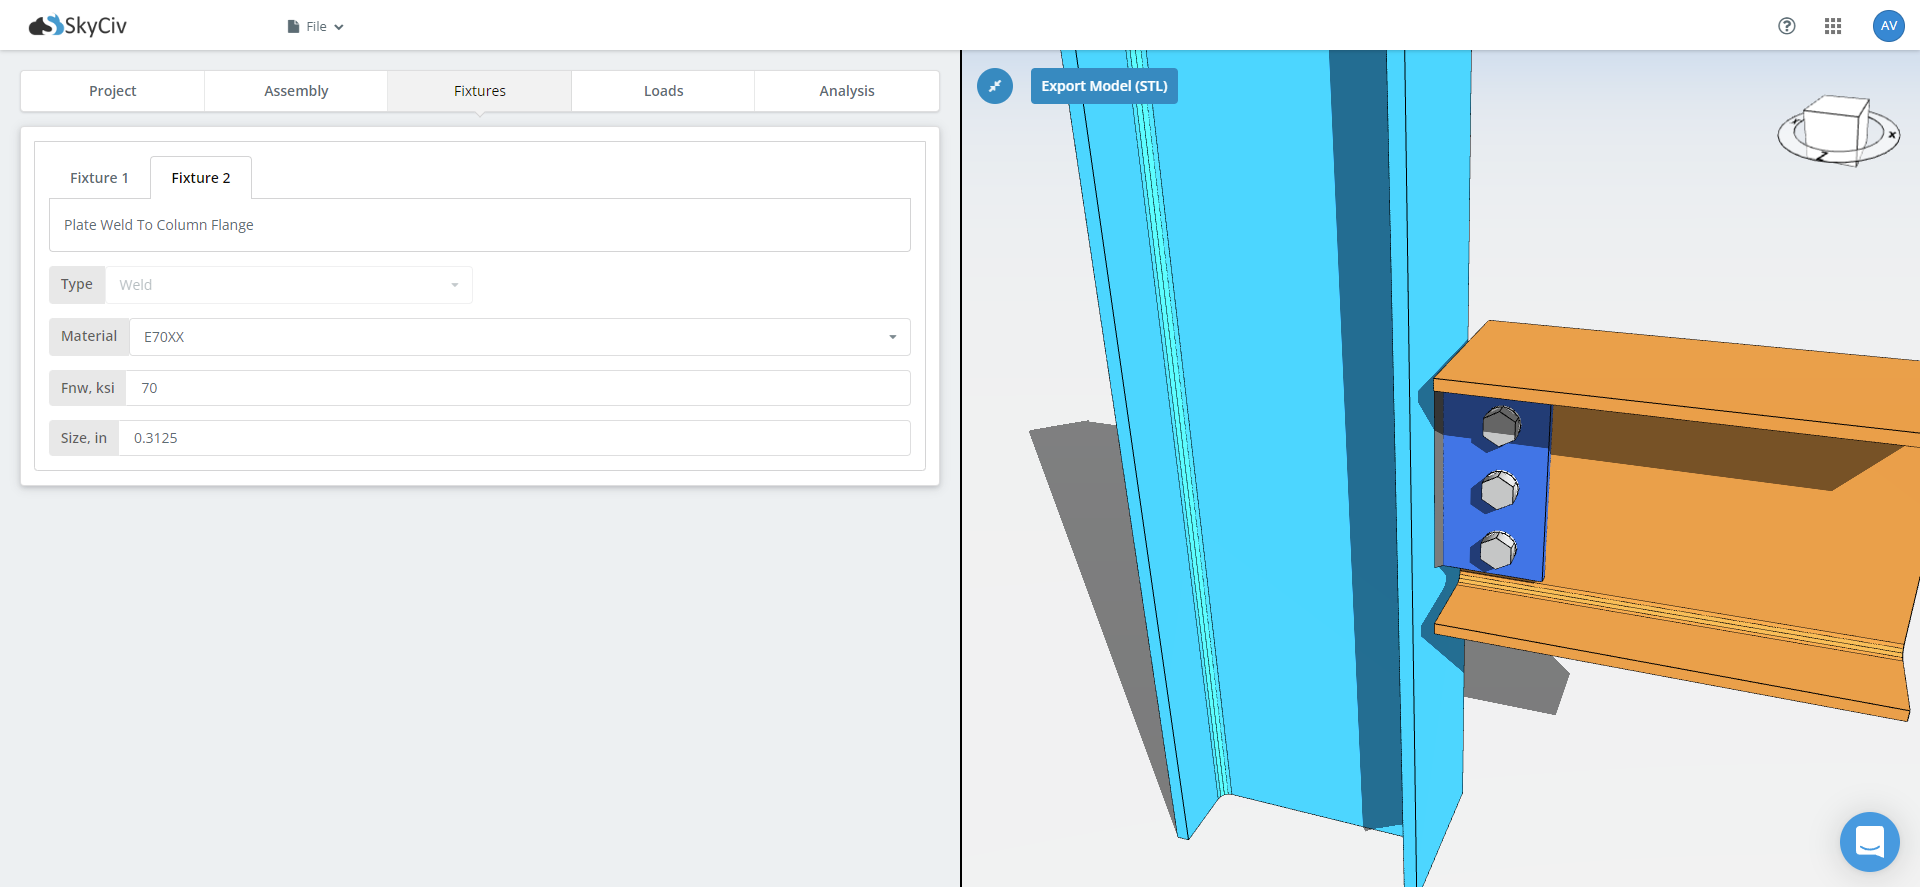
Een lasarmatuur heeft minder input nodig dan een vastgeschroefd exemplaar:
- Materiaal
- lassterkte:
- Grootte
Het 3D-model wordt bijgewerkt zodra de lasbevestiging is ingesteld.
Voor meer informatie over wat de module hiermee doet, zie de documentatie op bouten en lassen.
Ladingen
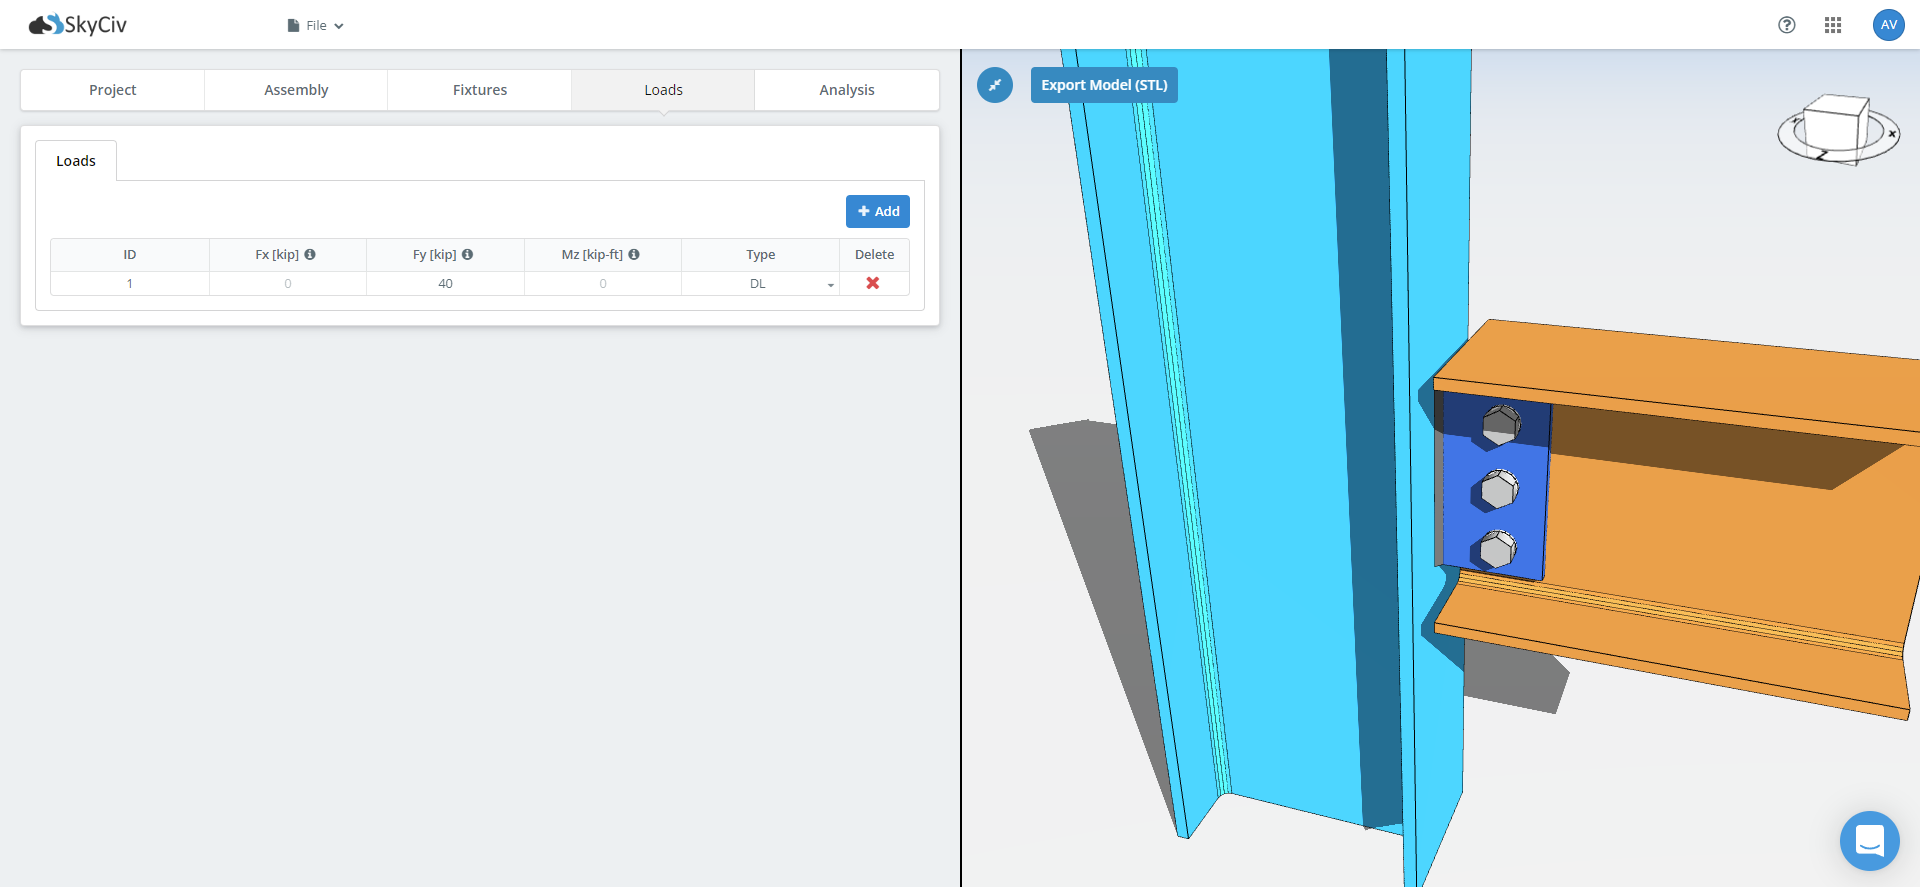
Typ de ontwerpbelastingen rechtstreeks in de cellen van de belastingtabel. Welke kolommen je krijgt, is afhankelijk van het verbindingstype: voor een afschuifverbinding is alleen afschuiving nodig, een momentverbinding duurt axiaal, schaar en moment, en een schoorverbinding is axiaal.
Stem uw ladingen af op de ontwerpmethode die u kiest. Onder LRFD, voer de berekende belastingen in en de module vergelijkt deze met de ontwerpsterkte. Onder ASS, voert de bedrijfsbelastingen in en vergelijkt deze met de toegestane sterkte. Gefactoriseerde belastingen invoeren in een ASD-ontwerp, of service wordt geladen in een LRFD-exemplaar, geeft u een benuttingsratio die niets betekent, en de software kan niet zien wat u hebt getypt.
Resultaten
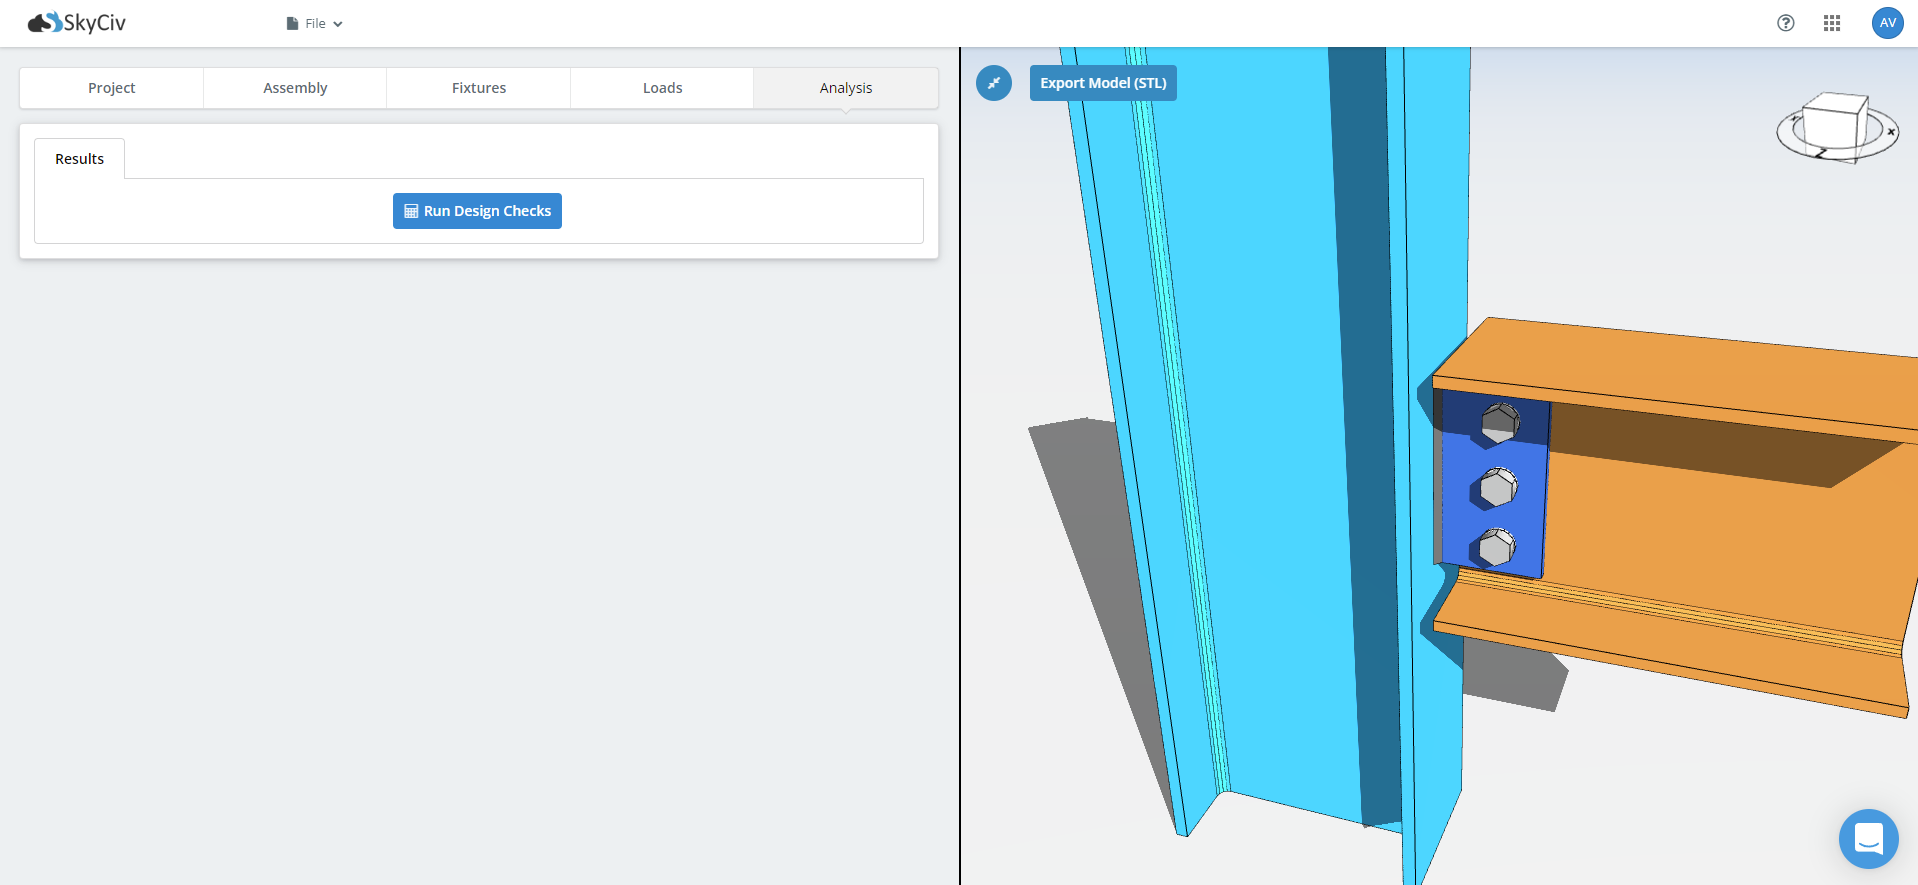
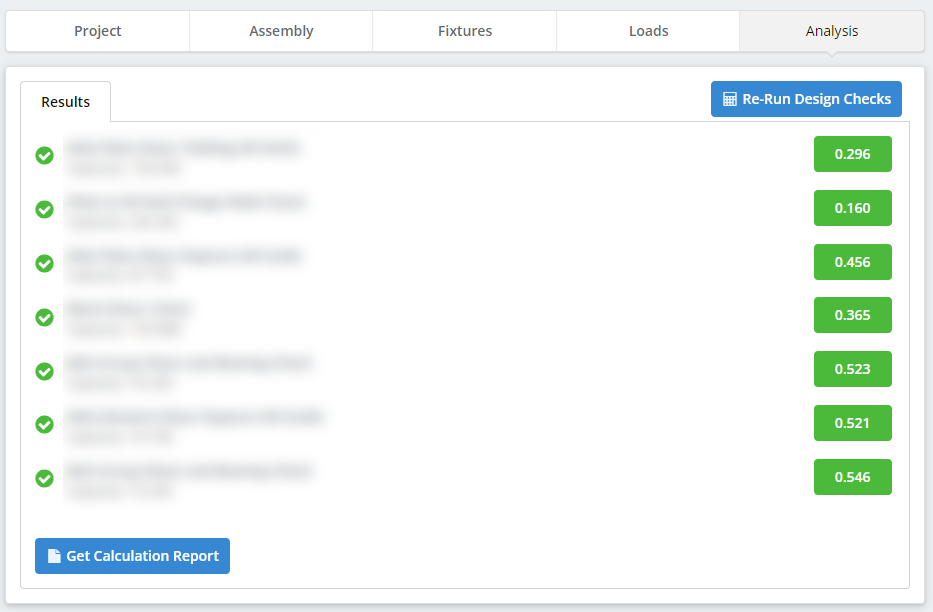
Met alles meegeleverd, voer de ontwerpcontroles uit. Resultaten komen terug als tabel en als grafiek, met een benuttingsratio en een voldoende of onvoldoende voor elke controle, en de heersende cheque werd bovenaan geroepen.
Detaillering vindt plaats vóór de sterktecontroles: afstanden van de boutranden, spatiëring, gereedschapsspeling, afmetingen plaat, en botsingsdetectie tussen platen, verstijvers, bouten en lassen. Een verbinding die niet opgebouwd kan worden mislukt hier, voordat enige capaciteit wordt berekend, dat is meestal wat je wilt.
Vanaf dit tabblad, Berekeningsrapport bekijken opent de stapsgewijze berekeningen met elke formule- en clausulereferentie, en PDF downloaden of HTML downloaden slaat het op. Bekijk gedetailleerde tekening opent het CloudCAD 2D-detailblad, met plattegrond en aanzichten, lasmarkeringen, boutschema's en afmetingen, die u in de app kunt bewerken en exporteren.
Start vandaag
Klaar om het te proberen? Kies een verbinding, voer uw secties en ladingen in, en zie elke cheque. Het draait in de browser, zonder dat u hoeft te installeren en geen account nodig heeft om te starten.
SkyCiv-verbindingsontwerp
SkyCiv-verbindingsontwerp dekt over 80+ vooraf geconfigureerde verbindingstypen, ontwerpen voor AISC 360-16 bij LRFD en ASS en bij AS 4100:2020, en toont elke formule en codereferentie volledig. Met een gratis account kunt u uw verbindingsbestanden opslaan en opnieuw laden.
Verbindingsontwerp standalone
U wilt alleen de verbindingsontwerpmodule gebruiken? Klik op onderstaande knop voor de losse prijzen.
