
Add members by distance or angle from an existing node
The Relative Member tool in SkyCiv Structural 3D creates a new member from an existing node, by entering how far the other end is in X, Y and Z, or by entering its length and angle in one of the global planes. You don’t need to know the coordinates of the new node: SkyCiv works them out from the reference node, adds the node and connects it with a member.
This is the quickest way to model members that are not aligned with the global axes, such as rafters, tirantes, cantilevers and inclined struts, or to extend several nodes of a model by the same distance in one step. A closely related tool, Agregar nodo relativo, does the same thing without creating a member. You can also ask the AI Assistant to add these members for you in plain language (vea abajo).
Opening the Relative Member tool
Select one or more nodes, then either:
- cadera-copia-jack-vigas R, o
- right-click the selection and choose Miembros > Agregar miembro relativo.
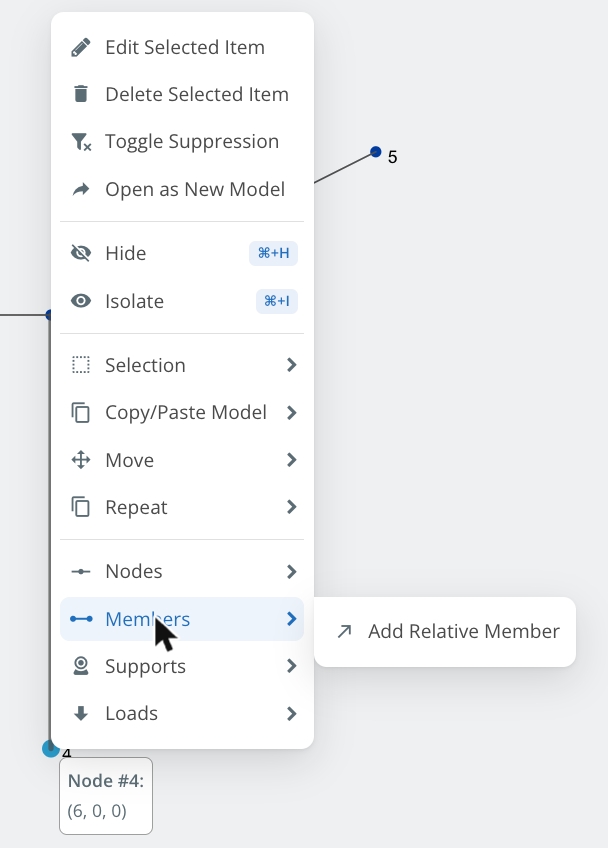
El Agregar miembro relativo panel opens over the model. You can drag it by its title bar anywhere in the model space, so it doesn’t hide the part of the model you are working on. Close it with the × in its title bar, o presione Esc. El i icon gives a quick reminder of how the tool works.
The panel has these fields:
- Ref. ID de nodo(s): the node, or nodes, the new members start from. It is filled with the nodes you selected, and you can type other node IDs, separado por comas.
- Método: how the position of the new node is defined, by distances (X,Y,Distancia Z) or by a distance and an angle in a plane (Plano XY, Plano XZ, y ZY-plane o YZ-plane depending on the vertical axis of the model).
- The inputs of that method, en las unidades de longitud de su modelo.
- ID de sección: the section assigned to the new members. Start typing to search the sections of the model. It remembers the last section you used.
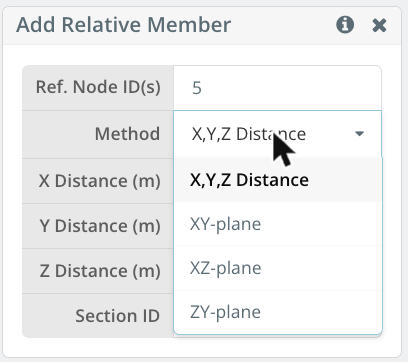
As you type, a dashed line previews the new member from each reference node to its new node. Presiona Ingresar in any field to create the member. If an input is not valid (for example a reference node that doesn’t exist, or all distances left at zero), a message tells you what to fix and nothing is created.
Adding a relative member with X, Y and Z distances
X,Y,Distancia Z is the default method. Enter the change in position from the reference node to the new node along each global axis:
- X Distancia, Y Distance y Distancia Z: the distances along X, Y and Z, positive or negative. A field you leave empty counts as zero.
Use it when you know how far the end of the member is from its start along each axis, which works in 2D and 3D models alike.
Ejemplo: a sloping member from the top of a column
A portal frame has its top right corner at Node 3, a (6, 4, 0) m. To add a member that rises 1.5 m over 3 m to the right, select Node 3, cadera-copia-jack-vigas R, y entrar 3 in X Distancia y 1.5 in Y Distance. The dashed line shows where the member will go:
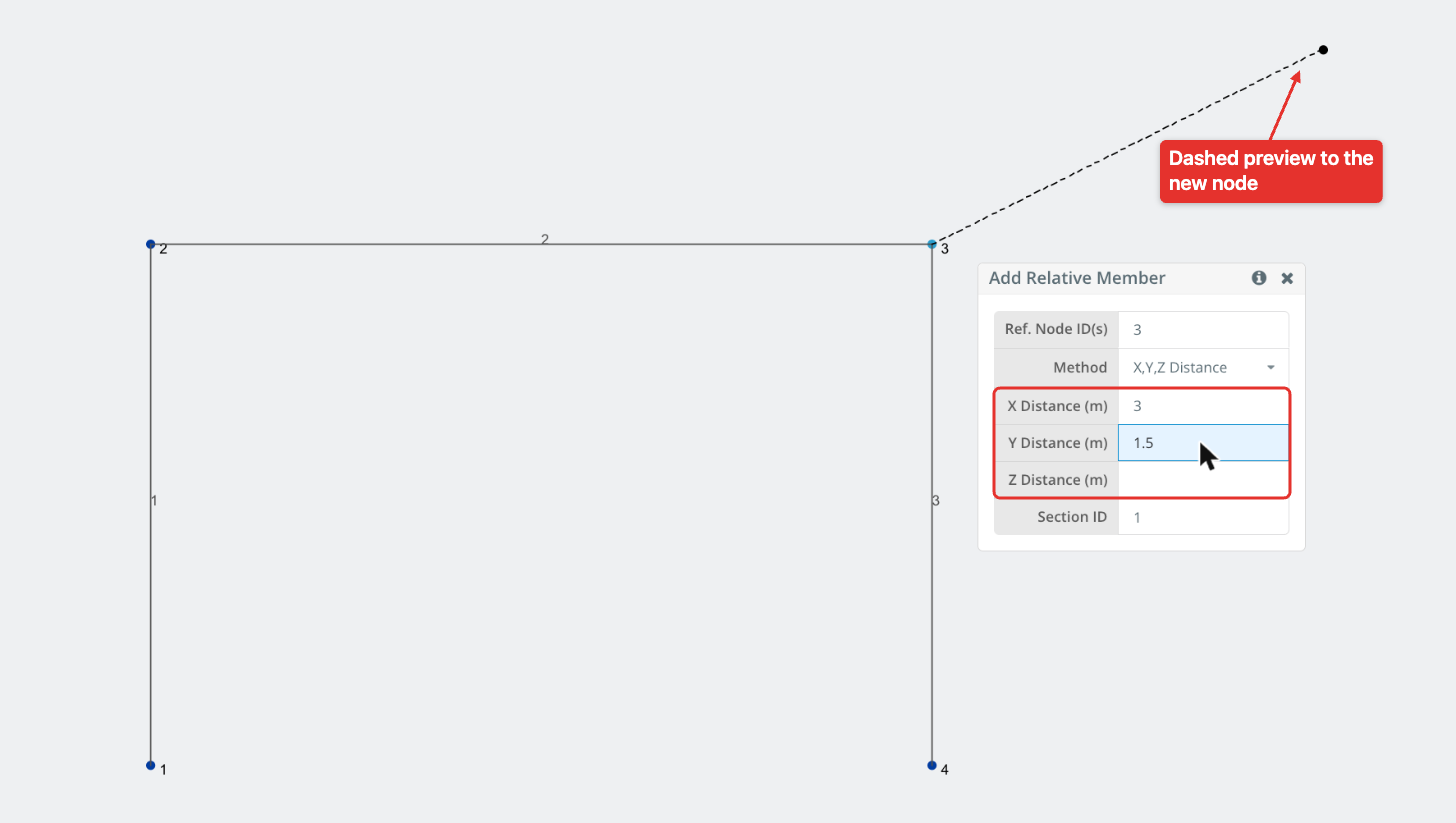
Presiona Ingresar para crear el miembro. SkyCiv adds Node 5 a (9, 5.5, 0) m and a member from Node 3 al nodo 5.
Chaining members
The panel stays open after each member, y Ref. ID de nodo(s) changes to the node just created. The distances you entered are kept, so pressing Ingresar again adds the next member from the new node with the same offset. Change the values between members to model a chain of members of different lengths and directions, without going back to the model.
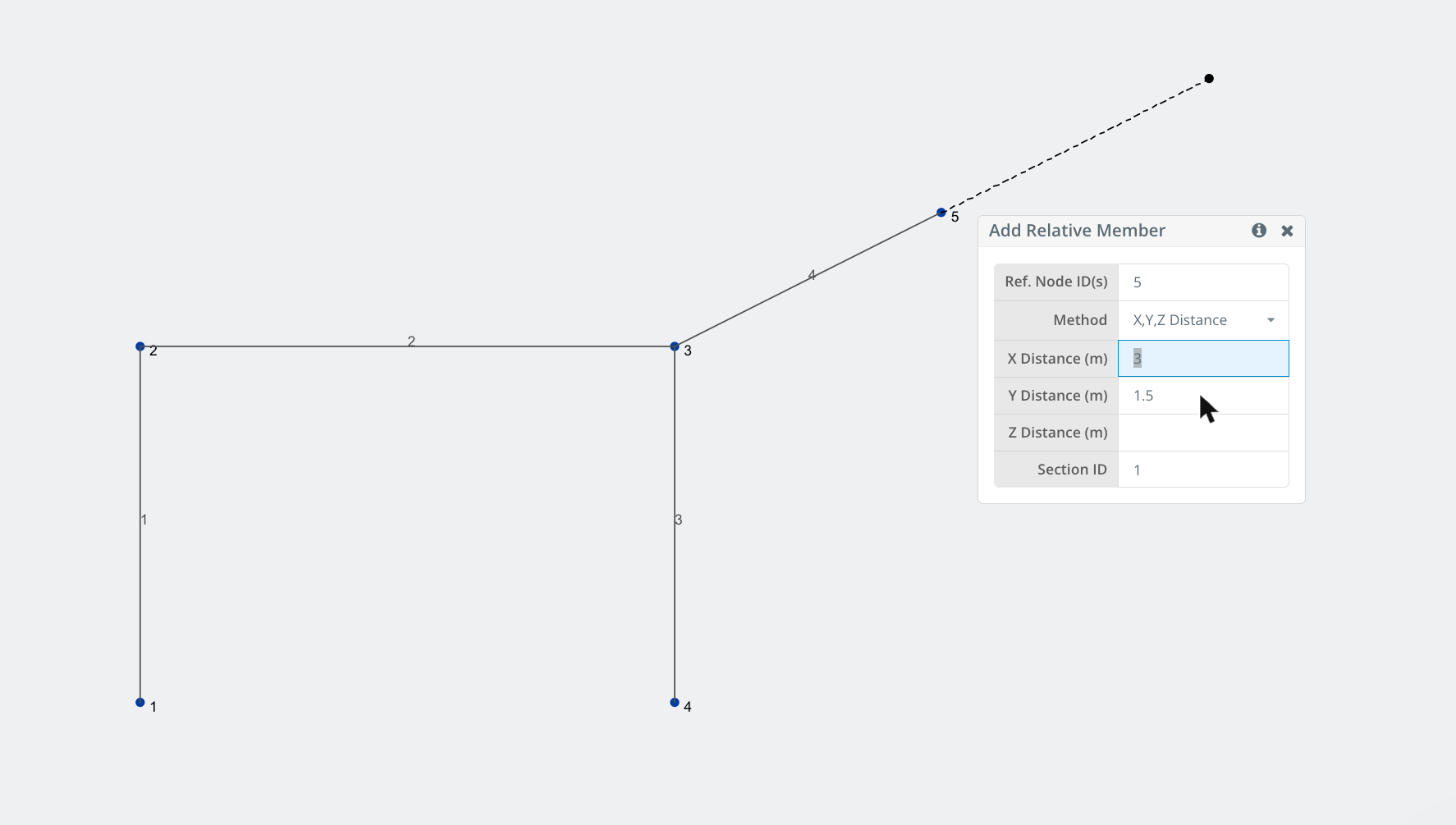
Adding a relative member by angle and distance
The plane methods create a member of a given length at a given angle, in a plane parallel to one of the global planes through the reference node. Use them when you know the length and slope of a member rather than its X, Componentes Y y Z. Pick the plane in Método, then enter:
- Distancia: the length of the new member.
- Ángulo (usted): the angle of the member in the plane, en grados, measured from the first axis of the plane towards the second. Negative angles go the other way.
| Método | Angle measured from | Towards |
|---|---|---|
| Plano XY | +X | +Y |
| Plano XZ | +X | +Z |
| ZY-plane (Y is the vertical axis) | +Z | +Y |
| YZ-plane (Z is the vertical axis) | +Y | +Z |
The list shows ZY-plane when Y is the vertical axis of the model and YZ-plane when Z is, so that the angle in the vertical plane is always measured up from the horizontal axis.
Ejemplo: an inclined member in the XY plane
From Node 5 of the previous example, Agrega un 3 m member sloping down at 60° from the horizontal. With Node 5 as the reference node, elegir Plano XY in Método, ingresar 3 in Distancia y -60 in Ángulo (usted):
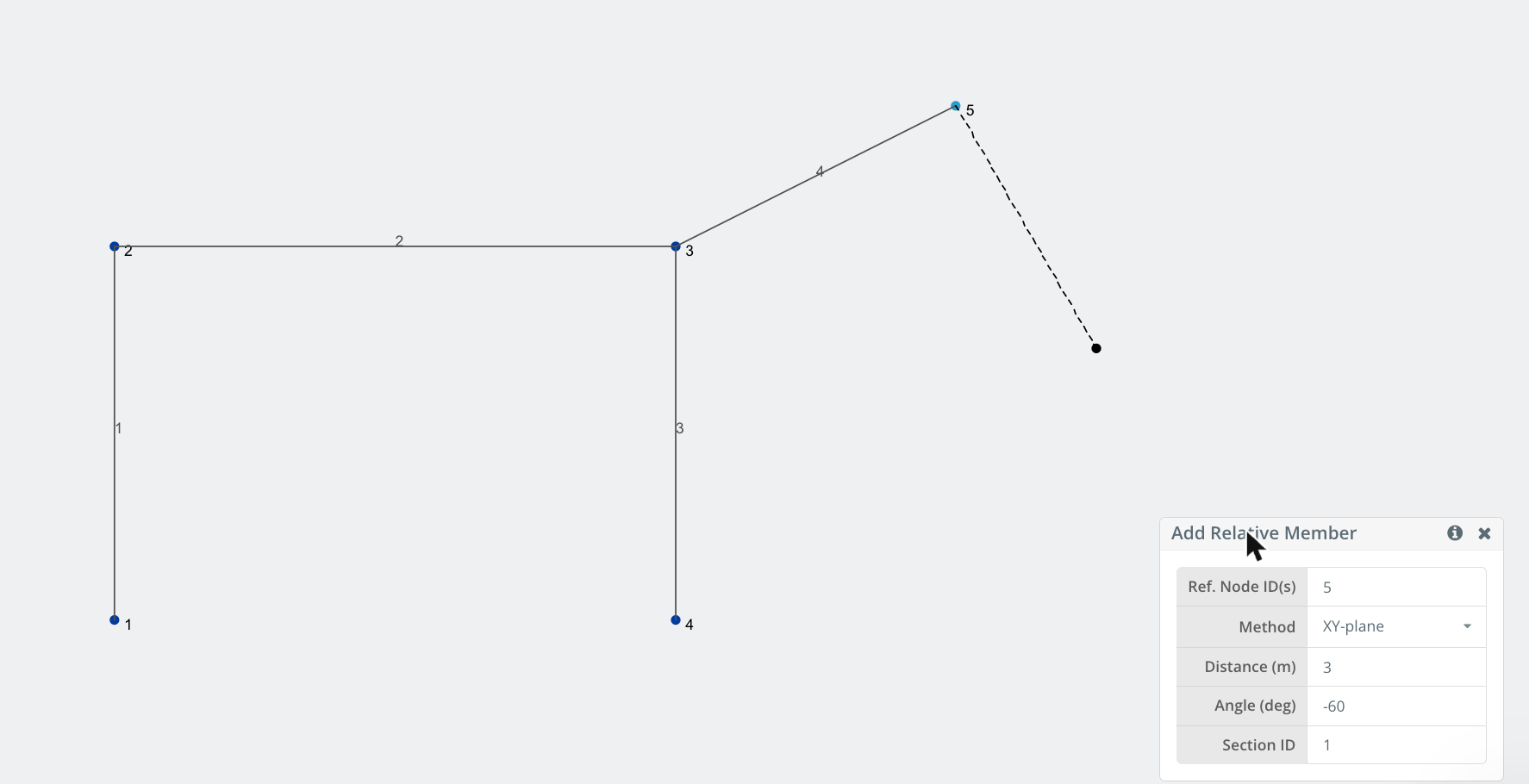
Presiona Ingresar to create it. As with distances, the new node becomes the reference node so you can keep going.
Adding relative members from multiple nodes
The tool works on several reference nodes at once: it creates one new node and one member from each of them, all with the same offset. The nodes don’t need to be in the same plane and can be anywhere in the model.
Select the nodes before pressing R (the tool only uses nodes, not members, from the selection), or type their IDs in Ref. ID de nodo(s), separado por comas. En este ejemplo, entrando 2,3 con un Y Distance de 2 m previews a 2 m extension of both columns:
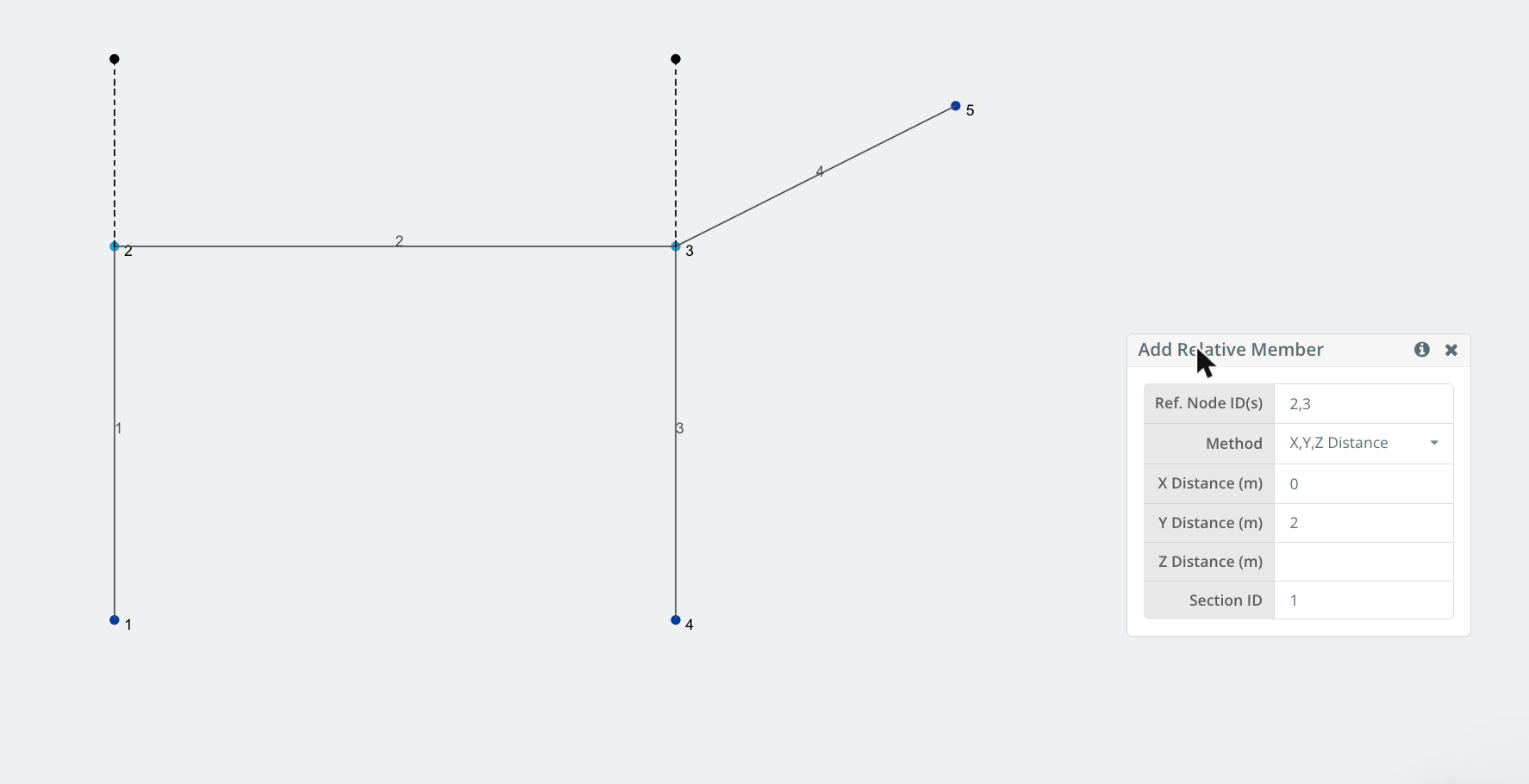
Presiona Ingresar to create the members. Ref. ID de nodo(s) then lists all the new nodes, so the next Ingresar extends each of them again.
This is handy for repetitive geometry, for example to add the columns of a mezzanine above every node of a floor, or to extend the frames of a model generated with Plantillas de ensamblaje.
Adding relative nodes
To add nodes at a relative position without connecting them with members, right-click the selected nodes and choose Nodos > Agregar nodo relativo. El Agregar nodo relativo panel works exactly like Agregar miembro relativo, with the same methods and the same preview, but has no ID de sección: it only creates the nodes.
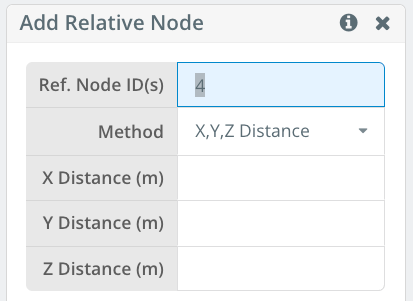
To move existing nodes by a distance rather than create new ones, usar Nodos cambiantes in the operations of Structural 3D.
Adding relative members with the AI Assistant
For larger or repetitive edits, la Asistente de IA en 3D estructural can do the same job from a single prompt. Click the sparkle icon in the bottom right corner to open the Asistente de modelo de IA “Construcción de madera laminada con espigas, and describe the members you want with the node IDs, distancias y ángulos, as you would enter them in the Relative Member tool. Por ejemplo:
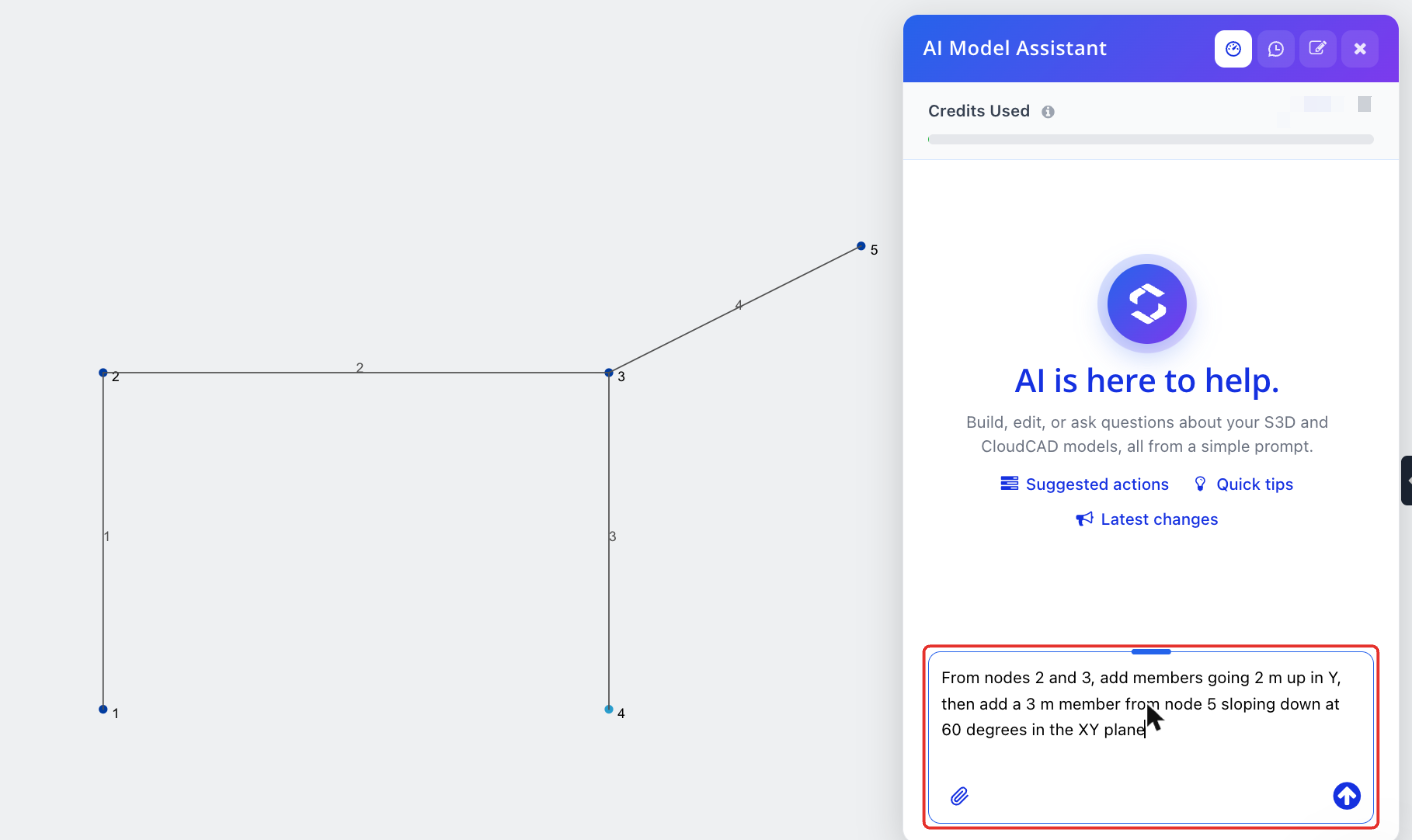
You can combine several steps in one request, such as extending a set of nodes by a distance and then adding an inclined member at a given angle, or ask for members in terms of the structure ("add a 2 m cantilever at the top of every column"). cuando esté hecho, el Asistente de IA te dice lo que cambió, y tu eliges Mantener o Deshacer. Check the new nodes and members in the model, como con cualquier cambio generado por IA. Cada solicitud utiliza créditos de IA.
Consejos
- Every member created with the tool can be undone with Ctrl+Z (Comando+Z en Mac), like any other change to the model.
- If the new end falls exactly on an existing node, the tool connects the member to that node instead of creating a duplicate, so you can close a frame by ending a relative member on a node that is already there.
- Set up the secciones of your model first, so you can pick the right one in ID de sección as you go.
