
Este tutorial lo guía paso a paso a través del diseño de una conexión en el módulo Diseño de conexión SkyCiv..
La interfaz de usuario de diseño tiene cinco pestañas principales.:
- Detalles
- Asamblea
- Accesorios
- Cargas
- Resultados
Trabaje con ellos en orden. Cada uno alimenta al siguiente., y el modelo 3D se vuelve a renderizar a medida que avanzas., para que puedas ver lo que estás construyendo antes de resolverlo.
Detalles
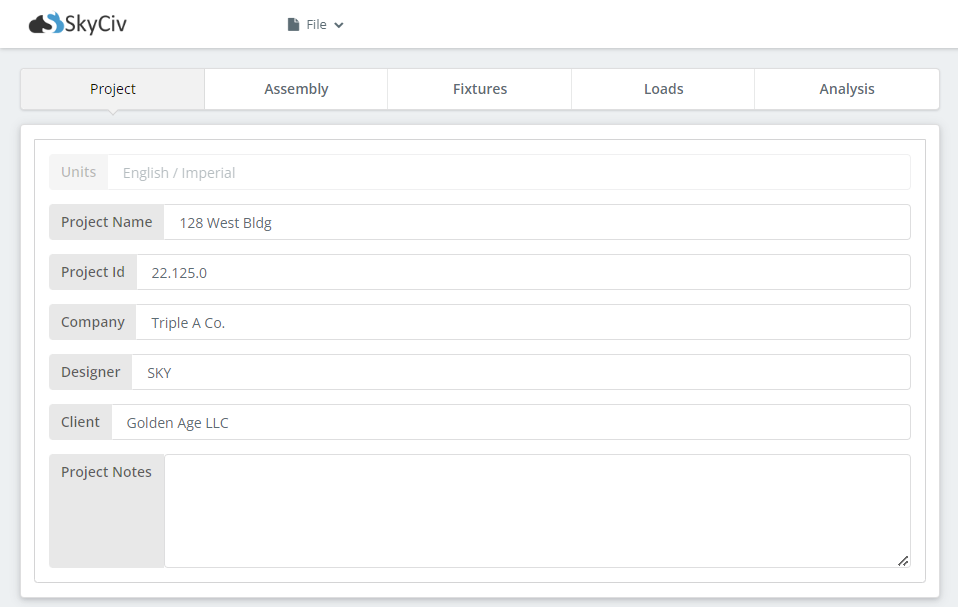
La pestaña Detalles es donde registra la información de su proyecto.. Nada de esto afecta los cálculos., pero se traslada al informe, que es lo que hace que un conjunto de diseños sea rastreable meses después:
- Nombre del proyecto
- Projecto ID
- Empresa
- en Hormigón
- Cliente
- Notas del proyecto
Asamblea
La segunda pestaña es donde construyes la conexión en sí..
Columna
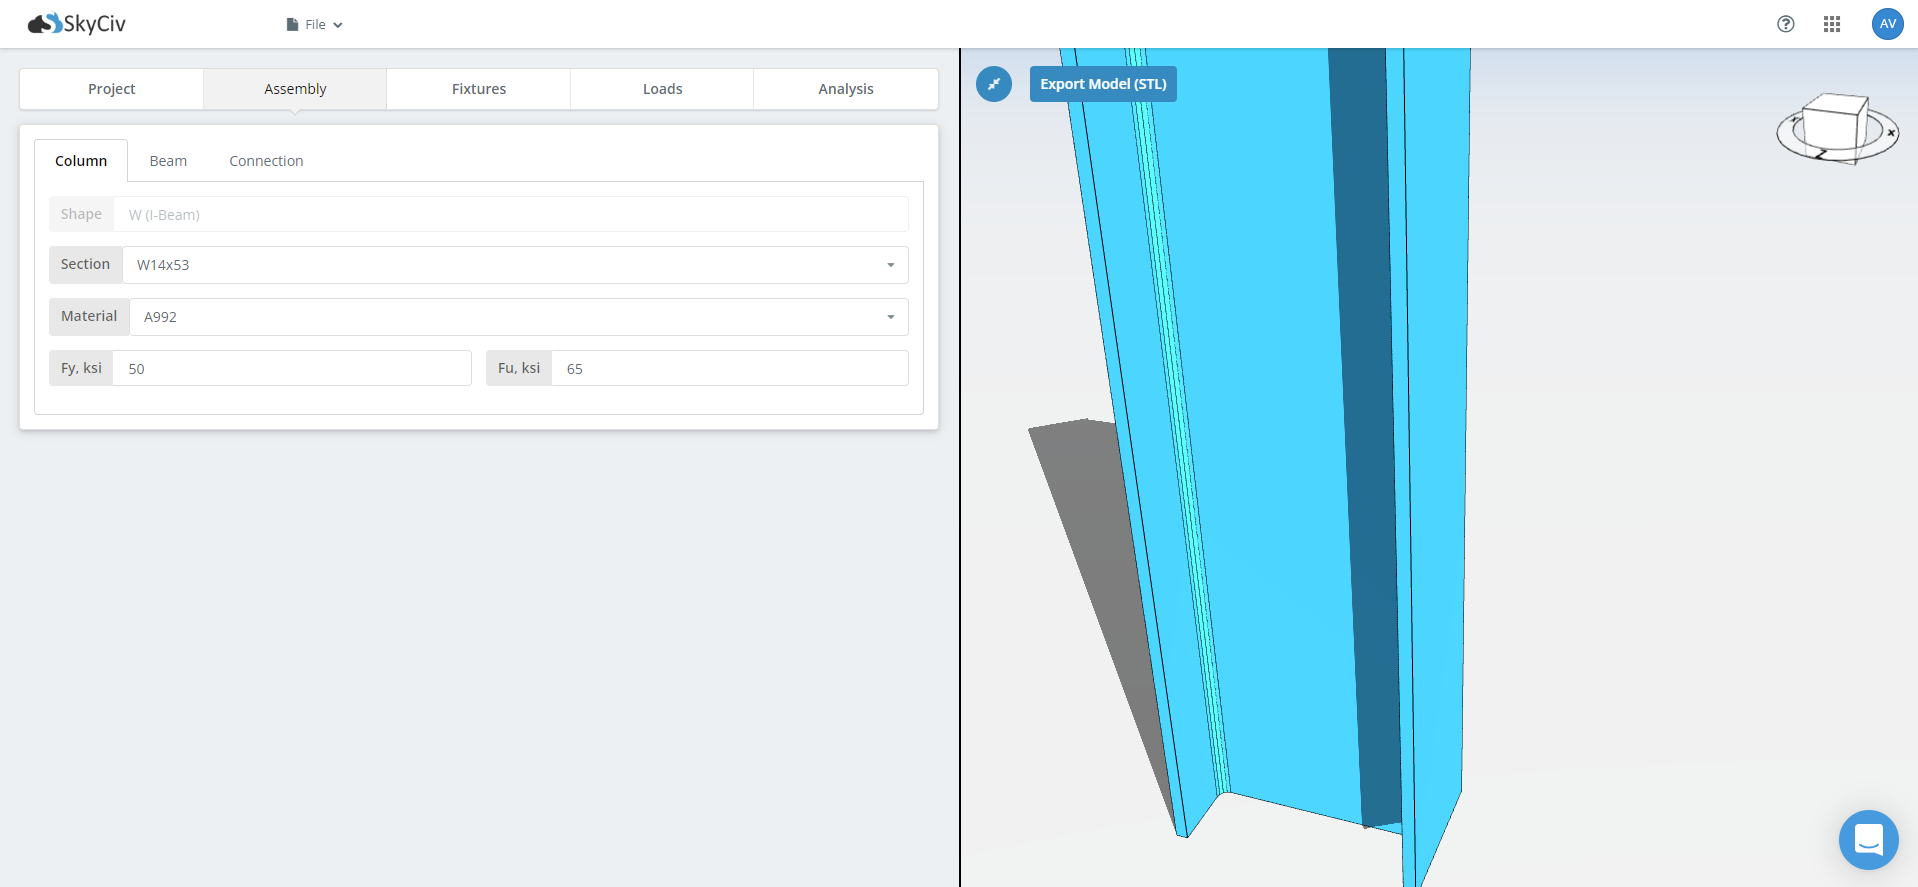
Comience con el miembro de apoyo, generalmente una columna. Elija el tamaño de la sección en el menú desplegable junto a la etiqueta de la sección., luego el grado del material. Los grados comunes están en la lista.; para cualquier otra cosa, escriba su propio Fy y Fu en esos campos. Verifique las unidades que se muestran en cada campo antes de escribir.
Calculadora de
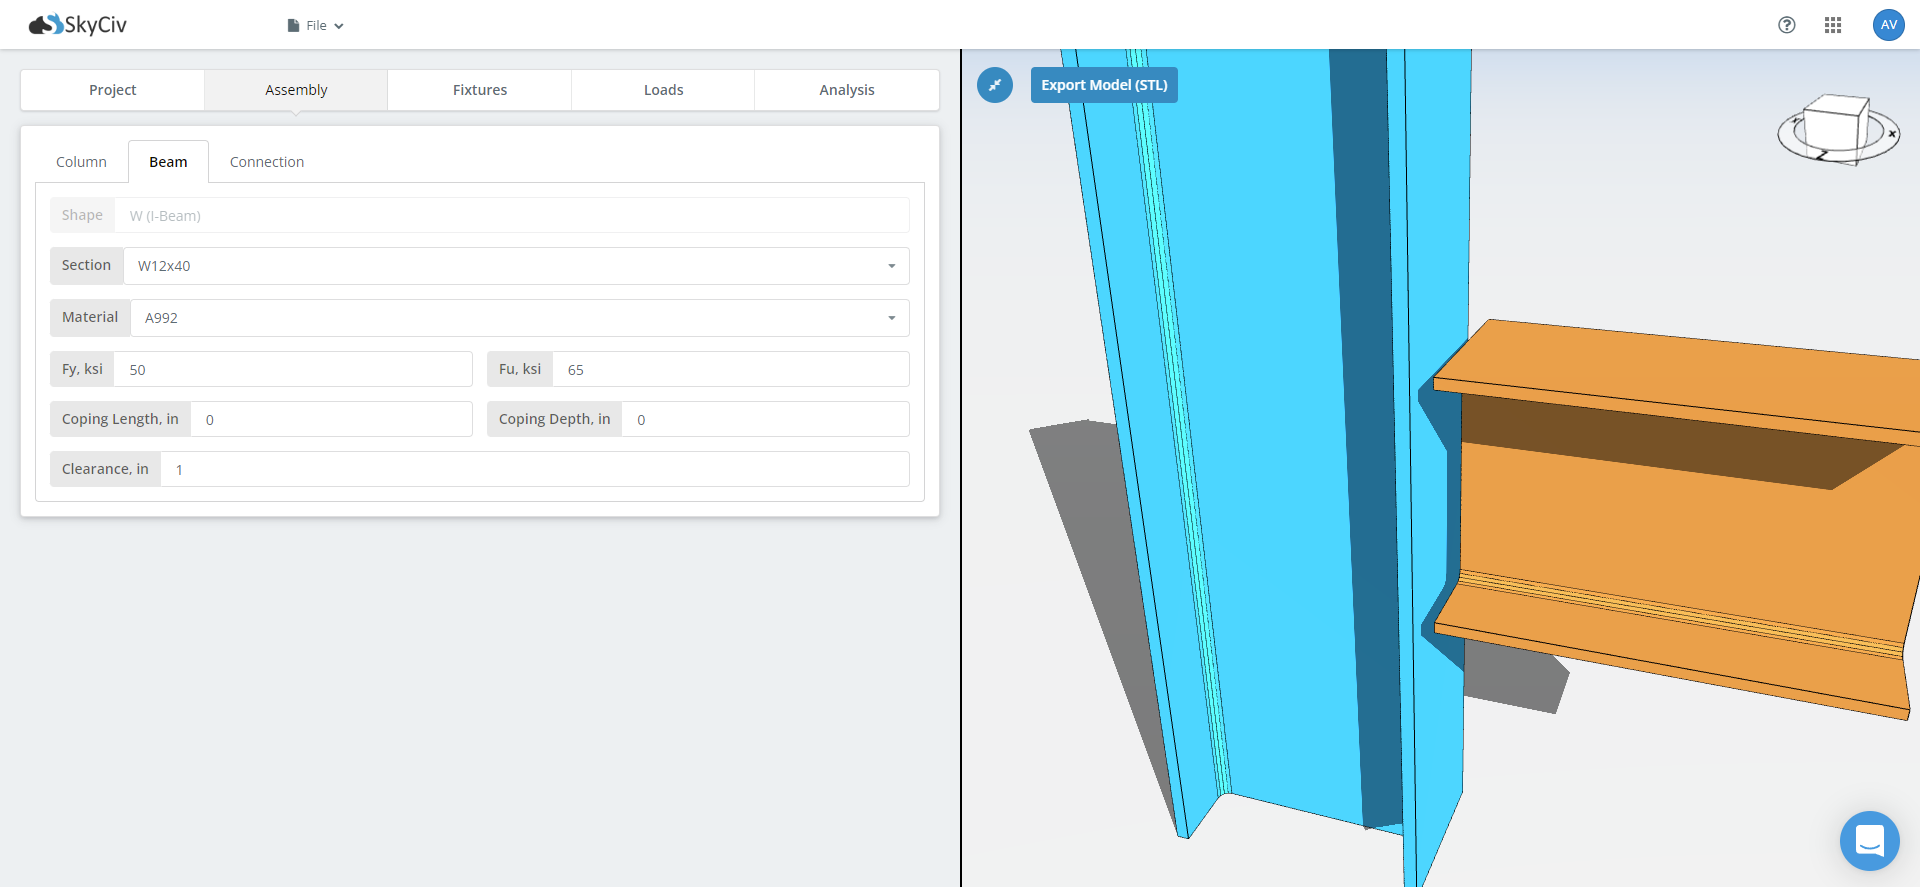
Luego viene la viga. Suministre el tamaño de la sección y el grado del material de la misma manera.. Esta pestaña también contiene las dimensiones del frente y el espacio libre de la viga.. Agregue una cubierta donde la viga se enmarca en una viga de soporte de profundidad similar y el ala superior debe recortarse, dado que la sección cubierta rige un cheque, la sección no cubierta no lo hace.
Conexión
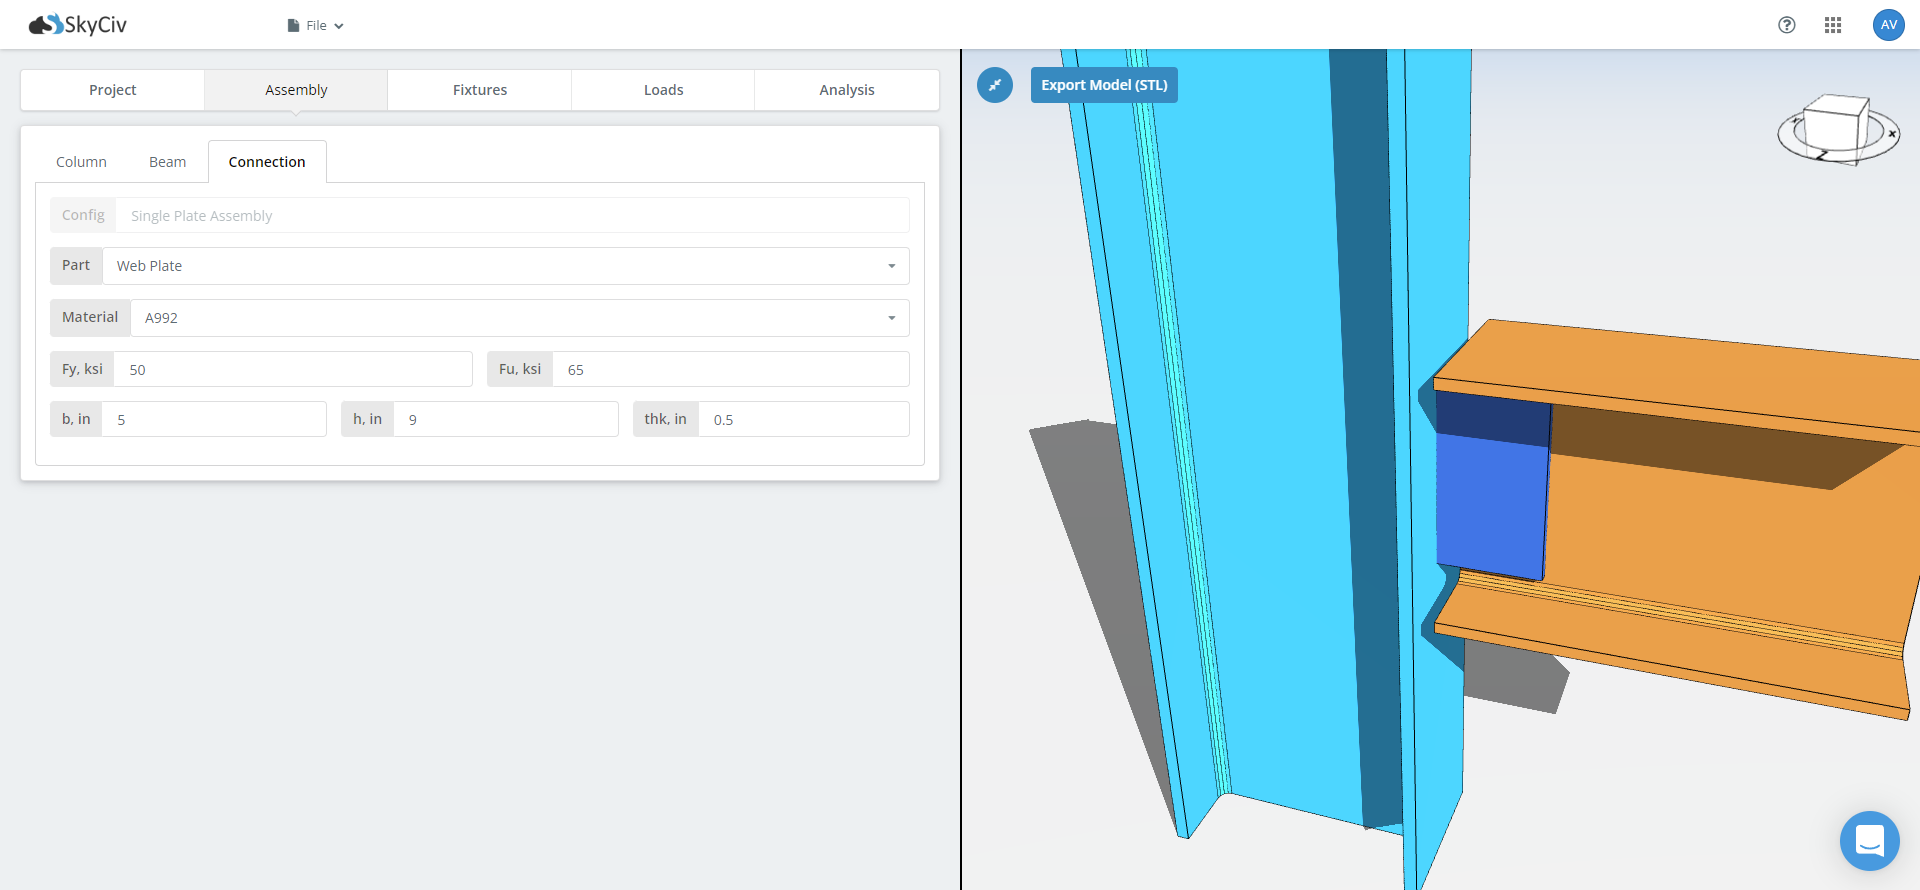
Por último vienen los componentes de conexión.: calificaciones, espesores, anchos y largos para las placas o ángulos. Cuando una conexión tiene tanto un ala como un componente de alma, recuerde cambiar entre las dos subpestañas y completar cada una. Una conexión de momento generalmente transmite el momento a través de las alas y el corte a través de una placa de alma separada., entonces ambos necesitan configuración.
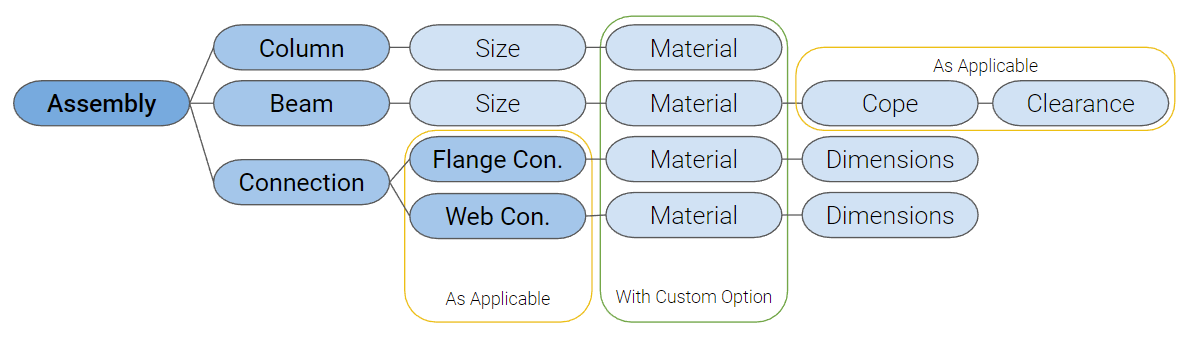
Una vez que los campos estén llenos para cada pestaña, el modelo representa la figura 3D automáticamente. Puedes probar esto en la herramienta gratuita sin una cuenta..
Accesorios
La pestaña Aparatos contiene los subgrupos de aparatos., numerado, con una breve descripción debajo del nombre de cada pestaña.
Comience eligiendo el tipo de luminaria. Hay dos: atornillado y soldado. En algunas conexiones el tipo está preseleccionado y bloqueado, porque la configuración solo funciona de una manera. Si el tipo que deseas no está disponible, enviar una solicitud de función al equipo de soporte de SkyCiv.
Tornillo
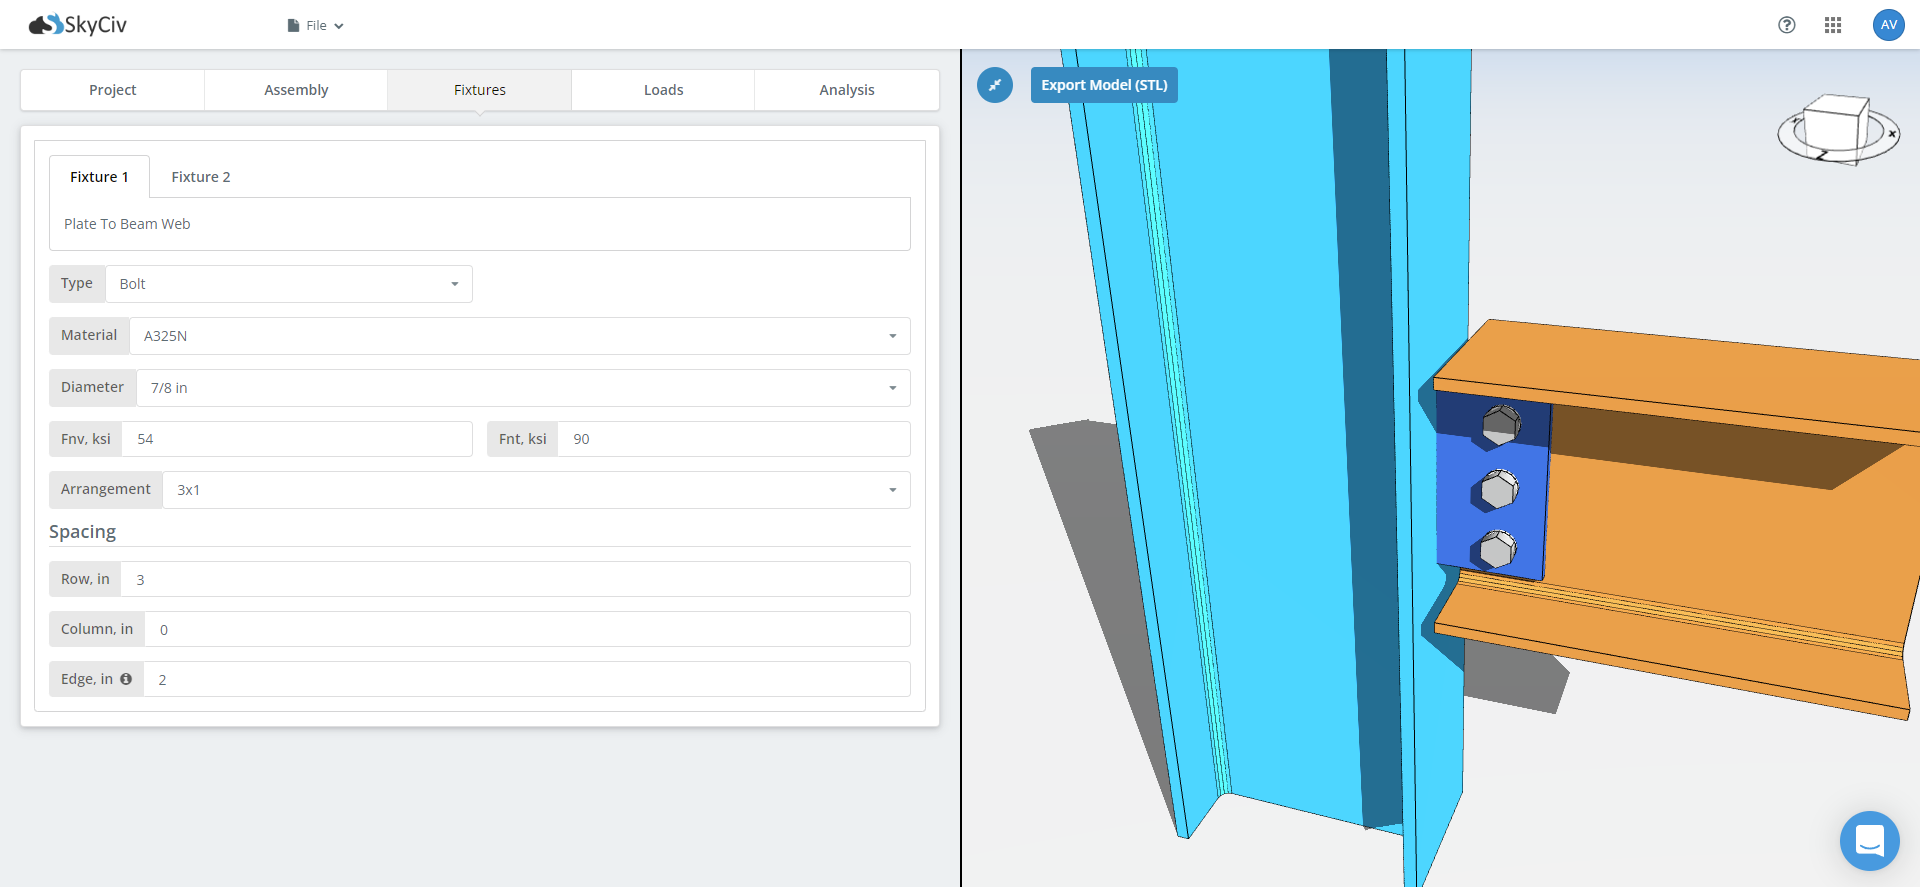
Para un accesorio atornillado, usted suministra:
- Material
- Diámetro
- Resistencia a la tracción y al corte del perno
- Tipo de agujero
- Arreglo
- Distancia entre filas
- Espaciado de columnas
- Distancia del borde
La mayoría de estos son menús desplegables., y hay una información sobre herramientas en Distancia al borde que explica desde qué se mide.
Una vez que los campos requeridos estén llenos, los tornillos se renderizan en el modelo. Cambie el tamaño del perno o abra el espaciado y la conexión se actualizará mientras observa, Cuál es la forma más rápida de saber si un grupo de pernos realmente encaja antes de que las comprobaciones detalladas le indiquen que no..
Soldar
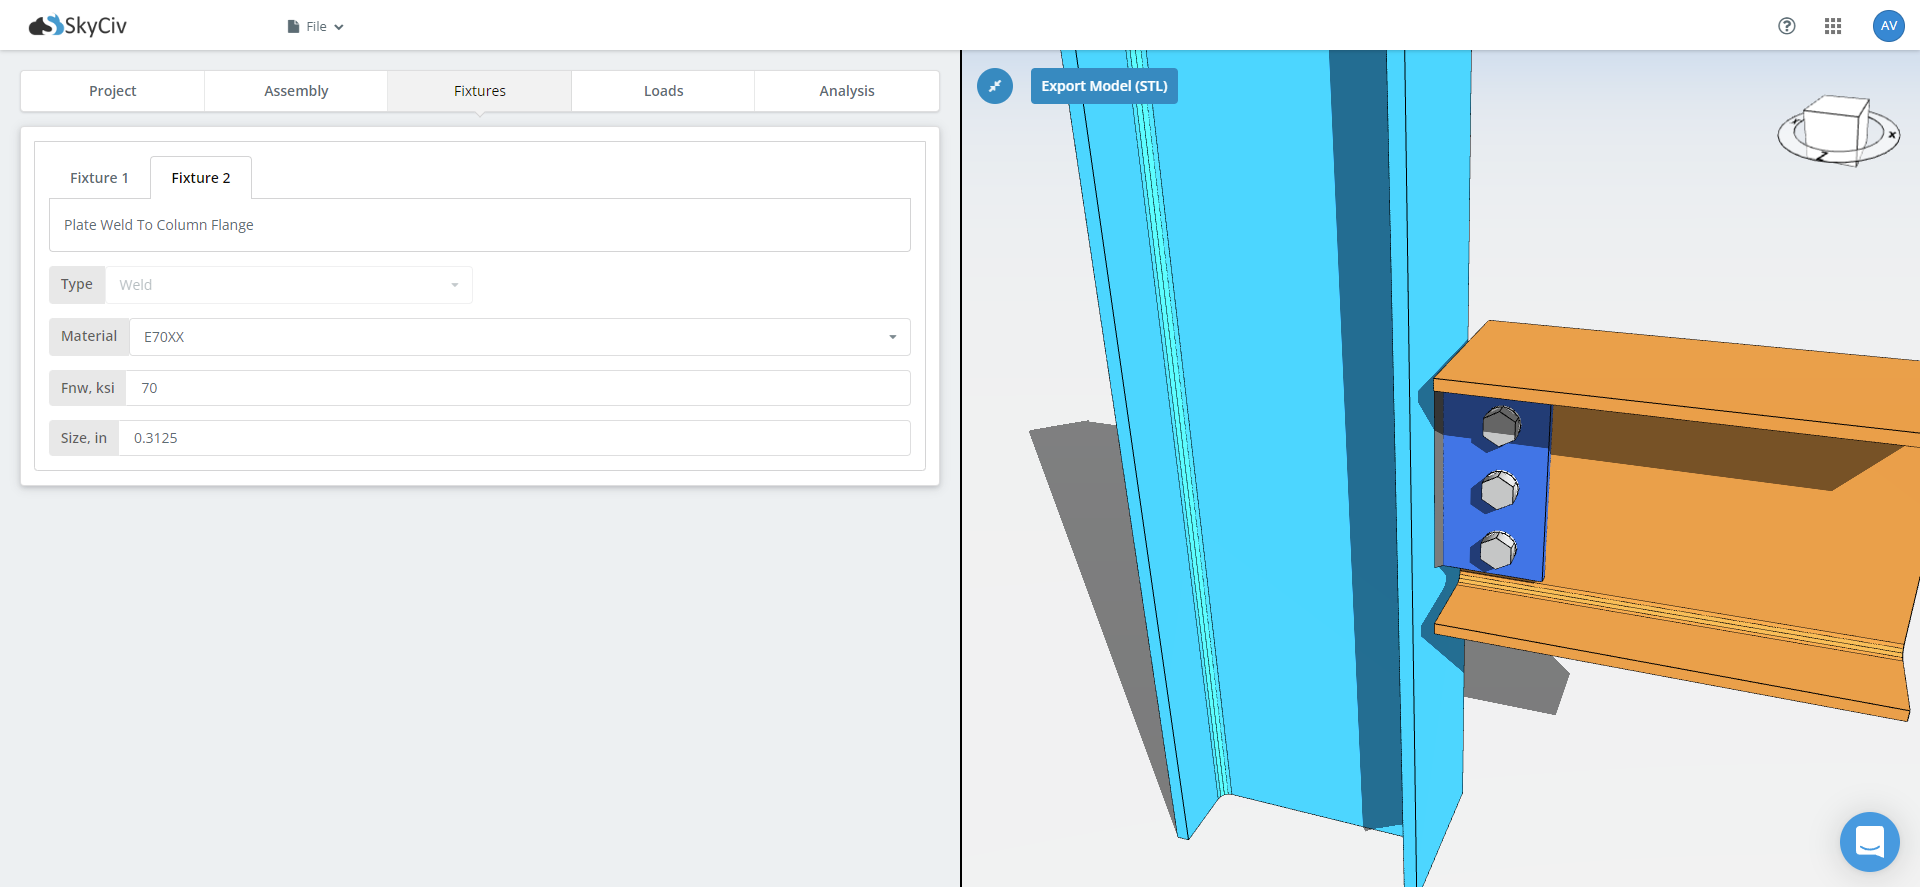
Un dispositivo de soldadura requiere menos insumos que uno atornillado:
- Material
- Fuerza de soldadura
- Tamaño
El modelo 3D se actualiza una vez que se establece el dispositivo de soldadura..
Para obtener más información sobre lo que hace el módulo con estos, ver la documentación en tornillos y soldaduras.
Cargas
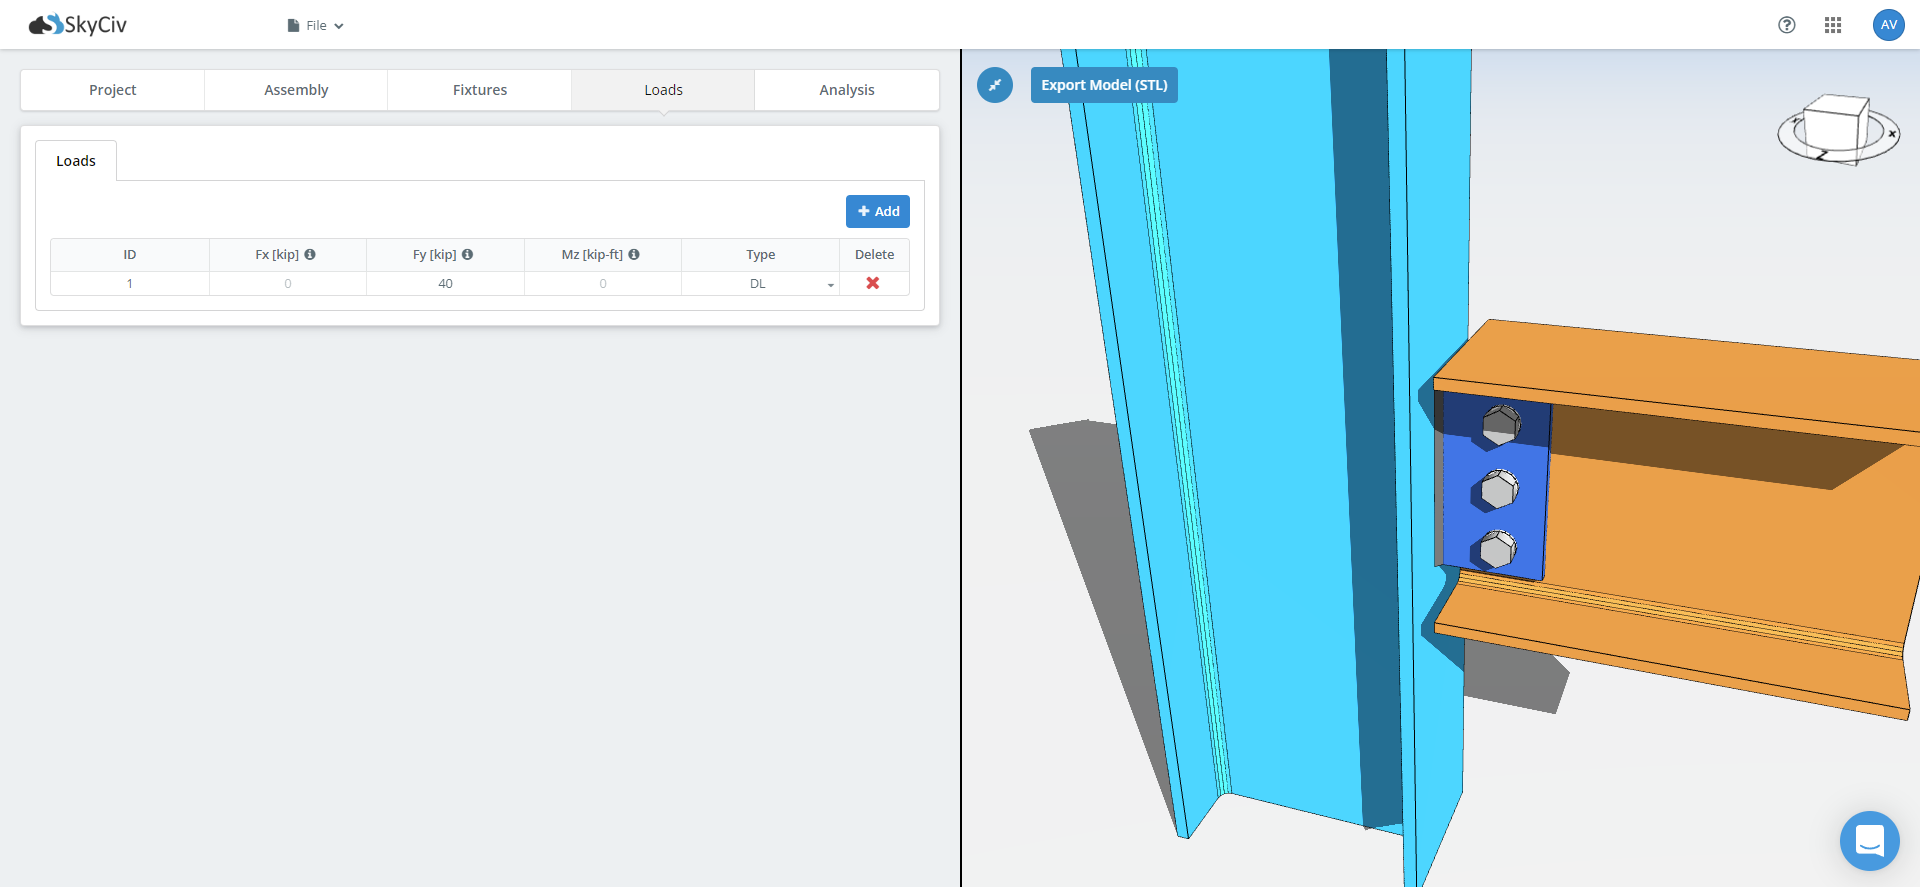
Escriba las cargas de diseño directamente en las celdas de la tabla de cargas.. Las columnas que obtienes dependen del tipo de conexión.: una conexión de corte requiere solo corte, una conexión de momento toma axial, corte y momento, y una conexión de refuerzo toma axial.
Haga coincidir sus cargas con el método de diseño que eligió. Bajo LRFD, ingrese cargas factorizadas y el módulo las comparará con la resistencia de diseño. Bajo TEA, Introduce cargas de servicio y las compara con la resistencia permitida.. Ingresar cargas factorizadas en un diseño ASD, o cargas de servicio en uno LRFD, le da un índice de utilización que no significa nada, y el software no puede decir lo que usted escribió.
Resultados
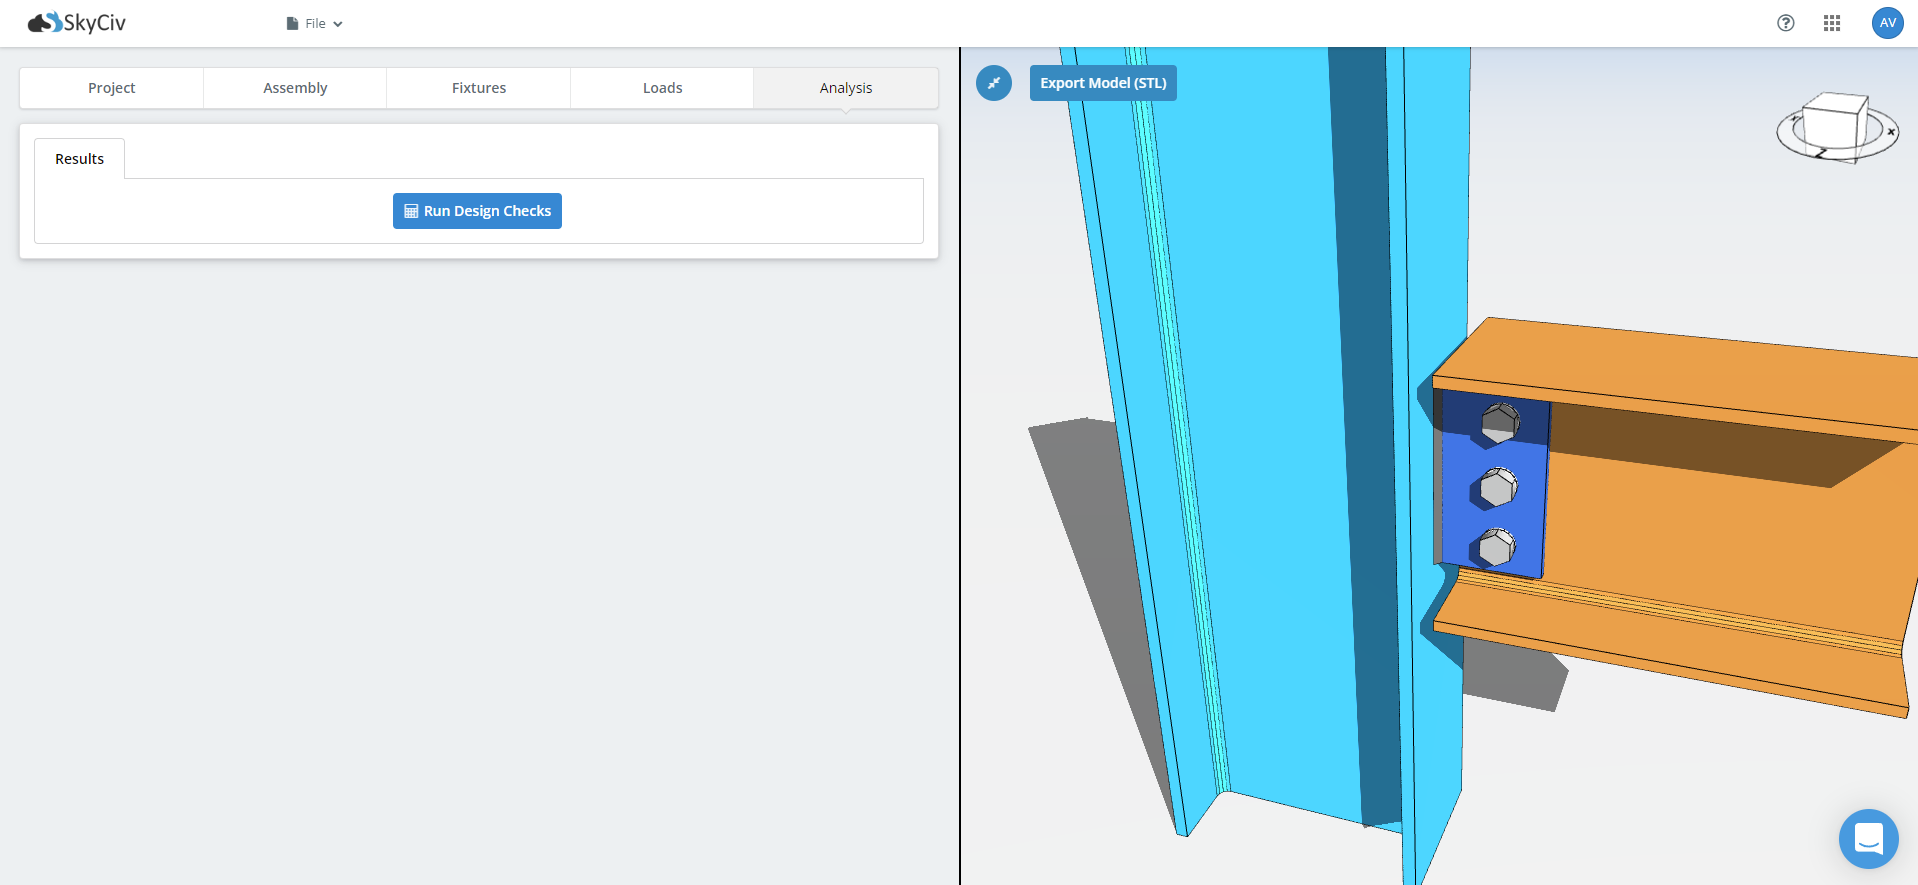
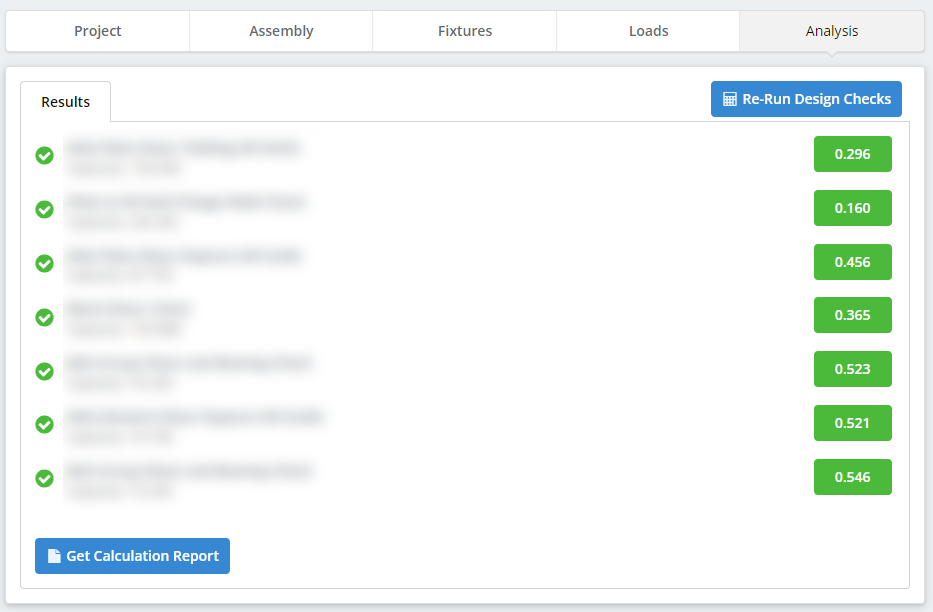
Con todo suministrado, ejecutar las comprobaciones de diseño. Los resultados aparecen en forma de tabla y gráficos., con un índice de utilización y un aprobado o reprobado en cada verificación, y el cheque gobernante llamado en la parte superior.
Detallado de carreras antes de las comprobaciones de resistencia.: distancias al borde del perno, espaciado, espacios libres de herramientas, dimensiones de placas, y detección de choques entre placas, refuerzos, pernos y soldaduras. Una conexión que no se puede establecer falla aquí, antes de calcular cualquier capacidad, que suele ser lo que quieres.
Desde esta pestaña, Ver informe de cálculo abre los cálculos paso a paso con cada fórmula y referencia de cláusula, y Descargar PDF o Descargar HTML lo guarda. Ver dibujo detallado abre la hoja de detalles de CloudCAD 2D, con vistas en planta y en alzado, llamadas de soldadura, horarios y dimensiones de los pernos, que puedes editar en la aplicación y exportar.
Empezar hoy
Listo para probarlo? Elige una conexión, ingresa tus secciones y cargas, y ver cada cheque. Se ejecuta en el navegador., sin nada que instalar y sin necesidad de una cuenta para comenzar.
SkyCiv Connection Design
SkyCiv Connection Design cubre sobre 80+ tipos de conexión preconfigurados, diseños para AISC 360-16 en LRFD y ASD y a AS 4100:2020, y muestra cada fórmula y referencia de código en su totalidad. Una cuenta gratuita le permite guardar y recargar sus archivos de conexión.
Diseño de conexión independiente
Quiere usar solo el módulo de diseño de conexión? Haga clic en el botón de abajo para el precio independiente.
