
Table of Contents
- Creating a New Project
- Adding Files
- Opening Files
- Creating Folders
- Saving Reports
- Downloading Project Data
- Sharing Projects
Creating a New Project
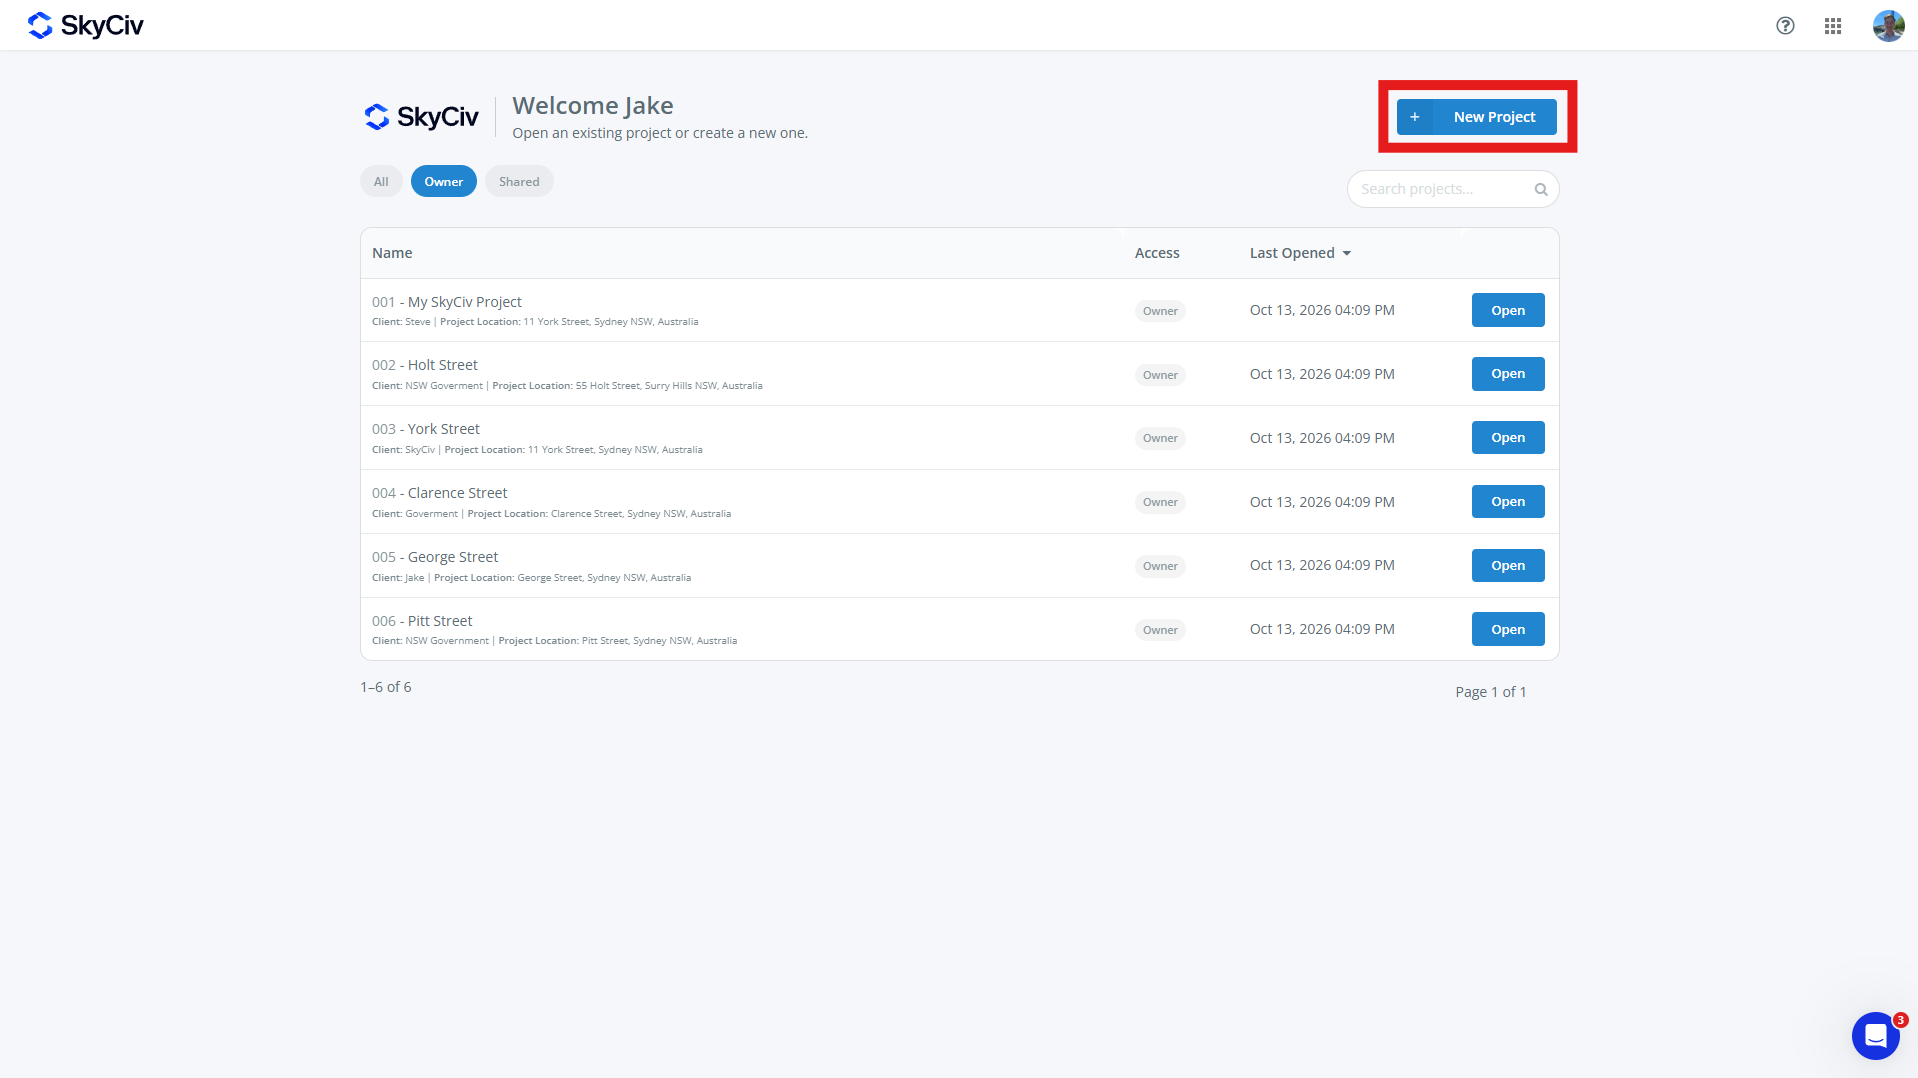
To create a new project, click the New Project button from the SkyCiv Dashboard or Projects page. New Projects can be created from within a SkyCiv Module as well.
Fill out the project form that pops up. A project can have:
-
- Project ID (optional)
- Project Name (required)
- Project Information
- Engineer (optional)
- Client (optional)
- Location (optional)
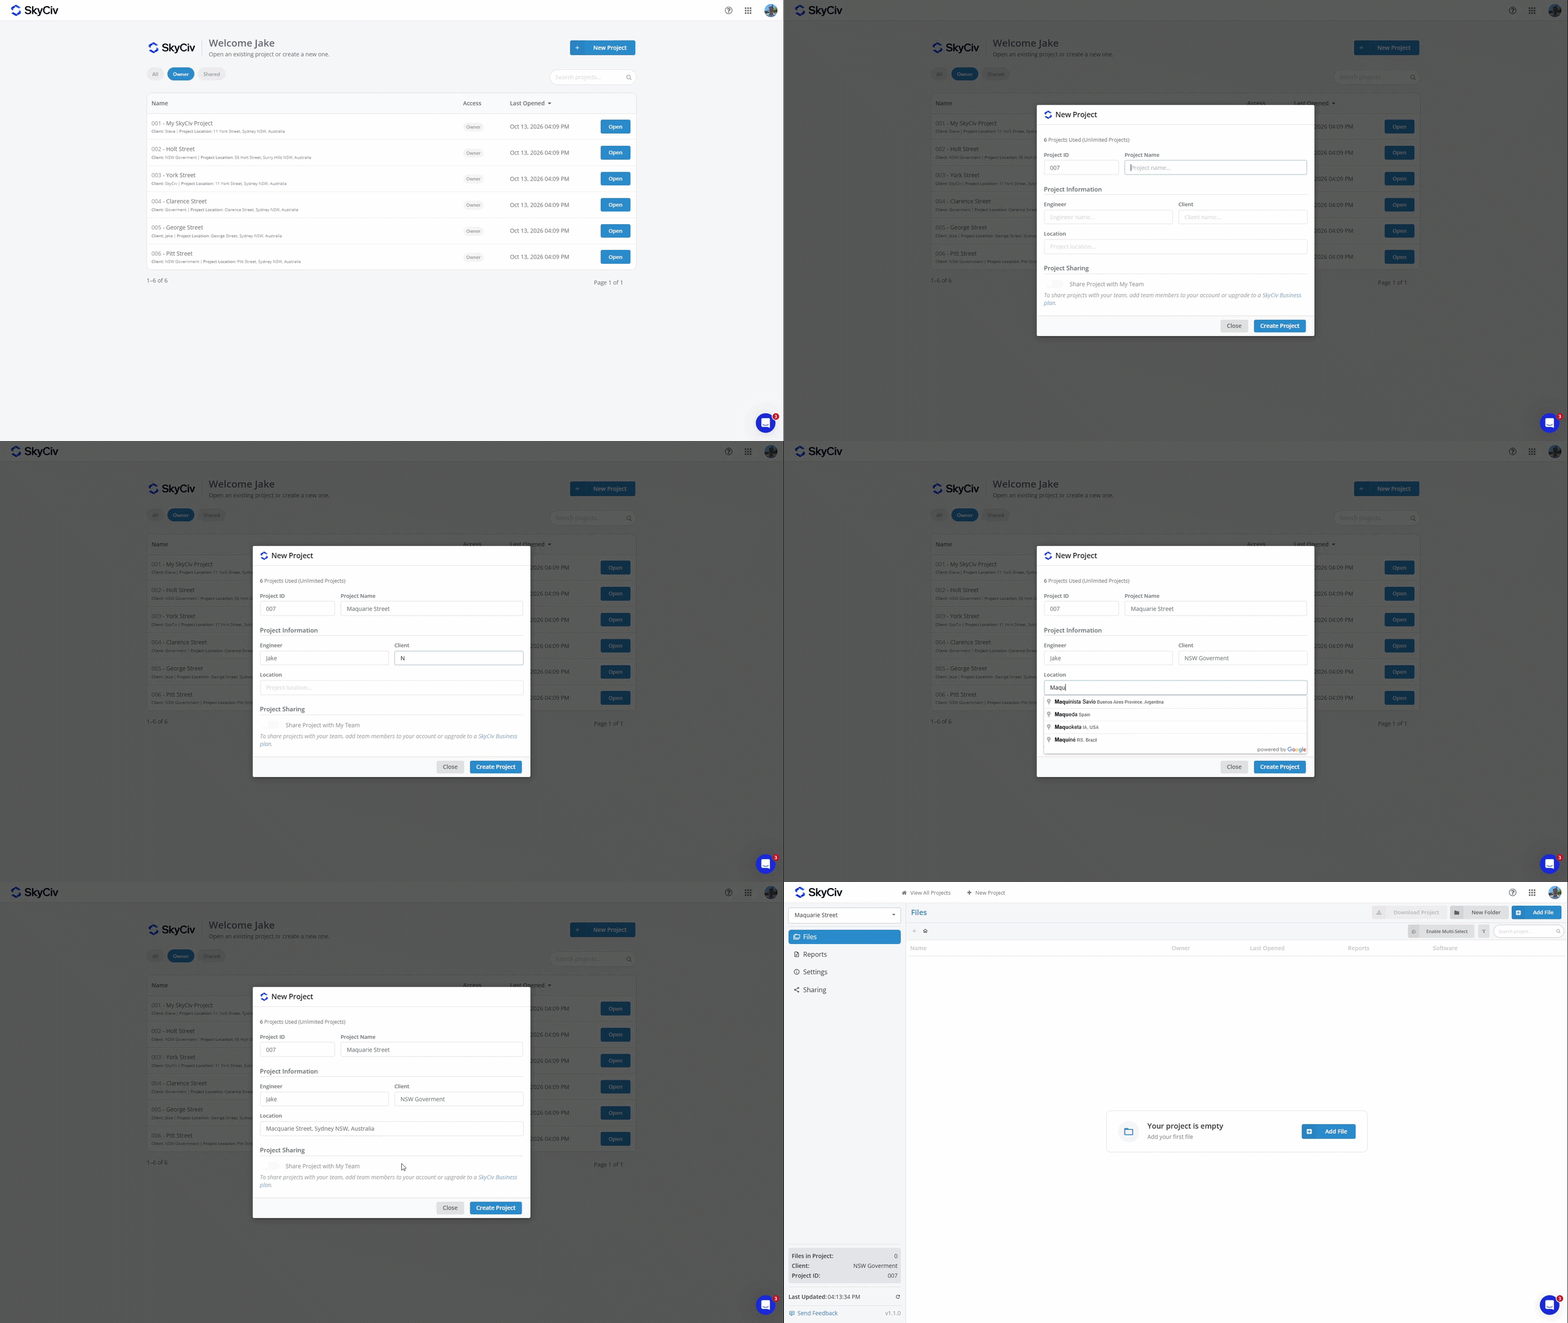
Click “Create Project” to create the new project. Your project is now ready to add files too.
Note: Accounts have a limited number of projects. To upgrade to Unlimited Projects, add Project Manager to your subscription at checkout or purchase a SkyCiv Business Account
Adding Files
Files can be added to a project by selecting an existing file or creating a new one. Each file can belong to only one project at a time.
Adding a File from within a Project
Files can be added from within a project using the Add File button in the top left of the screen.
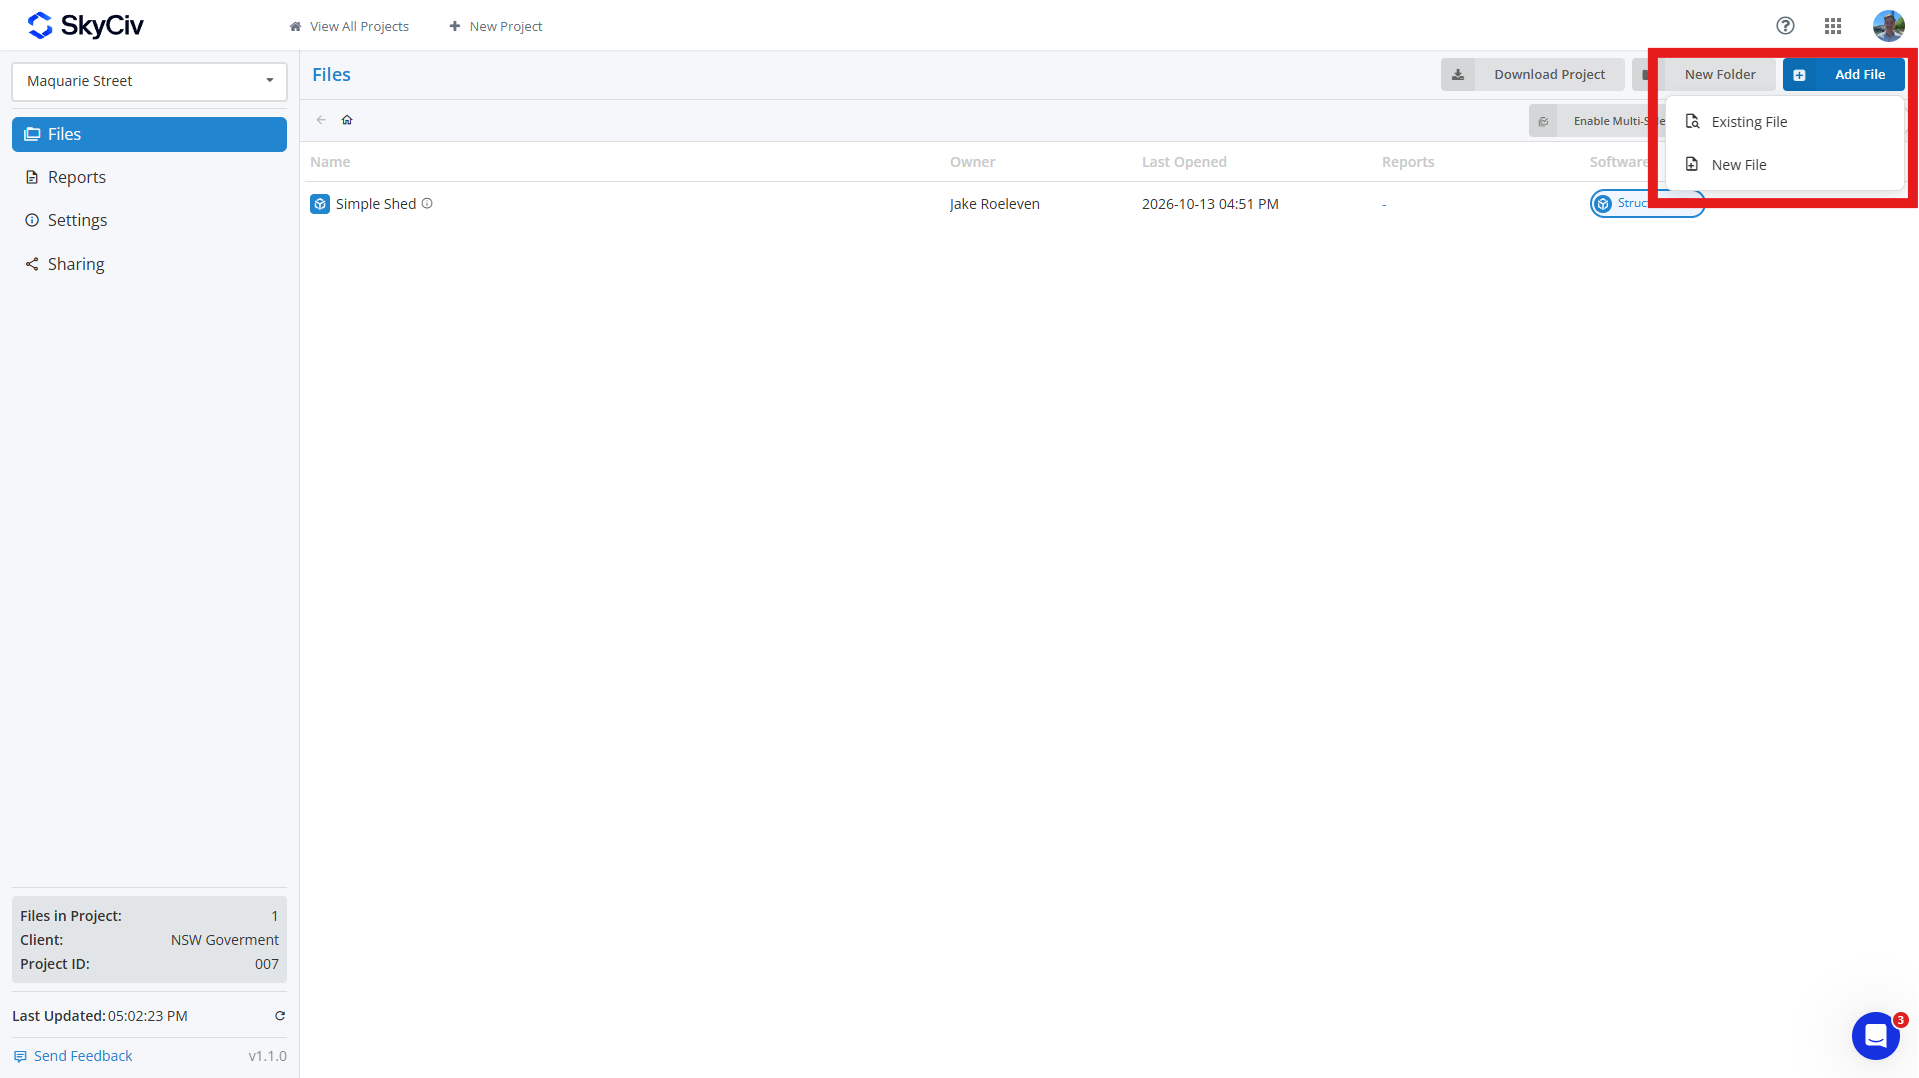
To add an existing file, click Existing File and select the file(s) you want to add to your project. You can search for files and filter them by SkyCiv module in the top left of the popup.
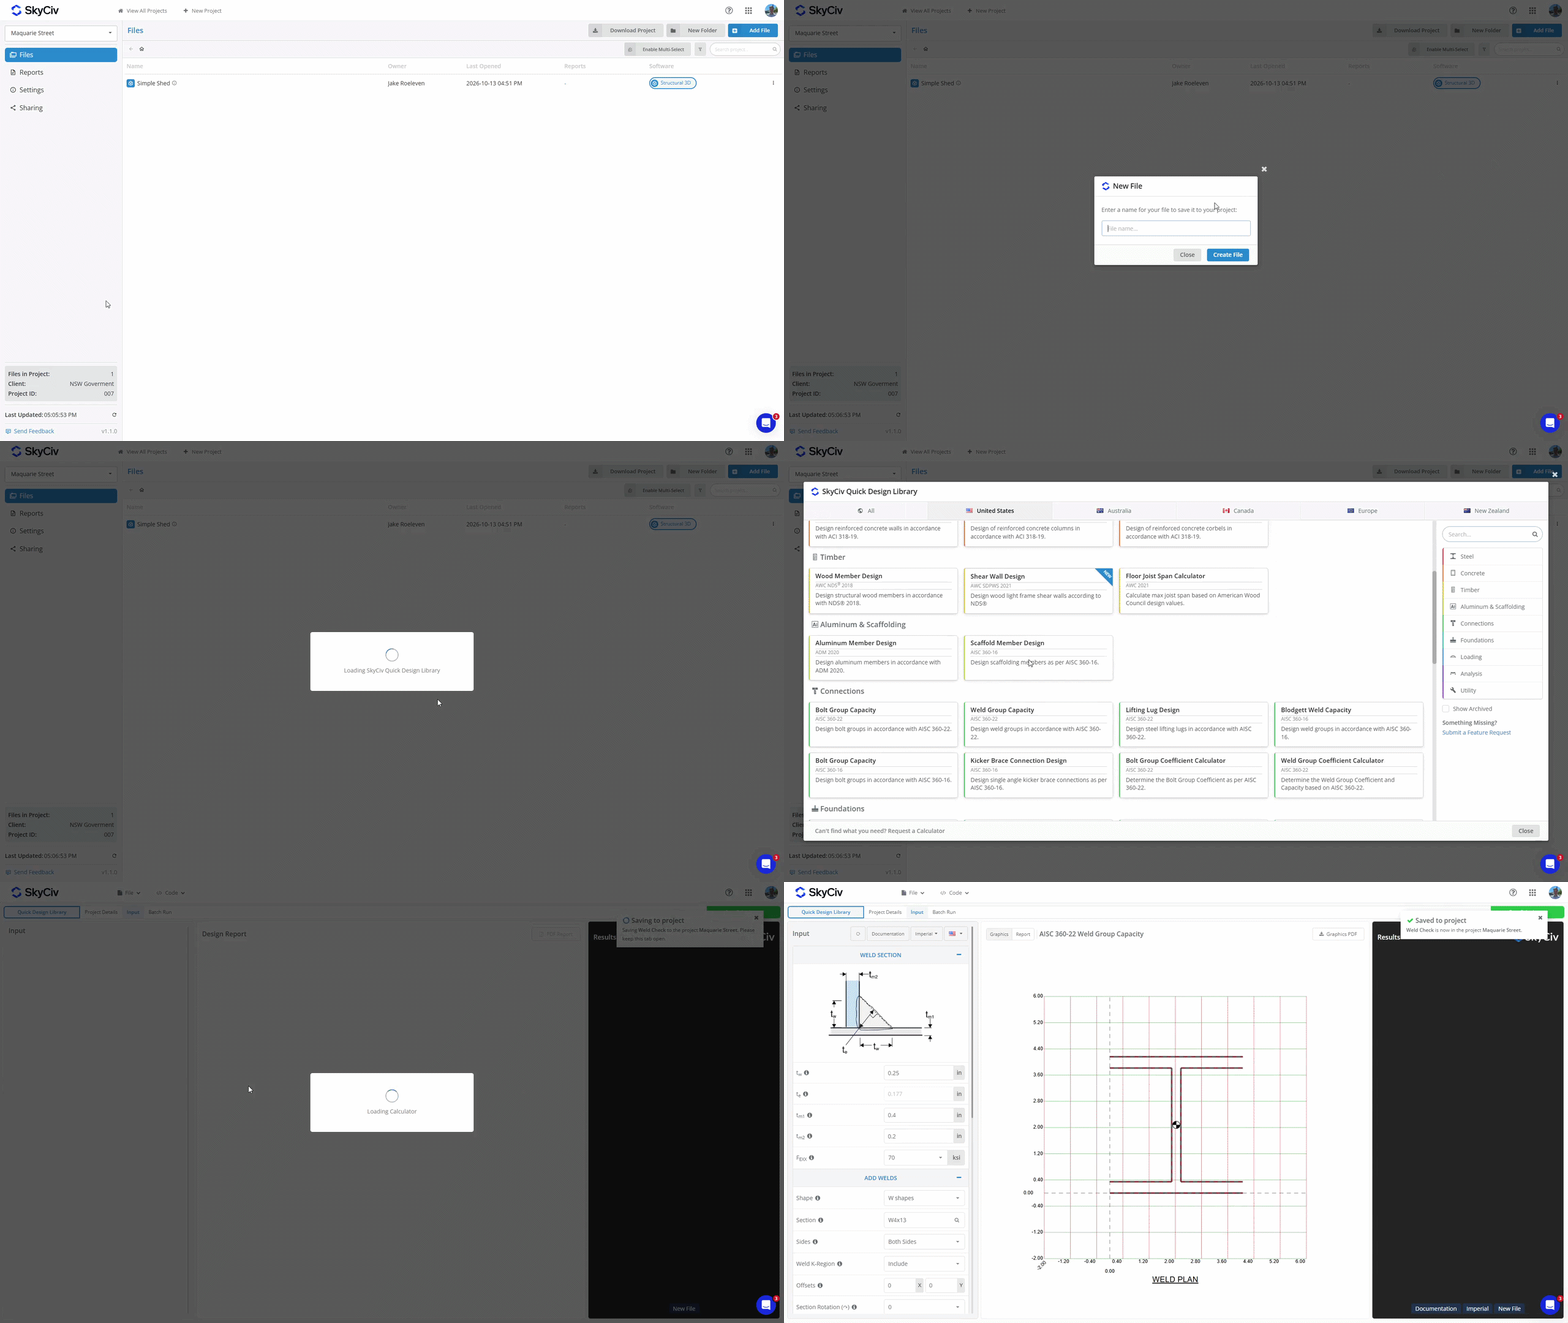
To create a new file, click New File and select the software module you want to use. Enter a name for the file, and a new tab will appear. If the selected module requires additional setup, such as choosing a design code or configuration, complete this before saving the file. Once the file is saved to the project, a pop-up will appear in the top right corner confirming that it was saved.
Adding a File from within a Software Module
If you created a file by launching a SkyCiv module directly, you can save it to a project from within the module. Open the File menu and select Save or Save As. Ensure you are in Project Manager mode, which is displayed in the top left of the popup.
Select a project from the list or create a new one. Enter a name for the file and click Save in the bottom left to save it to the project.
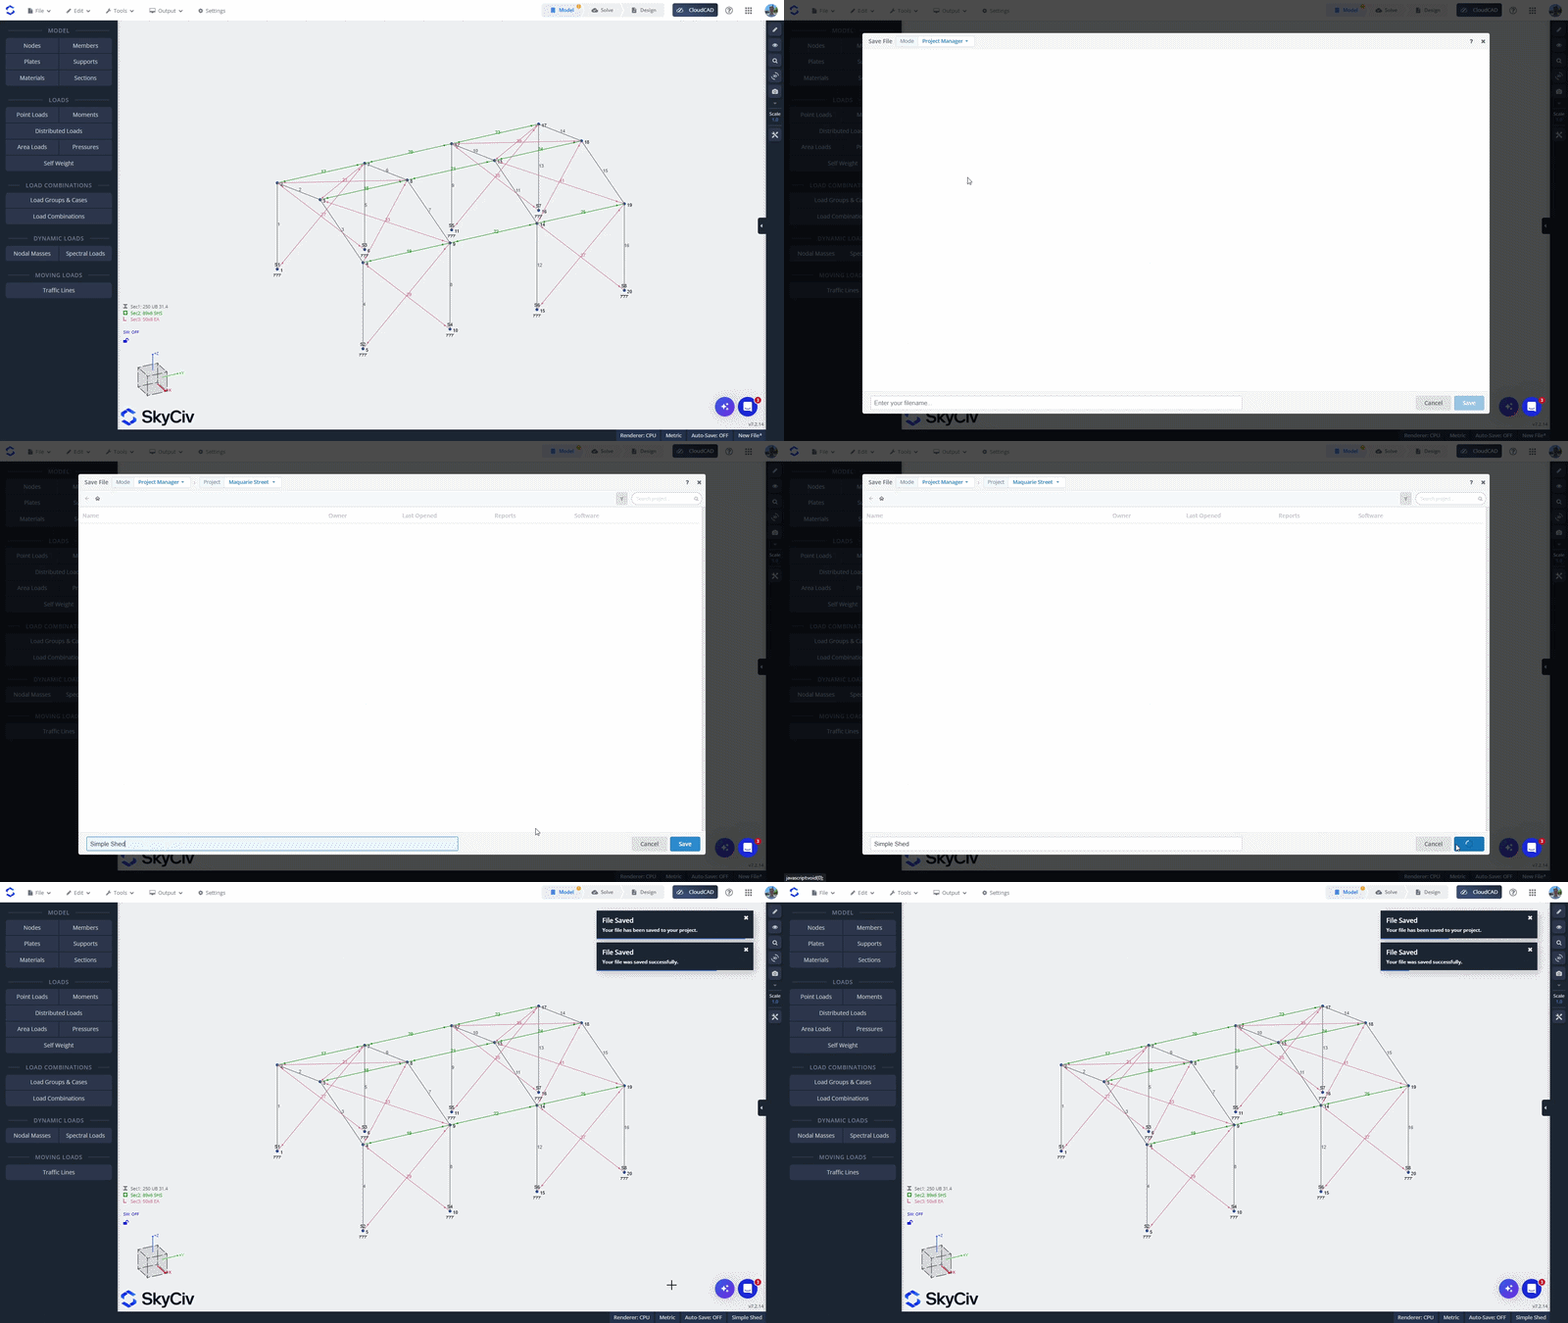
Adding a File from the SkyCiv File Manager
To add an existing file from the SkyCiv File Manager, right-click the file and select Add to Project. Select the project you want to add it to.
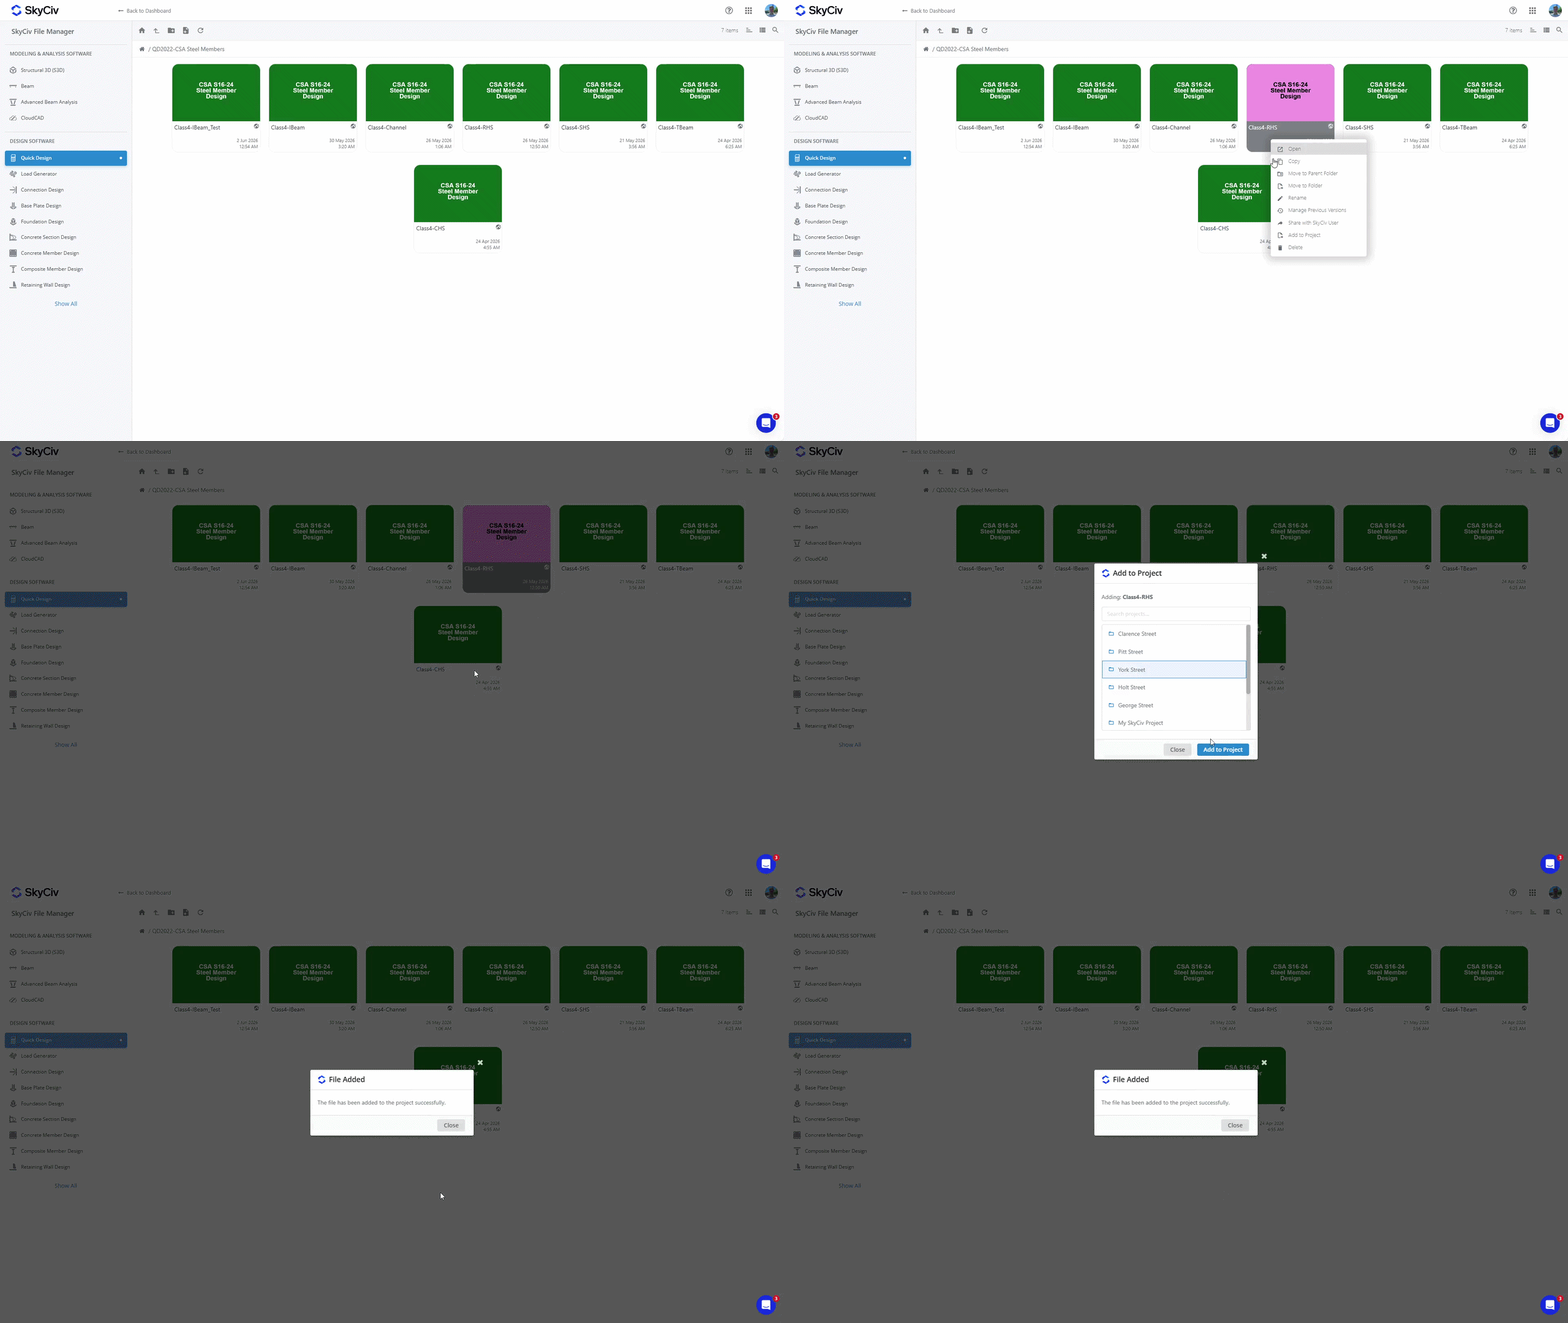
Note: Files saved to your projects are also accessible from the File Manager. Adding a file to a project does not change its existing location in the File Manager. See Where Are Project Files Saved? in Getting Started for more details.
Opening Files
Opening a file from inside the Project
To open a file from inside, double-click to open it in a new tab. Alternatively, right-click on the file to bring up the file menu and select the “Open” option.
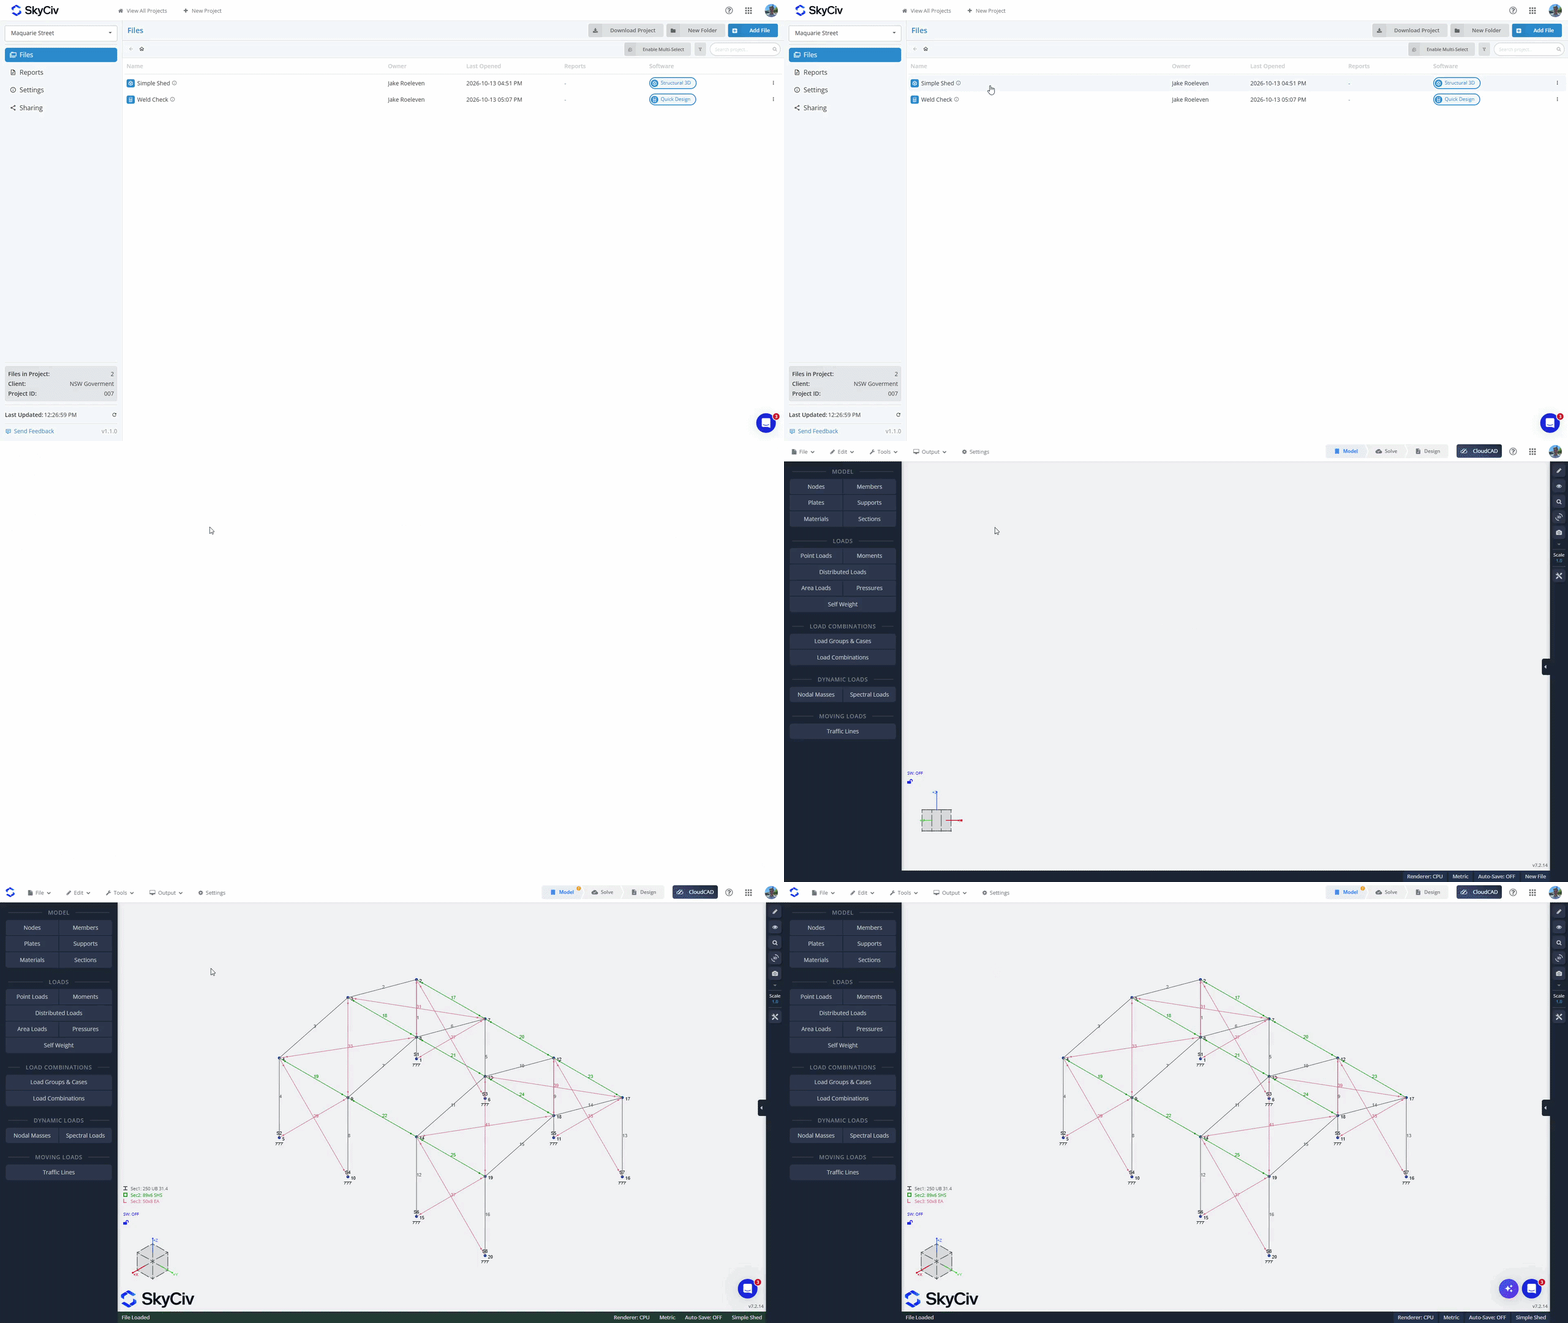
Opening a file from inside a Software Module
From the File menu, click “Open”. Make sure you are in Project Manager mode; you can check this in the top-left of the pop-up. Select your project to load available files. Files from the current module will load at the top of the list. If you select a file from the current module, it will open in the current tab. Files from other modules will be greyed out at the bottom of the list. If you select a file from another module they will load in a new tab.
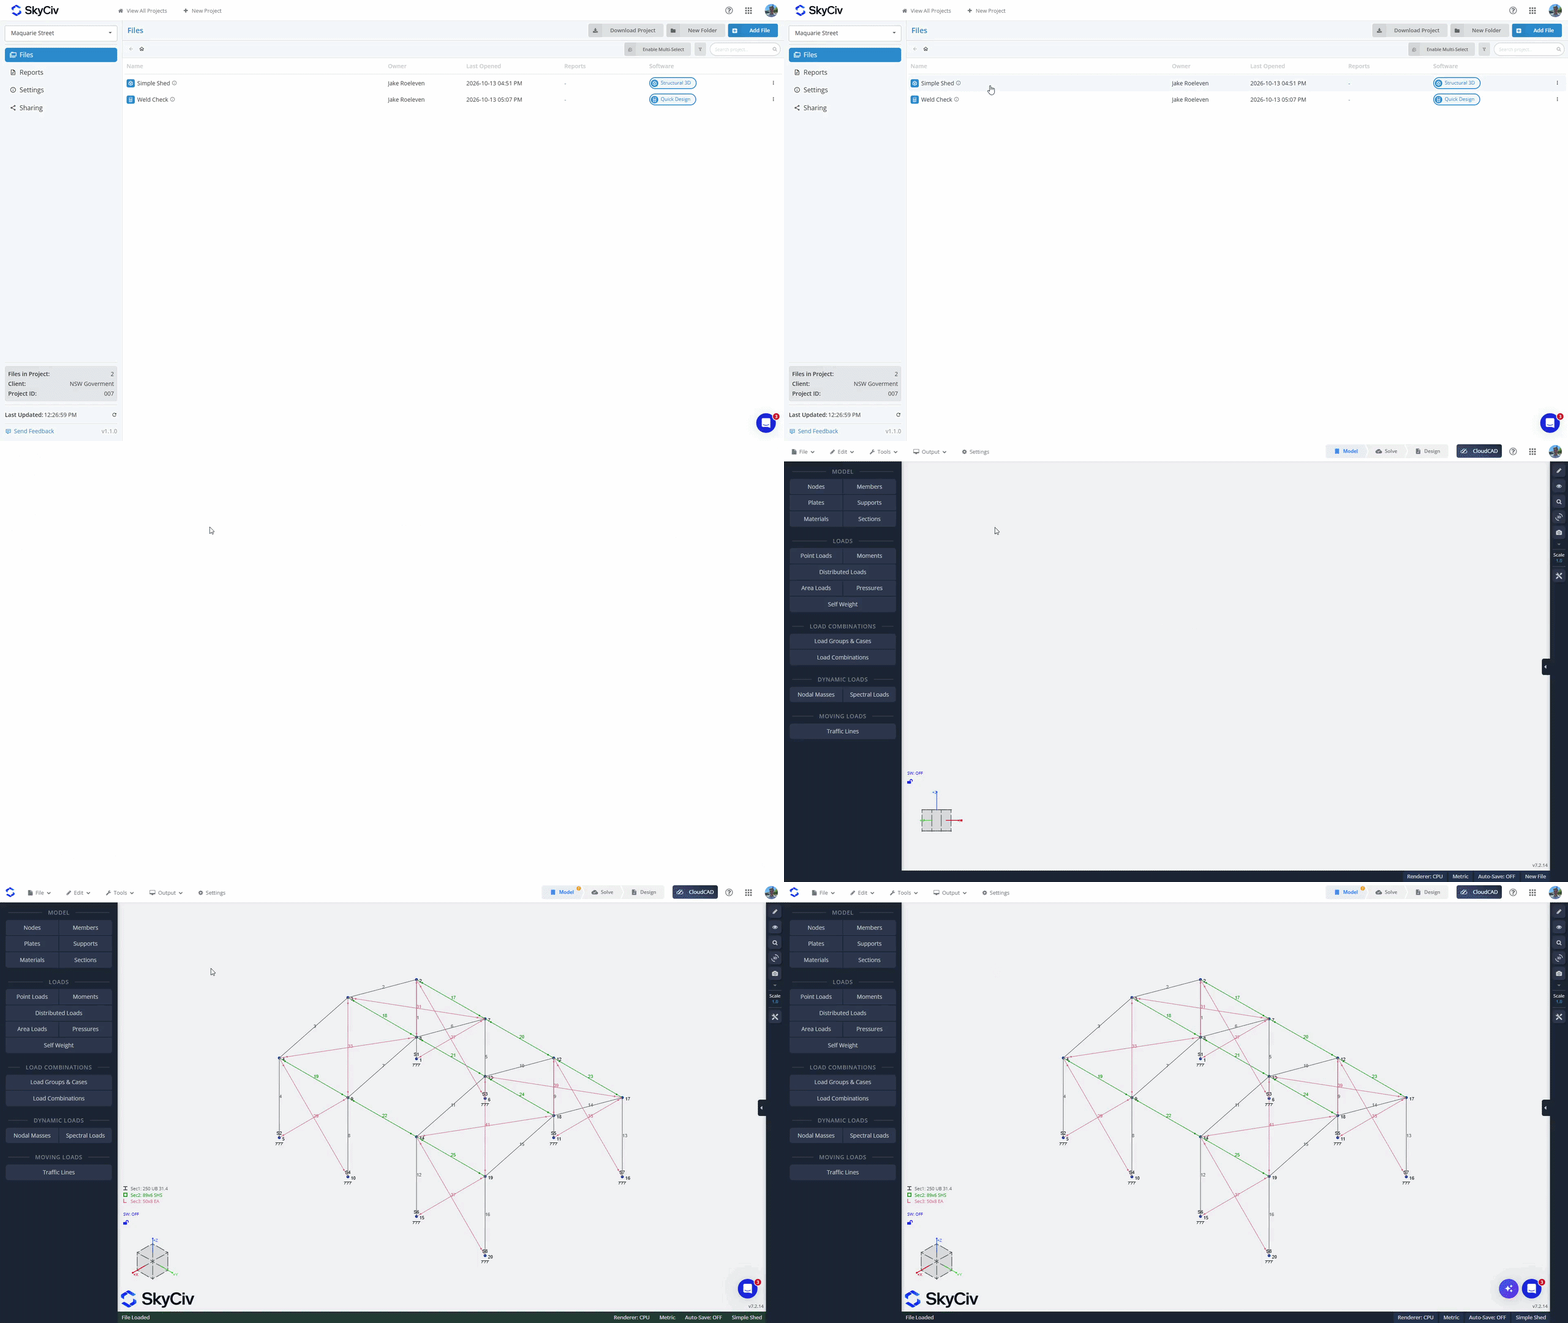
Creating Folders
Organize your files into folders by using the “New Folder” button inside the Project Manager and creating a name for your folder. Drag and drop files into folders to move them, or use the “Enable Multi-Select” option to bulk move files into folders.
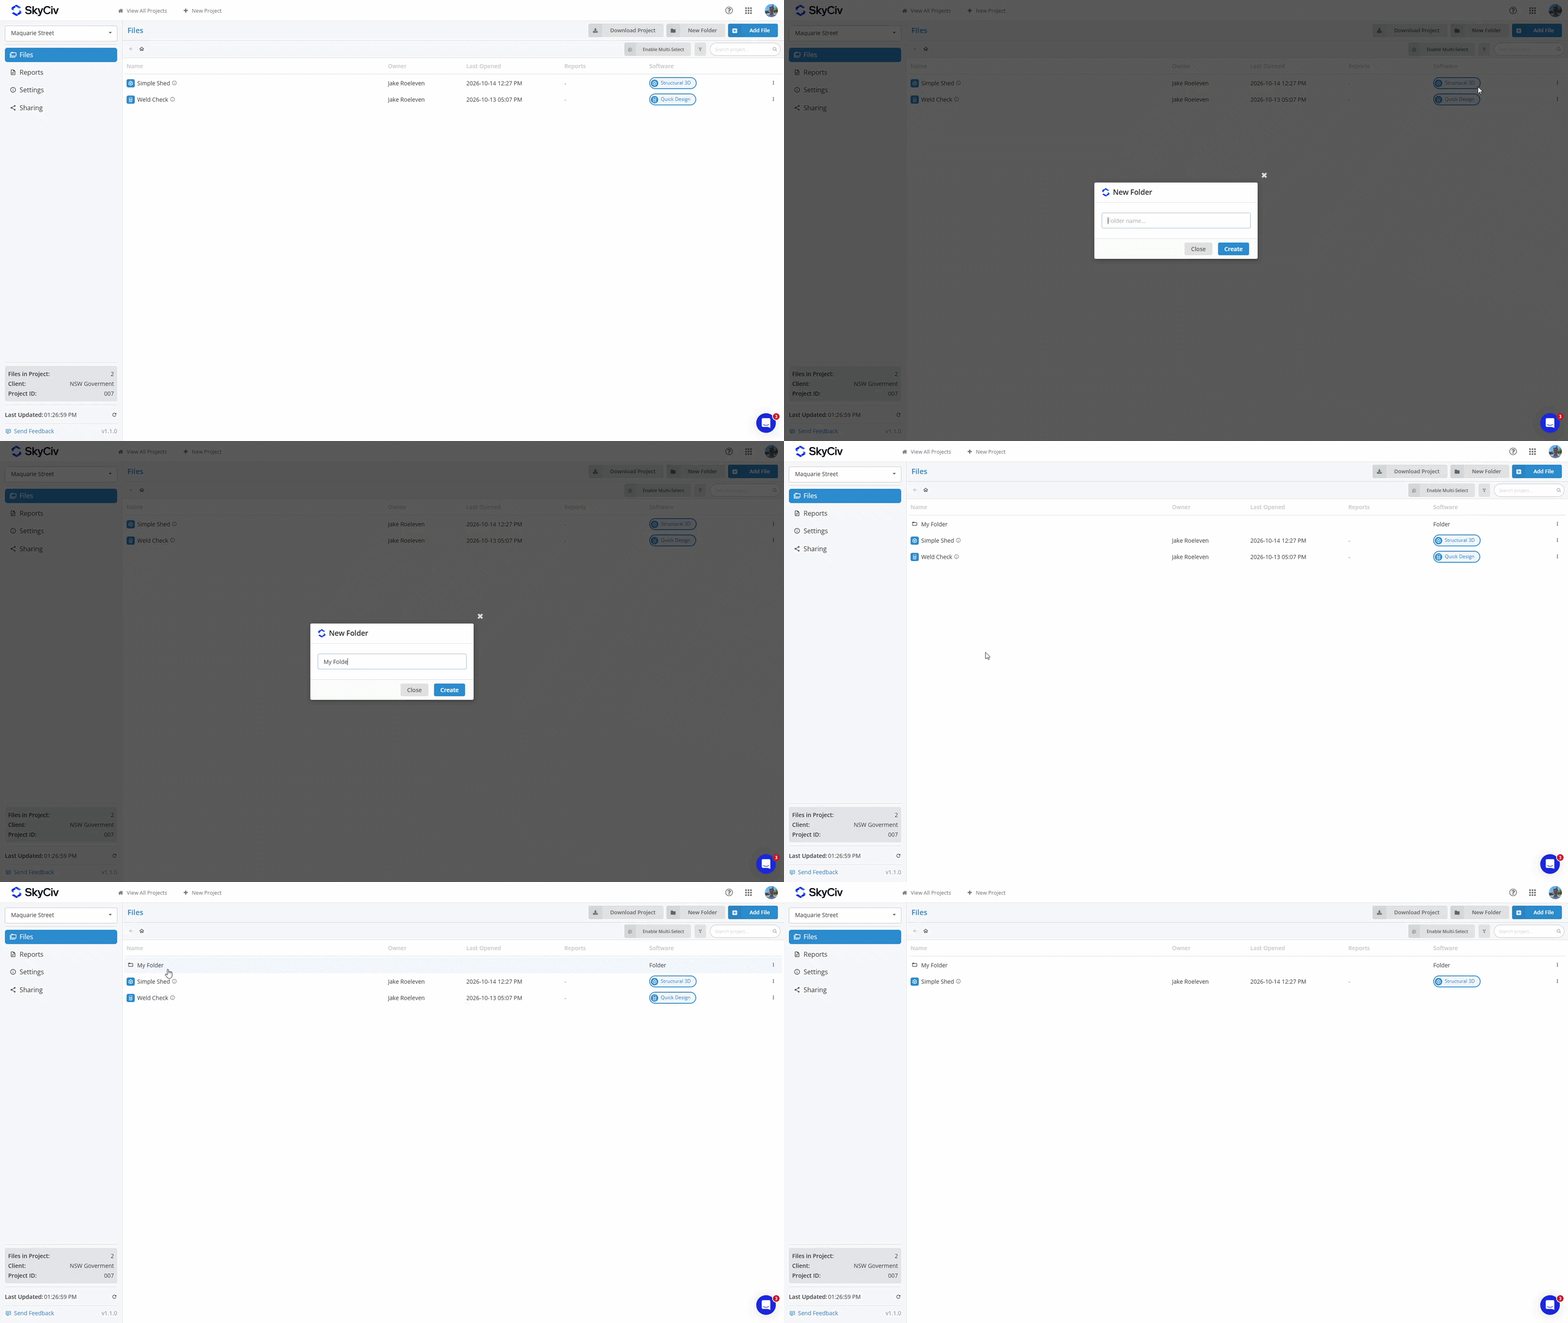
To move a file back to the parent folder, right-click on the file and select the Move File option. Select the parent folder or the “Project Root” for the top level of the Project.
Saving Reports
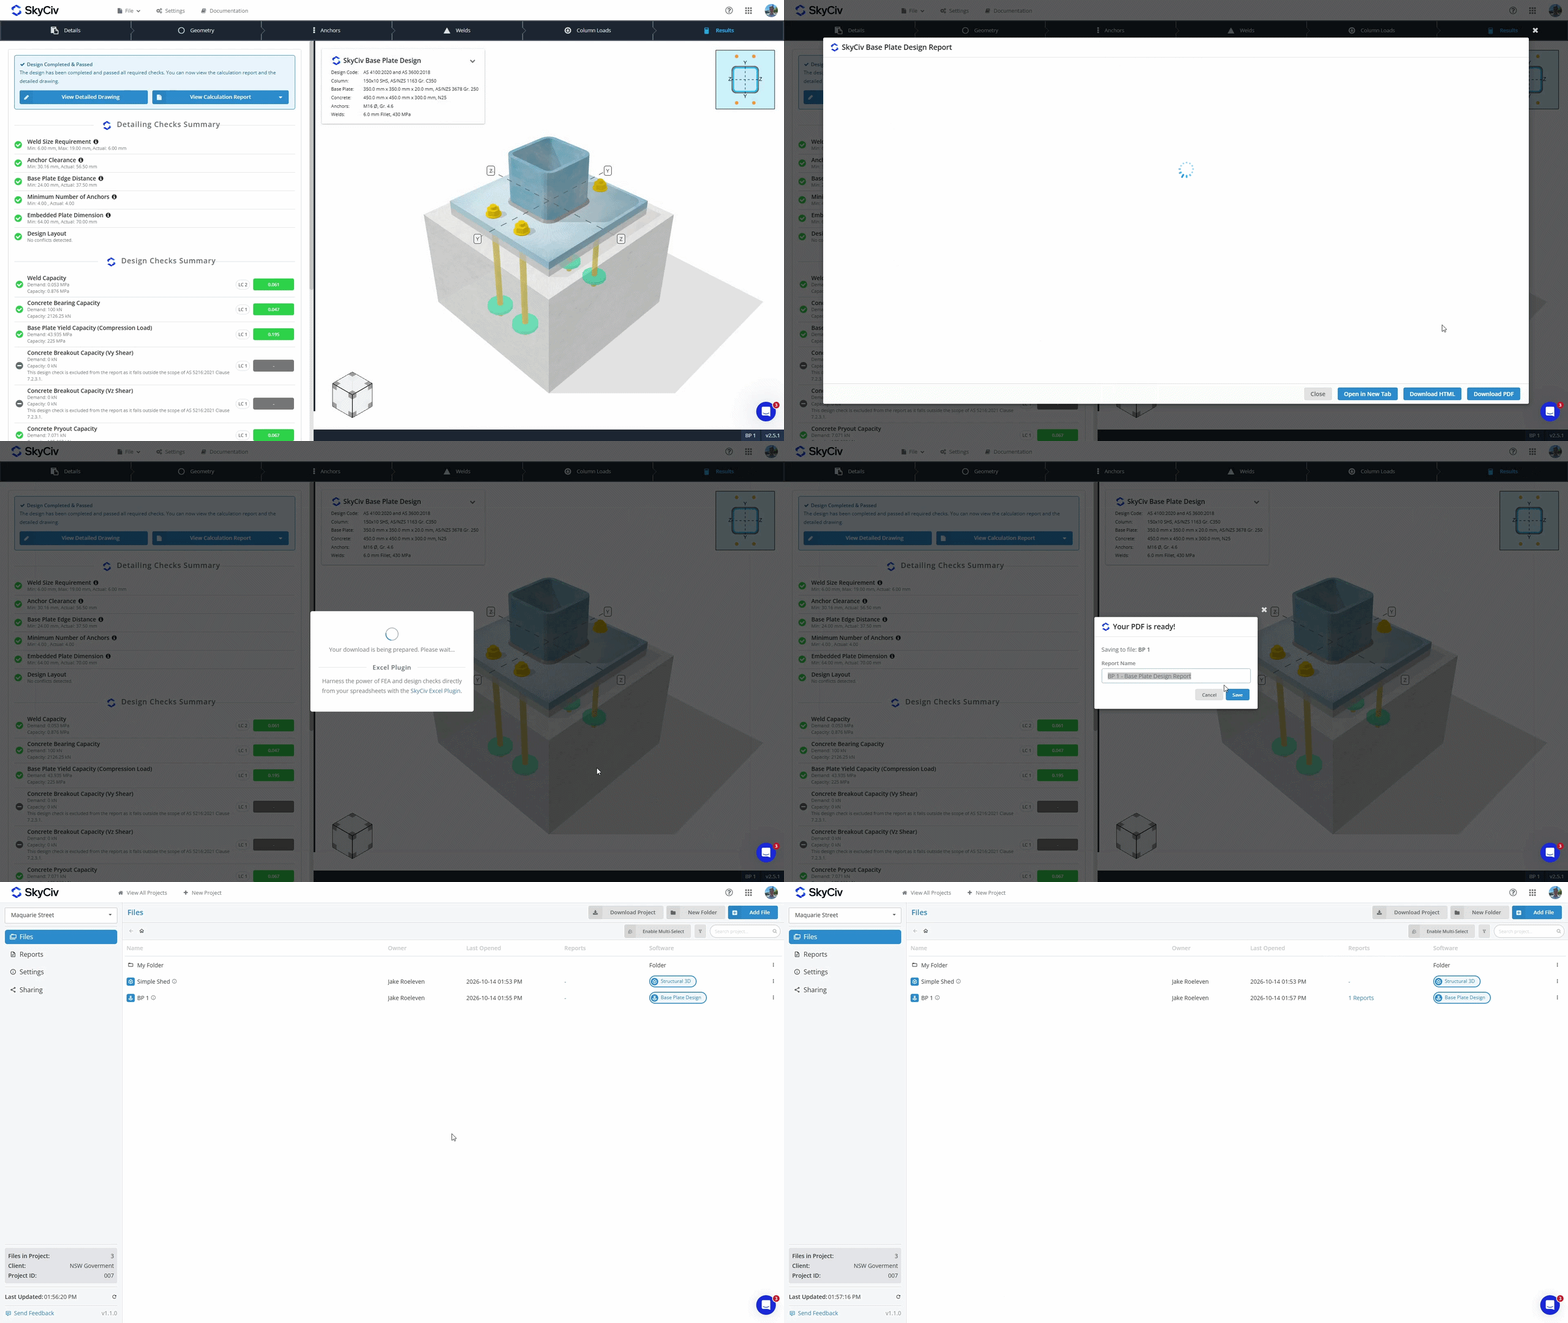
When you generate a PDF from a SkyCiv Module, you now have the option to either:
- Download and store the PDF on your local device.
- Save it with your file in our cloud storage.
PDFs that are saved to your File in the cloud storage can be viewed from within the Project Manager in both the Files and Reports tabs. Learn more in the Report Manager documentation.
Downloading Project Data
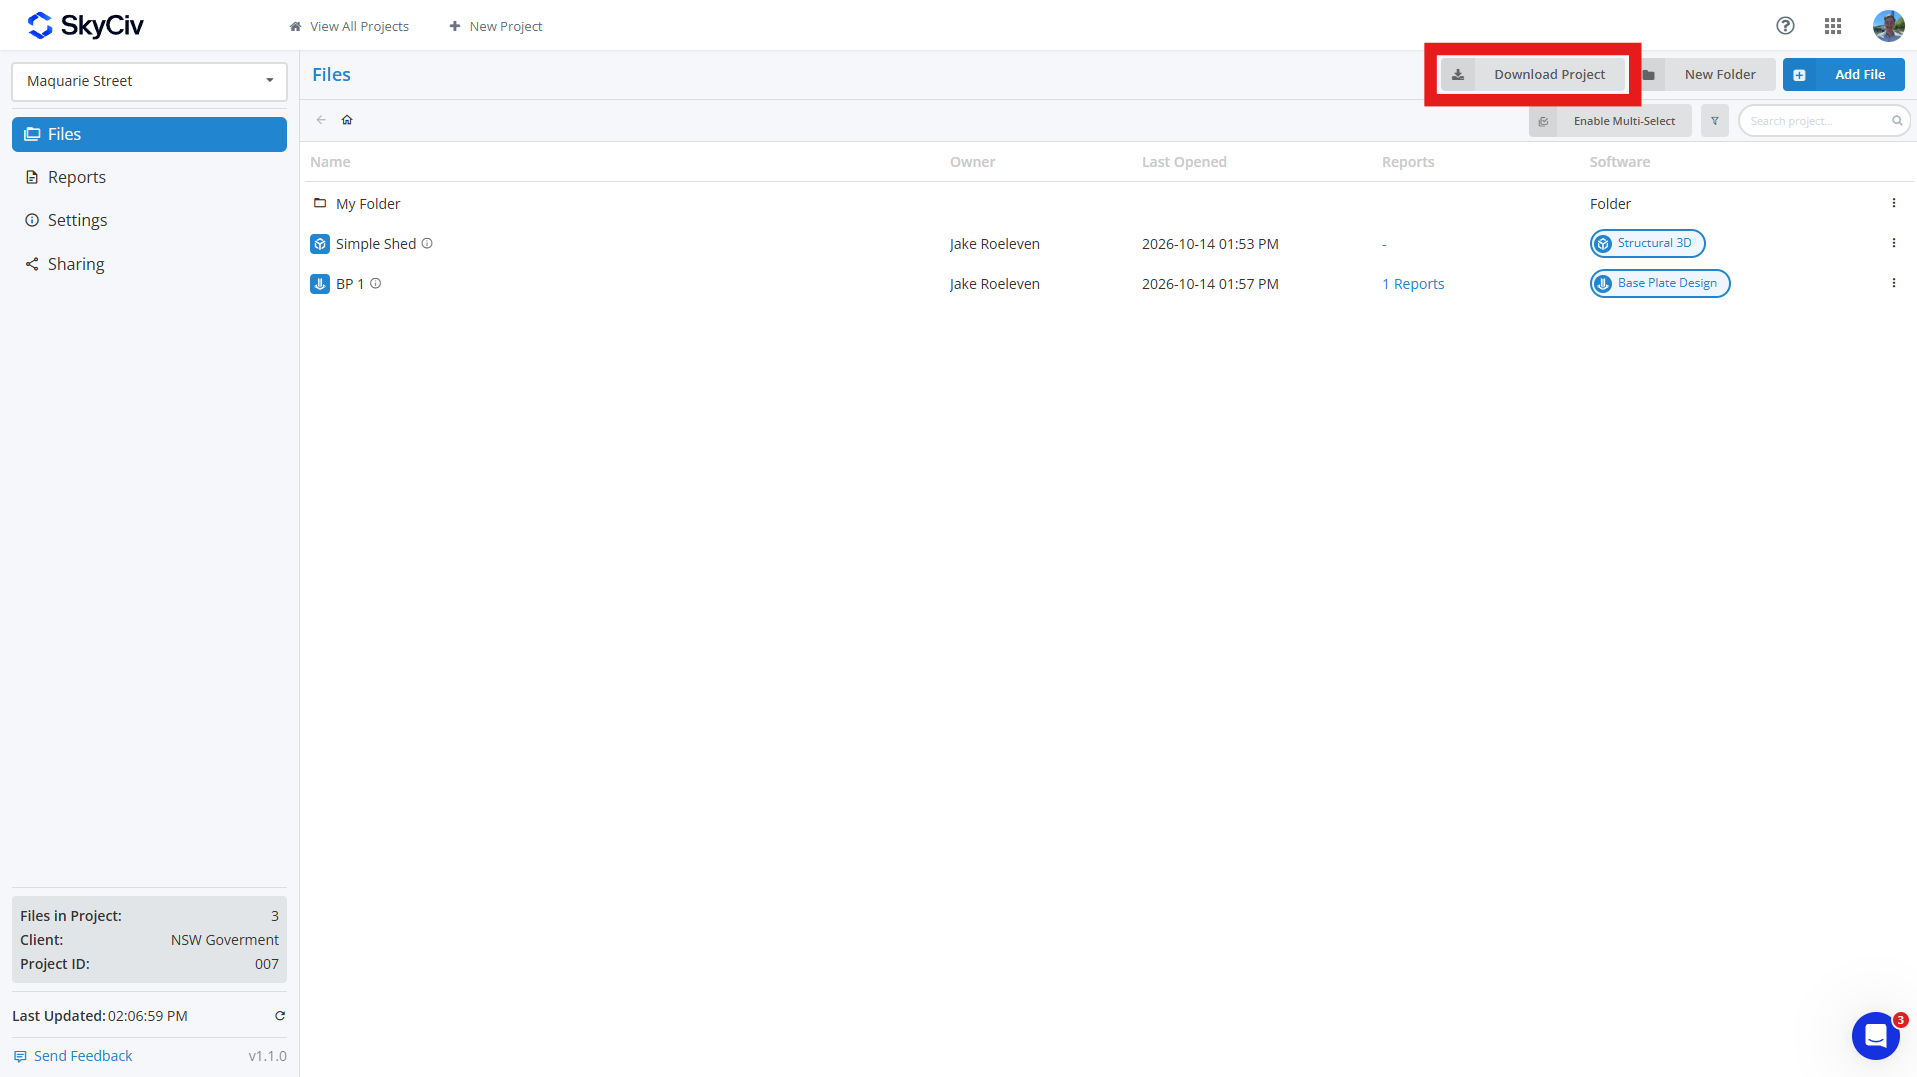
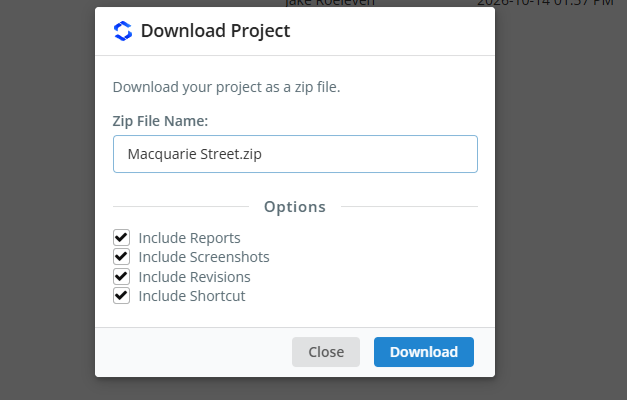
You can download your project data from the Files tab in your project by clicking the Download Project button. This allows you to generate a ZIP of the project, including:
- Model File (JSON File)
- Revision Data (optional)
- Screenshots (optional)
- Saved Reports (optional)
- Shortcut Link (optional)
If you select optional fields, then every model in your ZIP will be its own folder containing all this data; if you include only models, each model will be downloaded as a JSON file. Project folders will be replicated in the ZIP, with each folder differentiated with a [FOLDER] tag prepended to its name.
Sharing Projects
You can share projects with your teammates via the Sharing option on the left side of the Project Manager toolbar. When shared, all teammates listed in the My Team section of your account will see the project. See the Team Account Setup to learn more.
Note: only SkyCiv Business Accounts have access to the sharing functionality.

