
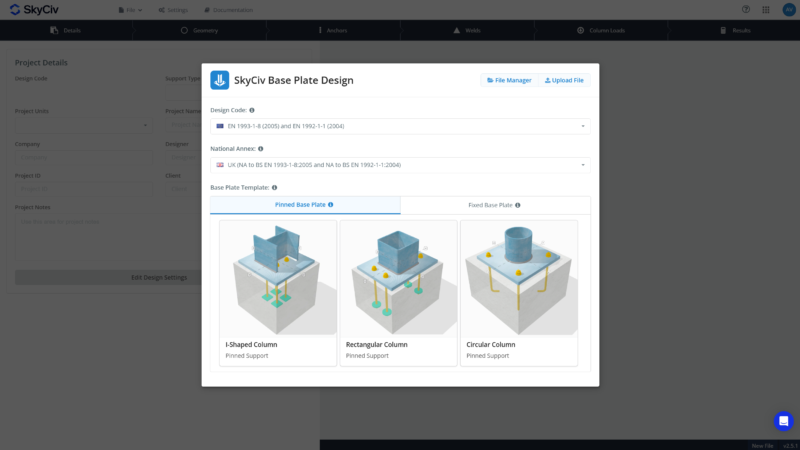
Iniciar el software haciendo clic en Diseño de Placa Base desde el plataforma o de aquí. Start by selecting a design code, selecting between Pinned and Fixed support, and choosing a starting design template. If designing with Eurocode, also select the National Annex to be used.
You may use the free Base Plate Calculator alongside this documentation as you build your first base plate design.
Pestaña Detalles
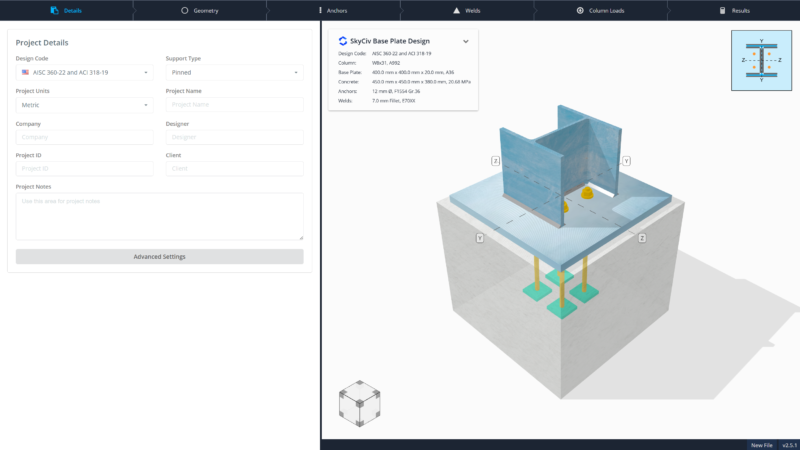
Define project information and configure settings.
- Establecer unidades de proyecto. AISC can choose between metric and imperial. Other design codes are defaulted to metric. Switching project units will convert all measurements of length, fuerza, and forces.
- Switch between Pinned and Fixed. Pinned is used for Axial and/or Shear loads only, while Fixed is used for designs with moment loads. Es requerido to provide moment load input if using Fixed.
- Ingrese los detalles del proyecto: Nombre del proyecto, Empresa, en Hormigón, Projecto ID, Cliente, y notas. These details appear in the calculation report and in the detail drawing.
- Configure more settings under Ajustes avanzados.
- también, switching to another design code is available on this tab. It is recommended not to do this half-way through the design as it will reset all progress.
Ajustes avanzados
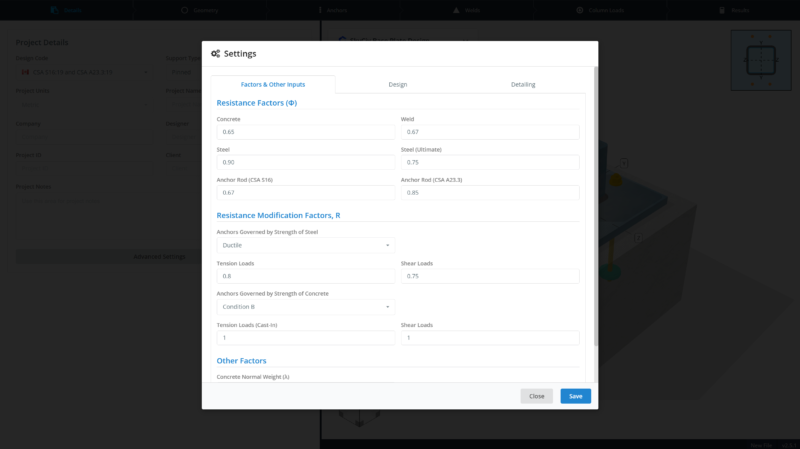
Set settings specific to the project.
- Set Resistance Factors (AISC, CSA), Factores de reducción (AS) or Partial Factors (EN) en el Factores & Other Inputs Tab. Also configure additional input values needed in the calculations. The available settings are different for each design code.
- Set assumptions for design in the Design Tab. Changes to these require guidance from a suitably qualified engineer.
- Modify the list of detailing checks to be performed in the Detailing Tab. Most of the checks are optional, except for the design layout check, which determines clashes in the geometries.
Pestaña de geometría
Definir la sección de columna, Dimensiones de placa base, y propiedades de concreto.
Pestaña de columna
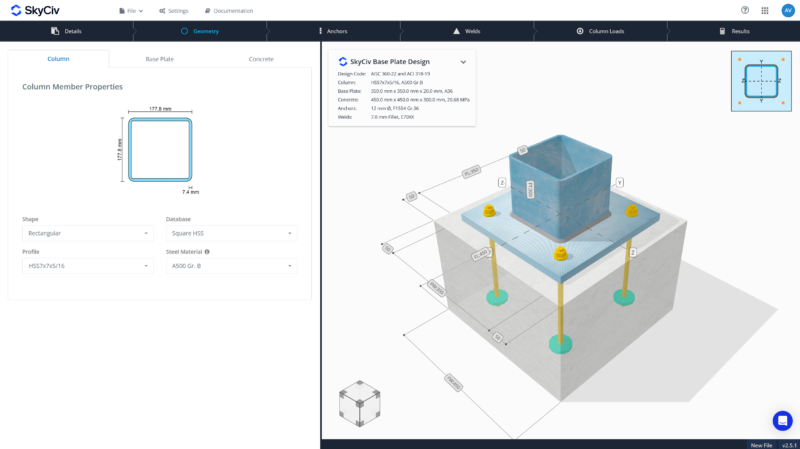
- Modify column shape. Choose among I-shaped sections, Secciones Rectangulares Huecas, or Circular Hollow Sections.
- Select the correct database. This depends on the available database on the design code. Por ejemplo, AISC I-shaped sections have W shapes, S shapes, M, shapes and HP shapes.
- Choose your column section. This list is synced with SkyCiv Section Builder, so it’s complete and reliable.
- Seleccione un material en el menú desplegable o ingrese valores personalizados (año fiscal, Fu).
Pestaña de placa base
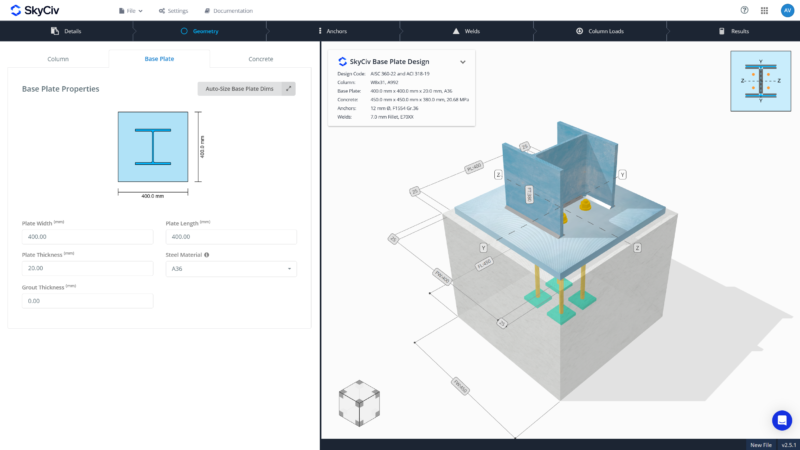
- Set base plate width (dimension across the column profile) y longitud (dimension along the column depth).
- Also set base plate thickness. Use thicknesses that are readily available from the manufacturer.
- To add grout, specify thickness. To remove grout, use zero thickness (0). Check your design code for a minimum grout thickness if required.
- Seleccione un material en el menú desplegable o ingrese valores personalizados (año fiscal, Fu).
- Usar Tamaño automático to easily adjust base plate dimensions relative to column dimensions. Nota: Esta característica no cambia el tamaño según la fuerza.
Pestaña de concreto
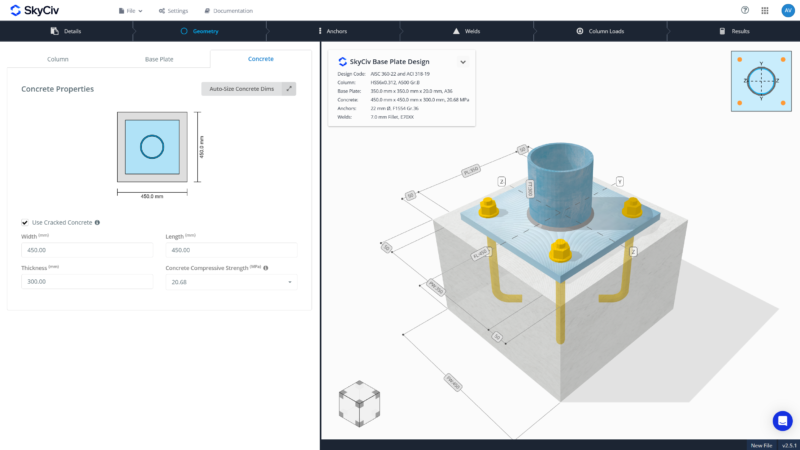
- Especificar concreto agrietado o no agrietado. To be conservative, use cracked concrete. Some calculations require the use of cracked concrete for the assumptions to be true. Check your design code if you need to use uncracked concrete.
- Establecer dimensiones concretas (anchura, longitud, grosor).
- Seleccione la resistencia de compresión de concreto desde el menú desplegable o ingrese un valor personalizado.
- Usar Tamaño automático to easily adjust concrete dimensions relative to base plate dimensions. Nota: Esta característica no cambia el tamaño según la fuerza.
Pestaña Anchors
Seleccionar propiedades de anclaje, posición, y comprobaciones de falla.
Pestaña Propiedades
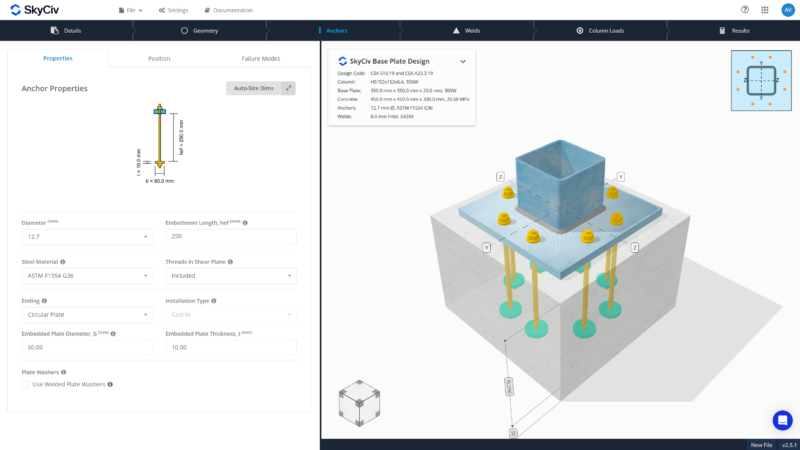
- Choose anchor diameter. Available anchor diameters vary by design code. If the required diameter is not available on the list, request it through Voto a favor de SkyCiv and provide the relevant specifications.
- Provide embedment length, tener. To visualize the extents of the embedment length, refer to the 2D figure in the tab.
- Select material grade for the anchor. Custom material grade can also be used by providing Fy and Fu values.
- Defina la forma de extremo incrustado: derecho, lámina, o gancho. Hook is only available in AISC and CSA.
- Set dimensions of the embedded plate. Usar Tamaño automático to easily adjust dimensions relative to anchor diameter. Nota: Esta característica no cambia el tamaño según la fuerza.
- Installation type is set to Cast-In anchors.
- Other anchor property settings are available depending on the design code. This includes settings to include threads in shear plane (AISC/CSA), to configure hole clearance (EN), and use of welded washers (AISC/CSA).
Pestaña
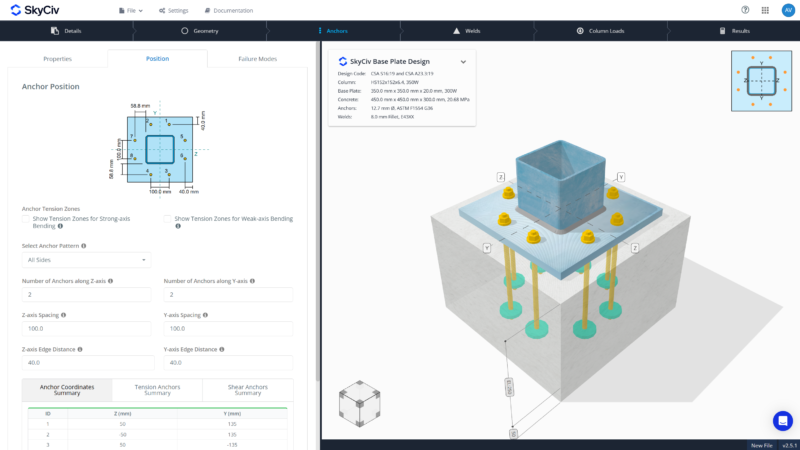
- Select an anchor pattern from the list. This will automatically define a set of anchors relative to given column and base plate sizes. Available anchor patterns are:
- En forma de I – Esquinas, Solo brida, Sólo web
- Rectangular – Esquinas, Sólo arriba/abajo, Sólo izquierda/derecha, Todos los lados
- Circular – Esquinas
- Adjust the number of anchors, spacing and or edge distances accordingly. If using ‘All Sides’ the number of anchors on each direction can be modified.
- Make use of the 3D renderer at the right or illustrative 2D guide at the top to visualize placement and measurements.
- Permitir Mostrar zonas de tensión de anclaje En la configuración de la figura para la orientación visual. Solo se activarán los anclajes en la zona de tensión para la carga de tensión.
- For Fixed support, enable Show Tension Zones for Strong-axis Bending y Show Tension Zones for Weak-axis Bending to know which locations can activate the anchors for induced uplift. Note that the location of the anchor zones differ per design code.
- Verifique el resumen de datos de anclaje para toda la información sobre el ancla - ID de anclaje, Z and Y coordinates, indicación de la zona de tensión, and group behavior for anchor checks.
Pestaña Modos de falla
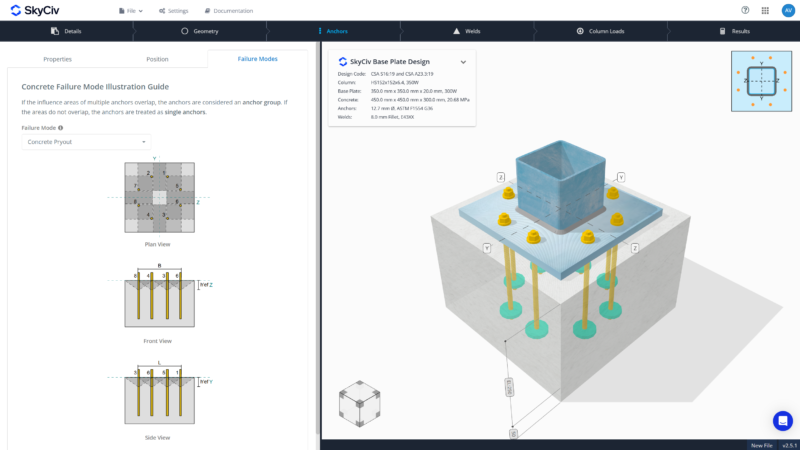
- Seleccione el modo de falla en el menú desplegable para ver representaciones gráficas de modos de falla concretos. Available failure modes are:
- Ruptura de hormigón en tensión.
- Ruptura del hormigón en corte
- Concrete side face blow-out in tension
- Concrete pryout in shear
- No input is required here. This part is just a helpful guide to review possible anchor failures based on the design and loads.
Pestaña de soldaduras
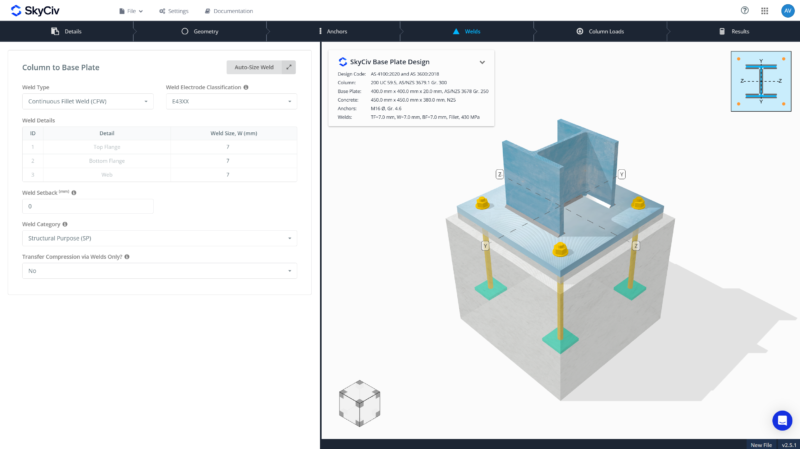
- Elija el tipo de soldadura: Fillet or CJP/FPBW.
- Set weld material or use custom electrode strength.
- For AISC and CSA, weld size is uniform throughout. For EN and AS, welds on flanges and web can be different.
- Set weld set-back. This is the distance near the fillet radius for I-shaped section where “no weld” is specified. This is helpful when welds clash near the radius, especially on larger weld sizes.
- Additional settings can be placed for AS, specifically on the weld category.
- Compression load transfer is modifiable. Select Yes or No if compression loads will be transferred through welds only. The default is transferring compression loads through bearing and checking the column for bearing capacity. Depending on engineering judgment, transferring through welds may be used instead.
Pestaña Cargas de columna
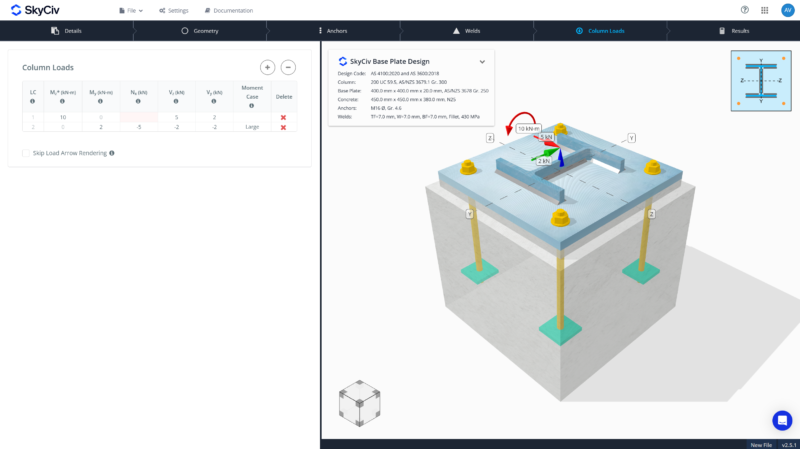
- Enter factored loads.
- For Pinned Supports, provide Axial and/or Shear Loads. For Axial Loads, use positive for compression and negative for tension.
- For Fixed Supports, provide Strong-Axis Moment (uni-axial), Momento del eje débil, Axial Load and/or Shear Loads. Note that biaxial bending is not yet supported.
- Utiliza el + y – buttons to add or remove load combinations.
- Haga clic en la celda de entrada de carga para ver la visualización en el renderizado 3D.
- When adding multiple load combinations at once, load arrow rendering can be skipped for faster 3D processing.
Pestaña Resultados
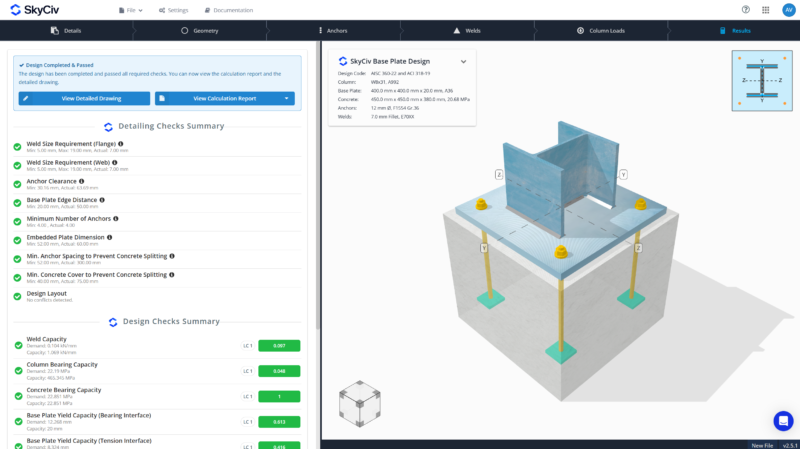
- Clicking results tab will automatically run the calculation process.
- View pass and fail results at a glance.
- El Resumen de cheques de detalle provides a comprehensive review of minimum and maximum dimension compliance and conflicts detection in the design.
- El Verificaciones de diseño provides a color-coded pass or fail, with the utilization ratio included. The governing load combination that resulted to the highest ratio per design check is also provided.
- Try the free tool. No es necesario registrarse.
Informe de cálculo
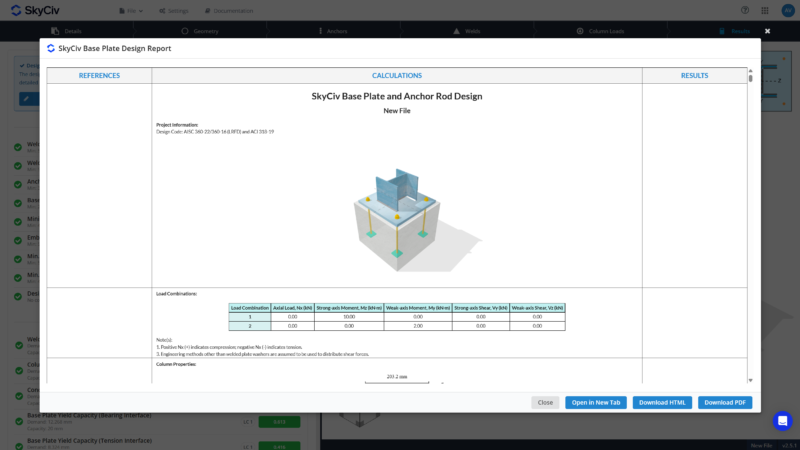
- Three calculation report options are available:
- Reporte completo – Provides comprehensive project details, step-by-step calculations, imágenes, and diagrams.
- Lite Report – Provides project details and step-by-step calculations without images or diagrams.
- Informe resumido – Provides project details and final results only.
Detail Drawing
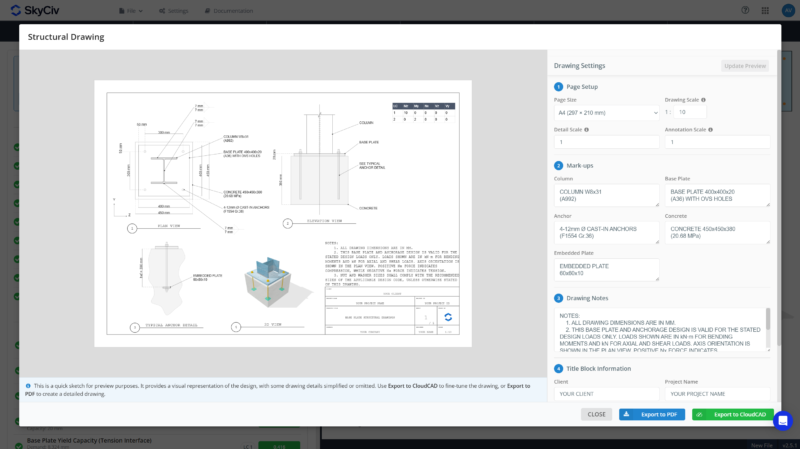
- Page size is automatically determined based on the actual size of the column, plato base, y concreto. Page size can still be modified
- Set the scales:
- Drawing scale – adjusts how the whole drawing printed on paper
- Detail scale – adjusts the size of the objects as a group
- Annotation scale – adjust the size of the dimensions, mark-ups texts, and other labels
- Input key information for the mark-ups: Columna, Plato base, Ancla, Concrete and Embedment Plate (si está presente)
- Customize the drawing notes. Provide as much note as needed.
- Supply title block information, if not the same as the information from the project details.
Exportar a PDF
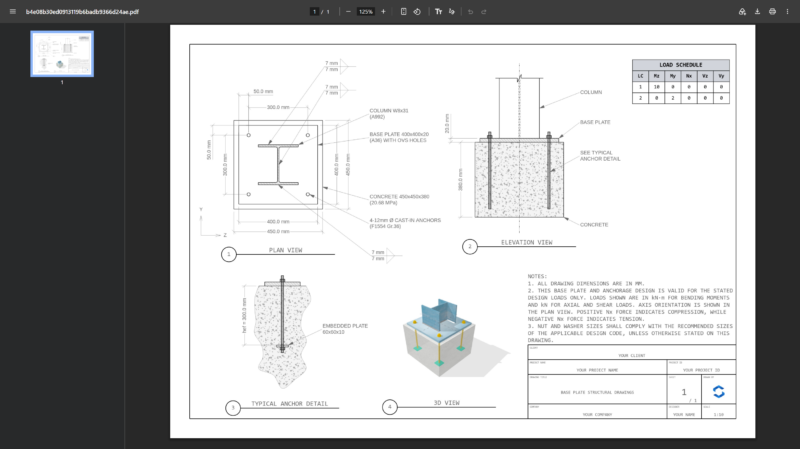
- Export the default drawing shown in the preview as PDF.
- No additional payment required for existing base plate subscriber. Only uses 2 API credits to generate a drawing.
- Drawing generation may take time.
Export to CloudCAD
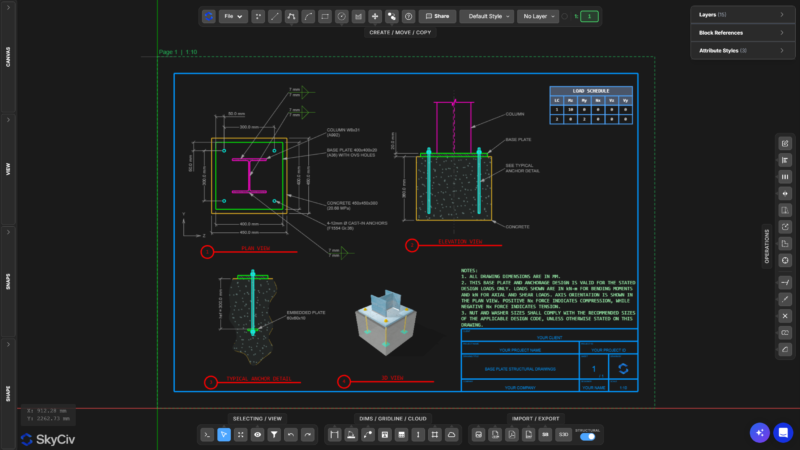
- Export the drawing to CloudCAD. No need to draw anything by hand.
- Easily modify and adjust the details for further enhancement and customization.
- Explore CloudCAD from aquí.
Prueba la herramienta gratuita
Configurar su primer modelo de placa base lleva menos que 10 minutos. Probar el Calculadora de diseño de placa base de Skyciv. Gratis para usar, straight from the browser.
