Importing Custom Data into Section Builder
This tutorial helps walk you through the basics of uploading custom sections and shapes into SkyCiv Section Builder module. This video will take you from a beginner to being able to import your own custom shapes and databases. If you are looking to use custom shapes and unique databases for you SkyCiv models, this is a great place to start!
Introduction
This tutorial will walk you through how to Importing Custom Data using SkyCiv Section Builder. We will cover how to import DXF files for custom sections as well as how to import data for custom databases as well.
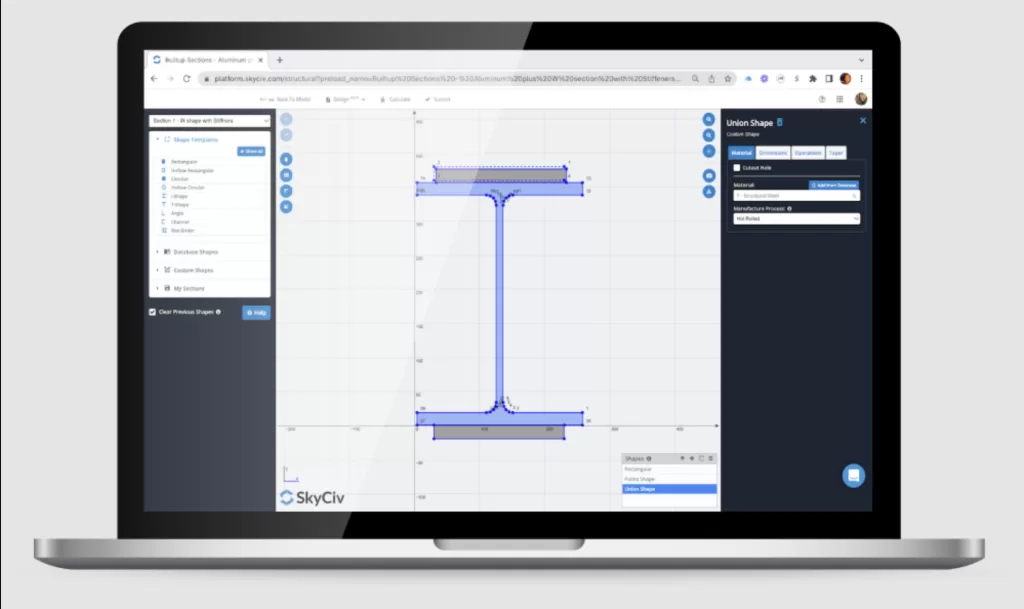
Importing Custom Sections
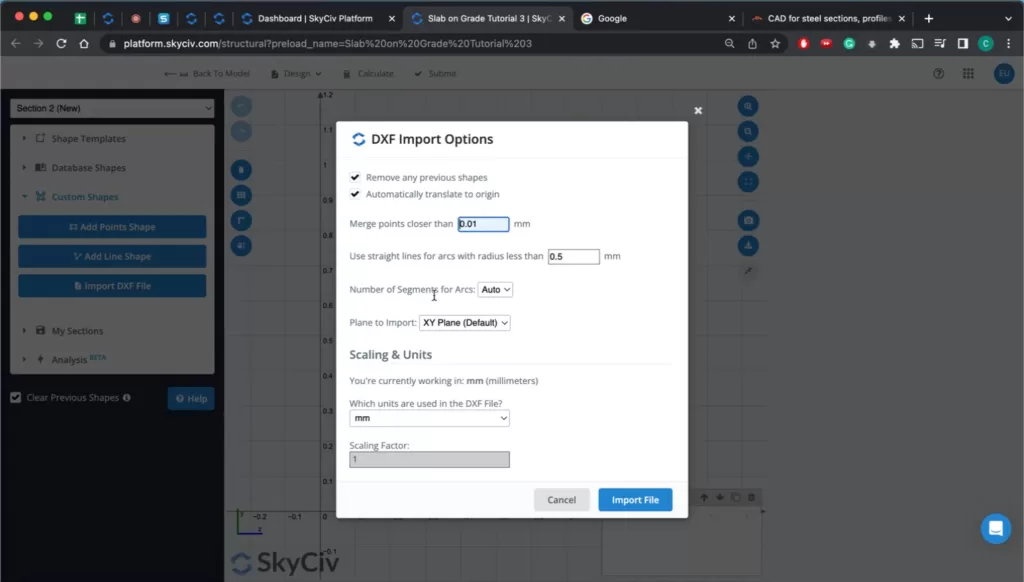
To import custom sections, first ensure that your section is saved in the DXF file format. Once this is done, navigate to Section Builder and select the “Custom Shapes” dropdown menu.
From here select “Import DXF File”, fill out the required data, select “Import File”, and follow through with the prompts in the dialogue boxes. Once you have made it through, your custom section will be imported into Section Builder.
After your section is imported, you can update the material properties, edit the geometry, etc. just as you would with other section shapes.
Importing Custom Databases
To import custom databases into SkyCiv Section Builder, you will first have to ensure that your CSV file is in the right format.
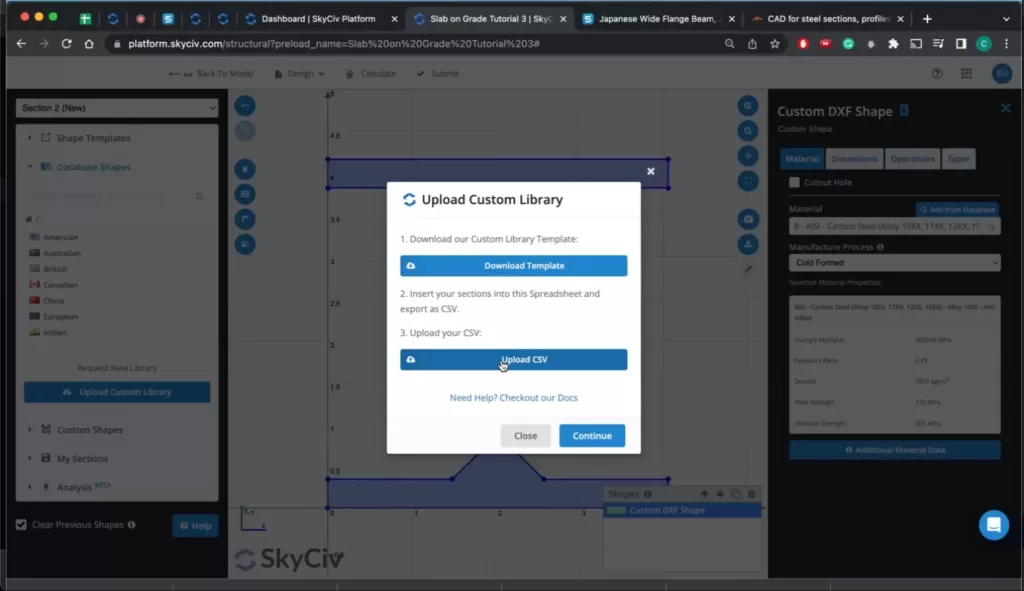
First, click on the “Database Shapes” dropdown menu and select the option “Upload Custom Library”. When the dialogue box pops up, select “Download Template” to download the SkyCiv CSV template.
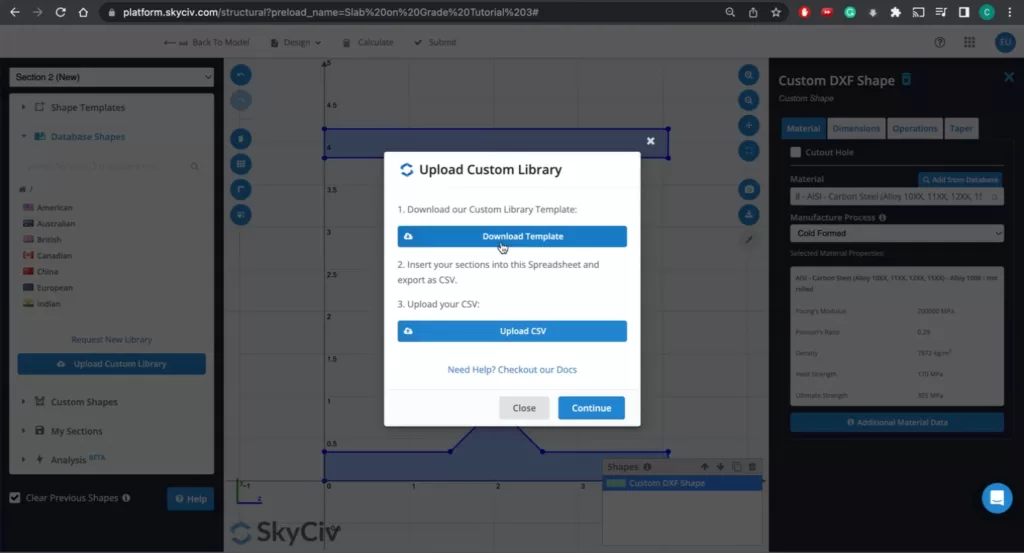
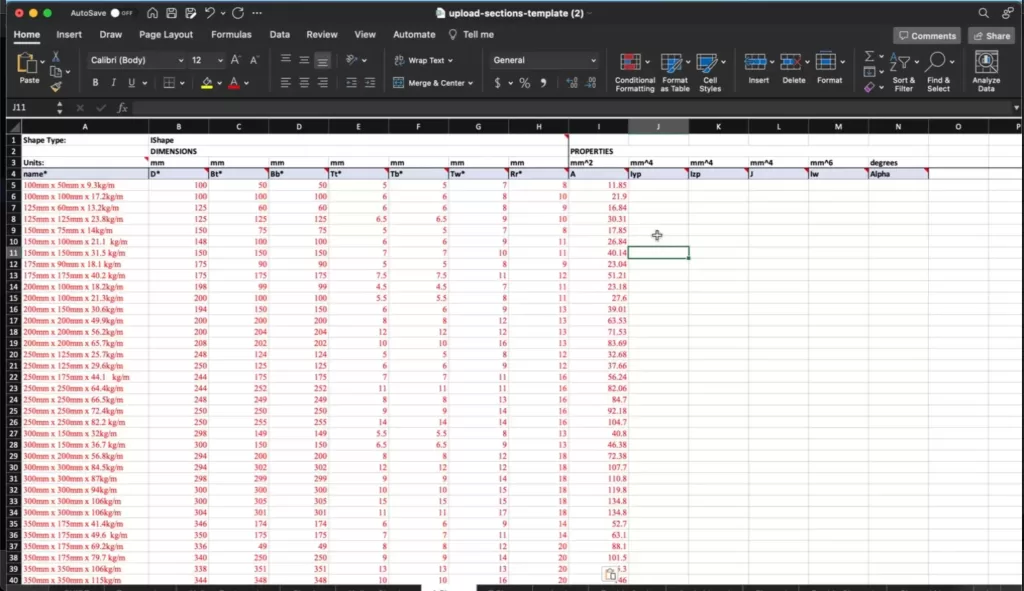
Once the CSV file has been opened, open it in Excel (or your spreadsheet program of choice) and navigate to the first sheet to review the instructions. All columns with an asterisk (“*”) must have values inputted while columns lacking an asterisk can be omitted.
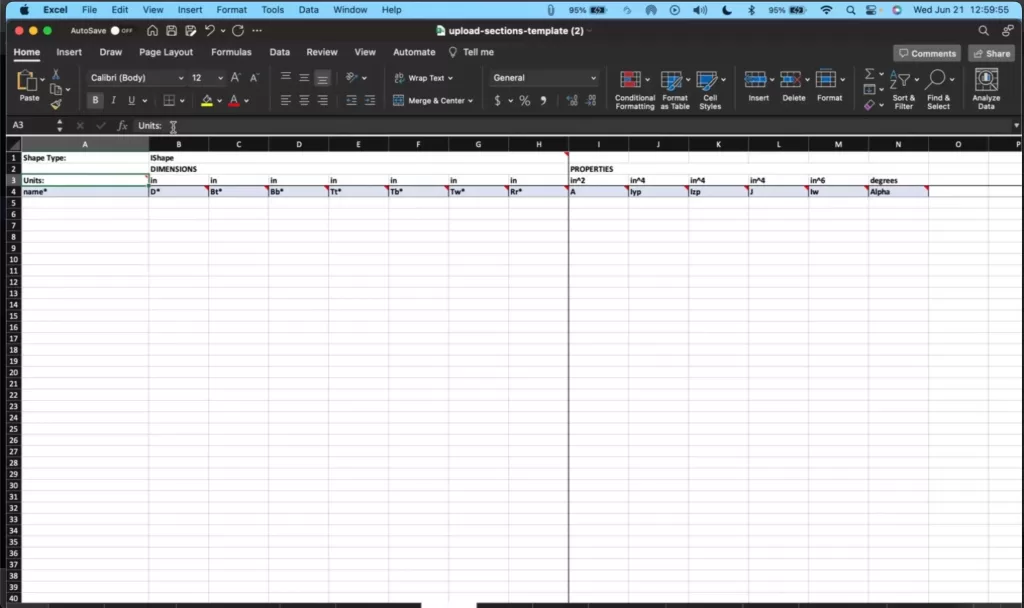
Collect your database data from your source (manufacturer site, national technical institute, trade association, etc.) and fill in the values in the corresponding columns in the spreadsheet.
Ensure that your units are correct and you have chosen the correct units system (Imperial vs. Metric). After you values have all been successfully filled in you are ready to to import the file in to SkyCiv!
Save you sheet as a CSV file and then navigate back to your SkyCiv Section Builder Module window. Select the “Upload CSV” button and then select the CSV file you just exported from your spreadsheet program. The button should turn green showing that the file has successfully been selected.
Once you press “Continue” then you can move onto the final step in the process.
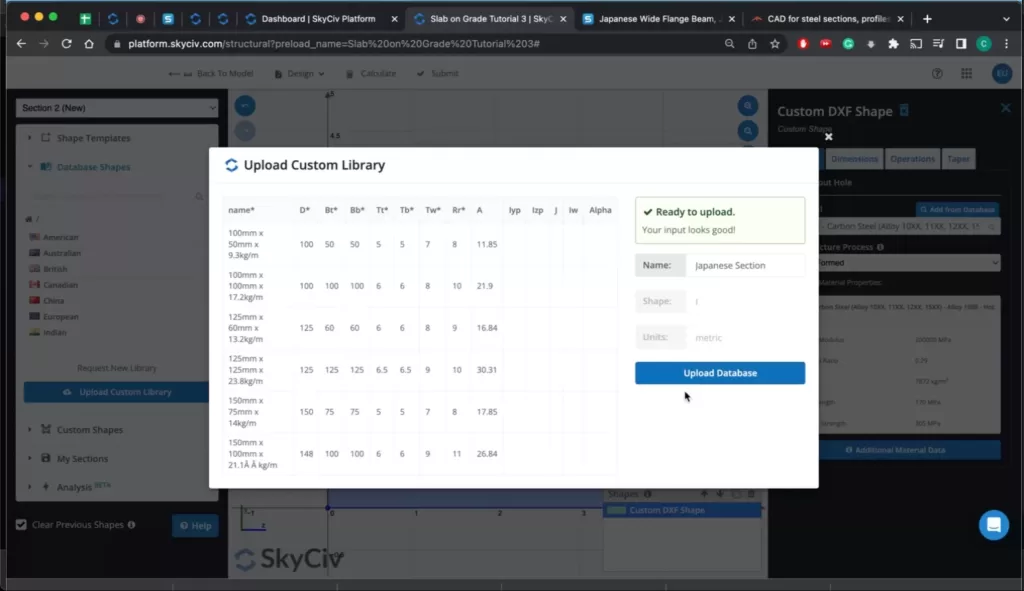
Now that you file has been uploaded, Section Builder will do a final check to make sure the CSV database is ready to upload. If you see the “Ready to upload” message then you are good to hit the “Upload Database” button and complete you upload.
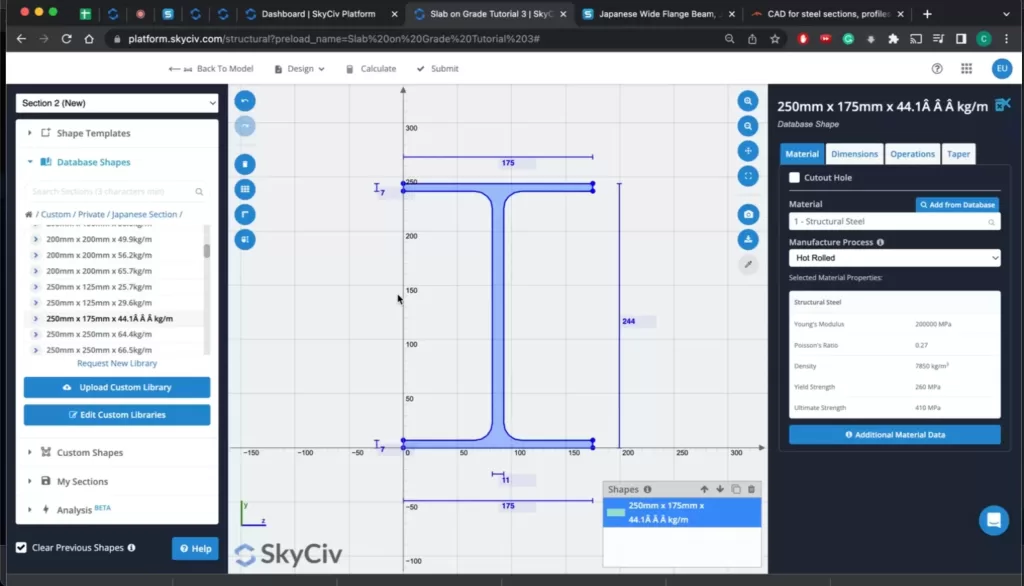
You can now find your database under the “Custom” database shapes folder. By navigating there, you can choose any of the shapes from your database now and upload the successfully into Section Builder and SkyCiv Structural 3D as well.
Congrats! You have successfully imported your custom DXF section shape and custom CSV shape databases into SkyCiv Section Builder.
FAQ
You are not able to upload DWG files but you can convert or export your DWG drawing into a DXF file before uploading it into SkyCiv Section Builder.
Many manufacturers and national technical institutes (AISC, JIS, etc.) maintain information on standard shapes, sizes, and material properties.
Yes – there is no additional cost to use the Section Builder module as it is fully integrated into our SkyCiv Structural 3D program!


