How to calculate the anchor loads on your event rigging structure in 5 easy steps
Working with temporary event structures, it is important to calculate the loads on the anchor points in a quick and accurate manner. Often these types of calculations can be hard to perform, time consuming or require software that is out of our grasp. The following article will show you how you can ensure the safety of your structure and the resulting anchor loads in a matter of minutes. This tutorial will use SkyCiv’s Structural 3D software.
1. Build your Structure
We will first want to model the structure – defining how the members are arranged in this system. We start by adding nodes, and then joining these nodes with members. I find it quicker to use the datasheet for node entries, as I can copy and paste my nodes.
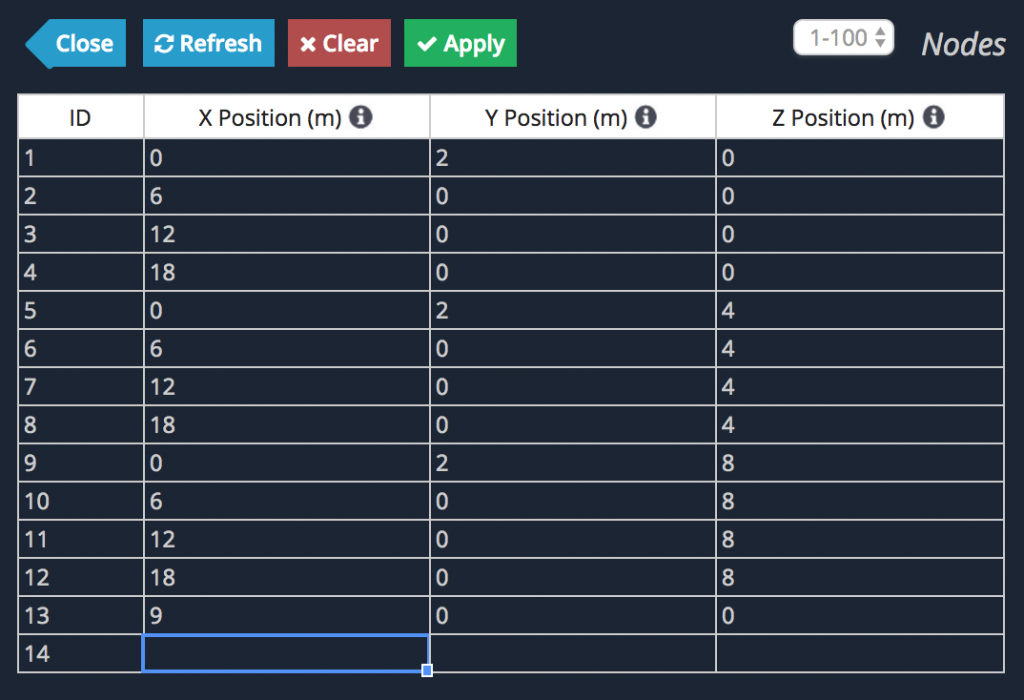
I also recommend building your structure in the X,Z plane, so that Y is pointing up. This makes interpreting the results easier and applying self weight more intuitive. With my nodes defined and my members joined, my structure is taking shape:
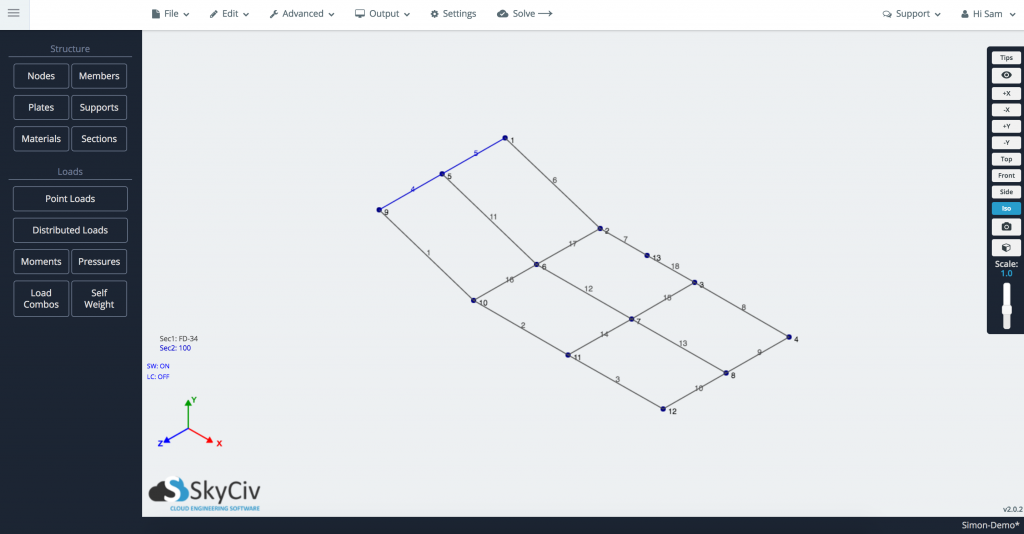
I am building this structure using EuroTruss members. So, under Sections I will define the black sections as FD-34 and the blue sections as FD-36 by loading them from the SkyCiv Section Library.
2. Load the structure
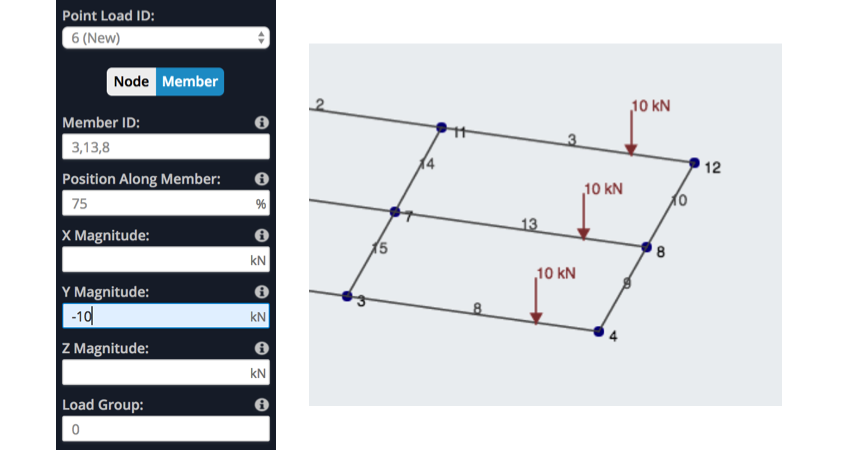
This involves adding loads that are applied to the structure, including lighting, … and … weights. These can be distributed along a member, or applied as point loads. For this structure, I am going to assume there's a range of loads including three lights on EuroTruss members 3, 13 and 8. I will add all of these at once by comma separating the member entries – this will add the loads like so:
At this point you might even want to add the Self Weight of the structure. This can be done with two clicks of the mouse (Self Weight -> Toggle on) and if you have loaded EuroTruss members, the system will already know the materials and weight to include.
3. Add anchor points
Your anchor points (or supports) are anywhere the structure is being hung or supported from. I am going to hang this structure from all of the outer nodes, and hopefully this is enough to safely suspend the structure. To do so, I will need to add pinned supports at all of these nodes (if you’d like to learn more about why I chose a pinned support, watch our video on fixities). Adding these anchor points can be done in one step:
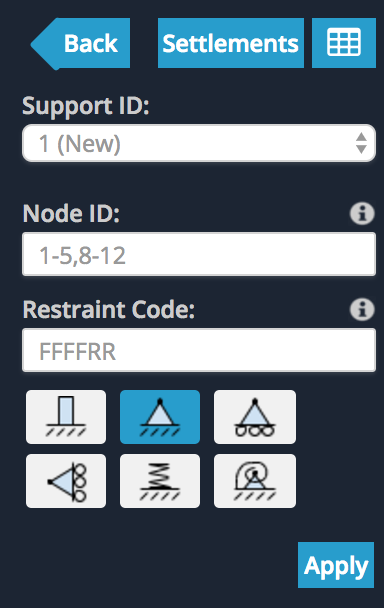
The supports will be shown as a green square on the diagram. Finally, we have a structure that is defined, loaded and now supported:

4. Calculate the anchor forces
Now that the hard(ish) part is over, it’s smooth sailing to find the forces at your anchor points. Simply click the "Solve" button and once the analysis has successfully run, toggle on the "Reactions" button. This will display all the forces at your hanging points, and should look something like this:
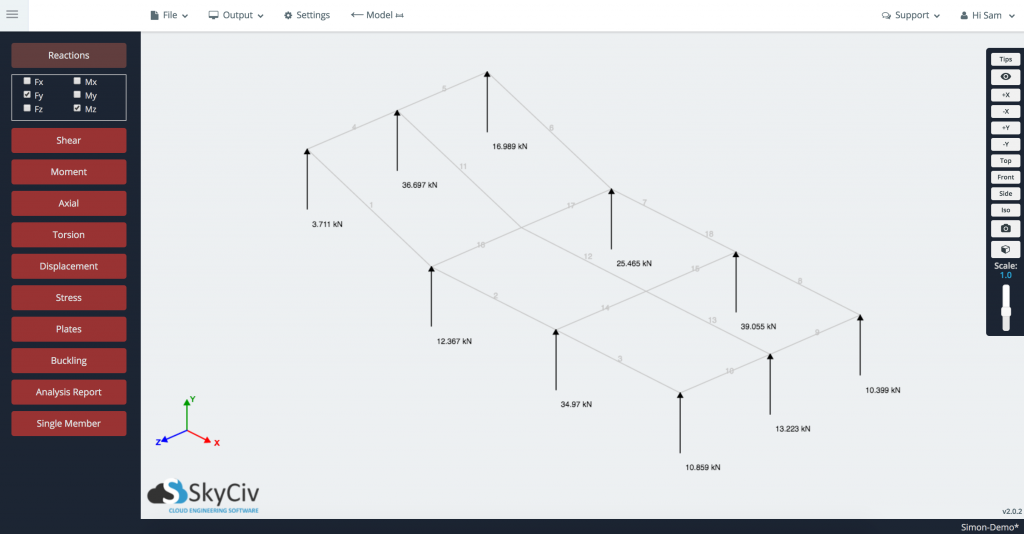
Here we have a summary of all the reactions (in the Y) that will occur from the loading of our structure. We can now go back and edit the structure (possible move the location of some light loads or add more anchor points) and solve again quite quickly.
5. Export your own Weight Report
Once you have reviewed the results, take a few screenshots (using Output-->Screenshot) of your structure with the Reactions on. Then generate your analysis report, remember to include your screenshots, and export as a PDF. Here's a sample of the weight report that you will get.
So that’s pretty much it – in less than 5 minutes I have built, loaded and solved the structure to determine exactly how much weight this structure is being imposed on those anchor points. SkyCiv Structural 3D is available on our Professional Account - try it today!

CEO and Co-Founder of SkyCiv
BEng (Civil), BCom