前書き
次のチュートリアルでは, we will explore how to apply snow loads in a Structure using Structural 3D. ノードの作成方法を段階的に説明します。, 会員, セクション, 材料, サポート, エリアロード, 等.
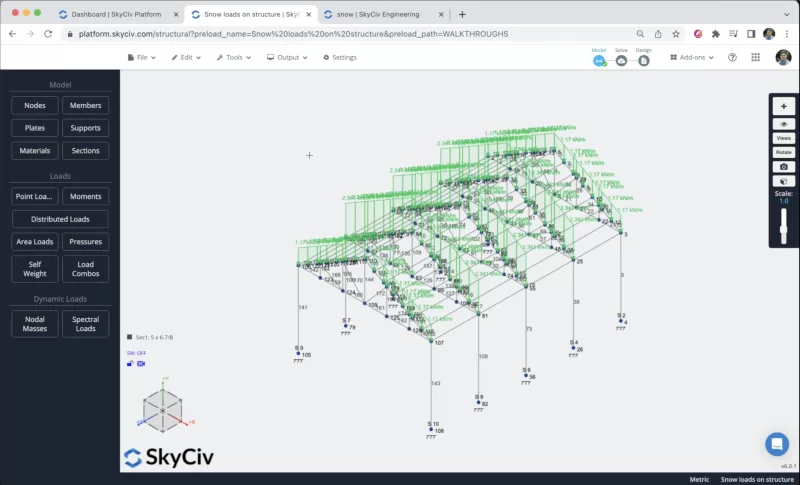
SkyCiv ダッシュボードから Structural 3D を開いて新しいプロジェクトを作成する必要があります, このチュートリアルでは, メーターの作業をしていきます, したがって、次のようにして単位を変更できます 設定 > 単位系 そして選択する メトリック
メンバーの作成
メンバーを作成するにはさまざまな方法があります, フォームを使用して, とデータシート, しかしこの例では, メンバーの作成にはペンツールを使用します, 右側にあるペンツールをアクティブにすることができます パネル > ペン > ペンツール.
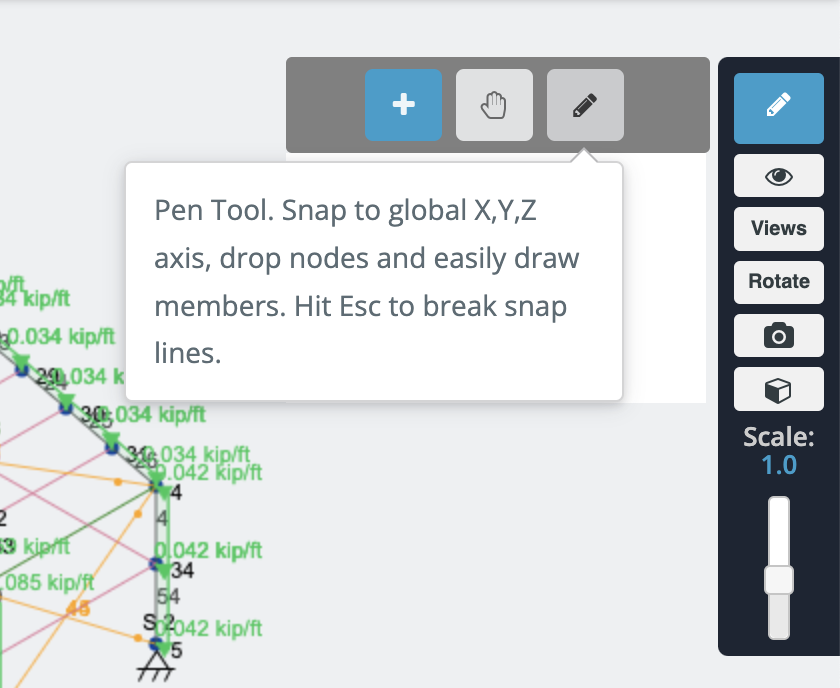
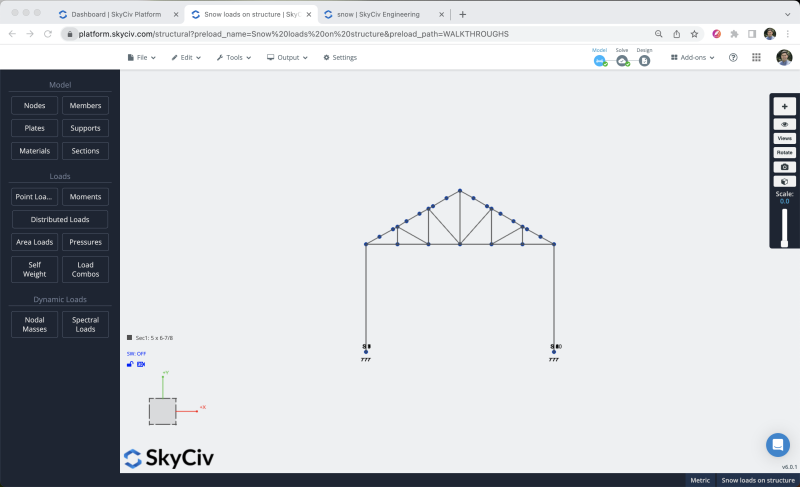
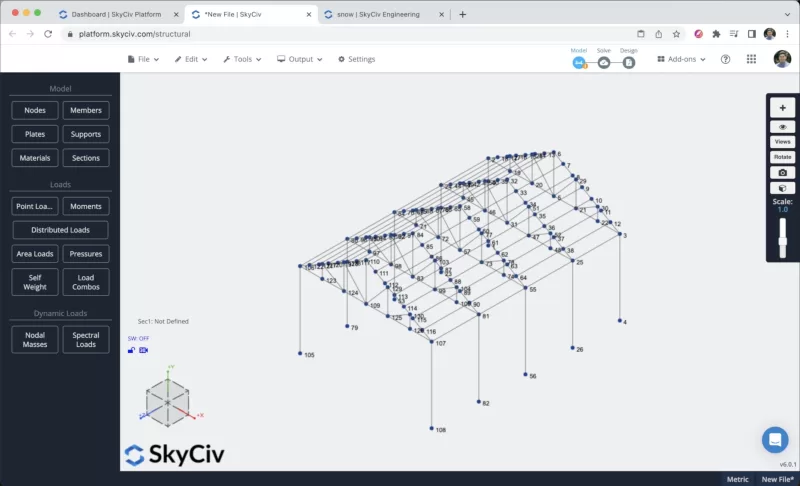
After we have the pen tool selected we can start to create all the frame members we will create a column member of 4m, and a beam of 7m, then create the roof with the biggest member of 2m as shown in the next image:
追加のノードとメンバーの作成を避けるために、前の手順で作成したフレームを複製します。. これを達成するには、次のようにしてフレーム全体を選択する必要があります。 右クリック キャンバスの上に > すべて選択 または殴る NS + あ キーボードで. フレーム全体を選択したら、次のステップに進みます。 編集する > 操作 > 構造の抑制とシフト繰り返し または殴る NS + D and we will repeat the members 4 times every 2.5m along the Z axis.
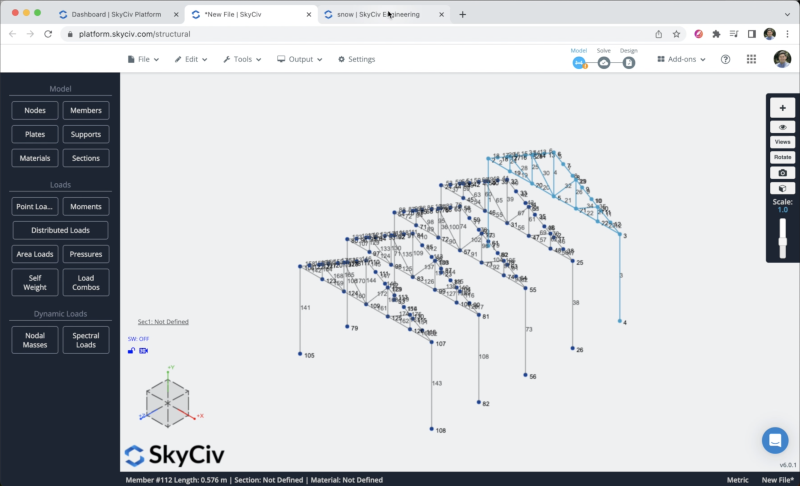
After this step, we will create the purlins for our structure.
割り当てをサポート
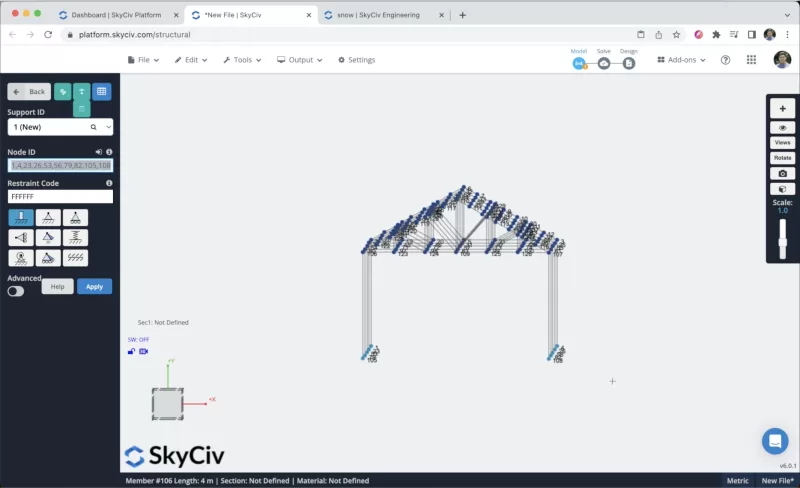
構造にサポートを追加するには、すべての接地ノードを選択する必要があります, それからに行きます サポート > ダブルクリック ノードIDフィールド (ノードが選択されている場合) > Select Fixed Support > 適用する. すべてのサポートを作成すると、それらがモデル上に表示されるはずです.
Applying Snow Loads
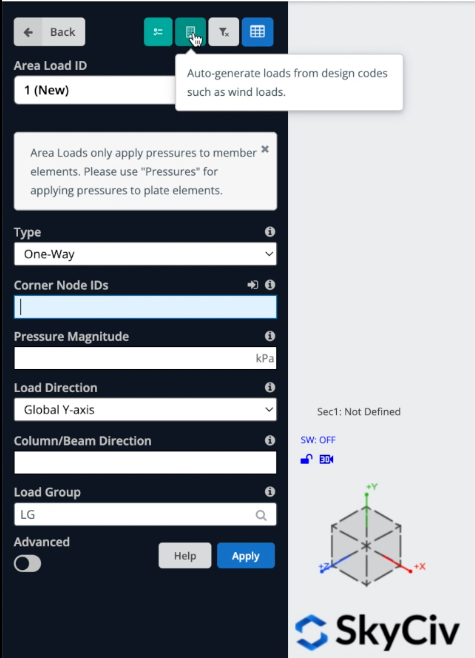
構造にいくつかの面荷重を適用します. To apply snow loads you can go to 面積荷重 というボタンを選択します: “風荷重などの設計コードから荷重を自動生成”.
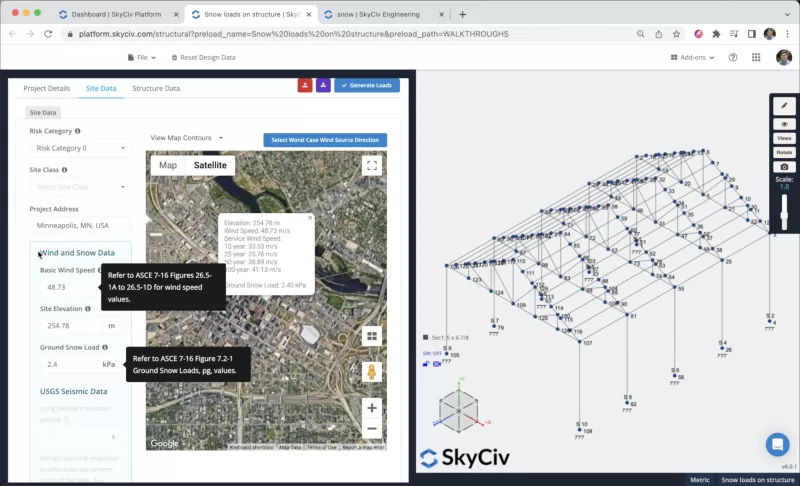
サイトデータを定義できます, を選択します リスクカテゴリー = II, そして、 ミネアポリスのプロジェクト住所, そしてプログラムは私たちの構造の風雪データを計算します.
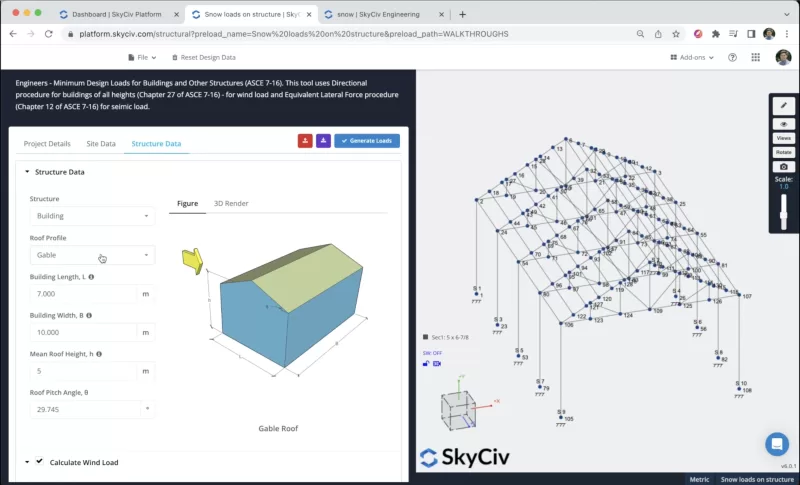
サイトデータを定義した後, クリックできます 構造データ プロジェクトを構成するには, この例では, we will select a building with a Gable Roof Profile with a roof pitch angle of 29.745.
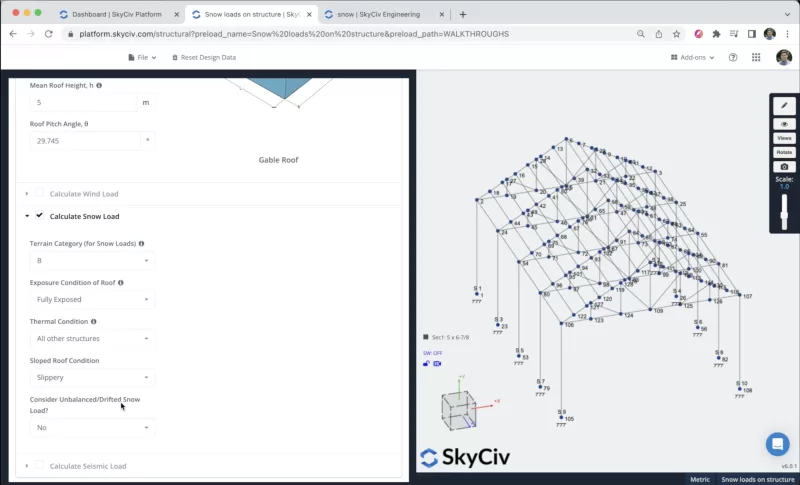
We need to define the terrain category, exposure condition of the roof, thermal condition, sloped roof condition, and if we will consider unbalanced/drifted snow loads. You can select the values shown in the following image:
一度, 私たちはすべての情報を持っています, クリックできます 負荷を生成する, the program will try to find the best way to apply Snow Loads in the structure, しかしながら, このような場合、より複雑なジオメトリがあるため、ソフトウェアにとって作業が難しくなり、結果が不正確になる可能性があります。.
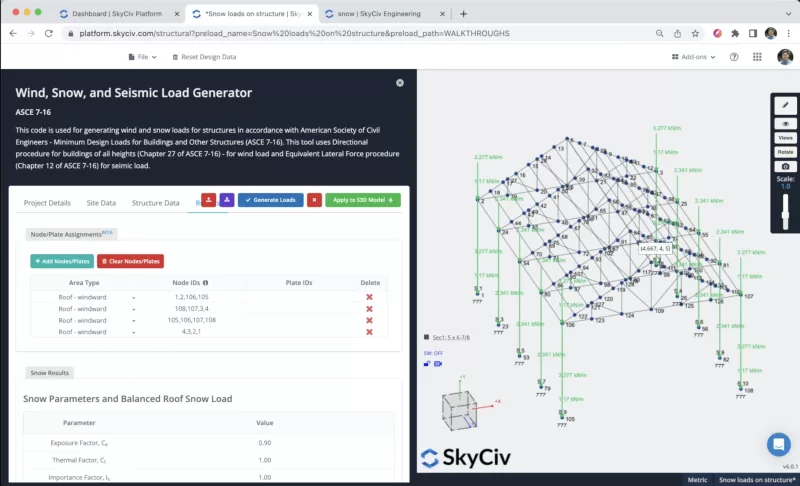
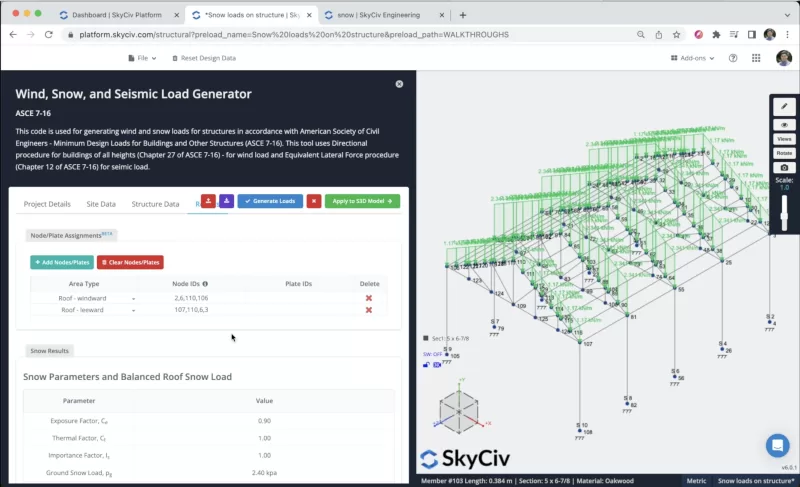
風荷重を正しく適用するために、自動生成された行をすべて消去し、独自のエリア タイプの追加を開始できます。. We can define which nodes will represent windward roofs, leewards roofs, 等. 次の画像では, 構造上でこれらの領域タイプを定義する正しい順序がわかります。.
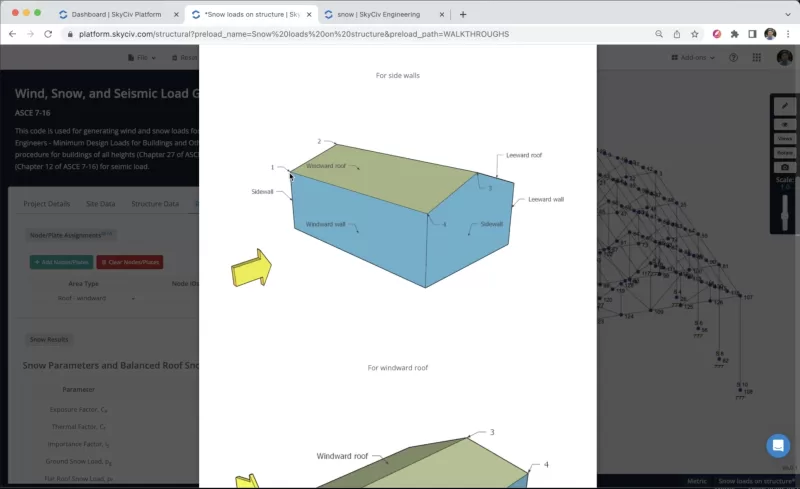
構造内で複数のエリアタイプを定義する必要があります, 次の図に示すように情報を追加できます, これらの領域荷重が構造部材に正しく適用されていることを継続的に確認できます。. 結果は次のようになります:
セクションとマテリアル
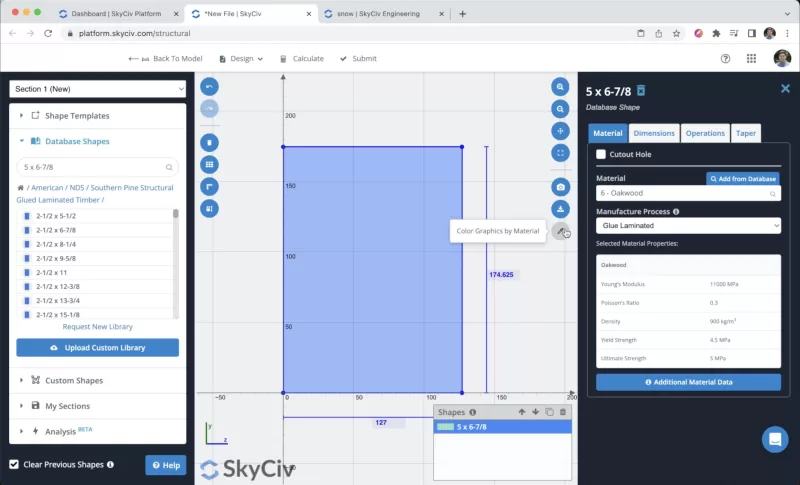
次のステップはセクションとマテリアルの作成です。, この例では, を使用します セクションビルダー セクションを作成するモジュール, セクションビルダーモジュールにアクセスするには、次の場所に移動する必要があります。 セクション > ビルダー. セクションビルダーを開いたら, 形状テンプレートからセクションを選択できます, この場合, 私たちが選択します MicrosoftExcelでこれを行うには > Find: 5 バツ 6-7/8. We can modify the material to Oakwood on the right panel.
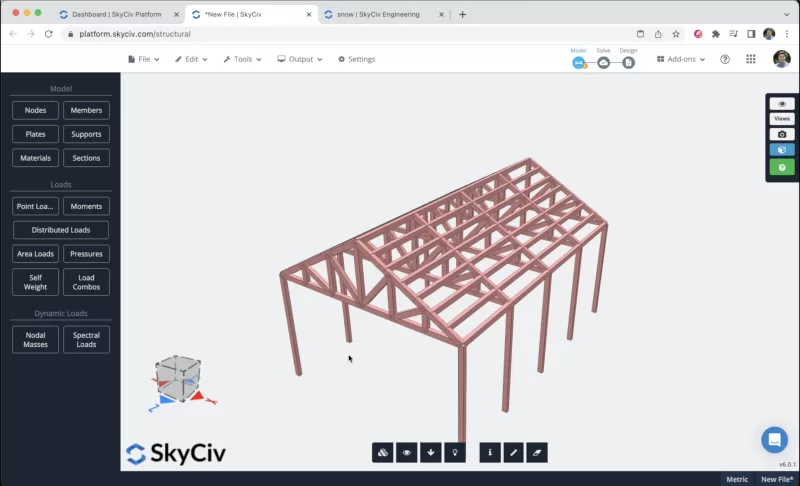
セクションを選択した後、クリックできます 繰り返し間の距離. デフォルトでは, セクションが定義されていないメンバーがある場合, 新しいセクションが彼らに割り当てられます. 3D レンダラーを開くと、次の結果が表示されます。.
モデルを解く
構造のモデリングが完了したら, 構造の解決に進むことができます, をクリックするとこれを行うことができます 解決する > 線形静的, 新しいウィンドウが開き、メンバーのすべての結果が表示されます。.
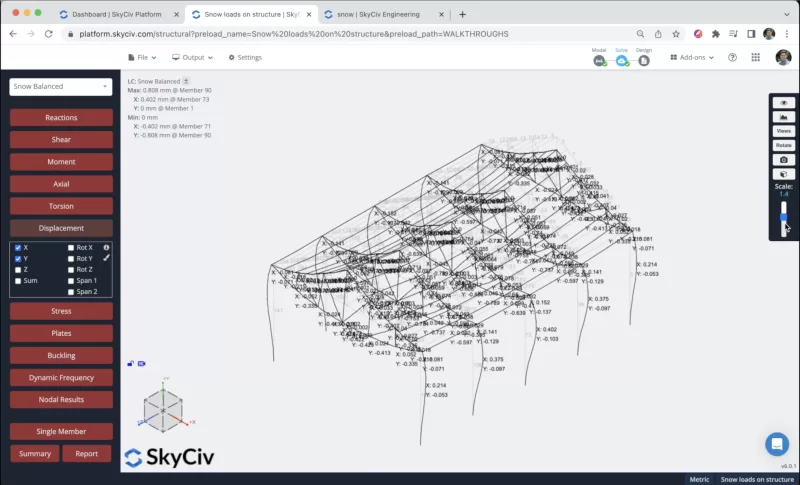
分析からレポートを作成することもできます, 「レポート」をクリックします, 必要に応じてレポートをカスタマイズする, 含める荷重の組み合わせを指定する, 等. 設定が完了したら、「レポートの作成」をクリックします。.

よくある質問
構造内に複雑なジオメトリがある場合に推奨されます。, 共通の形状がある場合、プログラムはこれらの荷重を正しい方法で自動的に生成しようとします。.
To create wind loads, 次のドキュメントを参照できます: wind loads documentation
プロセスは非常に似ています, ノード列挙のルールに従い、構造内の壁の長方形を選択するだけです。.


