介绍
在下面的教程中, 我们将探索如何使用结构3D在结构中施加雪负荷. 我们将逐步展示如何创建节点, 构件, 截面, 材料, 支持, 面积负荷, 等等.
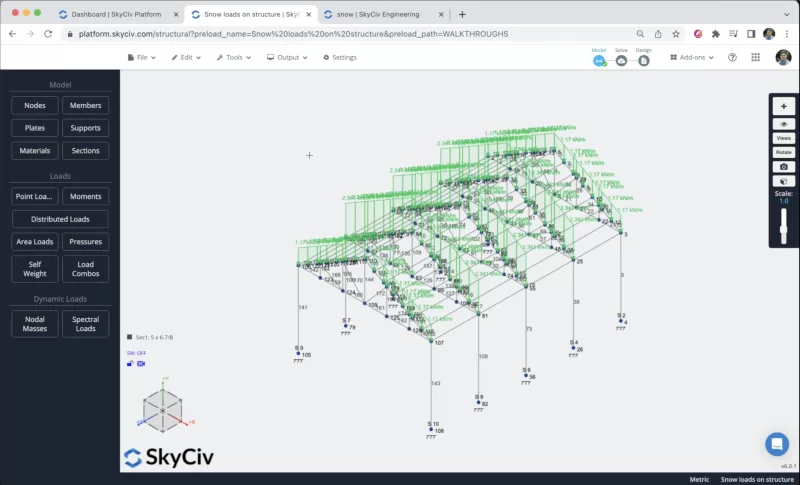
您必须从 SkyCiv 仪表板打开 Structural 3D 并创建一个新项目, 在本教程中, 我们将研究仪表, 所以你可以通过去修改单位 设定 > 单位制 并选择 公制
会员创建
有不同的方法来创建成员, 使用表格, 和数据表, 但在这个例子中, 我们将使用钢笔工具创建成员, 你可以激活右边的钢笔工具 控制板 > 笔 > 钢笔工具.
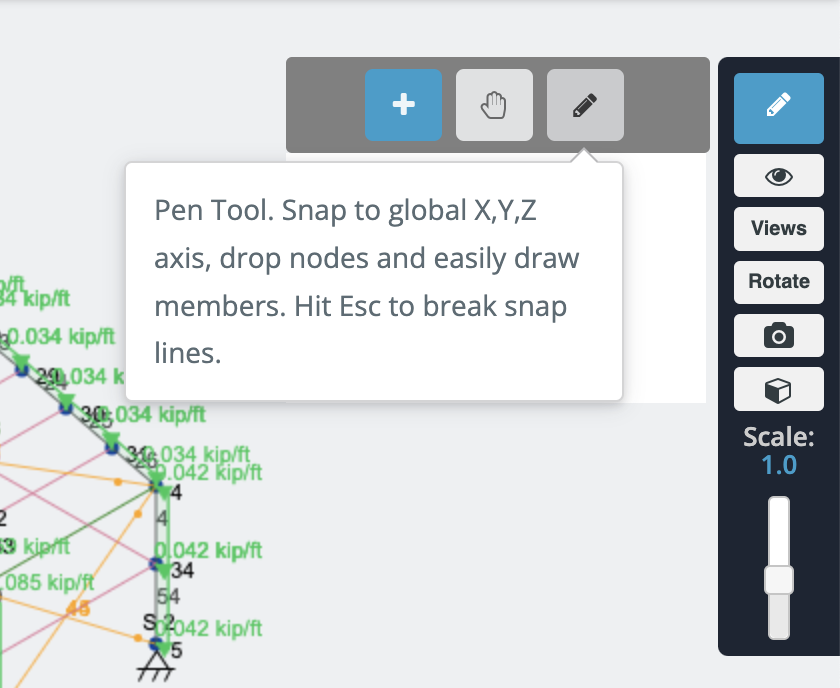
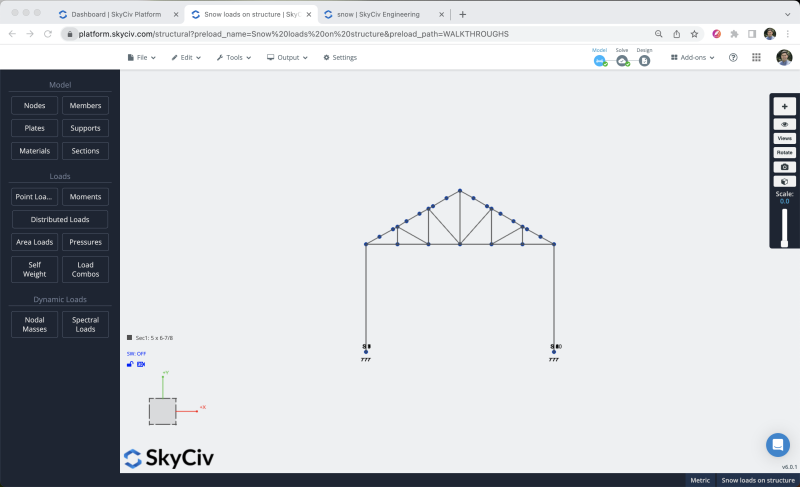
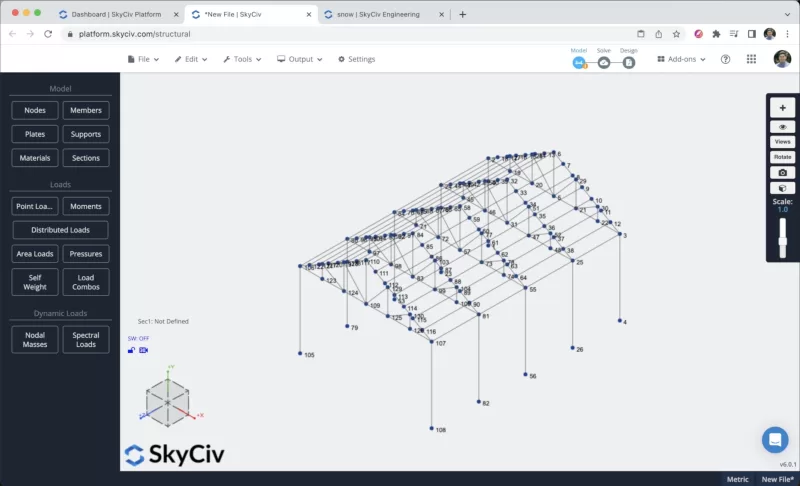
选择笔工具后,我们可以开始创建所有帧构件,我们将创建4M的列成员, 和7m的光束, 然后与下一个图像中所示的2m的最大成员创建屋顶:
为避免创建更多节点和成员,我们将复制在前面步骤中创建的框架. 为此,我们需要通过以下方式选择整个框架 右键点击 在画布上 > 全选 或打 Ctrl键 + 一个 在键盘上. 在我们选择整个框架后,我们可以去 编辑 > 运作方式 > 重复 或打 Ctrl键 + d 我们将重复成员 4 沿Z轴每250万次.
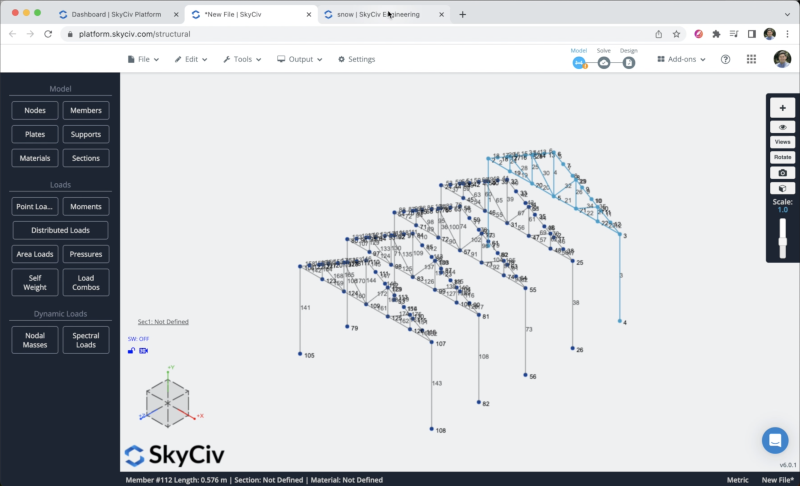
在此步骤之后, 我们将为我们的结构创建purlins.
支持赋值
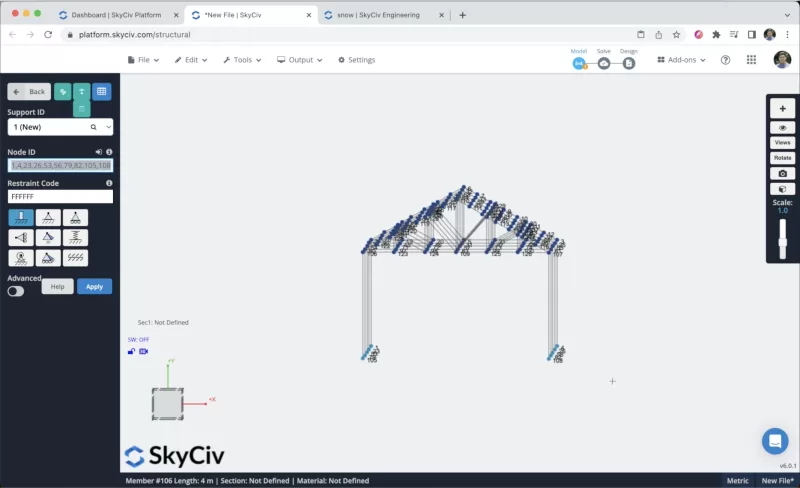
要为我们的结构添加支撑,我们必须选择所有地面节点, 然后去 支持 > 双击 在节点 ID 字段上 (如果您选择了节点) > 选择固定支持 > 申请. 创建所有支撑后,它们应该出现在您的模型上.
施加积雪
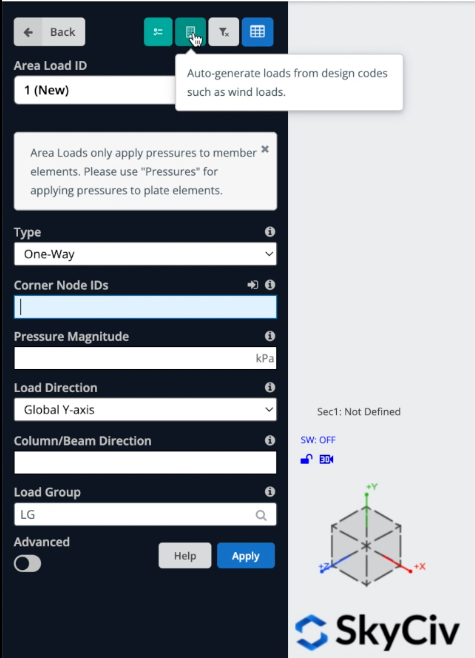
我们将对我们的结构应用一些区域负载. 要施加积雪,您可以去 区域负荷 并选择上面写着的按钮: “根据设计规范自动生成载荷,例如风载荷”.
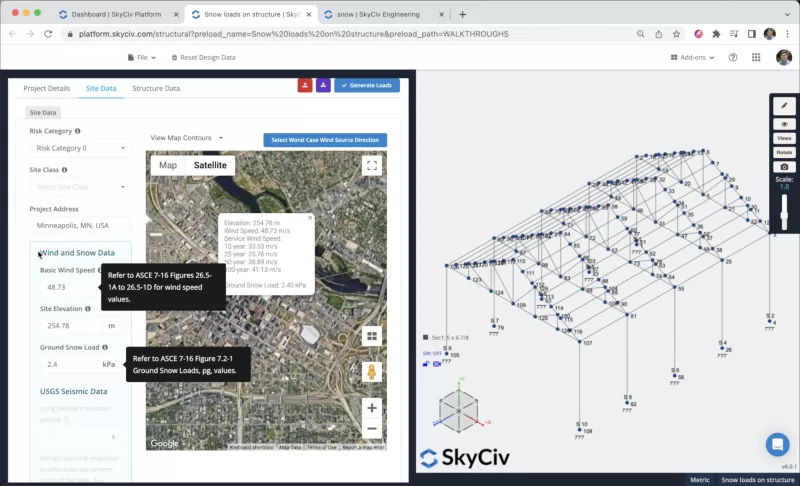
我们可以定义我们的站点数据, 我们将选择一个 风险类别 = II, 并定义 项目地址明尼阿波利斯, 该程序将为我们的结构计算风和雪数据.
当我们定义站点数据后, 我们可以点击 结构数据 配置我们的项目, 在这个例子中, 我们将选择一栋带有山墙屋顶轮廓的建筑物 29.745.
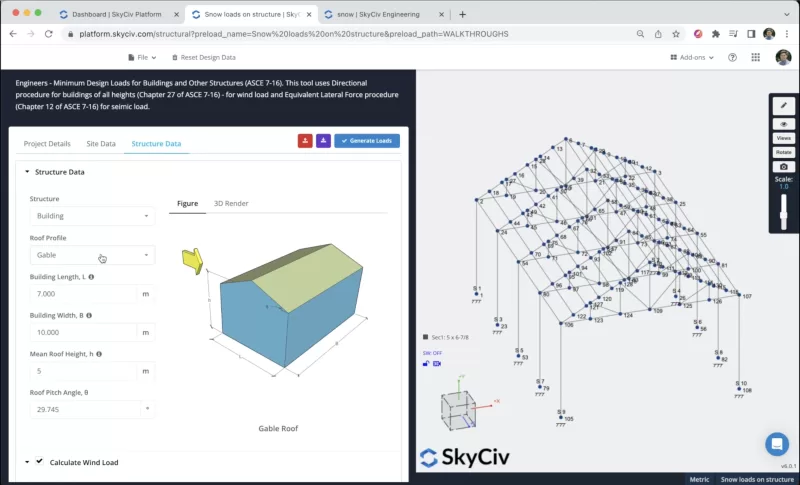
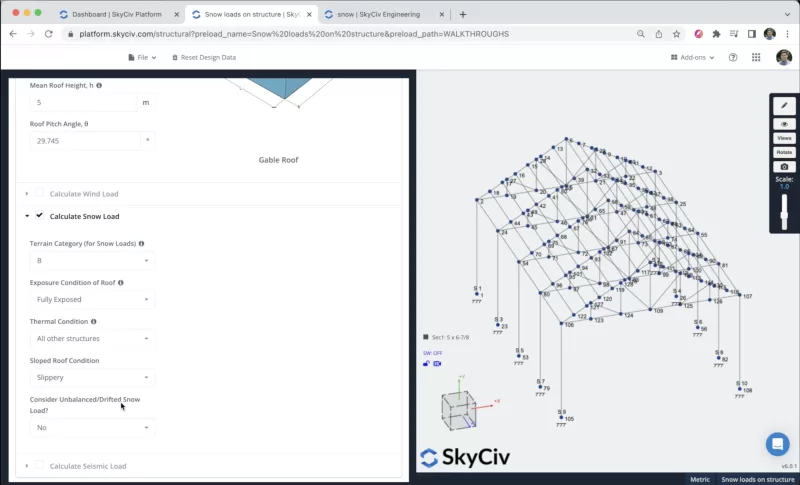
我们需要定义地形类别, 屋顶的暴露条件, 热条件, 倾斜的屋顶状况, 如果我们考虑不平衡/漂流的雪负荷. 您可以选择下图中显示的值:
一次, 我们有所有的信息, 我们可以点击 生成载荷, 该计划将尝试找到在结构中施加雪的最佳方法, 然而, 在这种情况下,我们有更复杂的几何形状,这对于软件来说是更困难的任务,并且结果可能不正确.
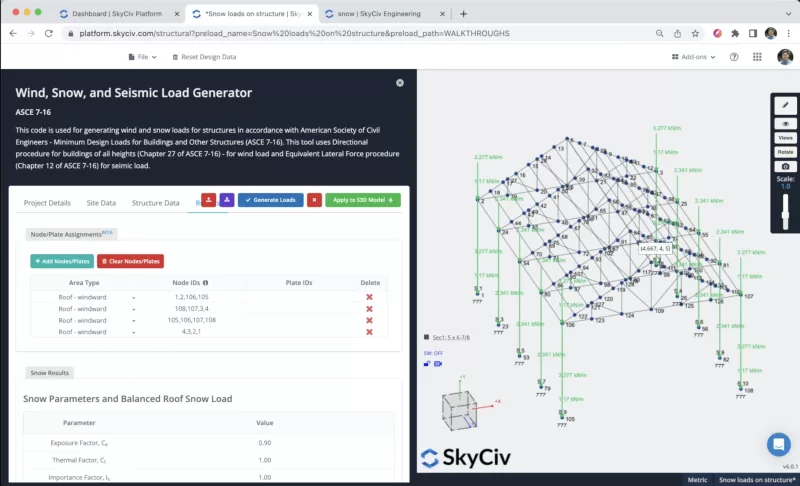
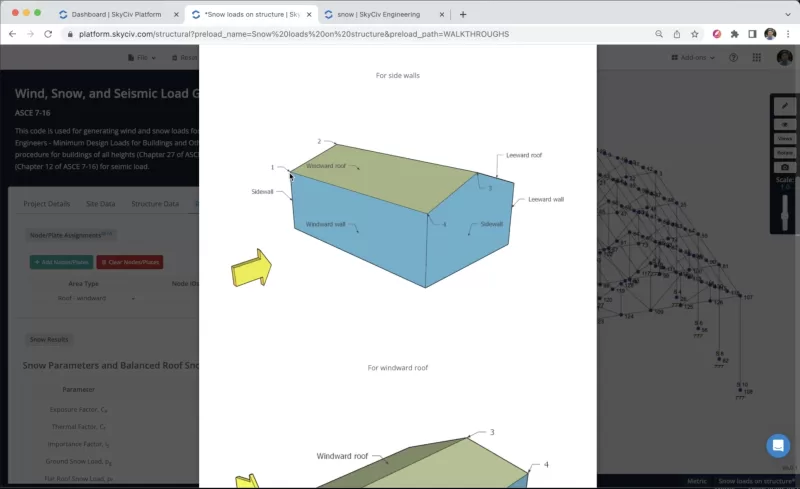
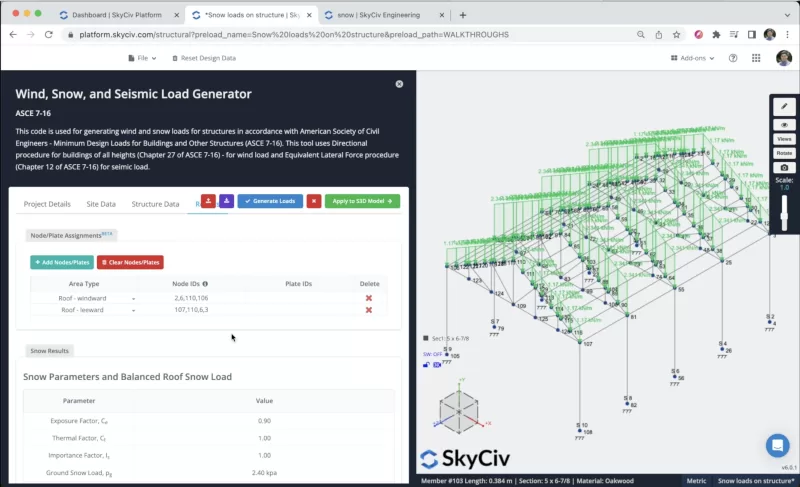
为了正确应用风荷载,我们可以删除所有自动生成的行并开始添加我们自己的区域类型. 我们可以定义哪些节点代表迎风屋顶, Leewards屋顶, 等等. 在下图中, 您可以看到在结构上定义这些区域类型的正确顺序是什么.
我们需要在结构中定义多种区域类型, 您可以添加如下图所示的信息, 您可以不断检查这些区域荷载在结构构件上的应用是否正确. 结果应该是这样的:
部分和材料
下一步将是创建部分和材料, 在这个例子中, 我们将使用 分区生成器 模块来创建我们的部分, 要访问 Section Builder 模块,我们需要转到 栏目 > 建造者. 打开部分构建器后, 我们可以从形状模板中选择部分, 在这种情况下, 我们将选择 数据库形状 > 寻找: 5 X 6-7/8. 我们可以将材料修改为右面板上的Oakwood.
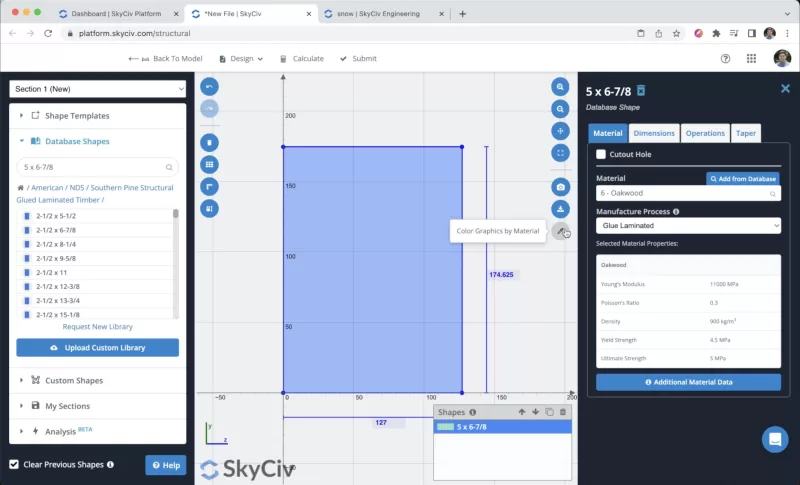
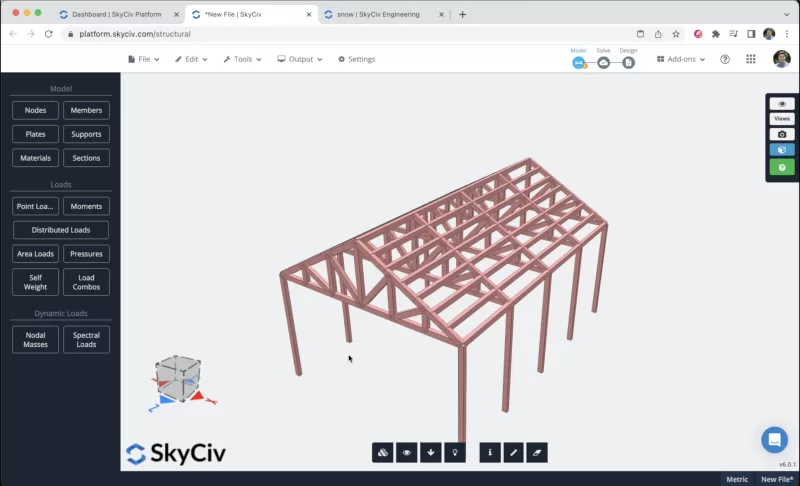
选择我们的部分后,我们可以单击 提交. 默认, 当我们有没有定义部分的成员时, 新部门将分配给他们. 如果我们打开 3D 渲染器,我们将看到以下结果.
求解模型
在我们完成结构的建模之后, 我们可以继续解决我们的结构, 我们可以通过点击 解决 > 线性静态, 它将把我们带到一个新窗口,在那里我们将能够看到成员的所有结果.
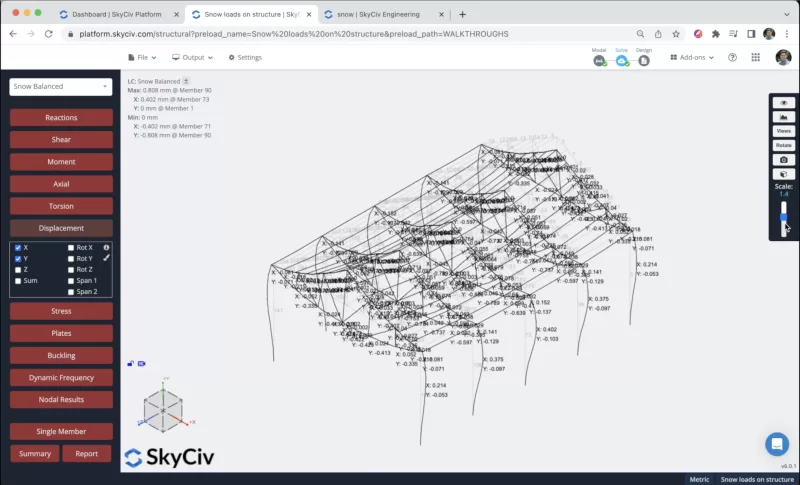
我们还可以根据分析创建报告, 我们可以点击举报, 根据需要自定义报告, 指定要包括的荷载组合, 等等. 完成配置后我们可以点击创建报告.

常问问题
当您的结构中有复杂的几何形状时,建议使用此方法, 当您有常见的几何形状时,程序将尝试以正确的方式自动生成这些载荷.
过程非常相似, 您只需要遵循节点枚举规则并在结构中选择墙矩形.


