How to Import your Revit Model
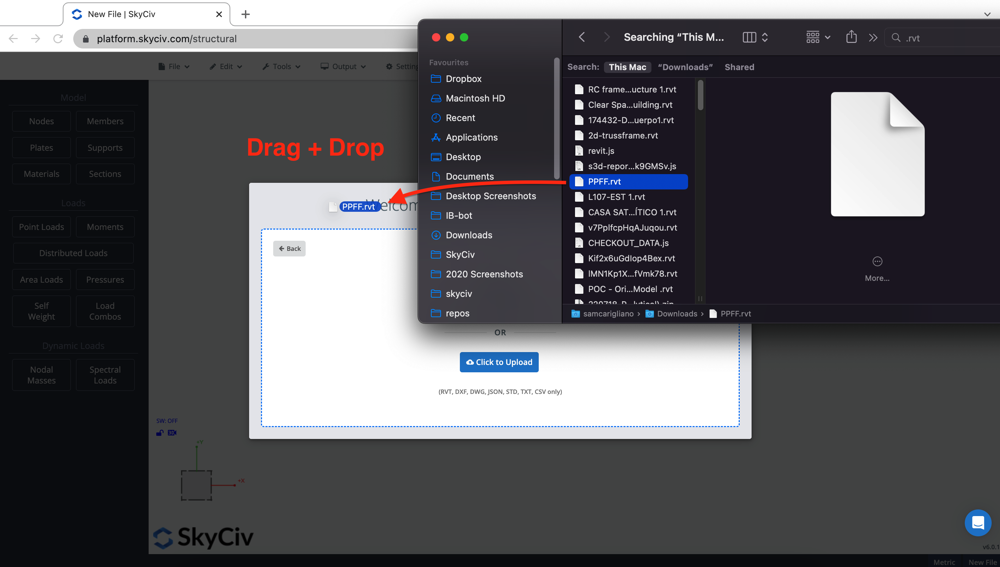
SkyCiv 3D Structural Analysis has made it easy to import your models, to the point you don’t even need Revit! Simply drag and drop your .rvt file into the User Interface:

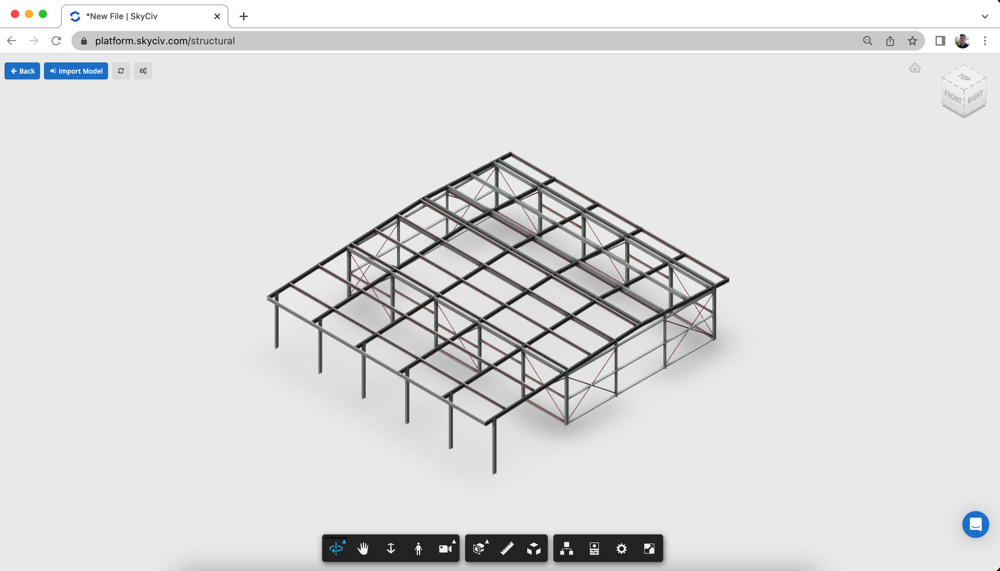
Alternatively, you can visit File – Import – Revit to select a file from your File Explorer. Once uploaded, your Revit model will preview in the same window. Note, this will display architectural elements as well as structural elements – meaning you might see walls or architectural members that won’t actually be imported:

Your Revit Model
The quality of your Revit Model will directly impact how much time is required repairing the model in Structural 3D. A well-setup model in Revit will import cleanly, with no post processing necessary. Some recommendations we have is to:
- Make sure your Revit Model has an analytical model
- Check your Sections/Materials and that all the required structural information is included
- Check your members are connected in the analytical model. In Revit, they might seem to be touching or connected, but this may not be the case
- Only Structural Elements will be imported from your Revit model, architectural only elements are ignored
- Supports, loads and load combinations can also be defined on Revit side if this is a preferred workflow.
We recommend cleaning your model on Revit’s side to ensure you have a single source of truth and save yourself cleaning up the model on S3D’s side each time.
Repairing your Model
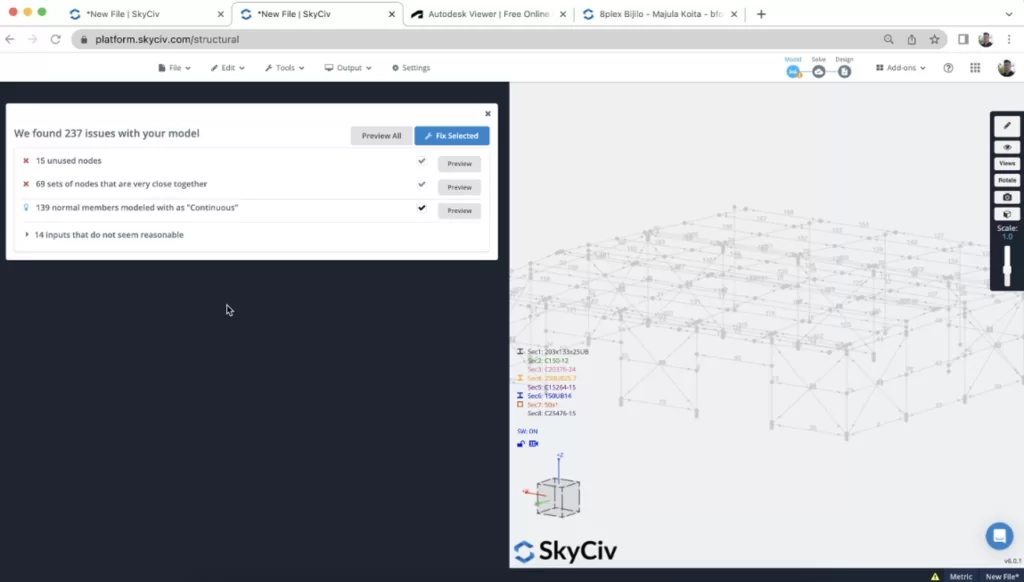
SkyCiv has an inbuilt Repair Model Function that will identify issues with your model, including overlapping members, merge close nodes and unused nodes. These are sometimes hard to identify and clean, so SkyCiv has added an automated tool to help you repair these issues.

In addition, users are recommended to review the member connectivity as this can often be problem with Revit imported models. Members need to be joined by nodes in order for them to be correctly connected.
Running a Solve
Running a solve is generally the next step for the engineer. This step in the process will also identify any other issues in your model. For instance, missing section properties, no loads being applied or insufficient restraints or supports in your model.
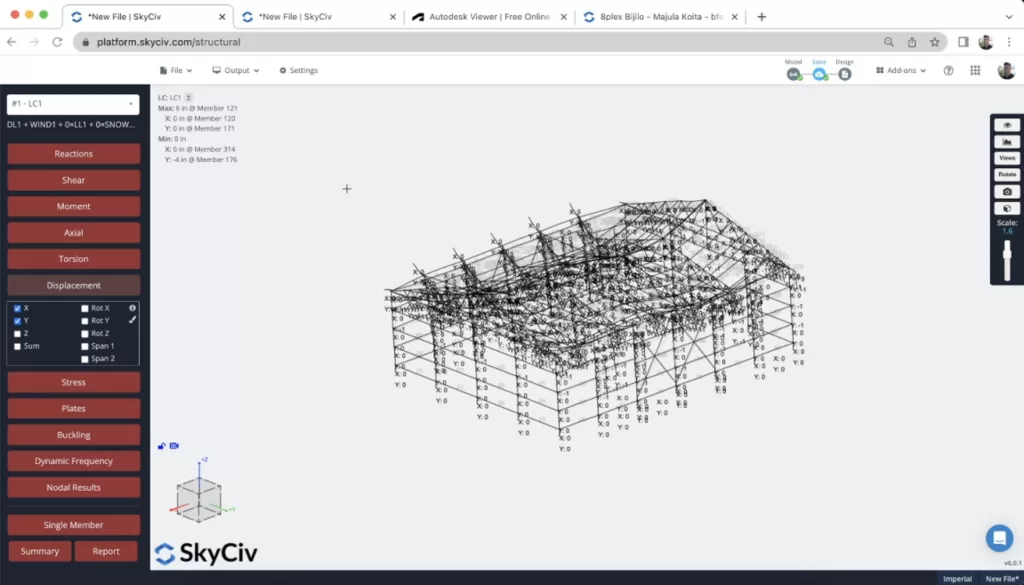
It’s often useful to scale and animate the deflection result (S + Scroll Mouse), this will help identify any connectivity issues in your model:

If loads combinations have been defined, you can also review the results from these combinations.
FAQ
- If your model did not show anything, please check your Revit model has an analytical model.
- Sometimes there can also be minor connectivity issues on Revit’s API which can cause the importing to fail.
- As a rule of thumb, the importing should take less than 5 minutes. If you’re waiting longer than 5 minutes please cancel the import and try again.
Definitely. SkyCiv also has a Revit Plugin that will let you export the model directly from Revit to S3D. In general, this runs faster and is the preferred method of importing Revit files.
Click here to download the SkyCiv-Revit Plugin.
Yes, SkyCiv supports two-way data migration between SkyCiv and Revit. Once you’re ready to Export, simply click File – Export – Revit and you can download a Revit File with all of your changes.


