Lesson 2 - The UI
In the previous section, we created a nice workflow to compile our app in a way which will help avoid unnecessary bugs. Let's now customize the User Interface (UI) to add our buttons.
As noted in the Sample App, SkyCiv uses jQuery and Semantic UI, so these library will be available to you.
Working With HTML#
VSCode has a very handy feature which allows us to see HTML live as we build it.
Open the HTML file and at the top right, click the square with the magnifying glass on it. You should see the current HTML template appear to the side.
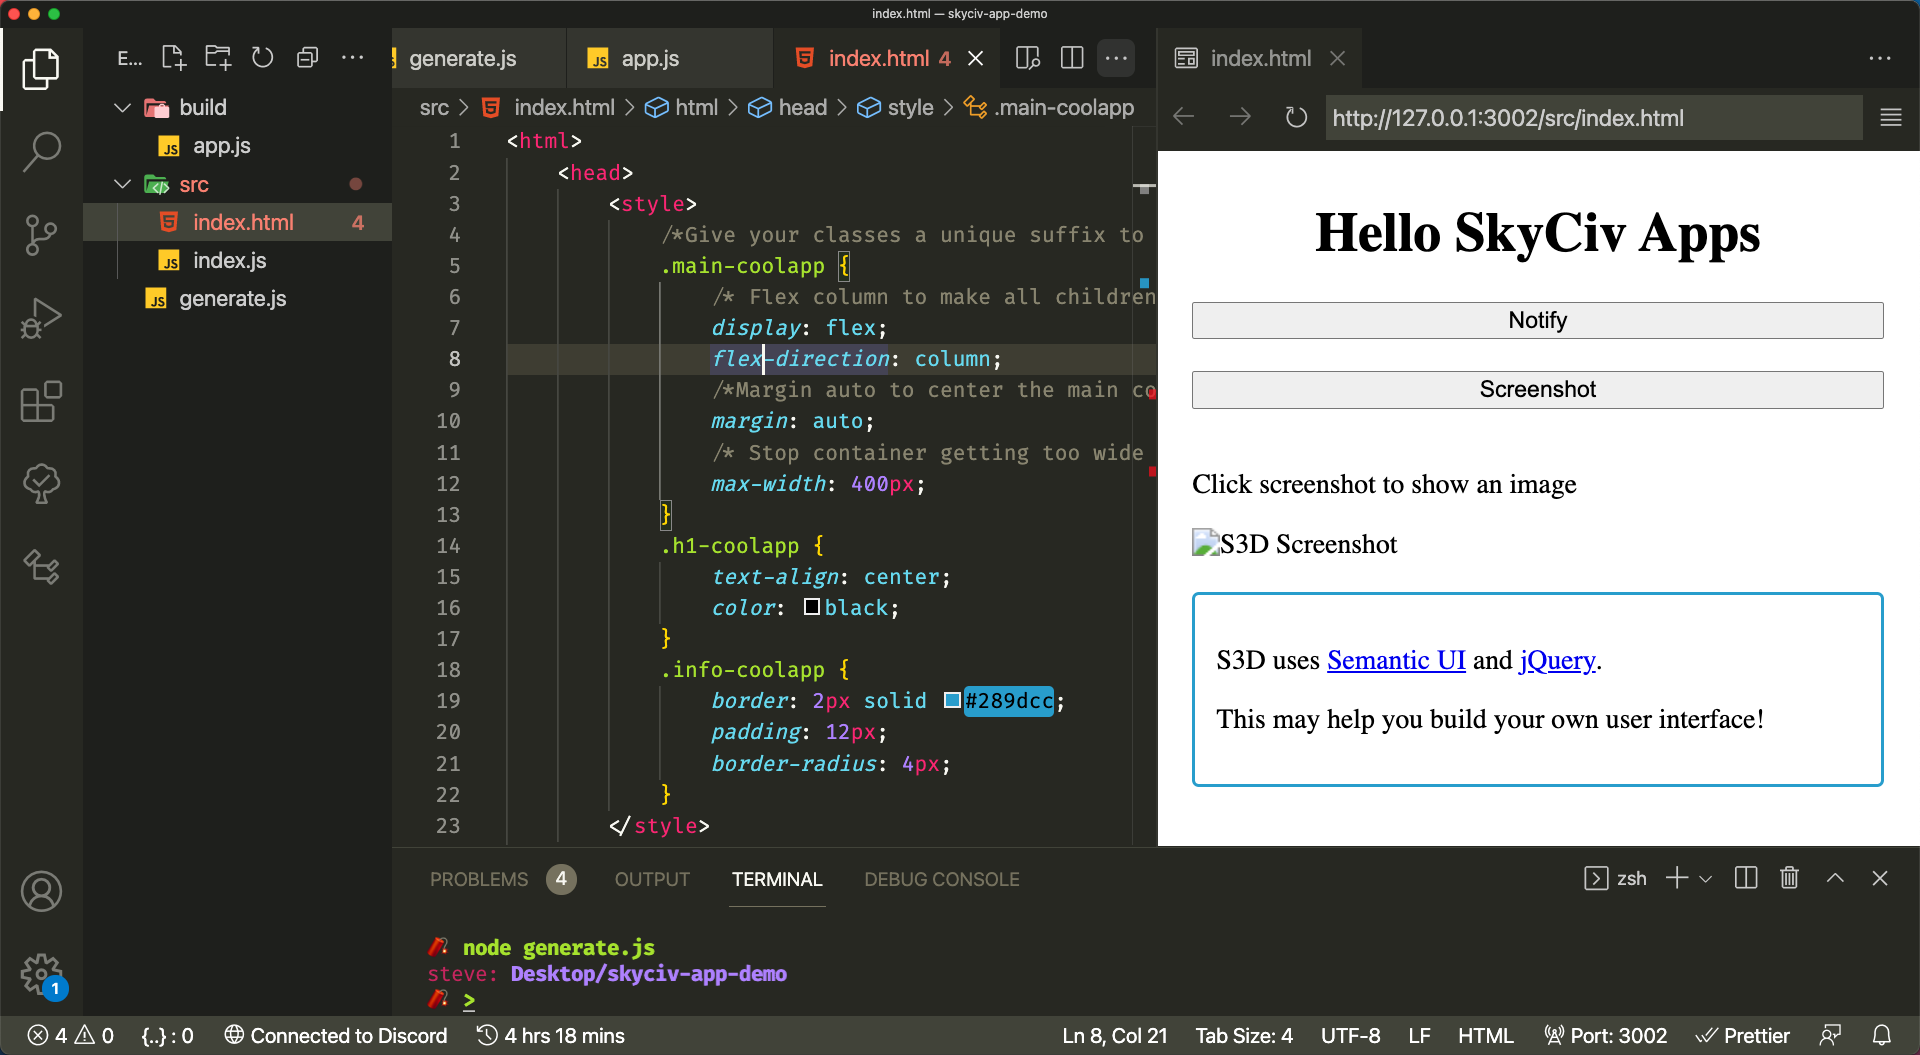
This won't show the effects of Semantic UI or jQuery operations however it gives us a good idea of how the layout is looking on-the-fly!
Add Buttons#
Go down to the existing button elements and make some changes to show our buttons. The code might look something like this.
tip
You can color the buttons by adding another class from the Semantic UI docs to the button's class list.
There are a couple of things to point out here.
- The class of
ui buttonis a Semantic UI class which will make the button look much nicer when the app is in S3D. - We are providing an
onclickevent to each button. The functions provided don't exist yet but we'll add them soon. ${app_id}Might show an error in the HTML however, because we wrapped the HTML content in backticks ingenerate.js, when this is injected, the${app_id}syntax will be inside a template string making it valid. Check yourapp.jsfile for proof! If we change our app id at a later date, all we need to do is change the constant at the top of theindex.jsfile.
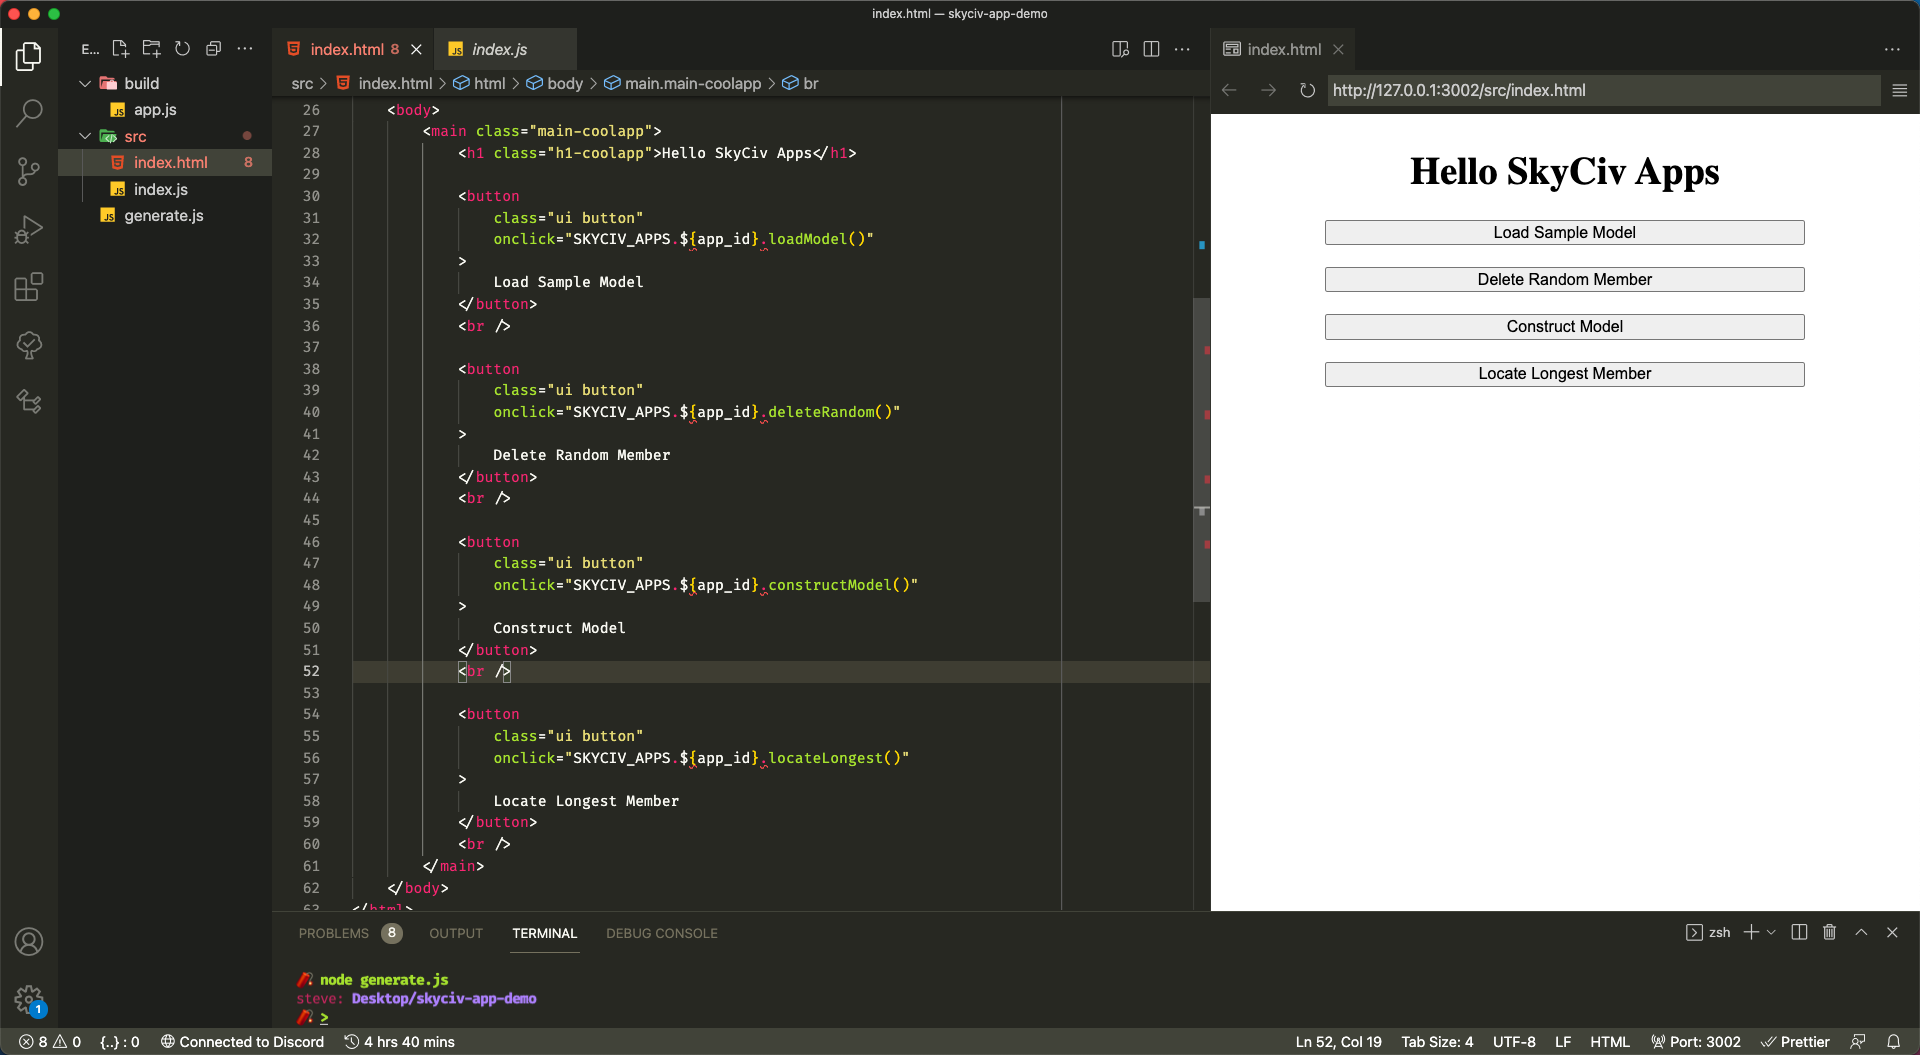
Remove the additional p, img and div elements from below the buttons and you should now have an interface that looks something like the following image. The formatting of your buttons might be different, that's ok.
Connect the Buttons#
Hop over to index.js and remove the app.customFunction and app.secondCustomFunction.
Add some code to handle the button clicks just after the const app = SKYCIV_APPS[app_id]; line, such as the following.
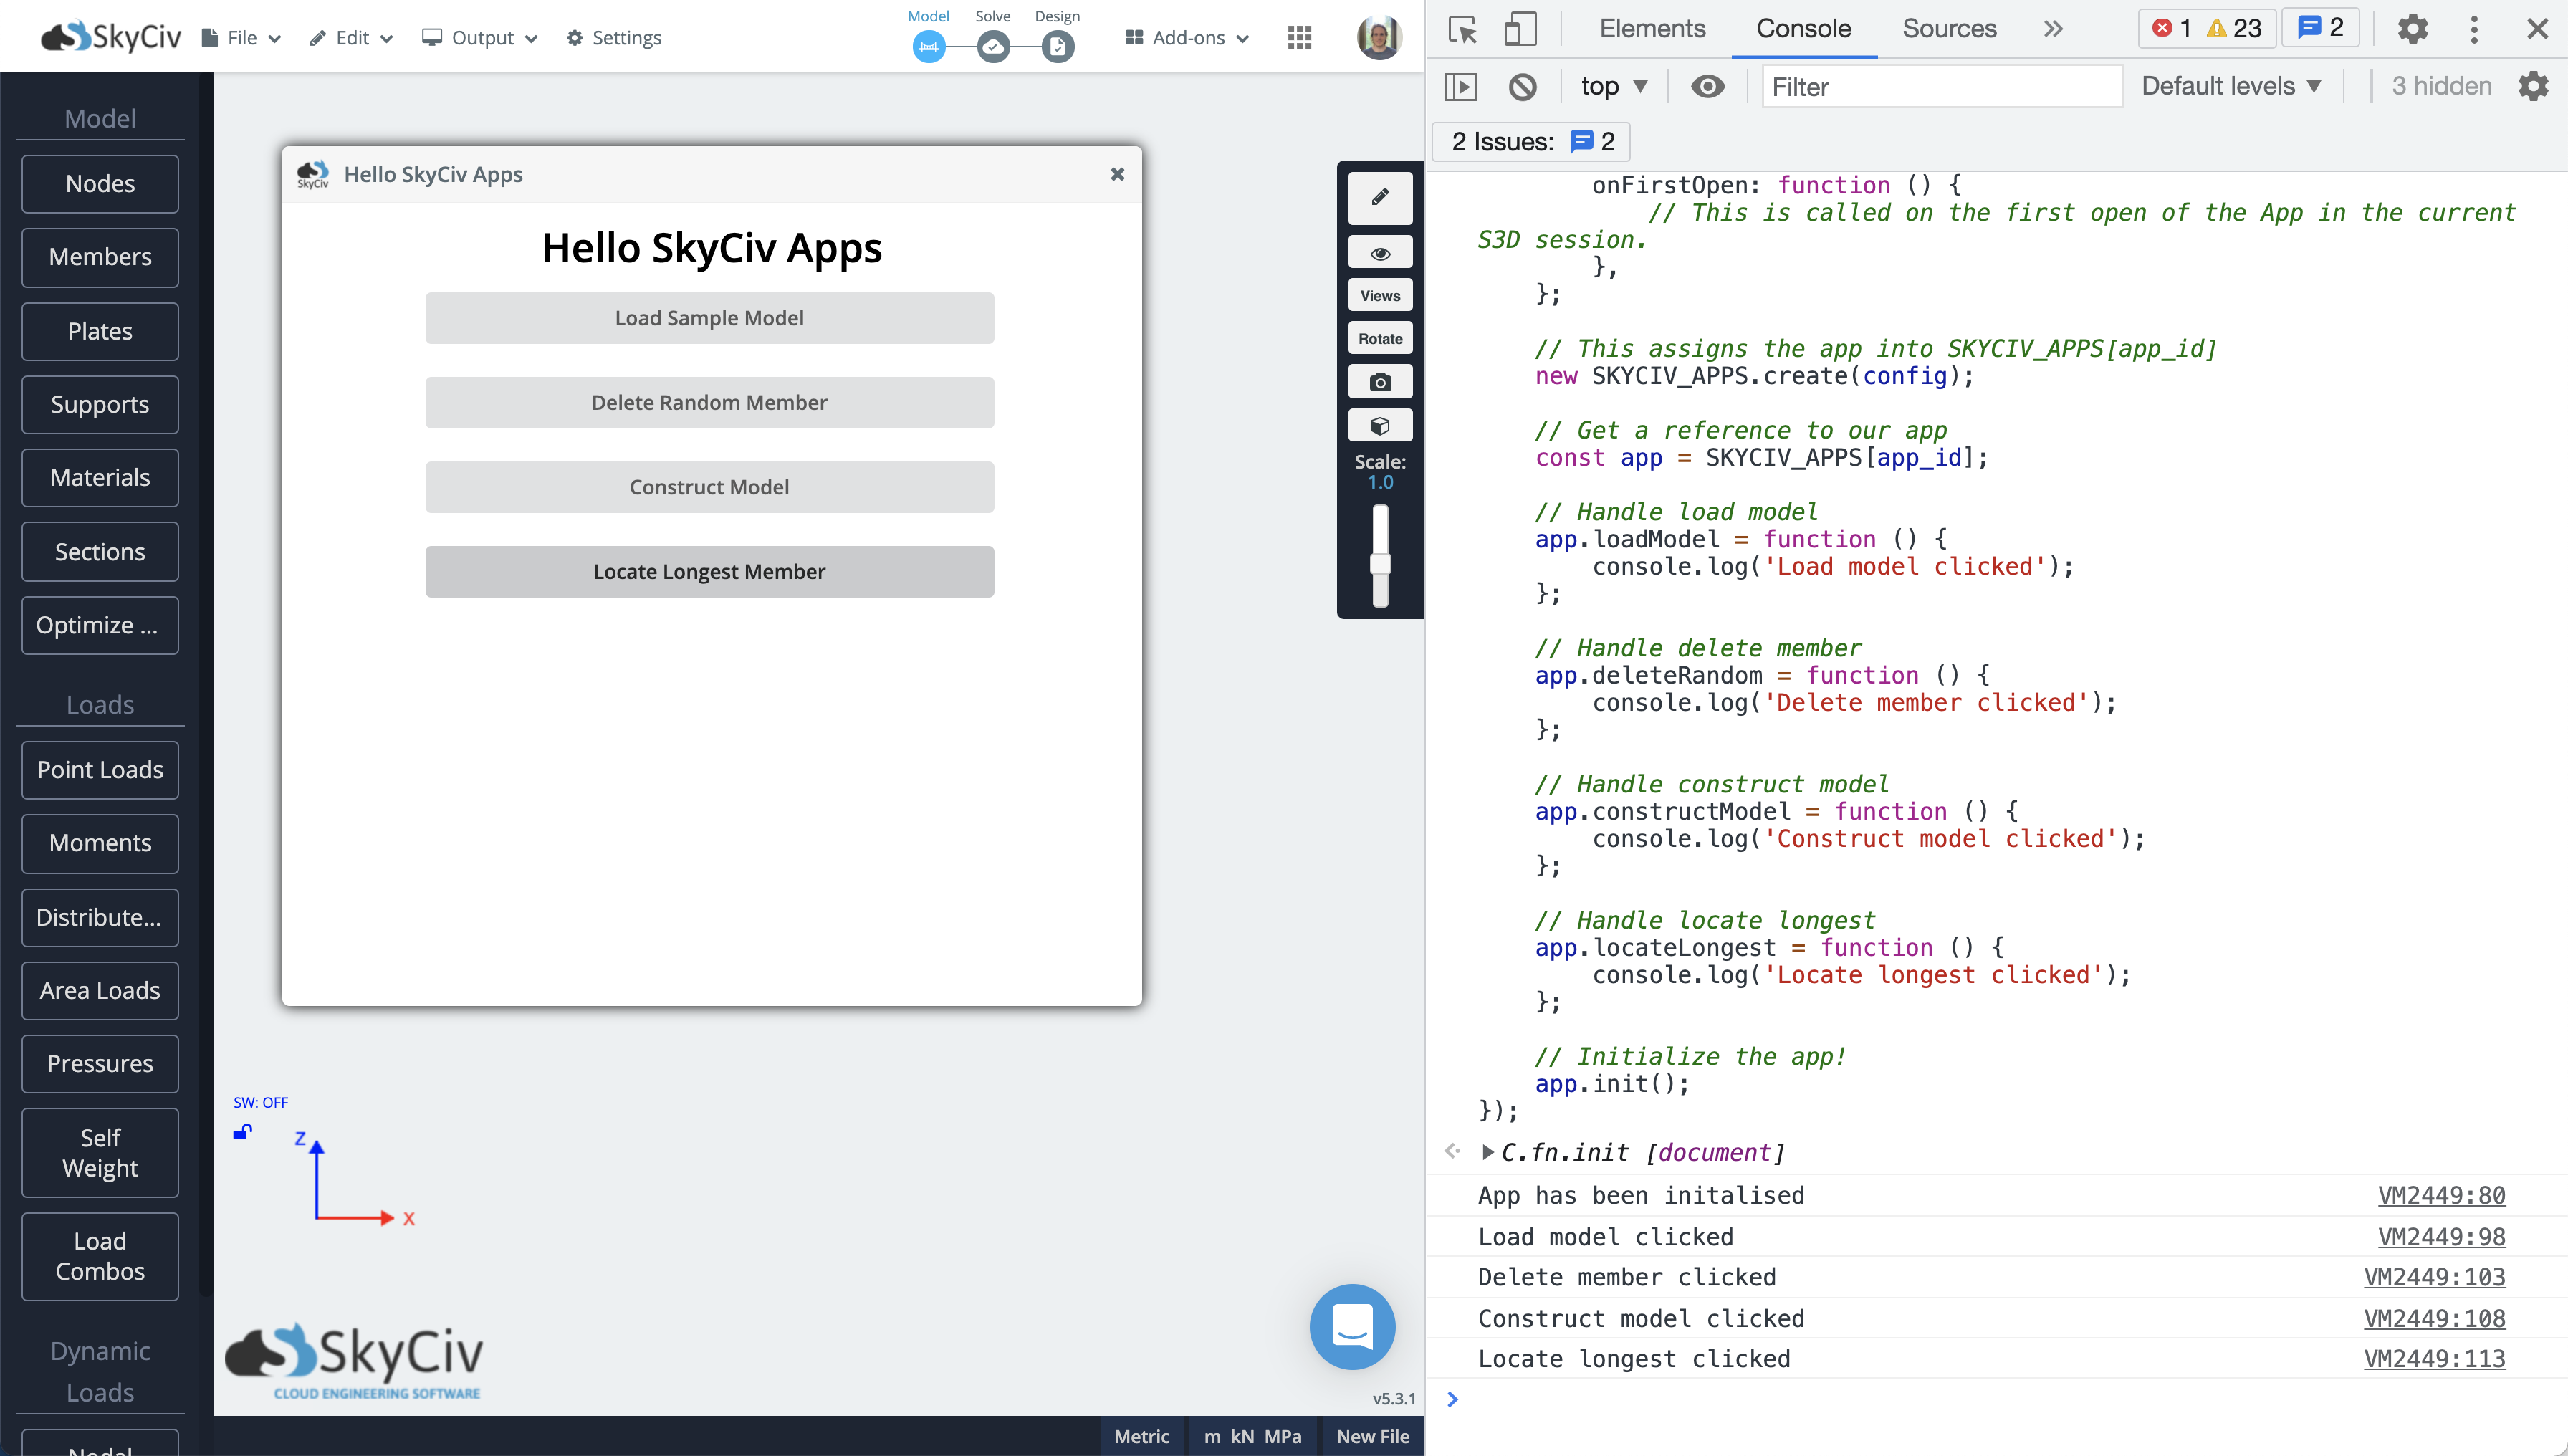
Run the generate.js script, refresh S3D and paste your app.js contents into the console. You should be able to click the buttons and see the result print to the console.
Next Section#
Great! Now our buttons are connected, let's start adding real functionality in the next section.